1996 GMC SIERRA height
[x] Cancel search: heightPage 23 of 404

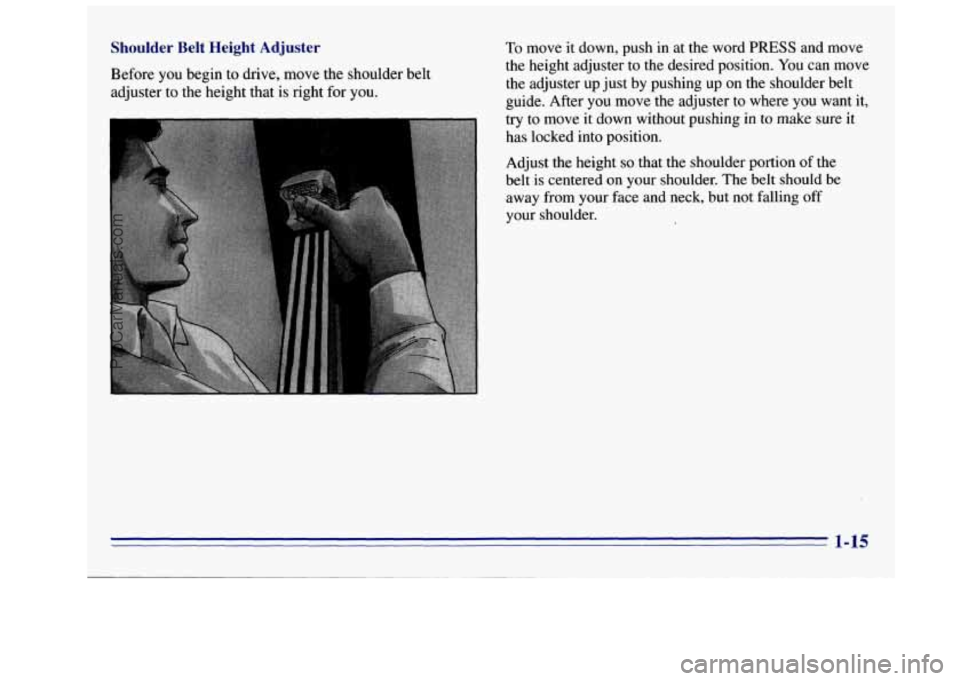
Shoulder Belt Height Adjuster
Before you begin to drive, move the shoulder belt
adjuster to the height that
is right for you.
To move it down, push in at the word PRESS and move
the height adjuster to the desired position. You can move
the adjuster up just by pushing up on the shoulder belt
guide. After you move the adjuster
to where you want it,
try to move it down without pushing in to make sure it
has locked into position.
Adjust the height
so that the shoulder portion of the
belt is centered on your shoulder. The belt should be
away from
your face and neck, but not falling off
your shoulder.
1-15
ProCarManuals.com
Page 35 of 404

Q=
A:
Is there anything I might add to the front of the
vehicle that could keep the air bag from
working properly?
Yes. If you add things that change your vehicle's
frame, bumper system, front end sheet metal or
height,
they may keep the air bag system from
working properly.
Also, the air bag system may
not work properly if you relocate any of the air bag
sensors.
If you have any question about this, you
should contact Customer Assistance before you
modify your vehicle. (The phone numbers and
addresses for Customer Assistance are
in Step Two
of the Customer Satisfaction Procedure in this
manual. See "Customer Satisfaction Procedure"
in
the Index.)
Safety 1 ___ Jse DurinP Z regnancy
Safety belts work for everyone, Including pregnant
women. Like all occupants, they are more likely to be
seriously injured
if they don't wear safety belts.
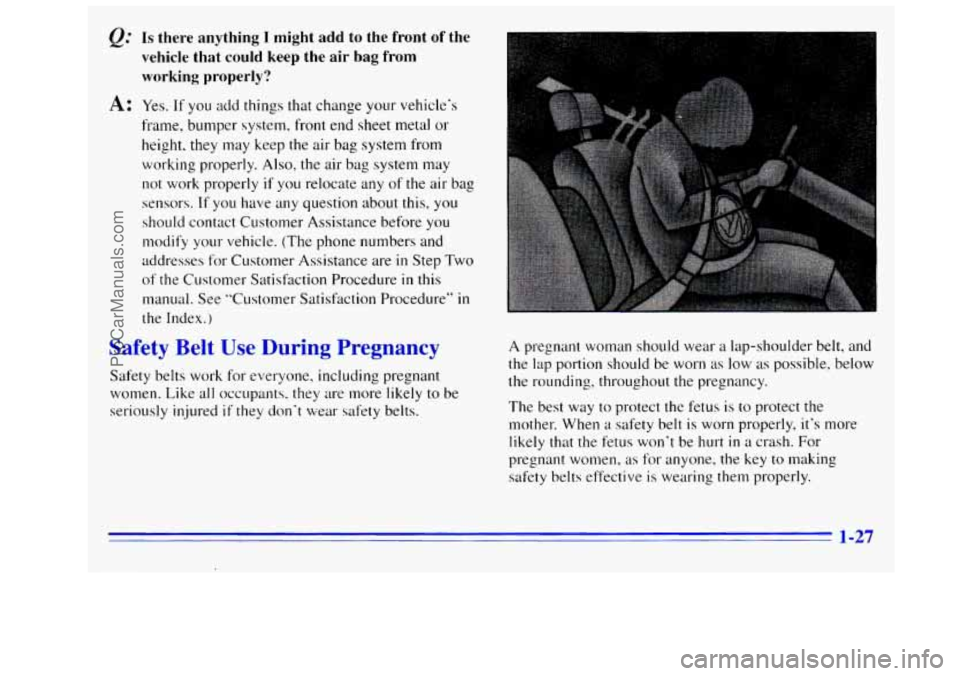
A pregnant woman should wear a lap-shoulder belt, and
the
lap portion should be worn as low as possible, below
the rounding, throughout the pregnancy.
The best way to protect
the fetus is to protect the
mother. When a safety belt
is worn properly, it's more
likely that the fetus won't
be hurt in a crash. For
pregnant women, as for anyone, the key
to making
safety belts effective is wearing them properly.
1-27
ProCarManuals.com
Page 286 of 404

NOTICE: .
Continuing to drive with worn-out brake pads
could result in costly brake repair.
Some driving conditions or climates may cause a brake
squeal when the brakes are first applied or lightly
applied. This does not mean something is wrong with
your brakes.
Free movement
of brake calipers and properly torqued
wheel nuts
are necessary to help prevent brake
pulsation. When tires
are rotated, inspect.brake calipers
for movement, brake pads for wear, and evenly torque
wheel nuts in the proper sequence
to GM specifications.
If you have rear drum brakes, they don’t have wear
indicators, but
if you ever hear a rear brake rubbing
noise, have the rear brake linings inspected.
Also, the
rear brake drums should be remoQed and inspected each
time the tires are removed for rotation or changing.
When you have the front brakes replaced, have the rear
brakes inspected,
too. I
Brake linings should always be replaced as complete
axle sets.
Brake Pedal Travel
See your dealer if the brake pedal does not return to
normal height, or if there is a rapid increase in pedal
travel. This could be a sign of brake trouble.
Brake Adjustment
Every time you make a brake stop, your disc brakes
adjust for wear.
If your brake pedal goes down farther than normal, your
rear drum brakes may need adjustment. Adjust them by
backing up and firmly applying the brakes a few times.
Replacing Brake System Parts
The braking system on a modern vehicle is complex. Its
many parts have to be
of top quality and work well
together if the vehicle is to have really good braking.
Vehicles we design and test have top-quality
GM brake
parts
in them, as your vehicle does when it is new. When
you replace parts of your braking system -- for example,
when- your brhke linings wear do.wn and you have
to
haye new ones put in -- be sure you get new genuine
GM replacement parts. If you don’t, your brakes may
no longer work properly. For example,
if someone
puts in brake linings that are wrong for your vehicle,
the balance between your front and rear brakes can
change
-- for the worse. The braking performance
you’ve come to expect can change
in many other ways
if someone puts in the wrong replacement brake parts.
I
I
6-36
ProCarManuals.com
Page 306 of 404

Each new wheel should have the same load-carrying
capacity, diameter, width, offset and be mounted the same way as the one it replaces.
If you need to replace any
of your wheels, wheel bolts
or wheel nuts, replace them only with new
GM original
equipment parts. This way, you will be sure
to have the
right wheel, wheel bolts and wheel nuts for your vehicle.
CAUTION:
I
Using the wrong replacement wheels, wheel bolts
or wheel nuts on your vehicle can be dangerous.
It could affect the braking and handling of your
vehicle, make your tires lose air and make you
lose. control.
You could have a collision in which
you or others could be injured. Always use the
correct wheel, wheel bolts and wheel nuts for
replacement.
NOTICE:
The wrong wheel can also cause problems with
bearing life, brake cooling, speedometer or
odometer calibration, headlamp aim, bumper
height, vehicle ground clearance and tire or tire
chain clearance to the body and chassis.
7
Whenever a wheel, wheel bolt or wheel nut is replaced
on a dual wheel setup, check the wheel
nut torque after
100,
1,000 and 6,000 miles (160, 1 600 and 10 000 km)
of driving. For proper torque, see “Wheel Nut Torque”
in
the Index.
See “Changing a Flat Tire” in the Index for
more information.
6-56
ProCarManuals.com
Page 398 of 404

ear Axle
....................
Outside Seat Position ......
Seat Passengers ..........
Towing .................
Window Defogger ........
iew Mirror .. .I .........
ctrochromic Daymight . .
Inside Daymight .........
Reclining Seatbacks .........
Recovery Hooks ............
Recovery Tank. Coolant ......
Parts ...................
Defects .....
.................... 6-24
............... 1-30, 1-33
..................... 1-30
..................... 5-9
..................... 3-6
................. 1-7, 1-8
.................... 2-43
..................... 2-44
.................... 2-43
..................... 1-3
.................... 5-33
.................... 5-14
.................... 6-76
............... 6.37. 6.73
.................... 6-75
..................... 6-55
.................... 1-53
..................... 8-8
................................... l-52
hild ....................................... l-38
Head ......................:................. l-5
Replacing Parts After a Crash 1-53
Systemcheck 7-43
Right Front Passenger Position 1-28 ...................
................................ .................... Roadside Assistance .............................. 8-4 Safety
Belt Extender
............................. 1-52
Center Passenger Position ...................... 1-28
How to Wear Properly
......................... 1-13
Lap Belt
...................................... 1-28 ..
Lap-Shoulder ...................... 1-13, 1-31, 1-34
Larger Children
.............................. 1-49 .
Passenger Position ............................ 1-28
Questions and Answers 1-12
.
Rear Seat Outside Passenger
Positions ....... 1-30, 1-33
. Reminder Light 1-9, 2-58
Replacing After a Crash ........................ 1-53
Right Front Passenger Position
.................. 1-28
Shoulder Belt Height Adjuster
................... 1-15
Smaller Children and Babies .................... 1-36
Safety Chains
.................................. 4-55
Safety Defects, Reporting
......................... 8-8
Scheduled Maintenance Services .................... 7-3
.................................... Safety Belts 1-8
Adults
...................................... l-13
Care ....................................... 6-61 .
Children 1-36
DriverPosition
......... I ..................... 1-13
Extender 1-52
Incorrect Usage
.................... 1-16, 1-50, 1-51
.....................................
....................................
........................
Rear Seat Passengers .......................... 1-30
..........................
Use During Pregnancy .............. : .......... 1-27
WhyTheyWork
............................... 1-9
... Safety Warnings and Symbols ......................... 111
ProCarManuals.com
Page 399 of 404

Seatback. Latches ................................ 1-5
Seatbacks. Reclining
............................. 1-3
Seats EasyEntry
................................... 1-6
ManualFront ................................. 1-1
Power Driver’s
................................ 1-2
Power Lumbar Control
.......................... 1-2
Rear
.................................... 1-7. 1-8
Seatcontrols
................................. 1-1
Securing a Child Restraint
. ..... 1-39. 1-41 1-44. 1-46
Service
......................................... 6-1
Bulletips, Ordering .............................. 8-9
EngineSoonLight
............................ 2-63
Manuals, Ordering
............................. 8-9
Parts Identification Label
....................... 6-67
Publications, Ordering
.......................... 8-9
Work, Doing Your Own
......................... 6- 1
Service and Appearance Care
...................... 6-1
Service and Owner Publications
.................... 8-9
Service Publications
.............................. 8-9
Servicing Your Air Bag-Equipped Vehicle
........... 1-26
Sheet Metal Damage
............................ 6-64
Shift Lever
.......................... 2-13,2-17, 2-18
Shift Light
............................... 2-20, 2-66
Shift Speeds
.................................... 2-19
Shifting Into Park
(P) ............................ 2-26
Shifting, Manual Transmission
............... 2- 17, 2- 18
Shoulder Belt Height Adjuster
..................... 1-15
Sidemarker Lamp Bulb Replacement
............... 6-43
Signaling Turns
................................ 2-34
Restraint Systems
.............................. 1 . 1 .
SIR .......................................... 1-21 Skidding
....................................... 4-12
Sound Equipment. Adding
........................ 3-23
Specifications and Capacities
...................... 6-74
Specifications. Engine
........................... 6-74
Speedometer
................................... 2-57
Stains. Cleaning
................................ 6-60
Starter Switch Check
............................ 7-44
Starting Your Engine
............................ 2-11
Steam
........................................ 5-10
Steering
....................................... 4-8
Column Lock Check
.......................... 7-45
In Emergencies
................................. 4-9
Power
....................................... 4-8
Tips
......................................... 4-8
Wheel. Tilt
.................................. 2-33
Step-Bumper Pad
............................... 4-62
StorageAreas
.................................. 2-46
Storage. Overhead
.............................. 2-48
Storage. Underhood
............................. 2-51
Storage. Vehicle
................................ 6-37
Stuck: In Sand. Mud. Ice or Snow
.................. 5-32
Sunglasses Storage
.............................. 2-48
Sunvisors
.................................... 2-53
Supplemental Inflatable Restraint
.................. 1-21
Symbols. Vehicle
.................................. v
Tachometer .................................. 2-57
Tailgate Marker Lamp Bulb Replacement
. .. .......... 6-45
Tailgate Removal
................................ 2-2
Taillamp Bulb Replacement
.................. 6-45. 6-46
Speech Impaired. Customer Assistance ............... 8-3
9-9
ProCarManuals.com