1996 GMC SIERRA belt
[x] Cancel search: beltPage 154 of 404
Care of Your Cassette Tape Player
A tape player that is not cleaned regularly can cause
reduced sound quality, ruined cassettes
or a damaged
mechanism. Cassette tapes should be stored in their
cases away from contaminants, direct sunlight and
extreme heat. If they aren’t,
they may not operate
properly or may cause failure
of the tape player.
Your tape player should be cleaned regularly after every
50 hours of use. Your radio may display CLN to indicate
that
you have used your tape player for 50 hours without
resetting the tape clean timer.
If you notice a reduction in
sound quality, try a known good cassette to see if the tape
or the tape player is at fault. If this other cassette has no
improvement
in sound quality, clean the tape player.
Cleaning may be done with a scrubbing action,
non-abrasive cleaning cassette with pads which scrub
the tape head as the hubs
of the cleaner cassette turn. It
is normal for the cassette to eject while cleaning because
your unit is equipped with
a cut tape feature. To
temporarily override this feature (for one insertion), turn
the radio off and press and hold TAPE AUX until the
tape symbol flashes on the display, then insert
the
cassette again. Insert the cassette at least three times to
ensure thorough cleaning. A scrubbing action cleaning
cassette
is available through your GM dealer.
You may also choose a non-scrubbing action, wet-type
cleaner which uses a cassette with
a fabric belt to clean the
tape head. This type
of cleaning cassette will not eject. It
may not clean as thoroughly as the scrubbing type cleaner.
Cassettes are subject
to wear and the sound quality may
degrade over time. Always make sure that
the cassette
tape
is in good condition before you have your tape
player serviced.
Care of Your Compact Discs
Handle discs carefully. Store them in their original cases
or other protective cases and away from direct sunlight
and dust.
If the surface of a disc is soiled, dampen a
clean, soft cloth in
a mild, neutral detergent solution and
clean
it, wiping from the center to the edge.
Be sure never
to touch the signal surface when handling
discs. Pick up discs by grasping the outer edges or the
edge of the hole and the outer edge.
Fixed Mast Antenna
The fixed mast antenna can withstand most vehicle
washes without being damaged.
If the mast should ever
become slightly bent, you can straighten
it out by hand.
If the mast is badly bent,
as it might be by vandals, you
should replace it.
Check every once in a while to be sure the mast is still
tightened to the cowl.
3-24
ProCarManuals.com
Page 155 of 404
Section 4 Your Driving and the Road
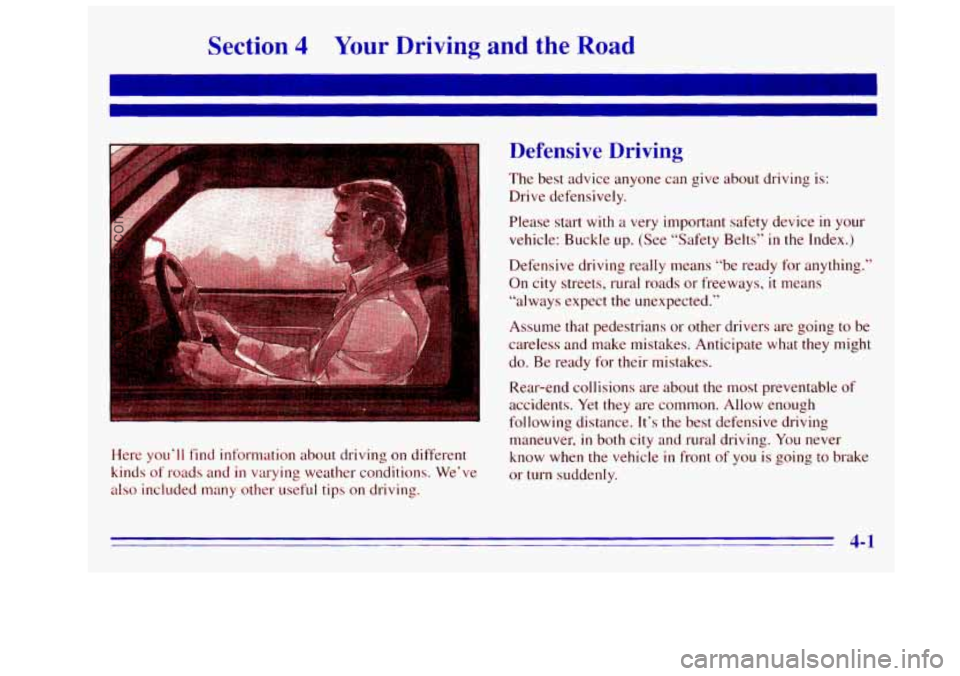
Here you‘ll find information about driving on different
kinds
of roads and in varying weather conditions. We’ve
also included many other useful tips on driving.
Defensive Driving
The best advice anyone can give about driving is:
Drive defensively.
Please start with
a very important safety device in your
vehicle: Buckle up. (See “Safety Belts”
in the Index.)
Defensive driving really means “be ready
for anything.”
On city streets, rural roads or freeways, it means
“always expect the unexpected.”
Assume that pedestrians
or other drivers are going to be
careless and make mistakes. Anticipate what they might
do.
Be ready for their mistakes.
Rear-end collisions are about the most preventable
of
accidents. Yet they are common. Allow enough
following distance. It’s the best defensive driving
maneuver,
in both city and rural driving. You never
know when the vehicle
in front of you is going to brake
or turn suddenly.
4-1
ProCarManuals.com
Page 164 of 404
Road Rea ---:y
An emergency like this requires close attention and a
quick decision. If you are holding
the steering wheel at .
the recommended 9 and 3 o’clock positions, you can
turn it a full
180 degrees very quickly without removing
either hand. But you have
to act fast, steer quickly, and
just as quickly straighten
the wheel once you have
avoided the object.
The fact that such emergency situations are always
possible
is a good reason to practice defensive driving at
all times and wear safety belts properly.
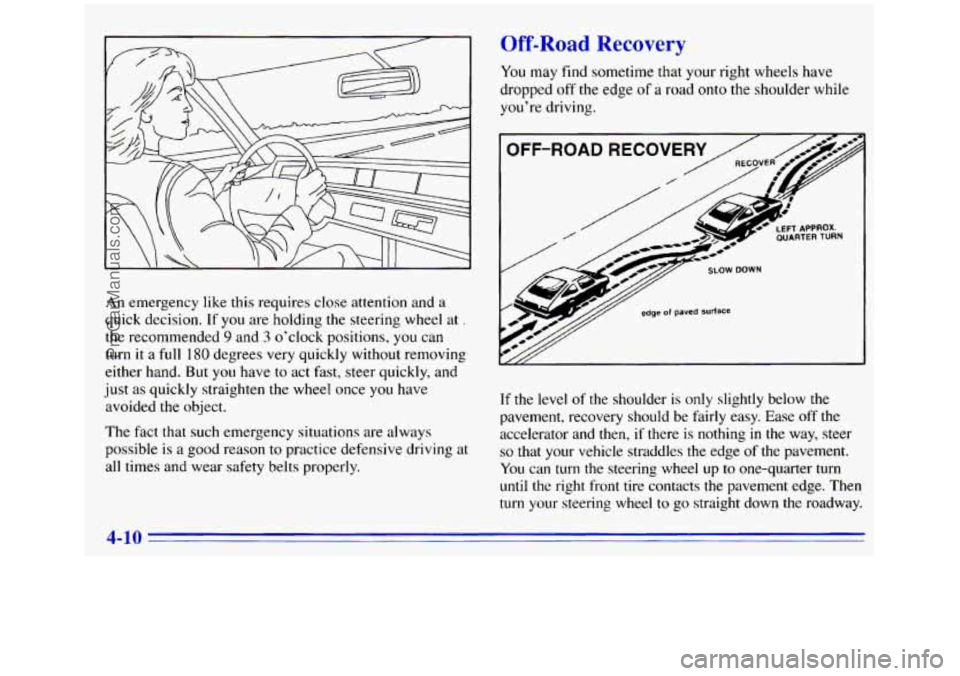
You may find sometime that your right wheels have
dropped off the edge of a road
onto the shoulder while
you’re driving.
- - -r- --
OFF-ROAD RECOVERY RECOVER
0-
If the level of the shoulder is only slightly below the
pavement, recovery should be fairly easy. Ease off the
accelerator
and then, if there is nothing in the way, steer
so that your vehicle straddles the edge of the pavement.
You can turn the steering wheel up to one-quarter turn
until the right front tire contacts the pavement edge. Then
turn your steering wheel to go straight down the roadway.
ProCarManuals.com
Page 170 of 404

Controlling your vehicle is the key to successful
off-road driving. One
of the best ways to control your
vehicle
is to control your speed. Here are some things to
keep in mind. At higher speeds:
you approach things faster and you have less time to
you have less time to react.
scm
the terrain
for obstacles.
you have more vehicle bounce when you drive
over obstacles.
you’ll need more distance for braking, especially
since you’re on an unpaved surface.
When you’re driving off-road, bouncing and
quick changes in direction can easily throw you
out of position. This could cause you to lose
control and crash.
So, whether you’re driving on
or off the road, you and your passengers should
wear safety belts.
Scanning the Terrain
Off-road driving can take you over many different
kinds of terrain.
You need to be familiar with the
terrain and its many different features. Here are some
things to consider.
Surface Conditions. Off-roading can take you over
hard-packed dirt, gravel, rocks, grass, sand, mud,
snow
or ice. Each of these surfxes affects the steering,
acceleration and braking
of your vehicle in different
ways. Depending upon the kind of surface
you are
on, you may experience slipping, sliding, wheel
spinning, delayed acceleration, poor traction and
longer braking distances.
Swfuce Obsrdes. Unseen or hidden obstacles can
be hazardous. A rock, log, hole, rut or bump can
startle you
if you’re not prepared for them. Often these
obstacles are hidden by grass, bushes, snow or even
the rise and fall
of the terrain itself. Here are some
things to consider:
Is the path ahead clear?
0 Will the surfxe texture change abruptly up ahead?
Does the travel take you uphill or downhill? (There’s
more discussion of these subjects later.)
0 Will you have to stop suddenly or change
direction quickly?
4-16
ProCarManuals.com
Page 213 of 404
When You Are Ready to Leave After
Parking on a Hill
1. Apply your regular brakes and hold the pedal down
while
you:
0 Start your engine;
Shift into a gear; and
0 Release the parking brake.
2. Let up on the brake pedal.
3. Drive slowly until the trailer is clear of the chocks.
4. Stop and have someone pick up and store the chocks.
Maintenance When Trailer Towing
Your vehicle will need service more often when you’re
pulling
a trailer. See the Maintenance Schedule for more
on this. Things
that are especially important in trailer
operation are automatic transmission fluid (don’t
overfill), engine oil, axle lubricant, belt, cooling system
and brake adjustment. Each of these is covered
in this
manual, and the Index will help you find them quickly.
If you’re trailering, it’s a good idea
to review these
sections before you start your trip.
Check periodically
to see that all hitch nuts and bolts
are tight.
Trailer Wiring Harness
A seven-wire harness is stored under the rear end of
your vehicle. between the frame rails. An electrical
connector
will need to be installed at the trailer end of
the harness, by a qualified electrical technician. For
additional trailer wiring and towing information please
consult your
GM dealer. Securely attach the harness to
the trailer, then tape or strap it to your vehicle’s frame
rail.
Be sure you leave it loose enough so the wiring
won’t bind or break when turning with the trailer, but
not so loose that it drags on the ground. Store the
harness in its original position. Wrap the harness
together and tie
it neatly so it won’t be damaged. If you
tow a trailer, your Center High-Mounted Stoplamp
(CHMSL) may not be properly visible from behind.
You should select a trailer with
a CHMSL on it or, if
one is not available, have one installed. See your GM
dealer about how to connect your vehicle’s wiring to
a trailer CHMSL.
4-59
ProCarManuals.com
Page 303 of 404
Dual Tire Operation
When the vehicle is new, or whenever a wheel, wheel
bolt or wheel nut is replaced, check the wheel nut torque
after
100, 1,000 and 6,000 miles ( 160, I 600 and IO 000
km) of driving. For proper torque, see "Wheel Nut
Torque" in the Index.
The outer tire on a dual wheel setup generally wears
faster than the inner tire. Your tires will wear more
evenly and last longer
if you rotate the tires periodically.
If you're going to be doing a lot of driving on
high-crown roads,
you can reduce tire wear by adding
5 psi (35 kPa) to the tire pressure in the outer tires. Be
sure to return to the recommended pressures when no
longer driving under those conditions. See "Changing
a
Flat Tire" in the Index for more information.
A CAUTION:
I
If you operate your vehicle with a tire that is
badly underinflated, the tire can overheat. An
overheated tire can lose air suddenly or catch fire.
You or others could be injured. Be sure
all tires
(including the spare, if any) are properly inflated.
Buying New Tires
To find out what kind and size of tires you need, look at
the Certificntion/Tire label.
Tlze tires installed
on your vehicle when it was new had
a Tire Performance Criteria Specification (TPC Spec)
number
on each tire's sidewall. When you get new tires,
get ones
with that same TPC Spec number. That way
your vehicle
will continue to have tires that are designed
to give proper endurance, handling, speed rating,
traction, ride and other things during normal service
on
your vehicle. If your tires have an all-season tread
design,
the TPC number will be followed by an "MS"
(for mud and snow).
If you ever replace your tires with those not having a
TPC
Spec number, make sure they are the same size,
load range, speed rating and construction type
(bias,
bias-belted or radial) as your original tires.
6-53
ProCarManuals.com
Page 304 of 404

-
A CAUTION:
Mixing tires could cause you to lose control while
driving.
If you mix tires of different sizes or types
(radial and bias-belted tires), the vehicle may not
handle properly, and you could have a crash.
Using tires of different sizes may also cause
damage to your vehicle.
Be sure to use the same
size and type tires on all wheels.
Uniform Tire Quality Grading
The following information relates to the system
developed by the United States National Highway
Traffic Safety Administration, which grades tires
by
treadwear, traction and temperature performance.
(This applies only to vehicles sold in the United States.)
The grades are molded on the sidewalls of most
passenger car tires. The Uniform Tire Quality Grading
system does
not apply to deep tread, winter-type snow
tires, space-saver or temporary
use spare tires, tires with
nominal rim diameters
of IO to 12 inches (25 to 30 cm),
or to some limited-production tires. While
the tires available on General Motors passenger
cars and light trucks may vary with respect to these
grades,
they must also conform to Federal safety
requirements and additional General Motors Tire
Performance Criteria (TPC) standards.
Treadwear
The treadwear grade is a comparative rating based on
the wear rate of the tire when tested under controlled
conditions on
a specified government test course. For
example. a tire graded 150 would wear one and a half
(1 1/2) times as well on the government course as a tire
upon the actual conditions of their use, however, and
may depart significantly from
the norm due to variations
in driving habits, service practices and differences in
road characteristics and climate.
E at-aded 100. The relative performance of tires depends
Traction -- A, B, C
The traction grades, from highest to lowest, are A, B, and
C, and they represent
the tire’s ability to stop on wet
pavement as measured under controlled conditions on
specified government test surfaces
of asphalt and concrete.
A tire marked C may have poor traction performance.
Warning: The traction grade assigned
to this, tire is based
on braking (straightahead) traction tests and does not
include cornering (turning) traction.
6-54
ProCarManuals.com
Page 311 of 404
Cleaning Leather
Use a soft cloth with lukewarm water and a mild soap or
saddle
soap.
For stubborn stains, use a GM VinyVLeather Cleaner
or equivalent product.
Never use oils, varnishes, solvent-based or abrasive
cleaners, furniture polish or shoe polish
on leather.
Soiled leather should be cleaned immediately. If
dirt is allowed to work into the finish, it can harm
the leather.
Cleaning the Top of the Instrument Panel
Use only mild soap and water to clean the top surfxes
of the instrument panel. Sprays containing silicones or
waxes
may cause annoying reflections in the windshield
and even make
it difficult to see through the windshield
under certain conditions.
Care of Safety Belts
Keep belts clean and dry.
-. '4 -
Do not bleach or dye safety belts. If you do, it
may severely weaken them. In a crash, they
might not
be able to provide adequate protection.
Clean safety belts only with mild soap and
lukewarm water.
Glass
Glass should be cleaned often. GM Glass Cleaner (GM
Part No. 1050427) or a liquid household glass cleaner
will remove normal tobacco smoke and dust films.
Don't use abrasive cleaners
on glass, because they may
cause scratches. Avoid placing decals
on the inside rear
window, since they may have to be scraped off later.
If
abrasive cleaners are used on the inside of the rear
window, an electric defogger element may be damaged.
Any temporary license should not be attached across the
defogger grid.
6-61
ProCarManuals.com