1996 GMC SIERRA brake fluid
[x] Cancel search: brake fluidPage 98 of 404
Driving without washer fluid can be dangerous. A
bad mud splash can block your vision. You could hit
another vehicle or go off the road. Check your washer
fluid
level often.
A CAUTION:
In freezing weather, don't use your washer until
the windshield is warmed. Otherwise the washer
fluid can form ice on the windshield, blocking
your vision.
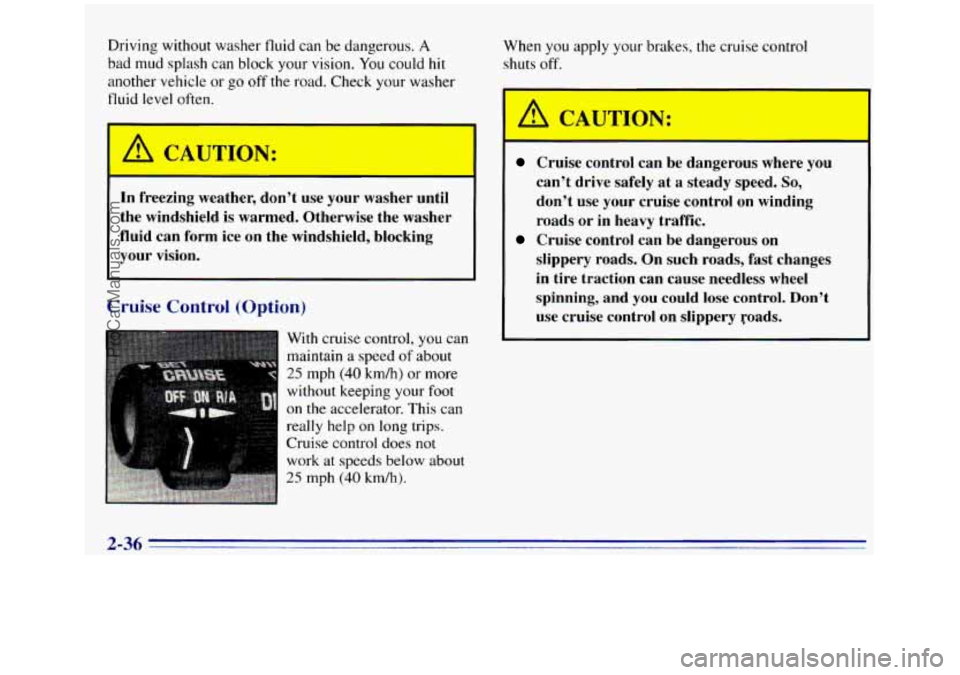
Cruise Control (Option)
With cruise control, y6u Cgn
maintain a speed of about
25 mph (40 kdh) or more
without keeping your
foot
on the accelerator. This can
really help on
long trips.
Cruise control does not
work at speeds below about
25 mph (40 km/h).
When you apply your brakes, the cruise control
shuts off.
Cruise control can be dangerous where you
can't drive safely at
a steady speed. So,
don't use your cruise control on winding
roads
or in heavy traffic.
slippery roads. On such roads, fast changes
in tire traction can cause needless wheel
spinning, and you
could lose control. Don't
use cruise control on slippery yoads.
Cruise control can be dangerous on
2-36
.
ProCarManuals.com
Page 191 of 404
0 Keep your vehicle in good shape. Check all fluid
levels and also the brakes, tires. cooling system and
transmission. These parts can work hard on
mountain roads.
Know how to go down hills. The most important
thing to know is this: let your engine
do some of the
slowing down. Shift
to a lower gear when you go
down a steep or long hill.
If you don’t shift down, your brakes could get
so
hot that they wouldn’t work well. You would then
have poor braking or even none going down a hill.
You could crash. Shift down to let your engine
assist your brakes on
a steep downhill slope.
0
0
0
0
~h CAUTION:
Coasting downhill in NEUTRAL (N) or with the
ignition
off is dangerous. Your brakes will have to
do
all the work of slowing down. They could get so
hot that they wouldn’t work well. You would then
have poor braking
or even none going down a hill.
You could crash. Always have your engine running
and your vehicle in gear when you go downhill.
Know
how to go uphill. You may want to shift down
to a lower gear. The lower gears help cool your engine
and transmission, and
you can climb the hill better.
Stay
in your own lane when driving on two-lane
roads
in hills or mountains. Don’t swing wide or cut
across the center
of the road. Drive at speeds that let
you stay
in your own lane.
As you go over the top of a hill, be alert. There
could be something
in your lane, like a stalled car
or an accident.
You may see highway signs on mountains that warn of
special problems. Examples are long grades, passing or
no-passing zones, a falling rocks area’or winding
roads. Be alert to these and take appropriate action.
4-37
ProCarManuals.com
Page 209 of 404

Y
You should always attach chains between your vehicle
and your trailer. Cross
the safety chains under the tongue
of the trailer
so that the tongue will not drop to the road
if
it becomes separated from the hitch. Instructions
about safety chains may be provided by the hitch
manufacturer or by the trailer manufacturer. Follow
the
manufacturer’s recommendation for attaching safety
chains and do
not attach them to the bumper. Always
leave just enough slack
so you can turn with your rig.
And, never allow safety chains to drag on the ground.
If your trarler weighs more than
1,000 lbs. (450 kg)
loaded, then it needs its own brakes
-- and they must be
adequate. Be sure
to read and follow the instructions for
the trailer brakes
so you’ll be able to install, adjust and
maintain them properly.
Your trailer brake system can tap into
the vehicle’s
hydraulic brake system
only if:
The trailer parts can withstand 3,000 psi
(20 650 kPa) of pressure.
0 The trailer’s brake system will use less than
0.02 cubic inch (0.3 cc) of fluid from your vehicle’s
master cylinder. Otherwise, both braking systems
won’t work well. You could even lose your brakes. If
everything checks out this far, make the brake tap
at the port
on the master cylinder that sends the fluid to
the rear brakes. But don’t use copper tubing for this.
If
you do, it will bend and finally break off. Use steel
brake tubing.
rrailer
Towing a trailer requires a certain amount of experience.
Before setting
out for the open road, you’ll want to get
to know your rig. Acquaint yourself with the feel of
handling and braking with the added weight of the
trailer. And always keep in mind that
the vehicle you are
driving is now a good deal longer and
not nearly as
responsive
as your vehicle is by itself.
Before
you start, check the trailer hitch and platform
(and attachments), safety chains, electrical connector,
lamps, tires and mirror adjustment. If the trailer has
electric brakes, start your vehicle and trailer moving and
then apply the trailer brake controller by hand
to be sure
the brakes are working. This lets
you check your
electrical connection at the same time.
During your trip, check occasionally
to be sure that the
load is secure, and that
the lamps and any trailer brakes
are still working.
4-55
ProCarManuals.com
Page 213 of 404
When You Are Ready to Leave After
Parking on a Hill
1. Apply your regular brakes and hold the pedal down
while
you:
0 Start your engine;
Shift into a gear; and
0 Release the parking brake.
2. Let up on the brake pedal.
3. Drive slowly until the trailer is clear of the chocks.
4. Stop and have someone pick up and store the chocks.
Maintenance When Trailer Towing
Your vehicle will need service more often when you’re
pulling
a trailer. See the Maintenance Schedule for more
on this. Things
that are especially important in trailer
operation are automatic transmission fluid (don’t
overfill), engine oil, axle lubricant, belt, cooling system
and brake adjustment. Each of these is covered
in this
manual, and the Index will help you find them quickly.
If you’re trailering, it’s a good idea
to review these
sections before you start your trip.
Check periodically
to see that all hitch nuts and bolts
are tight.
Trailer Wiring Harness
A seven-wire harness is stored under the rear end of
your vehicle. between the frame rails. An electrical
connector
will need to be installed at the trailer end of
the harness, by a qualified electrical technician. For
additional trailer wiring and towing information please
consult your
GM dealer. Securely attach the harness to
the trailer, then tape or strap it to your vehicle’s frame
rail.
Be sure you leave it loose enough so the wiring
won’t bind or break when turning with the trailer, but
not so loose that it drags on the ground. Store the
harness in its original position. Wrap the harness
together and tie
it neatly so it won’t be damaged. If you
tow a trailer, your Center High-Mounted Stoplamp
(CHMSL) may not be properly visible from behind.
You should select a trailer with
a CHMSL on it or, if
one is not available, have one installed. See your GM
dealer about how to connect your vehicle’s wiring to
a trailer CHMSL.
4-59
ProCarManuals.com
Page 256 of 404

Be careful not to spill gasoline. Clean gasoline from
painted surfxes as soon
as possible. See “Cleaning the
Outside
of Your Vehicle” in the Index.
When you put the cap back
on, turn it to the right until
you hear at least three clicks. Make sure you fully install
the cap. The diagnostic system can determine if the fuel
cap has been
left off or improperly installed. This would
allow
fuel to evaporate into the atmosphere. See
“Malfunction Indicator Lamp” in the Index.
I NOTICE:
If you need a new cap, be sure to get the right
type. Your dealer can get one for you. If you get
the wrong type, it may not fit or have proper
venting, and your fuel tank and emissions system
might be damaged.
Checking Things Under the Hood
h
I ! CAUTION:
If your vehicle has air conditioning, the auxiliary
engine fan under the hood can start up and
hjure you even when the engine
is not running.
Keep hands, clothing and tools away from any
underhood electric fan.
Things that burn can get on hot engine parts and
start a fire. These include liquids like gasoline or
diesel fuel, oil, coolant, brake fluid, windshield
washer and other fluids, and plastic or rubber.
You
or others could be burned. Be careful not to drop
or spill things that will burn onto a hot engine.
6-6
ProCarManuals.com
Page 259 of 404
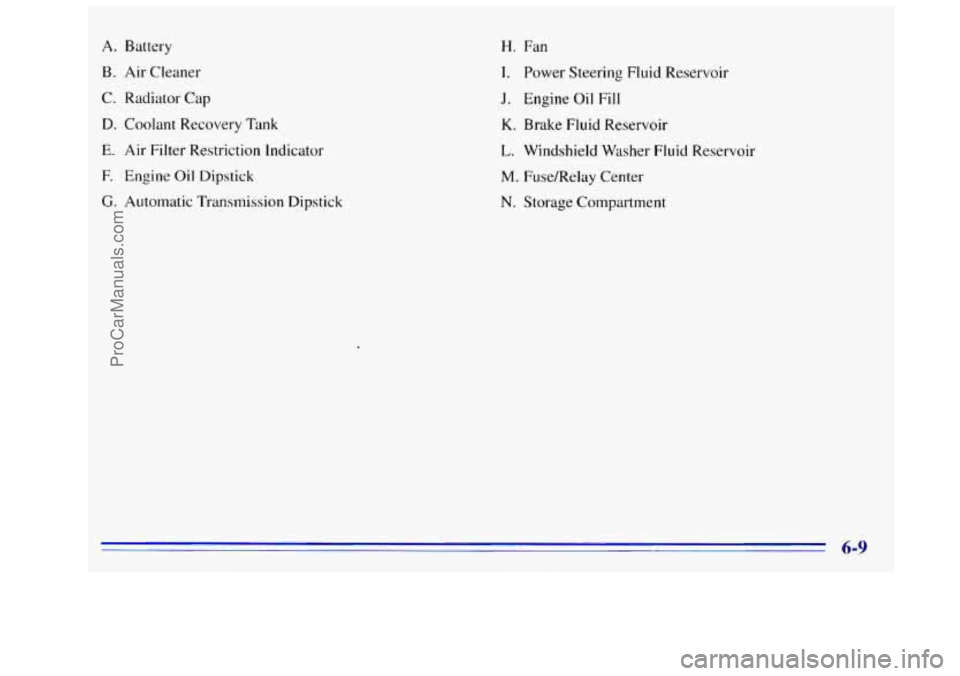
A. Battery
B. Air Cleaner
C. Radiator Cap
D. Coolant Recovery Tmk
E. Air Filter Restriction Indicator
E Engine Oil Dipstick
G. Automatic Transmission Dipstick
H. Fan
I. Power Steering Fluid Reservoir
J. Engine Oil Fill
K. Brake Fluid Reservoir
L. Windshield Washer Fluid Reservoir
M. FuseIRelay Center
N. Storage Compartment
ProCarManuals.com
Page 260 of 404
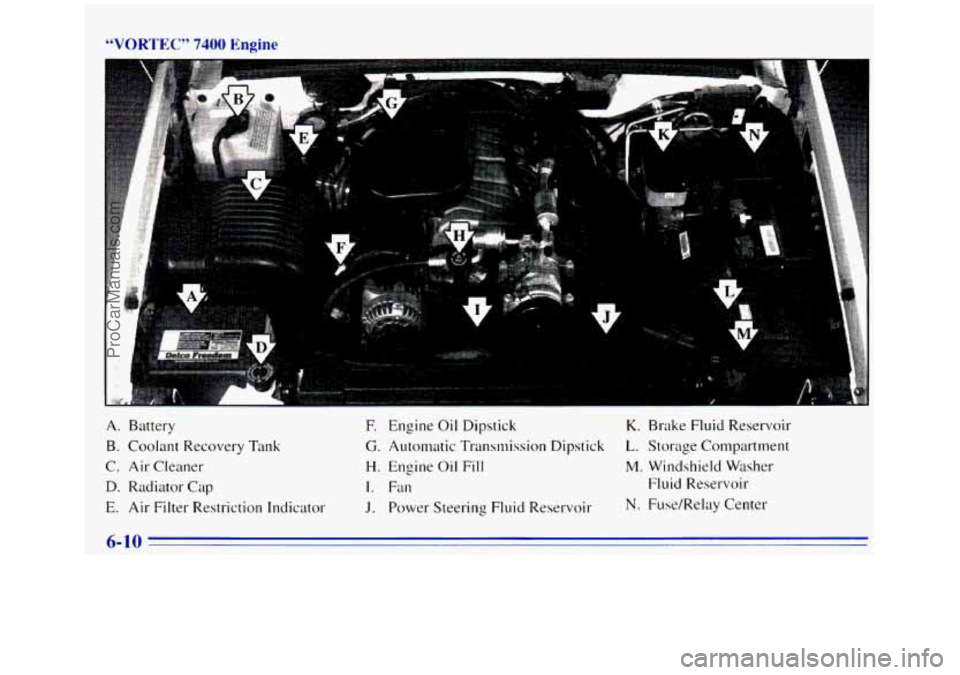
“VORTEC” 7400 Engine
I
A. Battery
B. Coolant Recovery Tank
C. Air Cleaner
D. Radiator Cap
E. Air Filter Restriction Indicator
E Engine Oil Dipstick K. Brake Fluid Reservoir
G. Automatic Transmission Dipstick L. Storage Compartment
H. Engine Oil Fill M. Windshield Washer
I. Fan Fluid
Reservoir
J. Power Steering Fluid Reservoir Ne Fuse/RelaY Center
ProCarManuals.com
Page 270 of 404

Checking Transmission Fluid Hot
Get the vehicle warmed up by driving about 15 miles
(24 km) when outside temperatures are above 50°F
(10°C). If it's colder than 50°F (lO"C), drive the
vehicle
in DRIVE (D) until the engine temperature
gage moves and then remains steady for
10 minutes.
Then
follow the hot check procedures.
Checking Transmission Fluid Cold
A cold check is made after the vehicle has been sitting
for eight hours or more with the engine off and is used
only
as a reference. Let the engine run at idle for five
minutes
if outside temperatures are 50°F (10°C) or
more. If it's colder than 50°F (lO"C), you may have to
idle the engine longer. Should
the fluid level be low
during a cold check, you nwst perform a hot check
before adding fluid. This will give you
a more accurate
reading
of the fluid level.
Checking the Fluid Hot or Cold
0 Park your vehicle on a level place. Keep the
engine running.
With the parking brake applied, place the shift lever
in PARK (P).
-,
With your foot on the brake pedal, move the shift
lever through each gear range, pausing for about three
seconds
in each range. Then, position the shift
lever
in PARK (P).
Let the engine run at idle for three minutes or more.
Then, without shutting off the engine, follow these steps:
The red transmission dipstick handle
is located at the
rear
of the engine compartment, on the passenger side.
I. Flip the handle up and then pull out the dipstick and
wipe
it with a clean rag or paper towel.
2. Push it back in all the way, wait three seconds and
then pull
it back out again.
6-20
ProCarManuals.com