1996 CHEVROLET TAHOE tailgate
[x] Cancel search: tailgatePage 67 of 403
Downloaded from www.Manualslib.com manuals search engine Keyless Entry System (Option)
If your vehicle has this option, you can lock and unlock
your doors or your tailgate from up to
30 feet (9 m)
away using the key chain transmitter supplied with
your vehicle.
Your Keyless Entry System operates on a radio
frequency subject to Federal Communications
Commission (FCC) Rules.
This device complies with Part
15 of the FCC Rules.
Operation is subject to the following two conditions:
(1) This device may not cause harmful interference,
and
(2) This device must accept any interference
received, including interference that may cause
undesired operation.
Should interference to this system occur, try this:
Check to determine if battery replacement is
necessary. See the instructions
on battery replacement.
0 Check the distance. You may be too far from your
vehicle. This product has a maximum range.
Check the location. Other vehicles or objects may
be blocking the signal.
See your GM dealer or a qualified technician for service.
Changes or modifications to this system by other than an
authorized service facility could void authorization to
use this equipment.
Operation
To unlock the driver’s door, press the UNLOCK button.
If you press this button again within five seconds, all the
doors will unlock. Press the
REAR button to unlock the
rear door only, or to release the tailgate glass.
Press the LOCK button to lock all the doors.
When the UNLOCK button is pushed, the interior dome
lamps are turned on for
40 seconds or until the ignition
switch is activated.
When the LOCK button is pushed, the interior lamps
are turned on for two seconds
if the doors are closed.
If the LOCK button is pushed when a door is open, the
interior lamps will stay on for two seconds after the door
is closed.
Page 69 of 403
Downloaded from www.Manualslib.com manuals search engine Your Doors and How They Work
Side Doors
To open the door from the outside, pull the handle up
and pull the door open.
To open the door from the inside, pull the lever toward
you and push the door open.
1
It can be dangerous to drive with’the tailgate
glass, tailgate or rear doors open because carbon
monoxide (CO) gas can come into your vehicle.
You can’t see or smell CO.
It can cause
unconsciousness and even death.
CAUTION: (Continued) CAUTION: (Continued!
If you must drive with the tailgate glass, tailgate
or rear doors open or if electrical wiring or other
cable connections must pass through the.seal
between the body and the. tailgate glass, tailgate
or rear doors:
Make sure all windows are shut.
’hrn the fan on your heating or cooling
system to its highest speed with the setting
on VENT. That will force outside air into
your vehicle. See “Comfort Controls” in
the Index.
instrument panel, open them all the
way.
If you have air outlets on or under the
See “Engine Exhaust” in the Index.
2-6
Page 70 of 403

Downloaded from www.Manualslib.com manuals search engine Tailgate Glass and Tailgate
If your vehicle has a tailgate, you must raise the rear
glass before lowering the tailgate.
To open the glass from the outside, use your key. With
the key in the lock, turn the key clockwise to release the
glass, then lift
it up.
To release the glass from the inside, use the electric
tailgate glass release switch on the instrument panel. For
more information, see “Tailgate
-- Electric Glass
Release” in the Index.
Open the tailgate by lifting up on the handle while
pulling the tailgate toward you.
Close the tailgate before closing the rear glass. After
closing, make sure the tailgate is securely latched by
pulling it toward you. After closing the rear glass, pull
up on its handle to make sure it is locked.
Panel Doors
To open the rear panel doors, you must open the
passenger’s side door first. If the door is locked, insert
your door key in the lock and turn it counterclockwise to
unlock it.
To open the passenger’s side door, pull up on the handle
and pull the door open.
To open the driver’s side door, first open the passenger’s
side, door. Then, pull the handle on the left door edge out
and pull the door open.
The rear doors have a check assembly
to keep them
from fully opening during normal use. Tofully open
either rear door, you must release the check strap.
First, open the door partway until the white mark on the
check strap is fully outside the door edge. If the end of
the strap catches the pin on the door, the door
is open
too far.
2-7
Page 90 of 403

Downloaded from www.Manualslib.com manuals search engine Windows
Manual Windows
To open your manual windows, turn the hand crank on
each door to raise or lower your side door windows.
Power Windows (Option)
If you have the optional
power windows, the controls are on each of the
side doors.
The driver’s door has a switch for the passenger
windows as well. Your power windows will work when
the ignition has been turned to
ACC or RUN.
Push the rear of the switch with the power window
symbol on it to lower the window.
Push the front of the switch with the power window
symbol on
it to raise the window.
The driver’s window switch has an express down feature
that allows the window to lower without holding the
switch. Press and hold the side
of the window switch
marked
AUTO for one second to activate the express
down mode. The express down mode can be canceled at
any time by pressing the opposite side
of the switch. To
open the window part way, lightly tap the switch until
the window is at the desired position.
If you have a four-door vehicle and power windows, the
power window switch has a lockout feature. This feature
prevents the rear windows from operating except from
the driver’s position, when the front driver’s side switch
is in the lockout position. When the switch is moved out
of the lockout position, the rear power windows will
operate again.
Electric Tailgate Glass Release
Before operating your electric tailgate glass release, see
the caution under “Your Doors and How They Work’’ in
this section.
2-27
Page 91 of 403
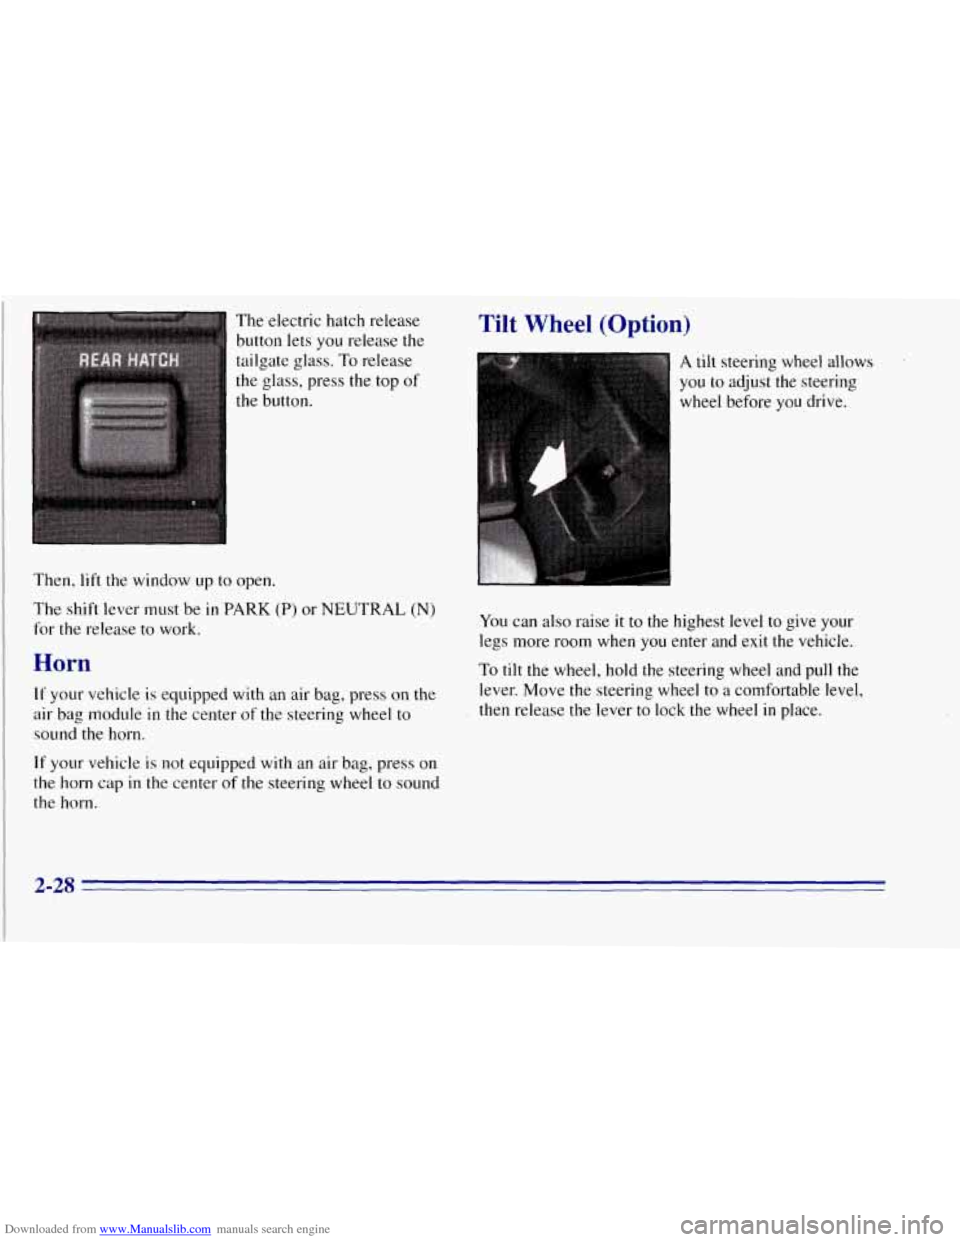
Downloaded from www.Manualslib.com manuals search engine The electric hatch release
button lets you release the
tailgate glass.
To release
the glass, press the top of
the button.
Then, lift the window up to open.
The shift lever must be in PARK (P) or NEUTRAL
(N)
for the release to work.
Horn
If your vehicle is equipped with an air bag, press on the
air bag module in the center
of the steering wheel to
sound the horn.
If your vehicle is not equipped with an air bag, press on
the horn cap in the center of the steering wheel to sound
the horn.
Tilt Wheel (Option)
A tilt steering wheel allows
you to adjust the steering
wheel before
you drive.
You can also raise it to the highest level to give your
legs more room when you enter and exit the vehicle.
To tilt the wheel, hold the steering wheel and pull the
lever. Move the steering wheel to a comfortable level,
then release the lever to lock the wheel
in place.
2-28
Page 114 of 403
Downloaded from www.Manualslib.com manuals search engine Don’t exceed the maximum vehicle capacity when
loading your vehicle. For more information on vehicle
capacity and loading, see “Loading Your Vehicle” in
the Index.
To prevent damage or loss of cargo as you’re driving,
check now and then to make sure the luggage carrier and
cargo are still securely fastened.
Be sure the cargo is properly loaded.
0
0
If small heavy objects are placed on the roof, place
the load in the area over the rear wheels (behind the
rear side door on Suburbans).
If you need to, cut a
piece of
3/8 inch plywood to fit inside the crossrails
and side rails to spread the load.
If plywood is used,
tie it to the side rail supports..
Tie the load to the crossrails or the side rail supports.
Use the crossrails only to keep the load from sliding.
0 If you need to carry long items, move the crossrails
as far apart as they will go. Tie the load to the
crossrails and the side rails or side rail supports. Also
tie the load to the bumpers.
Do not tie the load so
tightly that the crossrails or side rails are damaged.
0 After moving the crossrails, be sure to tighten all the
slider screws.
Your vehicle has a Center High-Mounted Stoplamp
(CHMSL) located above the tailgate glass or above the
rear load doors.
If items are loaded on the roof of the vehicle, as in a
luggage carrier, care should be taken not to block or
damage the CHMSL unit.
Page 294 of 403

Downloaded from www.Manualslib.com manuals search engine Center High-Mounted Stoplamp (CHMSL)
The individual bulbs in the CHMSL are not replaceable.
See your dealer for assistance.
Roof Marker Lamps
1. Remove the screws and lift off the lens.
2. Pull the bulb straight out of the socket.
3. Put a new bulb into the socket and push it in until it
4. Replace the lens and tighten the screws.
is
tight.
Rear Lamps
1. Open the tailgate or rear doors.
2. Remove the two black plastic plugs in the rear lamp
assembly access holes.
3. Remove the two rear
lamp assembly screws
inside the fender and
pull out the lamp
assembly. You may want
to use a magnetic
screwdriver when
removing
the screws.
6-41
Page 295 of 403
Downloaded from www.Manualslib.com manuals search engine 4. Remove the screws from
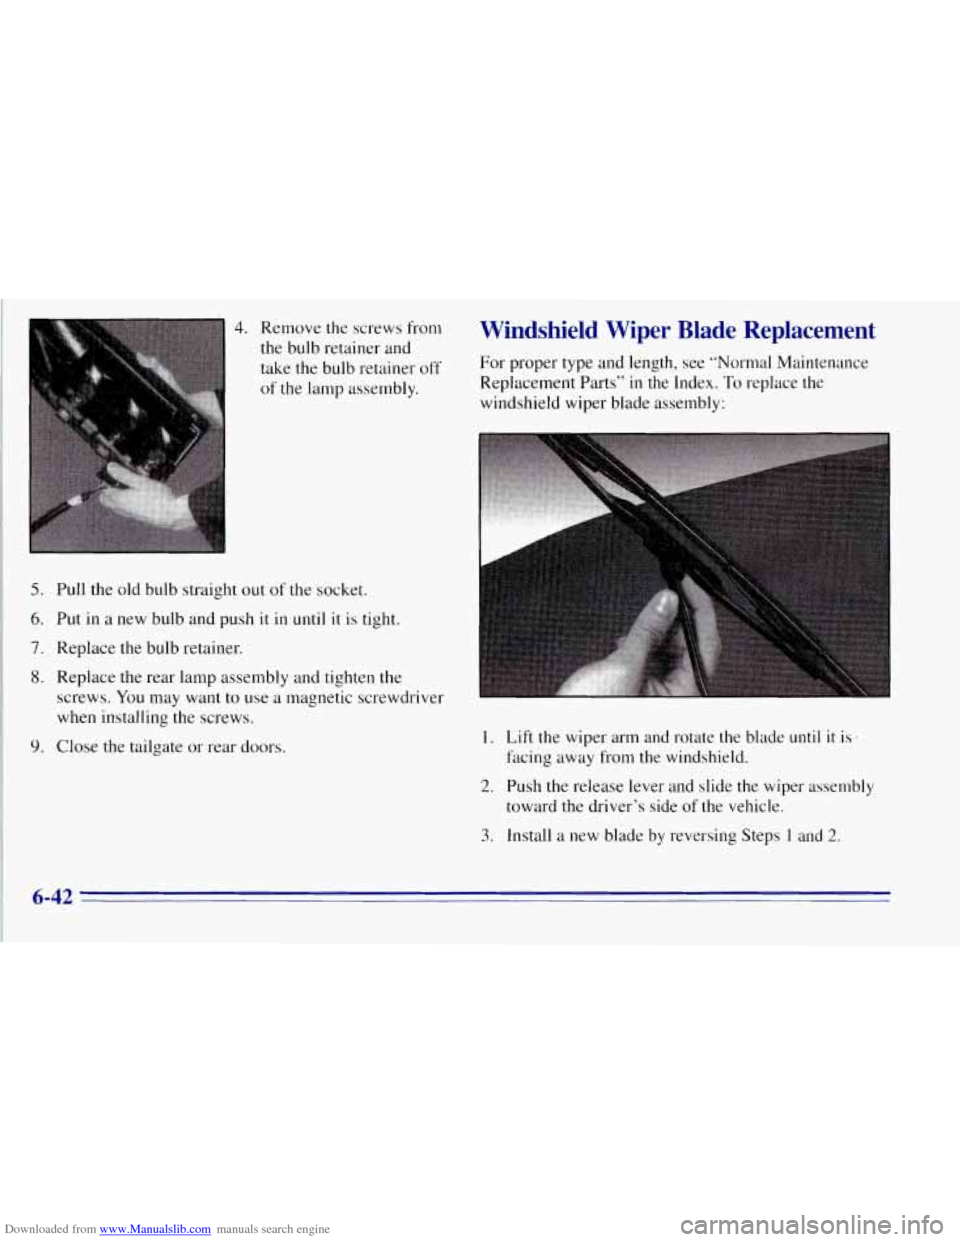
the bulb retainer and
take the bulb retainer
off
of the lamp assembly.
5. Pull the old bulb straight out of the socket.
6. Put in a new bulb and push it in until it is tight.
7. Replace the bulb retainer.
8. Replace the rear lamp assembly and tighten the
screws.
You may want to use a magnetic screwdriver
when installing the screws.
9. Close the tailgate or rear doors.
Windshield Wiper Blade Replacement
For proper type and length, see “Normal Maintenance
Replacement Parts” in‘the Index.
To replace the
windshield wiper blade assembly:
1. Lift the wiper arm and rotate the blade until it is..
facing away from the windshield.
2. Push the release lever and slide the wiper assembly
toward the driver’s side
of the vehicle.
3. Install a new blade by reversing Steps 1 and 2.
6-42 . =.