1996 CHEVROLET TAHOE load capacity
[x] Cancel search: load capacityPage 114 of 403
Downloaded from www.Manualslib.com manuals search engine Don’t exceed the maximum vehicle capacity when
loading your vehicle. For more information on vehicle
capacity and loading, see “Loading Your Vehicle” in
the Index.
To prevent damage or loss of cargo as you’re driving,
check now and then to make sure the luggage carrier and
cargo are still securely fastened.
Be sure the cargo is properly loaded.
0
0
If small heavy objects are placed on the roof, place
the load in the area over the rear wheels (behind the
rear side door on Suburbans).
If you need to, cut a
piece of
3/8 inch plywood to fit inside the crossrails
and side rails to spread the load.
If plywood is used,
tie it to the side rail supports..
Tie the load to the crossrails or the side rail supports.
Use the crossrails only to keep the load from sliding.
0 If you need to carry long items, move the crossrails
as far apart as they will go. Tie the load to the
crossrails and the side rails or side rail supports. Also
tie the load to the bumpers.
Do not tie the load so
tightly that the crossrails or side rails are damaged.
0 After moving the crossrails, be sure to tighten all the
slider screws.
Your vehicle has a Center High-Mounted Stoplamp
(CHMSL) located above the tailgate glass or above the
rear load doors.
If items are loaded on the roof of the vehicle, as in a
luggage carrier, care should be taken not to block or
damage the CHMSL unit.
Page 125 of 403
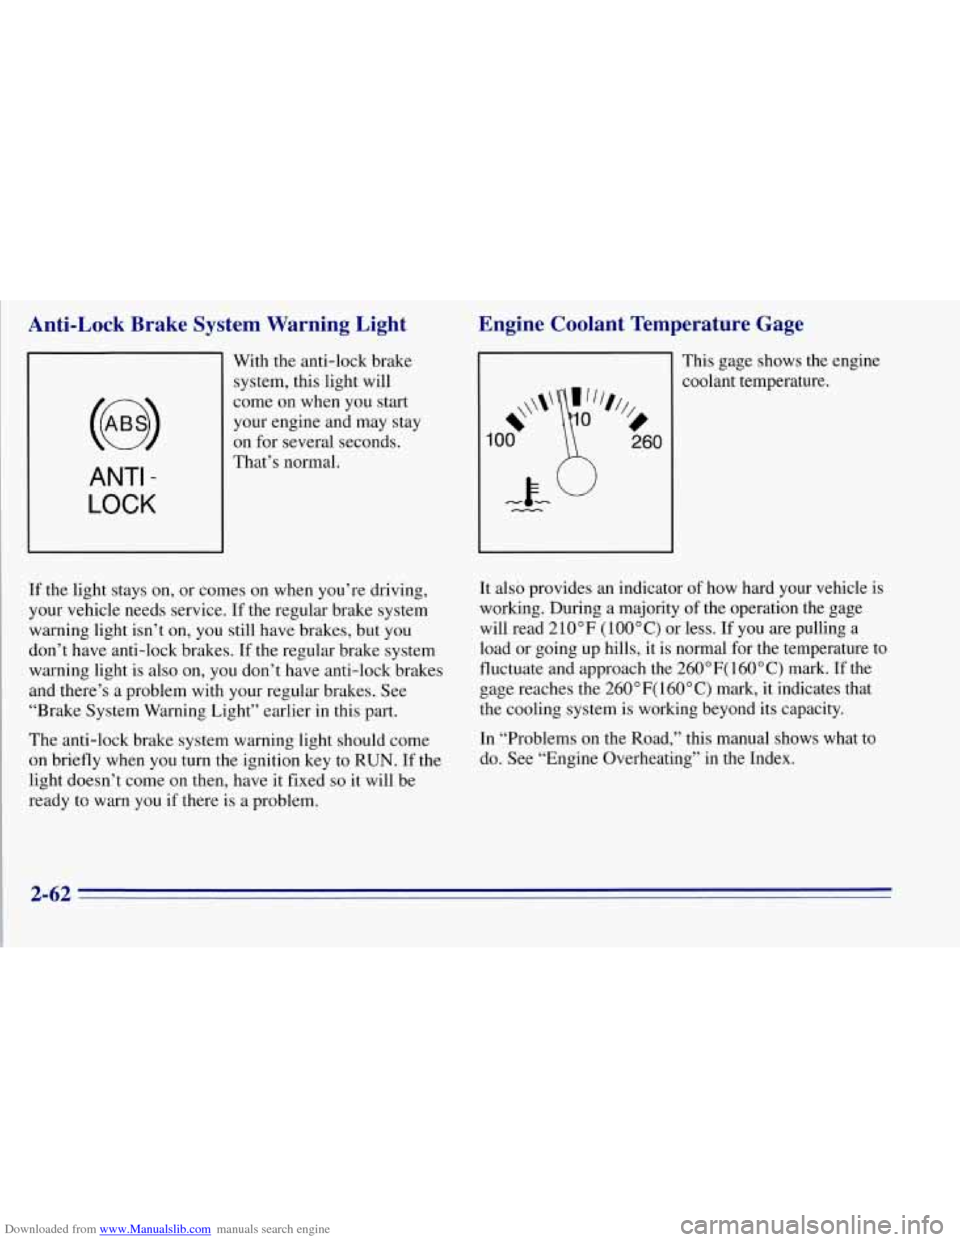
Downloaded from www.Manualslib.com manuals search engine Anti-Lock Brake System Warning Light
ANTI -
LOCK
With the anti-lock brake
system, this light will
come on when you start
your engine and may stay
on for several seconds.
That’s normal.
If the light stays on, or comes on when you’re driving,
your vehicle needs service. If the regular brake system
warning light isn’t
on, you still have brakes, but you
don’t have anti-lock brakes. If the regular brake system
warning light is also on, you don’t have anti-lock brakes
and there’s a problem with your regular brakes. See
“Brake System Warning Light” earlier in this part.
The anti-lock brake system warning light should come
on briefly when you turn the ignition key to RUN. If the
light doesn’t come
on then, have it fixed so it will be
ready to warn
you if there is a problem.
Engine Coolant Temperature Gage
This gage shows the engine
coolant temperature.
It also provides an indicator of how hard your vehicle is
working. During a majority of the operation the gage
will read 2
10 OF ( 100 ” C) or less. If you are pulling a
load or going up hills, it is normal for the temperature to
fluctuate and approach the 260”F( 160°C) mark. If the
gage. reaches the 260”F( 160°C) mark, it indicates that
the cooling system is working beyond its capacity.
In “Problems on the Road,” this manual shows what to
do. See “Engine Overheating” in the Index.
2-62
Page 131 of 403
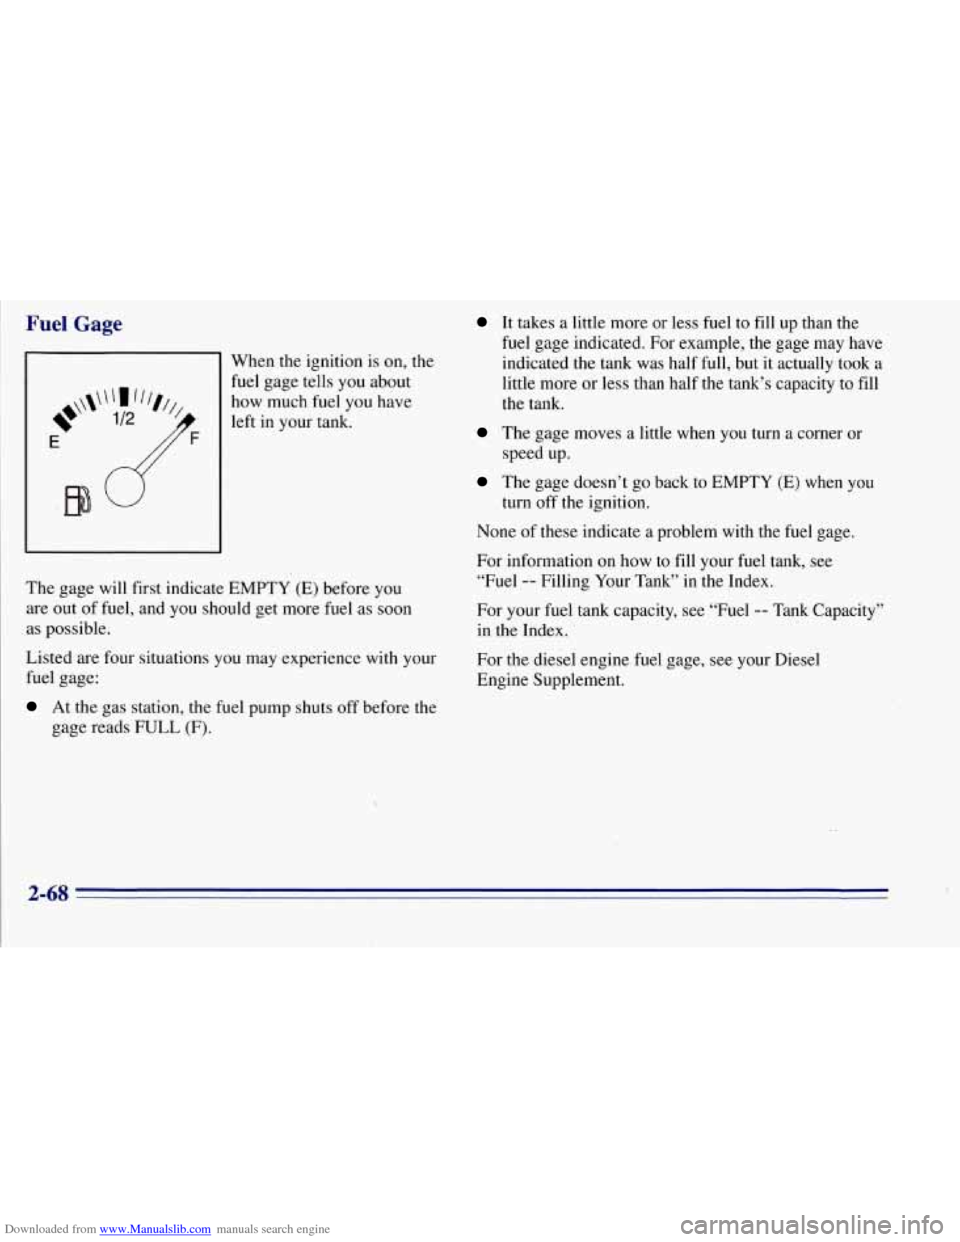
Downloaded from www.Manualslib.com manuals search engine Fuel Gage
-1 When the ignition is on, the
I
fuel gage tells you about
how much fuel you have
left in your tank.
The gage will first indicate EMPTY
(E) before you
are out of fuel, and you should get more fuel as soon
as possible.
Listed are four situations you may experience with your
fuel gage:
At the gas station, the fuel pump shuts off before the
gage reads
FULL (F).
It takes a little more or less fuel to fill up than the
fuel gage indicated. For example, the gage may have
indicated the tank was half
full, but it actually took a
little more or less than half the tank’s capacity to fill
the tank.
The gage moves a little when you turn a corner or
speed up.
The gage doesn’t go back to EMPTY (E) when you
turn
off the ignition.
None of these indicate a problem with the fuel gage.
For information
on how to fill your fuel tank, see
“Fuel -- Filling Your Tank” in the Index.
For your fuel tank capacity, see “Fuel
-- Tank Capacity”
in the Index.
For the diesel engine fuel gage, see your Diesel
Engine Supplement.
2-68
Page 200 of 403
Downloaded from www.Manualslib.com manuals search engine Run your engine only as long as you must. This saves
fuel. When
you run the engine, make it go a little faster
than just idle. That is, push the accelerator slightly. This
uses less fuel for the heat that you get and it keeps the
battery (or batteries) charged.
You will need a
well-charged battery (or batteries) to restart the vehicle,
and possibly for signaling later on with your headlamps.
Let the heater run for awhile.
If you have a diesel engine, you may have to run it at a
higher speed to get enough heat. Then, shut the engine
off and close the window almost all the way to preserve
the heat. Start the engine again and repeat this only
when you feel really uncomfortable from the cold. But
do it as little as possible. Preserve the fuel as long as
you
can. To help keep warm, you can get out of the vehicle
and
do some fairly vigorous exercises every half hour or
so until help comes.
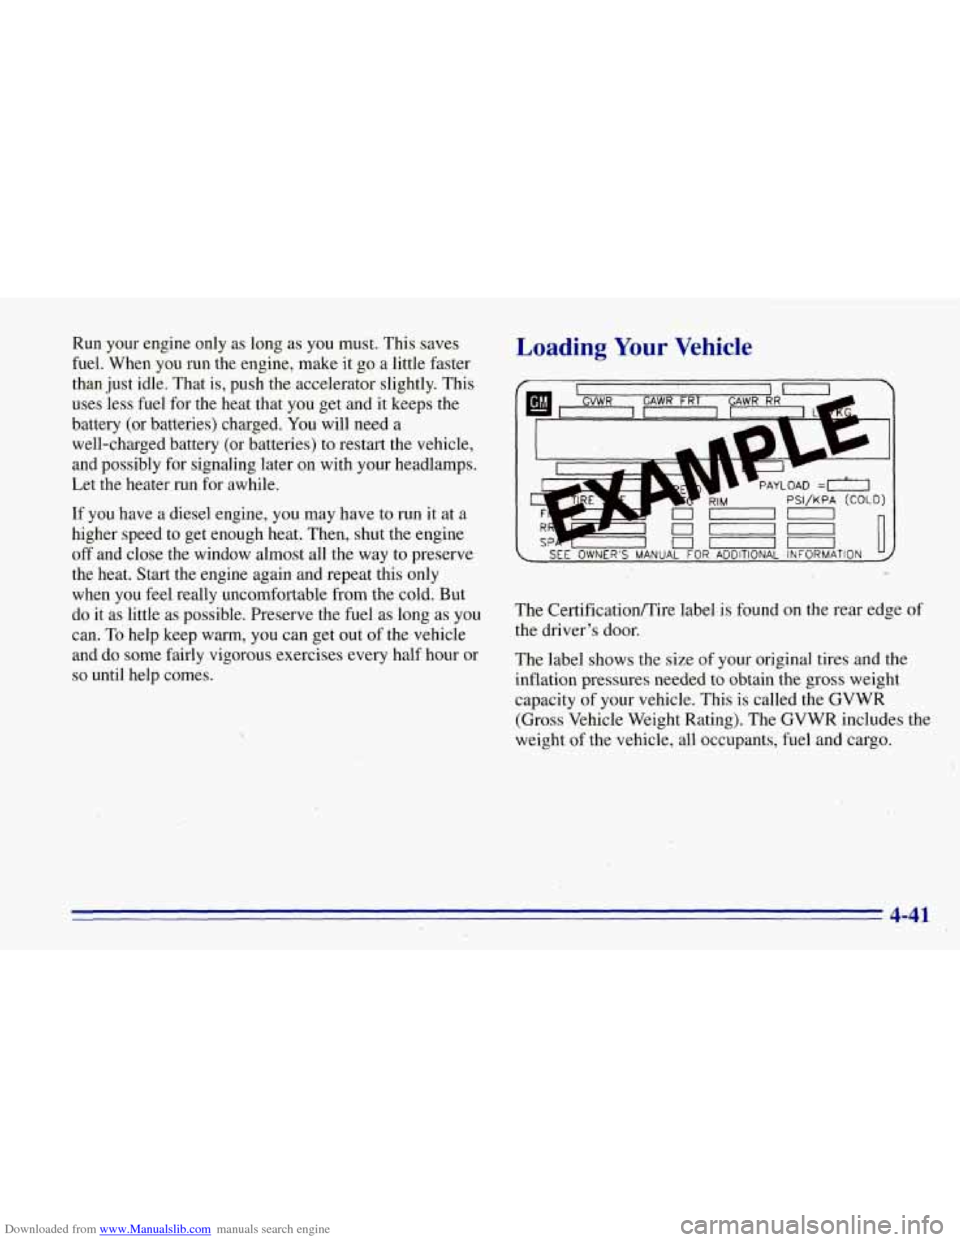
Loading Your Vehicle
nun-
a-n SEE OWNER'S MANUAL FOR ADDITIONAL INFORMATION
The Certification/Tire label.is found on the rear edge of
the driver's door.
The label shows the size of your original tires and the
inflation pressures needed to obtain the gross weight
capacity
of your vehicle. This is called the GVWR
(Gross Vehicle Weight Rating). The GVWR includes
the
weight of the vehicle, all occupants, fuel and cargo.
4-41
Page 206 of 403
Downloaded from www.Manualslib.com manuals search engine Weight of the Trailer Tongue
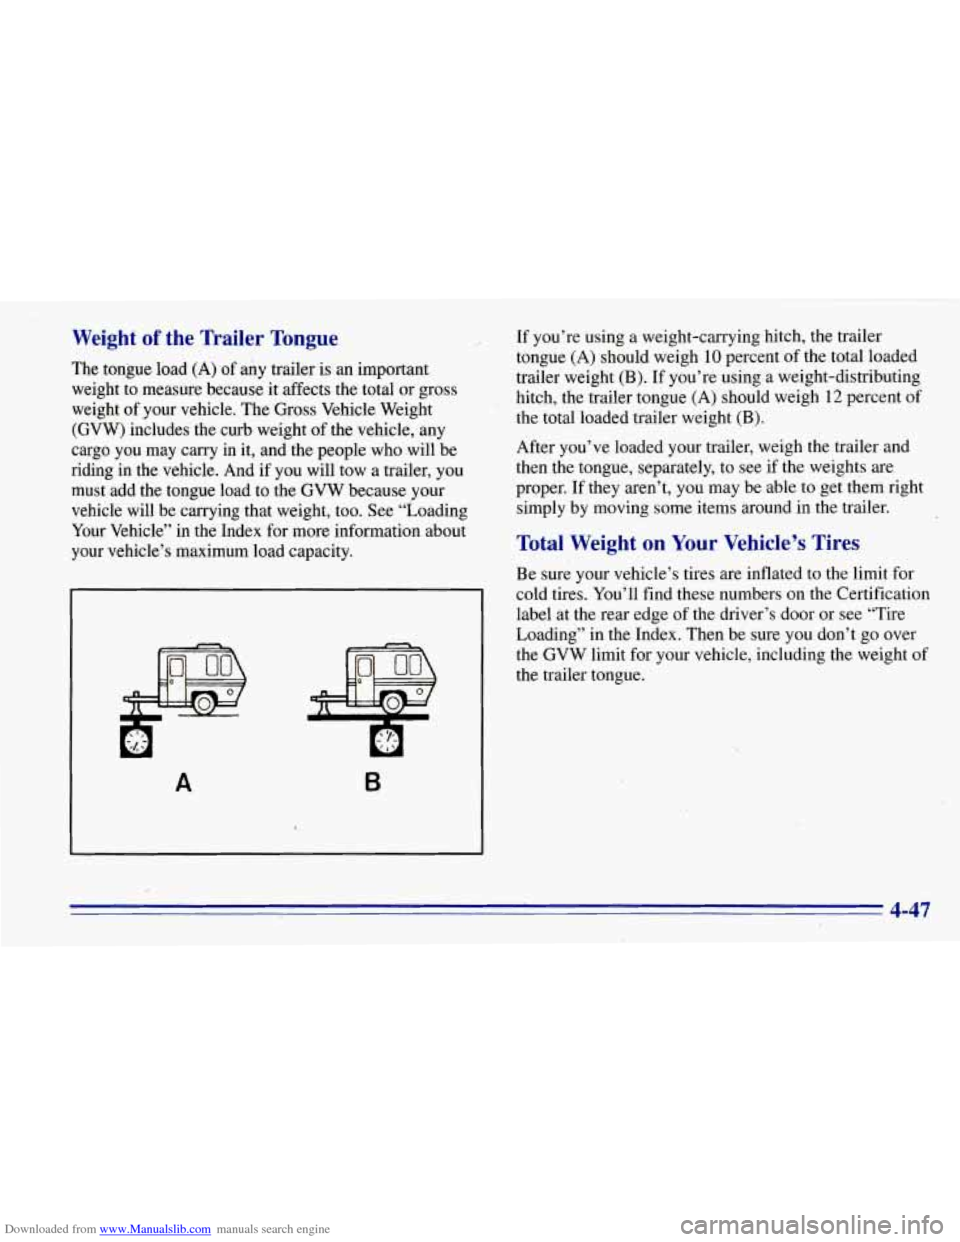
The tongue load (A) of any trailer is an important.
weight to measure because
it affects the total or gross
weight of,your vehicle. The
Gross Vehicle Weight
(GVW) includes the curb weight .of the vehicle, any
cargo you may carry in it, and the people who will be
riding in the vehicle. And if you will tow a trailer, you
must add the tongue load to the
GVW because your
vehicle will be carrying that weight, too. See “Loading
Your Vehicle” in the Index for more information about
your vehicle’s maximum load capacity.
I
A B
If you’re using a weight-carrying hitch, the trailer
tongue (A) should weigh
10 percent of the total loaded
trailer weight (B). If you’re using a weight-distributing
hitch, the trailer tongue (A) should weigh
12 percent of
the total loaded trailer weight
(B).
After you’ve loaded your trailer, weigh the trailer and
then the tongue, separately, to see if the weights are
proper. If they aren’t, you may be able to get them right
simply by moving some items around in the trailer.
Total Weight on Your Vehicle’s Tires
Be sure your vehicle’s tires are inflated to the 1imit.for
cold tires. You’ll find these numbers on the Certification
label at the rear edge of the driver’s door or see “Tire
Loading” in the Index. Then be sure you don’t go over
the
GVW limit for your vehicle, including the weight of
the trailer tongue.
4-47
Page 266 of 403
Downloaded from www.Manualslib.com manuals search engine When to Add Oil
If the oil is at or below the ADD mark, then you’ll
need to add some oil.
But you must use the right
kind. This part explains what kind of oil to use. For
crankcase capacity, see “Capacities and Specifications”
in the Index.
NOTICE:
Don’t add too much oil. If your,engine has so
much oil that the oil level gets above the upper
mark that shows the proper operating range,
your engine could be damaged.
The engine oil filler cap is located on the driver’s side
engine valve cover.
Just fill it enough to
put the level somewhere in the
proper operating range. Push the dipstick all the way
back in when you’re through.
What Kind of Oil to Use
Oils recommended for your vehicle can be identified
by looking for the “Starburst” symbol. This symbol
indicates that the oil has been certified by the American
Petroleum Institute (API).
Do not use any oil which
does not carry ,this Starburst symbol.
If you change your own oil,
be sure you use oil that has
the Starburst symbol on the
front
of the oil container.
If you have your oil changed for you, be sure the oil put
into your engine is American Petroleum Institute
certified for gasoline engines.
You should also use the proper viscosity oil for your
vehicle, as shown in the following chart:
‘6-13
Page 302 of 403
Downloaded from www.Manualslib.com manuals search engine Temperature -- A, B, C
The temperature grades are A (the highest), B, and C,
representing the tire's resistance to the generation of
heat and its ability to dissipate heat when tested under
controlled conditions on a specified indoor laboratory
test wheel. Sustained high temperature can cause the
material
of the tire to degenerate and reduce tire life, and
excessive temperature can lead to sudden tire failure.
The grade
C corresponds to a level of performance
which all passenger car tires must meet under the
Federal Motor Vehicle Safety Standard
No. 109. Grades
B and A represent higher levels of performance on the
laboratory test wheel than the minimum required by law.
Warning: The temperature grade for this tire is
established for a tire that is properly inflated and not
overloaded. Excessive speed, underinflation, or
excessive loading, either separately or
in combination,
can cause heat buildup and possible tire failure.
Wheel' Alignment and Tire Balance
The wheels on your vehicle were aligned and balanced
carefully at the factory
to give you the longest tire life
and best overall performance. In
most cases, you will
not need to have your wheels
aligned again. However,
if you notice unusual tire wear
or your vehicle pulling one way or the other, the
alignment may need to be reset. If
you notice your
vehicle vibrating when driving on a smooth road, your
wheels may need to be rebalanced.
Wheel Replacement
Replace any wheel that is bent, cracked, or badly rusted
or corroded. If wheel nuts keep coming loose, the wheel,
wheel bolts and wheel nuts should be replaced.
If the
wheel leaks air, replace it (except some aluminum
wheels, which can sometimes be repaired). See your
GM dealer if any of these conditions exist.
Your dealer will know the kind of wheel
you need.
Each new wheel should have the same load-carrying
capacity, diameter, width, offset and be mounted the
same way as the one it replaces.
If you need
to replace any of your wheels, wheel bolts
or wheel
nuts, replace them only with new GM original
equipment parts. This way, you will be sure
to have the
right wheel, wheel bolts and wheel nuts for your vehicle.
6-49
Page 325 of 403
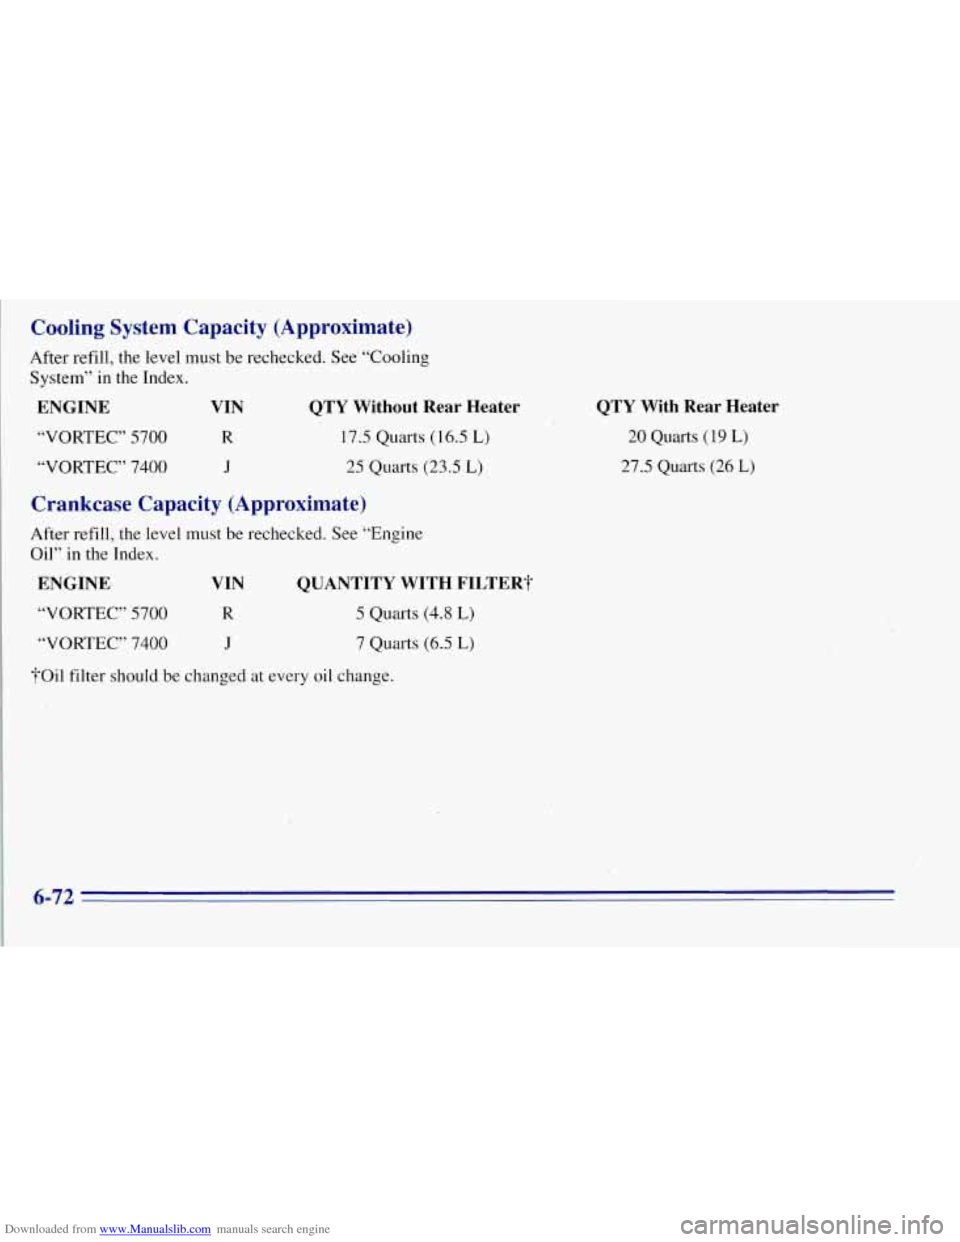
Downloaded from www.Manualslib.com manuals search engine Cooling System Capacity (Approximate)
After refill, the level must be rechecked. See “Cooling
System” in the Index.
ENGINE VIN QTY Without Rear Heater
“VORTEC” 5700
R 17.5 Quarts (1615 L)
“VORTEC” 7400 J 25 Quarts (23.5 L)
Crankcase Capacity (Approximate)
After refill, the level must be rechecked. See “Engine
Oil” in the Index.
ENGINE, VIN QUANTITY WITH FILTER?
“VORTEC” 5700 R 5 Quarts (4.8 L)
“VORTEC” 7400 J 7 Quarts (6.5 L)
?Oil filter should be changed at every oil change.
QTY With Rear Heater
20 Quarts (19 L)
27.5 Quarts (26 L)
6-72