1996 CHEVROLET S10 oil pressure
[x] Cancel search: oil pressurePage 10 of 375
Downloaded from www.Manualslib.com manuals search engine 1
Vehicle Symbols
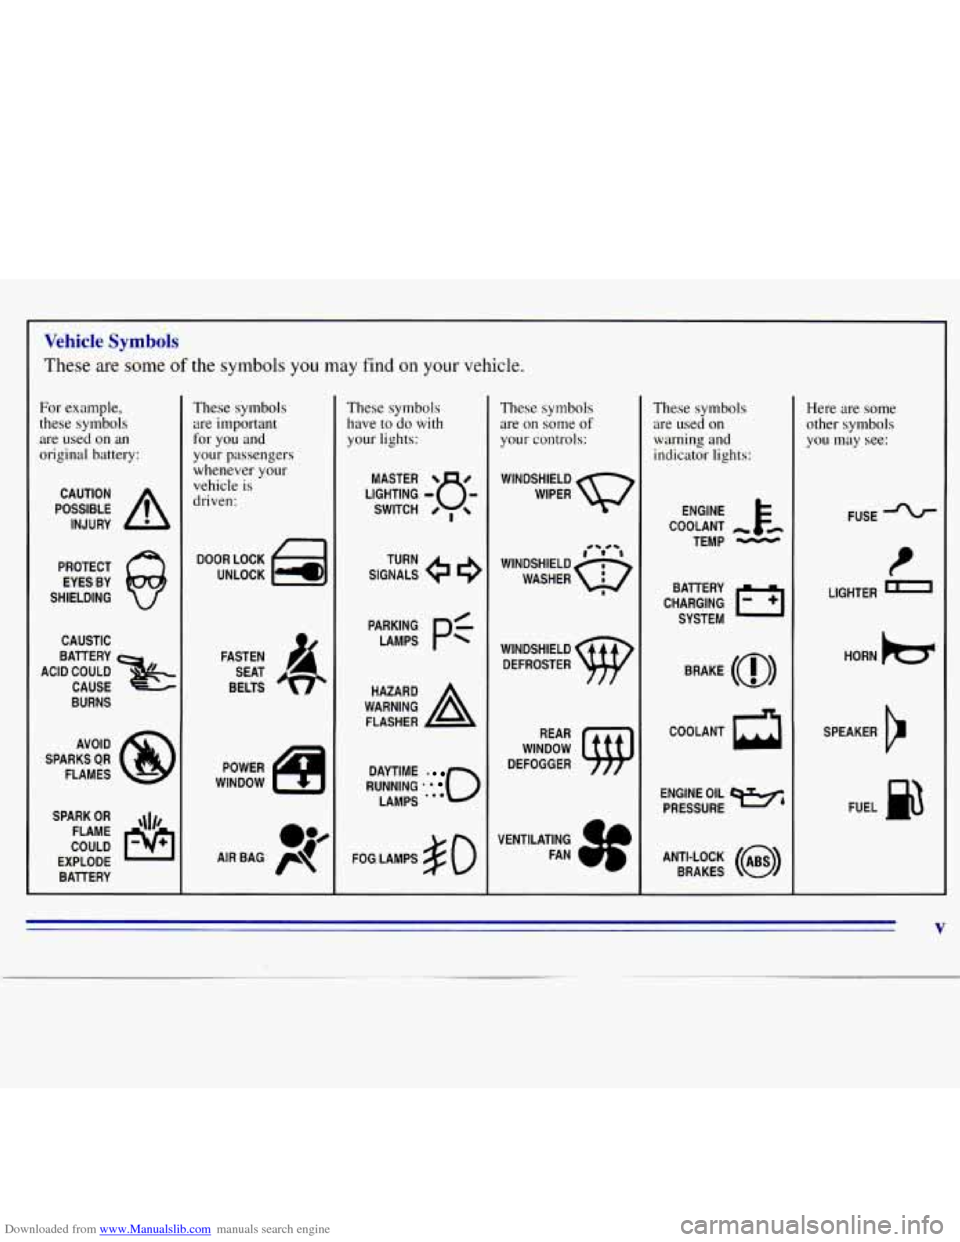
These are some of the symbols you may find on your vehicle.
For example,
these symbols
are used on an
original battery:
POSSIBLE A
CAUTION
INJURY
PROTECT EYES BY
SHIELDING
CAUSTIC
BURNS
SPARK
OR ,111,
COULD FLAME
EXPLODE BATTERY
These symbols are important
for you and
your passengers
whenever your vehicle
is
driven:
DOOR LOCK
UNLOCK
FASTEN SEAT
BELTS
POWER
WINDOW
These symbols have
to do with
your lights:
SIGNALS e
TURN
RUNNING
* 0
DAYTIME -
LAMPS '.*
FOG LAMPS $0
These symbols
are on some
of
your controls:
WINDSHIELD
WIPER
WINDSHIELD DEFROSTER
VENTILATING FAN
These symbols are used on
warning and
indicator lights:
COOLANT -
TEMP -
CHARGING I-1
BATTERY
SYSTEM
BRAKE
(0)
COOLANT a
ENGINE PRESSURE OIL e,
ANTI-LOCK (@)
BRAKES
Here are some
other symbols
you may see:
FUSE
LIGHTER
m
HORN k3
SPEAKER
b
FUEL B3
V
Page 111 of 375
Downloaded from www.Manualslib.com manuals search engine Engine Oil Pressure Gage
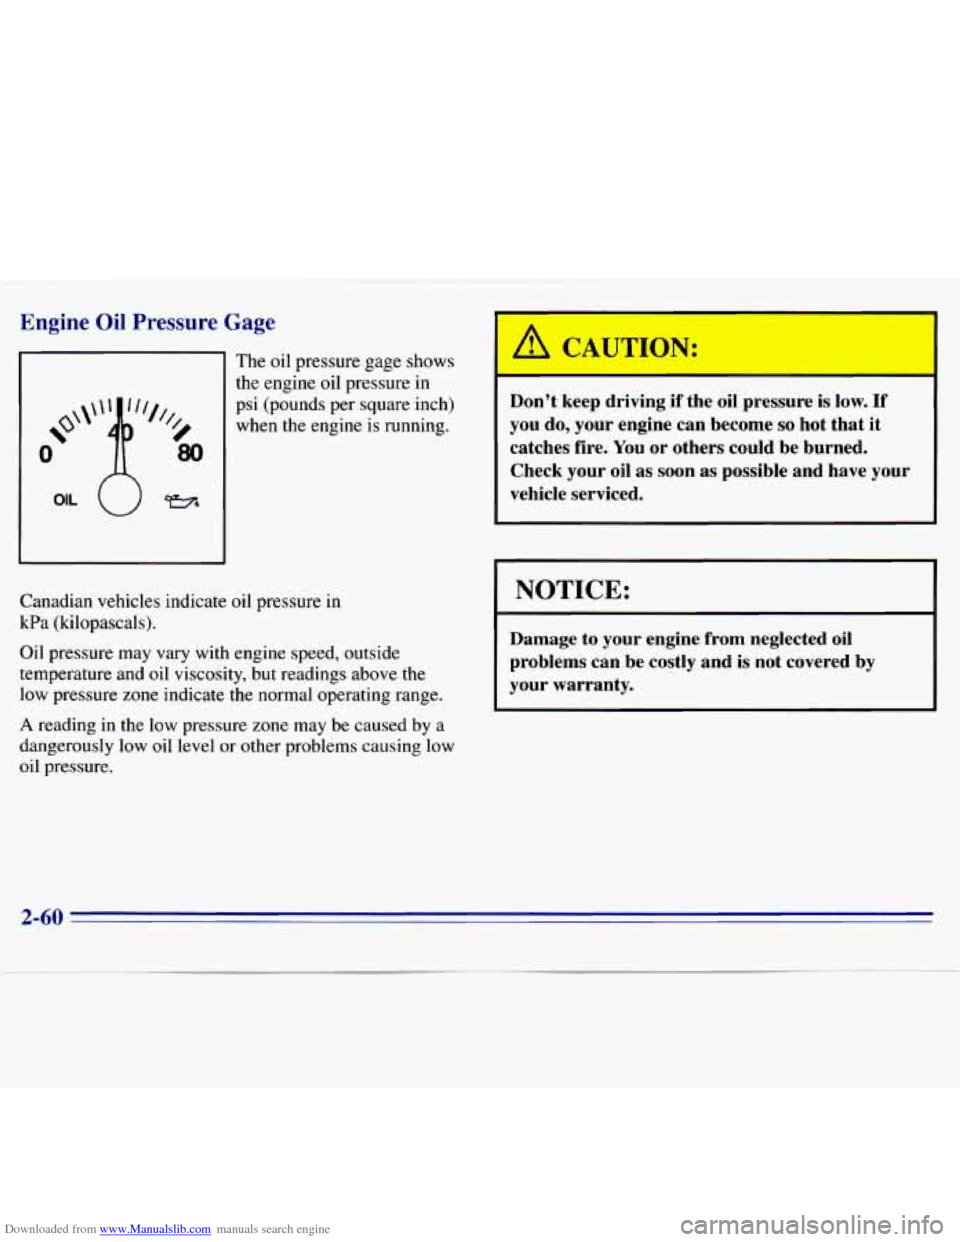
The oil pressure gage shows
the engine oil pressure
in
psi (pounds per square inch)
when the engine is running.
Canadian vehicles indicate
oil pressure in
kPa (kilopascals).
Oil pressure may vary with engine speed, outside
temperature
and oil viscosity, but readings above the
low pressure zone indicate the normal operating range.
A reading in the low pressure zone may be caused by a
dangerously low oil level or other problems causing low
oil pressure.
A CA"T1ON:
Don't keep driving if the oil pressure is low. If
you do, your engine can become so hot that it
catches fire. You or others could be burned.
Check your oil as soon as possible and have your
vehicle serviced.
1 NOTICE:
Damage to your engine from neglected oil
problems can be costly and
is not covered by
your warranty.
2-60
Page 113 of 375
Downloaded from www.Manualslib.com manuals search engine Check Gages Light
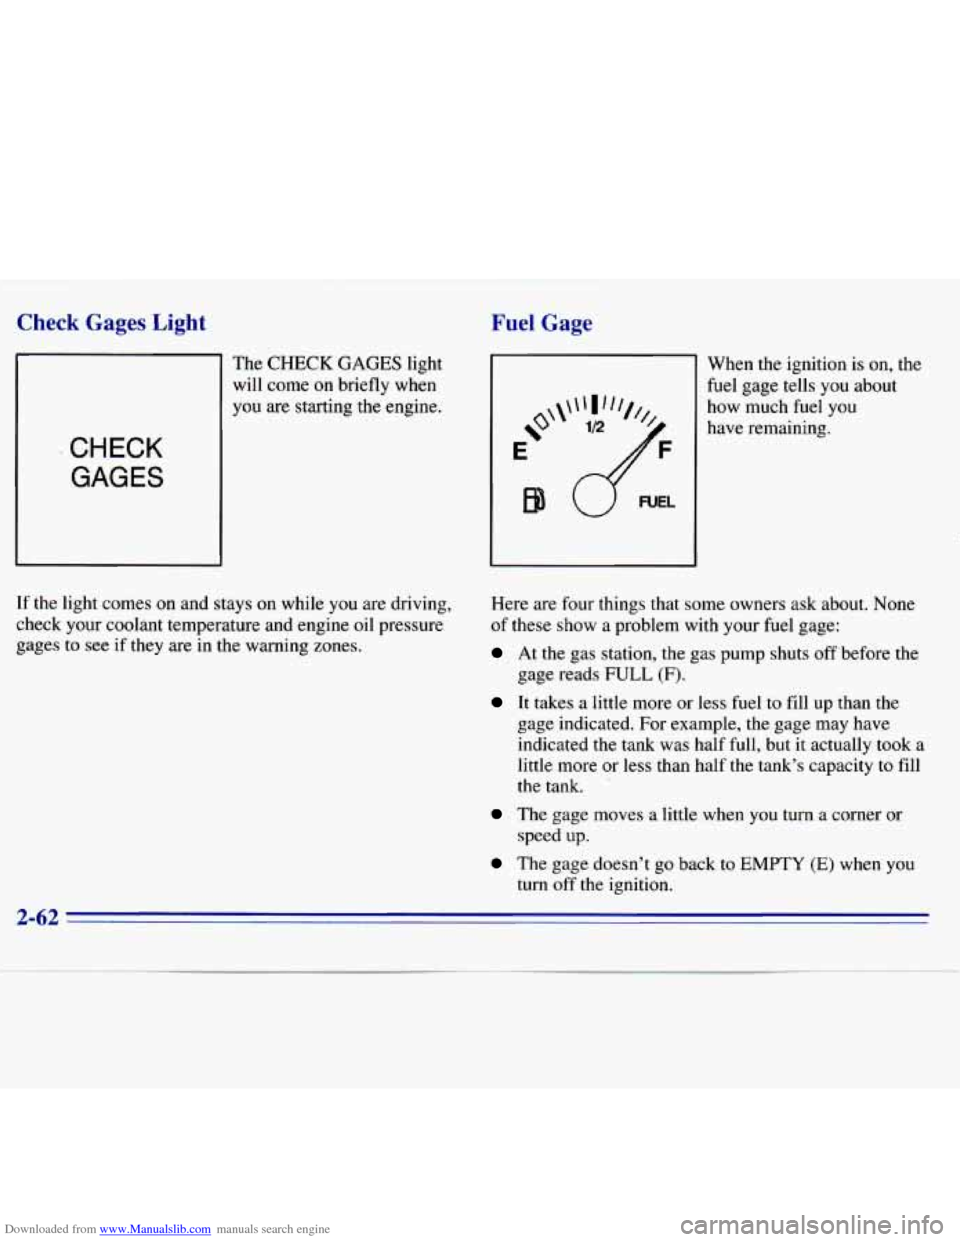
The CHECK GAGES light
will come on briefly when
you are starting the engine.
CHECK
GAGES
If the light comes on and stays on while you are driving,
check your coolant temperature and engine oil pressure
gages to see if they are
in the warning zones.
Fuel Gage
When the ignition is on, the
fuel gage tells
you about
how much fuel
you
have remaining.
Here are four things that some owners ask about. None
of these show a problem with your fuel gage:
At the gas station, the gas pump shuts off before the
It takes a little more or less fuel to fill up than the
gage reads
FULL (F).
gage indicated. For example, the gage may have
indicated the tank was half full, but it actually took a
little more or less than half the tank’s capacity to fill
the tank.
The gage moves a little when you turn a corner or
speed up.
The gage doesn’t go back to EMPTY (E) when you
turn off the ignition.
2-62
Page 165 of 375
Downloaded from www.Manualslib.com manuals search engine Once you are moving on the freeway, make certain you
allow
a reasonable following distance. Expect to move
slightly slower
at night.
When you want to leave the freeway, move to the proper
lane well in advance.
If you miss your exit, do not,
under any circumstances, stop and back
up. Drive on to
the
next exit.
The exit ramp can be curved, sometimes quite sharply.
The exit speed is usually posted.
Reduce your speed according to your speedometer, ‘not
to your sense of motion. After driving for
any distance
at higher speeds, you may tend to think you are going
slower than
you actually are.
Before Leaving on a Long Trip
Make sure you’re ready. Try to be well rested. If you
must start when you’re not fresh
-- such as after a day’s
work
-- don’t plan to make too many miles that first part
of the journey. Wear comfortable clothing and shoes you
can easily drive in.
Is your vehicle ready for a long trip? If you keep it
serviced and maintained,
it’s ready to go. If it needs
service, have it done before starting out. Of course,
you’ll find experienced and able service experts in
GM
dealers all across North America. They’ll be ready and
willing to help
if you need it.
Here are some things you can check before
a trip:
0
0
0
0
0
0
0
Windshield Washer Fluid: Is the reservoir full?
Are all windows clean inside and outside?
Wiper Blades: Are they in good shape?
Fuel, Engine Oil, Other Fluids: Have you checked
all levels?
Lamps: Are they all working? Are the lenses clean?
Tires: They are vitally important to a safe,
trouble-free trip.
Is the tread good enough for
long-distance driving? Are the tires all inflated to the
recommended pressure?
Weather Forecasts: What’s the weather outlook
along your route? Should you delay your trip a short
time to avoid a major storm system?
Maps: Do you have up-to-date maps?
4-34
Page 203 of 375
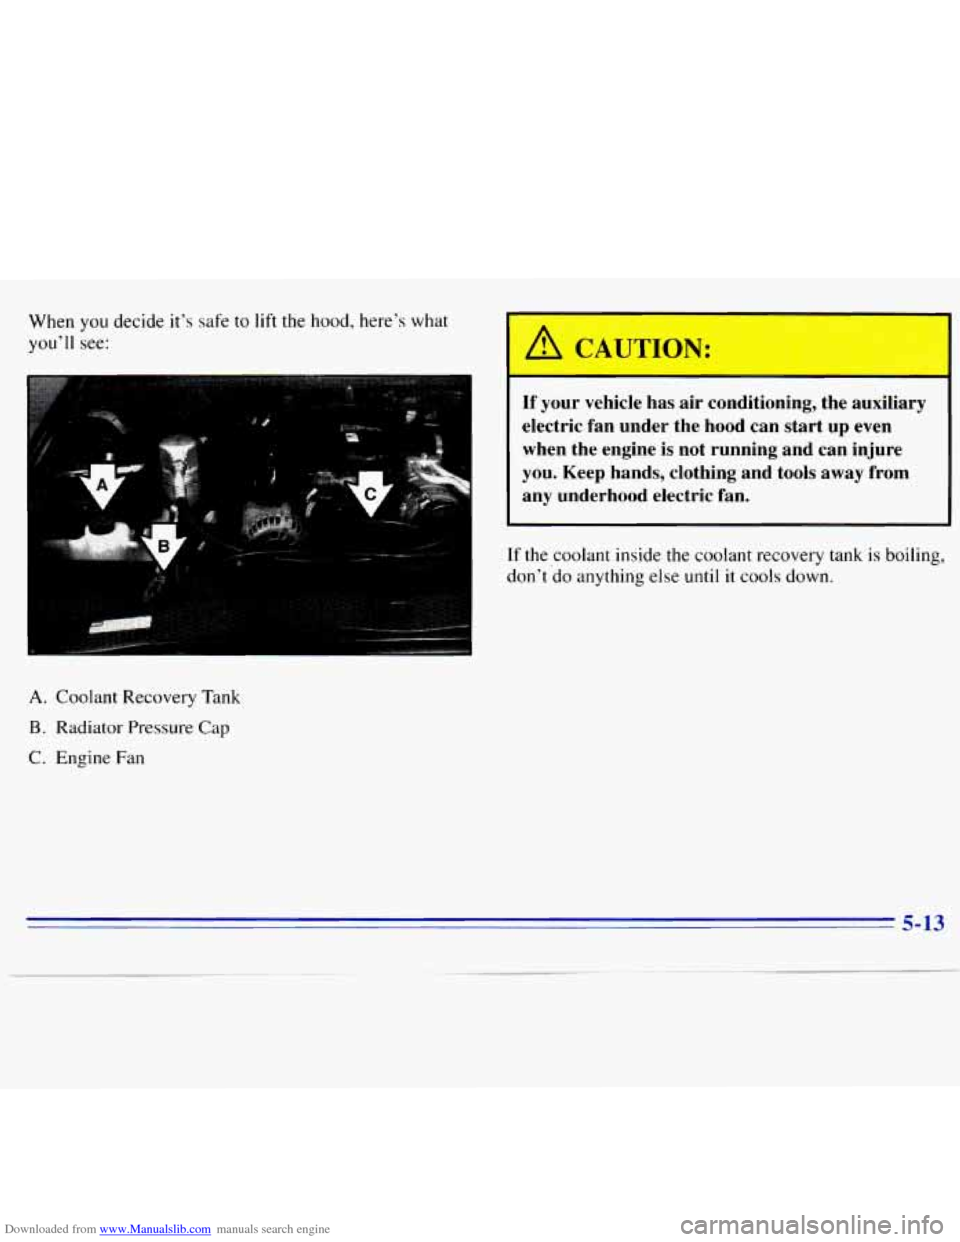
Downloaded from www.Manualslib.com manuals search engine When you decide it’s safe to lift the hood, here’s what
you’ll see:
If your vehicle has air conditioning, the auxiliary
electric fan under the hood can start up even
when the engine is not running and can injure
you. Keep hands, clothing and tools away from
--1 any underhood electric fan.
If the coolant inside the coolant recovery tank is boiling,
don’t
do anything else until it cools down.
A. Coolant Recovery Tank
B. Radiator Pressure Cap
C. Engine Fan
5-13
Page 236 of 375
Downloaded from www.Manualslib.com manuals search engine Before closing the hood, be sure all the filler caps are on
properly. Then lift the hood to relieve pressure on the
hood prop.
Remove the hood prop from the slot in the hood and
return the prop to its retainer.
Then pull the hood down firmly to close. It will latch
when dropped from
10 to 12 inches (25 to 30 cm)
without pressing on the hood.
Engine Oil
It’s a good idea to check your engine oil every time you
get fuel. In order
to get an accurate reading, the oil must
be warm and the vehicle must
be on level ground.
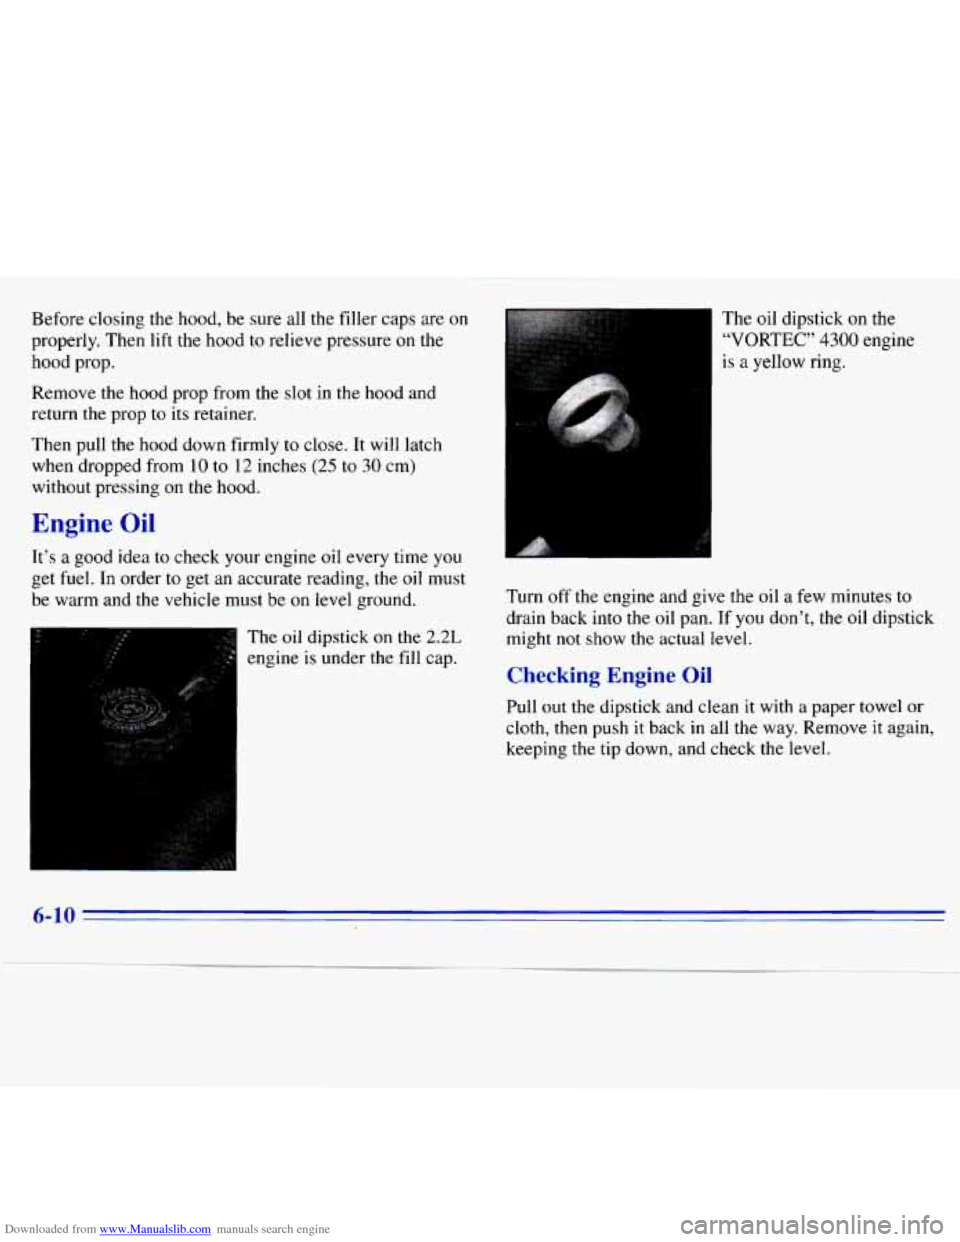
The oil dipstick on the 2.2L
engine is under the fill cap.
’* .d. L
The oil dipstick on the
“VORTEC” 4300 engine
is a yellow ring.
Turn
off the engine and give the oil a few minutes to
drain back into
the oil pan. If you don’t, the oil dipstick
might
not show the actual level.
Checking Engine Oil
Pull out the dipstick and clean it with a paper towel or
cloth,
then push it back in all the way. Remove it again,
keeping
the tip down, and check the level.
6-10
Page 280 of 375
Downloaded from www.Manualslib.com manuals search engine Using Solvent-Type Cleaner on Fabric
First, see if you have to use solvent-type cleaner at all.
Some spots and stains will clean off better with just
water and mild soap.
If
you need to use a solvent:
Gently scrape excess soil from the trim material with
a clean, dull knife or scraper. Use very little cleaner,
light pressure and clean cloths (preferably
cheesecloth). Cleaning should start at the outside of
the stain, “feathering” toward the center. Keep
changing to a clean section
of the cloth.
0 When you clean a stain from fabric, immediately
dry the area with a blow dryer to help prevent a
cleaning ring.
Fabric Protection
Your vehicle has upholstery and carpet that has been
treated with Scotchgard
TM Fabric Protector, a 3M
product. It protects fabrics by repelling oil and water,
which are the carriers
of most stains. Even with this
protection,
you still need to clean your upholstery and
carpet often
to keep it looking new.
Further information
on cleaning is available by calling
1-800-433-3296 (in Minnesota, 1-800-642-6 167).
Special Cleaning Problems
Greasy or Oily Stains
Stains caused by grease, oil, butter, margarine, shoe
polish, coffee with cream, chewing gum, cosmetic
creams, vegetable
oils, wax crayon, tar and asphalt can
be removed as follows:
0 Carefully scrape off excess stain.
Follow the solvent-type instructions described
earlier.
Shoe polish, wax crayon, tar and asphalt will stain if
left on a vehicle’s seat fabric. They should be
removed as soon as possible. Be careful, because the
cleaner will dissolve them and may cause them to
spread.
Non-Greasy Stains
Stains caused by catsup, coffee (black), egg, fruit, fruit
juice, milk, soft drinks, wine, vomit, urine and blood can
be removed as follows:
Carefully scrape off excess stain, then sponge the
soiled area with cool water.
If a stain remains, follow the foam-type instructions
described earlier.
6-54
Page 283 of 375
Downloaded from www.Manualslib.com manuals search engine Cleaning the Outside of Your Vehicle
The paint finish on your vehicle provides beauty, depth
of color, gloss retention and durability.
Washing Your Vehicle
The best way to preserve your vehicle’s finish is to
keep it clean by washing
it often with lukewarm or
cold water.
Don’t wash your vehicle
in the direct rays of the sun.
Don’t use strong soaps or chemical detergents. Use
liquid hand, dish or car washing (mild detergent) soaps.
Don’t use cleaning agents that are petroleum based, or
that contain acid or abrasives. All cleaning agents
should be flushed promptly and not allowed to dry on
the surface, or
they could stain. Dry the finish with a
soft, clean chamois or a 100% cotton towel to avoid
surface scratches and water spotting.
High pressure car washes may cause water to enter
your vehicle.
Finish Care
Occasional waxing or mild polishing of your vehicle by
hand may be necessary to remove residue from the paint
finish. You can get GM-approved cleaning products
from your dealer. (See “Appearance Care and Materials”
in the Index.)
Your vehicle has a “basecoatlclearcoat” paint finish.
The clearcoat gives more depth and gloss to the
colored basecoat. Always use waxes and polishes that
are non-abrasive and made for a basecoat/clearcoat
paint finish.
I NOTICE: I
Machine compounding or aggressive polishing on
a basecoatklearcoat paint finish may dull the
finish or leave swirl marks.
Foreign materials such as calcium chloride and other
salts, ice melting agents, road oil and tar, tree sap, bird
droppings, chemicals from industrial chimneys, etc. can
damage your vehicle’s finish if they remain on painted
surfaces. Wash the vehicle as soon
as possible. If
6-57