1996 CHEVROLET CORVETTE wiring
[x] Cancel search: wiringPage 54 of 386
Downloaded from www.Manualslib.com manuals search engine A CAUTION:
I I
It can be dangerous to drive with the hatch open
because carbon monoxide (CO) gas can come into
your vehicle. You can’t see or smell CO.
It can
cause unconsciousness and even death.
If you must drive with the hatch open or if
electrical wiring or other cable connections must
pass through the seal between the body and the
hatch:
Make sure all windows are shut.
0 Thrn the fan on your heating or cooling
system to its highest speed with the setting
on bi-level or vent. That will force outside
air into your vehicle. See “Comfort
Controls” in the Index.
If you have air outlets on or under the
instrument panel, open them all the
way.
See “Engine Exhaust” in the Index.
NOTICE:
If you put things in the hatchback area, be sure
they won’t break the glass when you close it.
Never slam the hatch down. You could break the
glass or damage the defogger grid.
When you close the hatch, make sure you pull
down from the center, not the sides.
If you pull
the hatch down from the side too often, the
weatherstrip can be damaged.
Page 93 of 386
Downloaded from www.Manualslib.com manuals search engine NOTICE:
Your Corvette’s radio receiver is in the rear
storage compartment.
To help avoid damage to
the receiver:
Securely store the jack (if equipped) in the
Store any other objects under the storage
Do not store items such as liquids or sharp
foam container
after use.
tray carefully.
objects that could puncture or cut the radio
receiver or wiring.
Also, to reduce the potential for radio receiver
interference, do not install any other electronic
module under the storage tray.
Ashtray and Cigarette Lighter
To use the ashtray, push on the right side of the door
next to the shift lever.
To remove it, lift up on the
snuffer.
NOTICE:
Don’t put papers and other things that burn into
your ashtray. If you do, cigarettes
or other
smoking materials could set them on fire, causing
damage.
You can remove the ashtray and use the space as a
second cupholder. When you put the ashtray back, first
put the ashtray into the rubber isolator, then be sure to
put the ashtray and isolator into the forward opening.
NOTICE:
Loose objects (such as paper clips) can lodge
behind and beneath the ashtray lid and prevent
movement of the lid. Avoid putting small loose
objects near the ashtray.
To use the lighter, push it in all the way and let go.
When it’s ready,
it will pop back by itself.
2-50
Page 119 of 386
Downloaded from www.Manualslib.com manuals search engine Air Bag Readiness Light
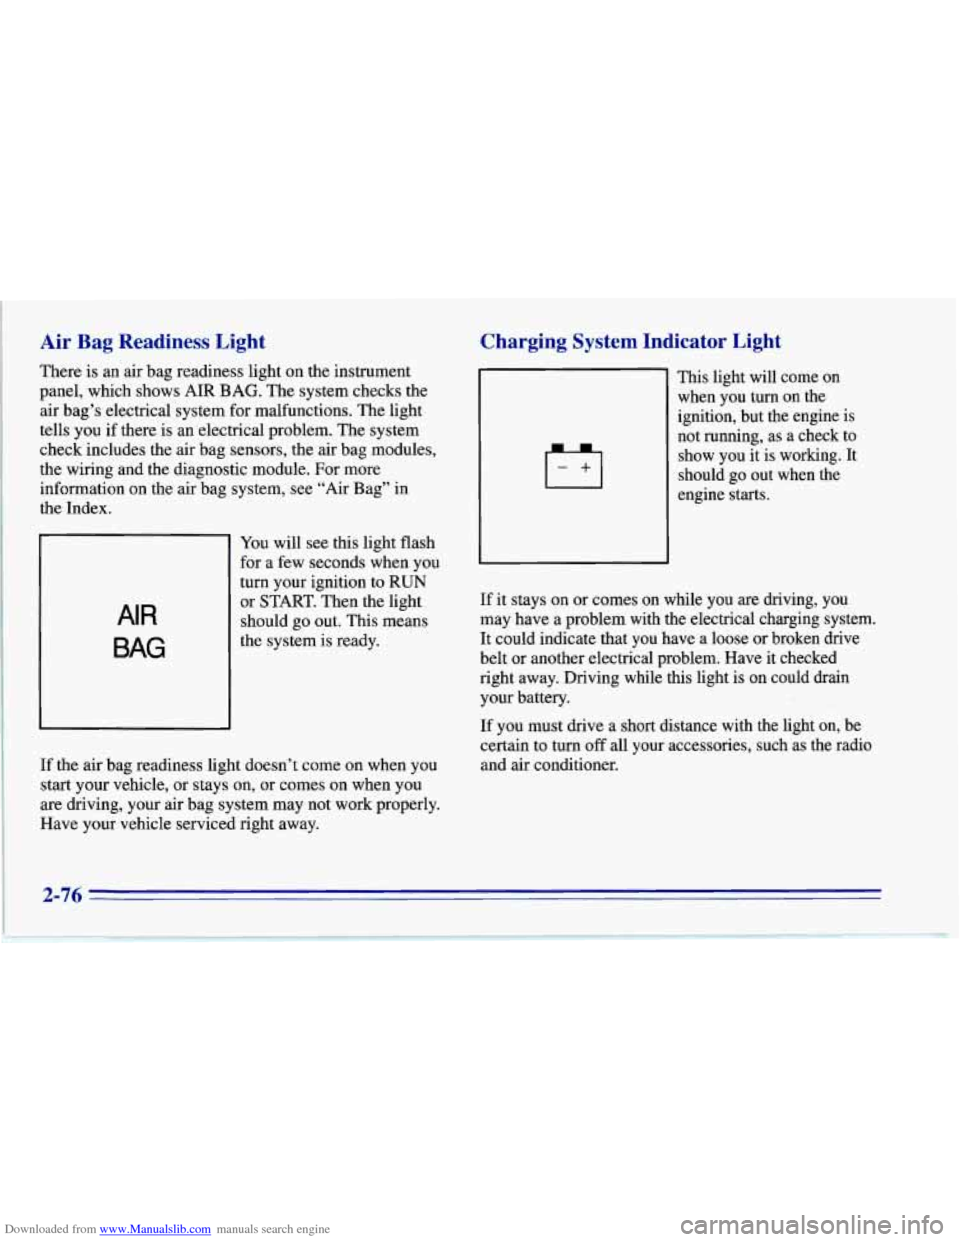
There is an air bag readiness light on the instrument
panel, which shows AIR BAG. The system checks the
air bag’s electrical system for malfunctions. The light
tells you if there is an electrical problem. The system
check includes the air bag sensors, the air bag modules,
the wiring
and the diagnostic module. For more
information on the air bag system, see “Air Bag” in
the Index.
AIR
BAG
You will see this light flash
for a few seconds when you
turn your ignition to RUN
or START. Then the light
should go out. This means
the system is ready.
If the air bag readiness light doesn’t come on when you
start your vehicle, or stays on,
or comes on when you
are driving, your air bag system may not work properly.
Have your vehicle serviced right away.
Charging System Indicator Light
-+I
This light will come on
when you turn on the
ignition, but the engine is
not running, as a check to
show you it is working. It
should go out when the
engine starts.
If it stays on or comes on while you are driving, you
may have a problem with the electrical charging system.
It could indicate that you have a loose or broken drive
belt or another electrical problem. Have it checked
right away. Driving while this light is on could drain
your battery.
If you must drive a short distance with the light on, be
certain to turn
off all your accessories, such as the radio
and air conditioner.
2-76
Page 226 of 386
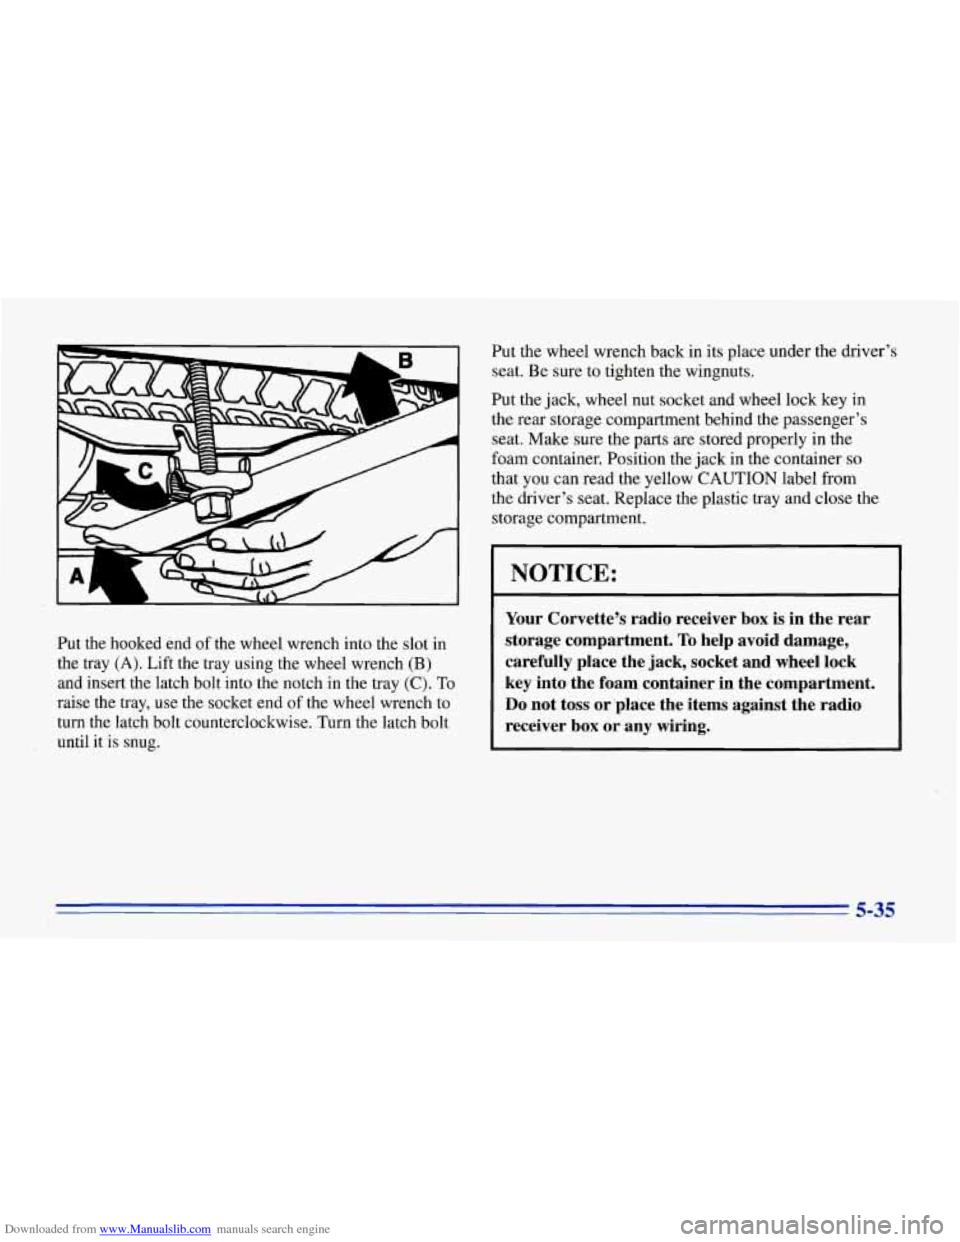
Downloaded from www.Manualslib.com manuals search engine Put the hooked end of the wheel wrench into the slot in
the tray
(A). Lift the tray using the wheel wrench (B)
and insert the latch bolt into the notch in the tray (C). To
raise the tray, use the socket end of the wheel wrench to
turn the latch bolt counterclockwise. Turn the latch bolt
until it is snug. Put
the wheel wrench back in its place under the driver’s
seat. Be sure to tighten the wingnuts.
Put the jack, wheel nut socket and wheel lock
key in
the rear storage compartment behind the passenger’s
seat. Make sure the
parts are stored properly in the
foam container. Position the jack in the container
so
that you can read the yellow CAUTION label from
the driver’s seat. Replace the plastic tray and close the
storage compartment.
I NOTICE: I
Your Corvette’s radio receiver box is in the rear
storage compartment.
To help avoid damage,
carefully place the jack, socket and wheel lock
key into the foam container in the compartment.
Do not toss or ‘place the items against the radio
receiver
box or any wiring.
5-35
Page 229 of 386

Downloaded from www.Manualslib.com manuals search engine Put the jack, wheel nut socket and wheel lock key in the
rear storage compartment behind the passenger’s seat.
Make sure the parts are stored properly in the foam
container. Position the jack in the container
so that you
can read the yellow CAUTION label fromthe driver’s
seat. Replace the plastic tray and close the storage
compartment.
NOTICE:
Your Corvette’s radio receiver box is in the rear
storage compartment.
To help avoid damage,
carefully place the jack, socket and wheel lock
key into the foam container in the compartment.
Do not toss or place the items against the radio
receiver box or any wiring.
Compact Spare Tire (If So Equipped)
Although the compact spare tire was fully inflated when
your vehicle was new, it can lose air after a time. Check
the’inflation pressure regularly. It should be
60 psi
(420 Wa).
After installing the compact spare on your vehicle, you should stop as soon as possible and make sure your spare
tire is correctly inflated. The compact spare is made to
perform well at posted speed limits for distances up to
3,000 miles (5 OOO km), so you can finish your trip and
have your full-size tire repaired or replaced where you
want.
Of course, it’s best to replace your spare with a
full-size tire as soon
as you can. Your spare will last
longer and
be in good shape in case you need it again.
When the compact spare is installed, your
vehicle’s handling capabilities will be reduced
during severe maneuvers.
If you drive too fast,
you could lose control
of your vehicle. You or
others could be injured. Don’t drive over
55 mph
(90 km/h) when the compact spare is installed.
5-38
Page 271 of 386
Downloaded from www.Manualslib.com manuals search engine Cornering Lamps
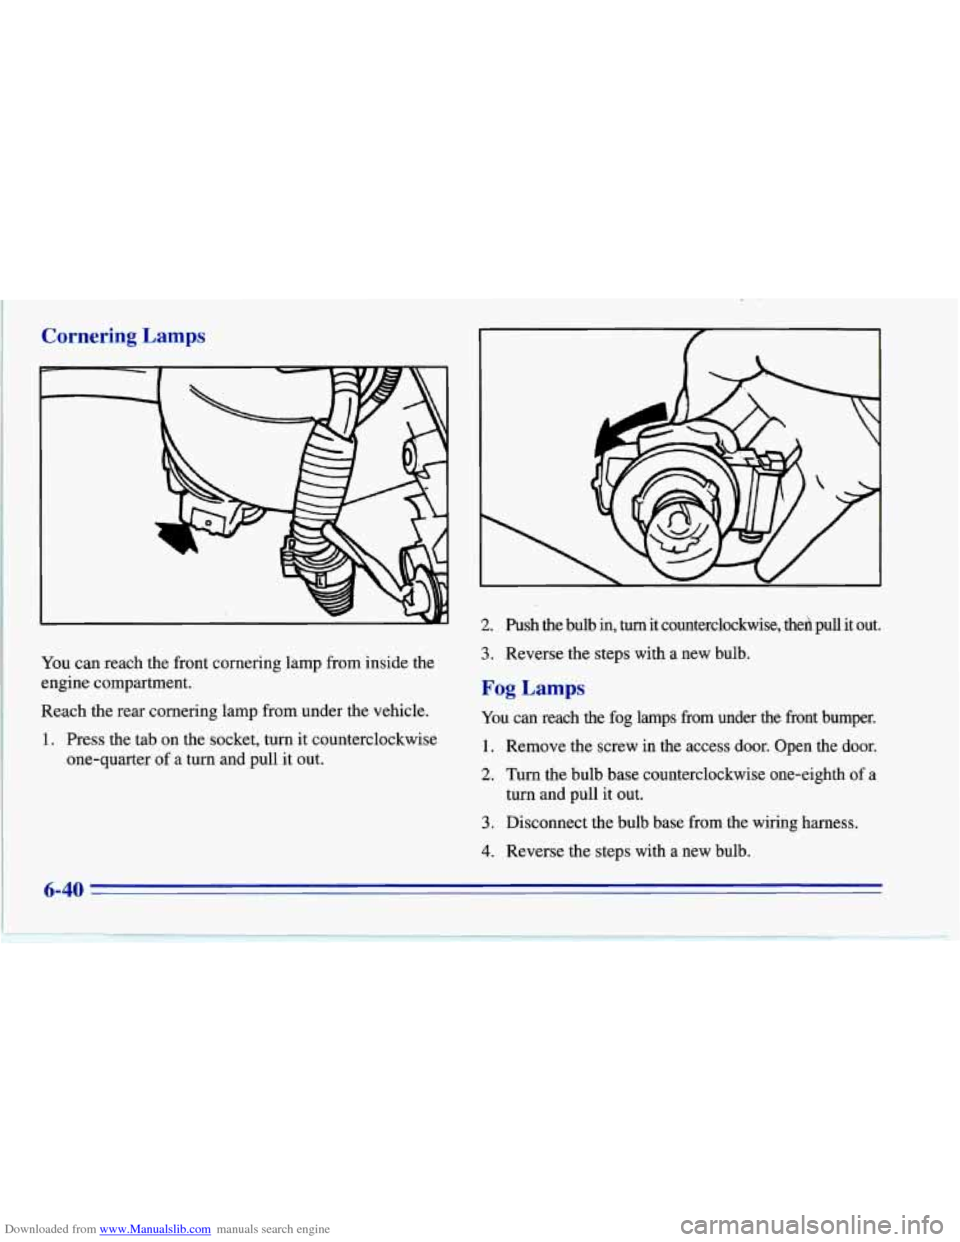
You can reach the front cornering lamp from inside the
engine compartment.
Reach the rear cornering lamp from under the vehicle.
1. Press the tab on the socket, turn it counterclockwise
one-quarter
of a turn and pull it out.
6-40
1_
2. Push the bulb in, turn it counterclockwise, theh pull it out.
3. Reverse the steps with a new bulb.
Fog Lamps
You can reach the fog lamps from under the front bumper.
1. Remove the screw in the access door. Open the door.
2. Turn the bulb base counterclockwise one-eighth of a
3. Disconnect the bulb base from the wiring harness.
4. Reverse the steps with a new bulb.
turn and pull
it out.
Page 295 of 386
Downloaded from www.Manualslib.com manuals search engine Electrical System
Add-on Electrical Equipment
NOTICE:
Don’t add anything electrical to your Corvette
unless you check with your dealer first. Some
electrical equipment can damage your vehicle
and the damage wouldn’t be covered by your
warranty. Some add-on electrical equipment can
keep other components from working as they
should.
Your vehicle has an air bag system. Before attempting to
add anything electrical to your Corvette, see “Servicing
Your Air Bag-Equipped Corvette” in the Index.
Headlamps
The headlamp wiring is protected by a circuit breaker.
An electrical overload will cause the lamps
to go on and
off,
or in some cases to remain off. If this happens, have
your headlamp wiring checked right away.
Windshield Wipers
The windshield wiper motor is protected by a fuse and
an internal circuit breaker.
If the motor overheats due to
heavy snow, etc., the wiper will stop until the motor
cools. If the overload is caused by some electrical
problem and not snow, etc., be sure to get it fixed.
Power Windows and Other Power Options
Circuit breakers protect the power windows and other
power accessories. When the current load is too heavy,
the circuit breaker opens and closes, protecting the
circuit until the problem is fixed or goes away.
Page 296 of 386
Downloaded from www.Manualslib.com manuals search engine Fuses and Circuit Breakers
The wiring circuits in your vehicle are protected from
short circuits by a combination of maxi-fuses,
mini-fuses and circuit breakers. This greatly reduces
the chance
of fires caused by electrical problems.
Look at the silver-colored band inside the fuse. If the
band is broken or melted, replace the fuse.
Be sure you
replace a bad fuse with a new one of the identical size
and rating.
If you ever have a problem
on the road and don’t have
a spare fuse,
you can borrow one that has the same
amperage. Just pick some feature of your vehicle that
you can get along without
-- like the radio or cigarette
lighter
-- and use its fuse, if it is the correct amperage.
Replace it as soon as you can.
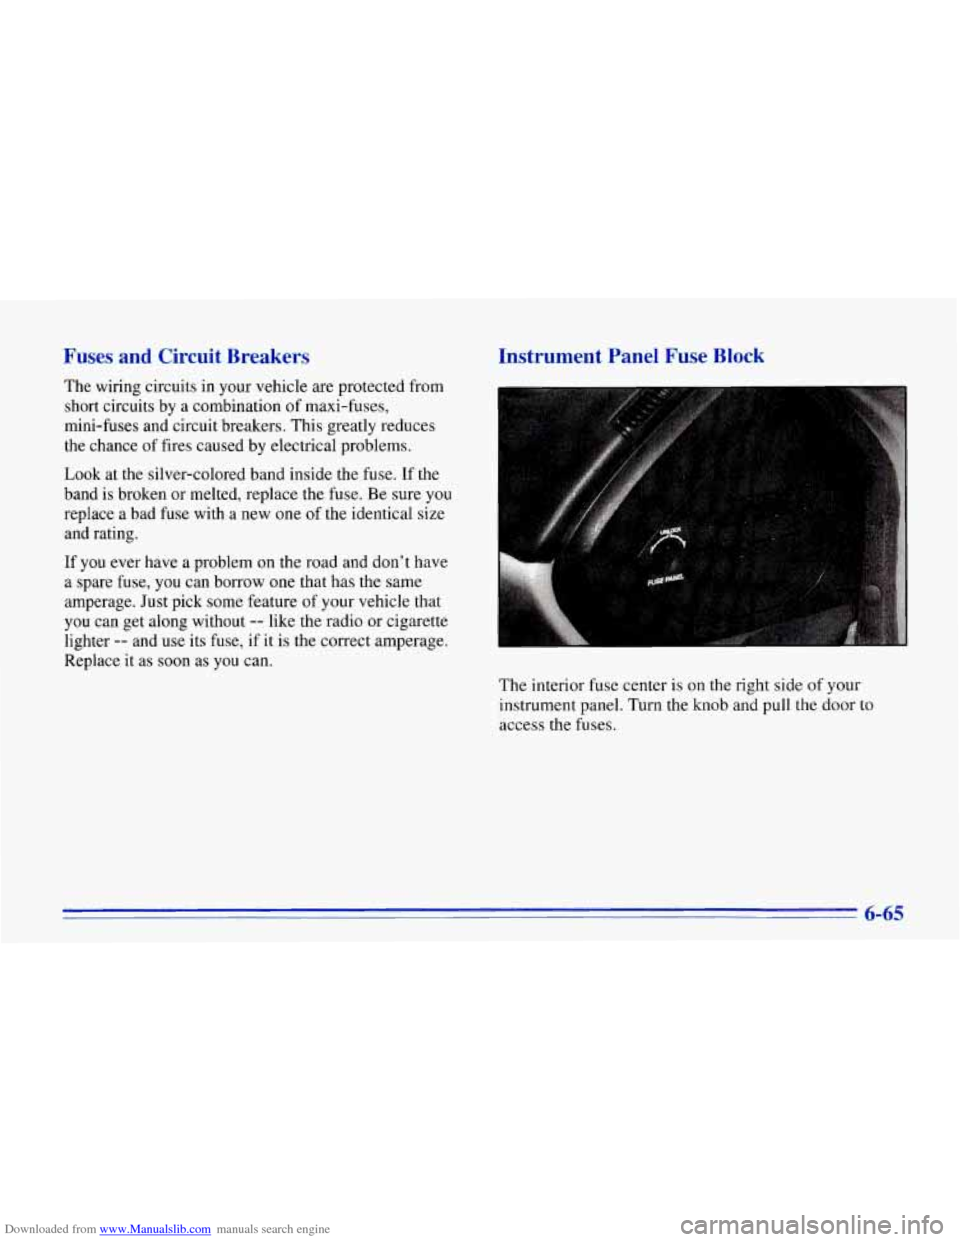
Instrument Panel Fuse Block
The interior fuse center is on the right side of your
instrument panel. Turn the knob and pull the door
to
access the fuses.
6-65