1996 CHEVROLET CORVETTE transmission oil
[x] Cancel search: transmission oilPage 136 of 386
Downloaded from www.Manualslib.com manuals search engine Security Light Check Gauges Light
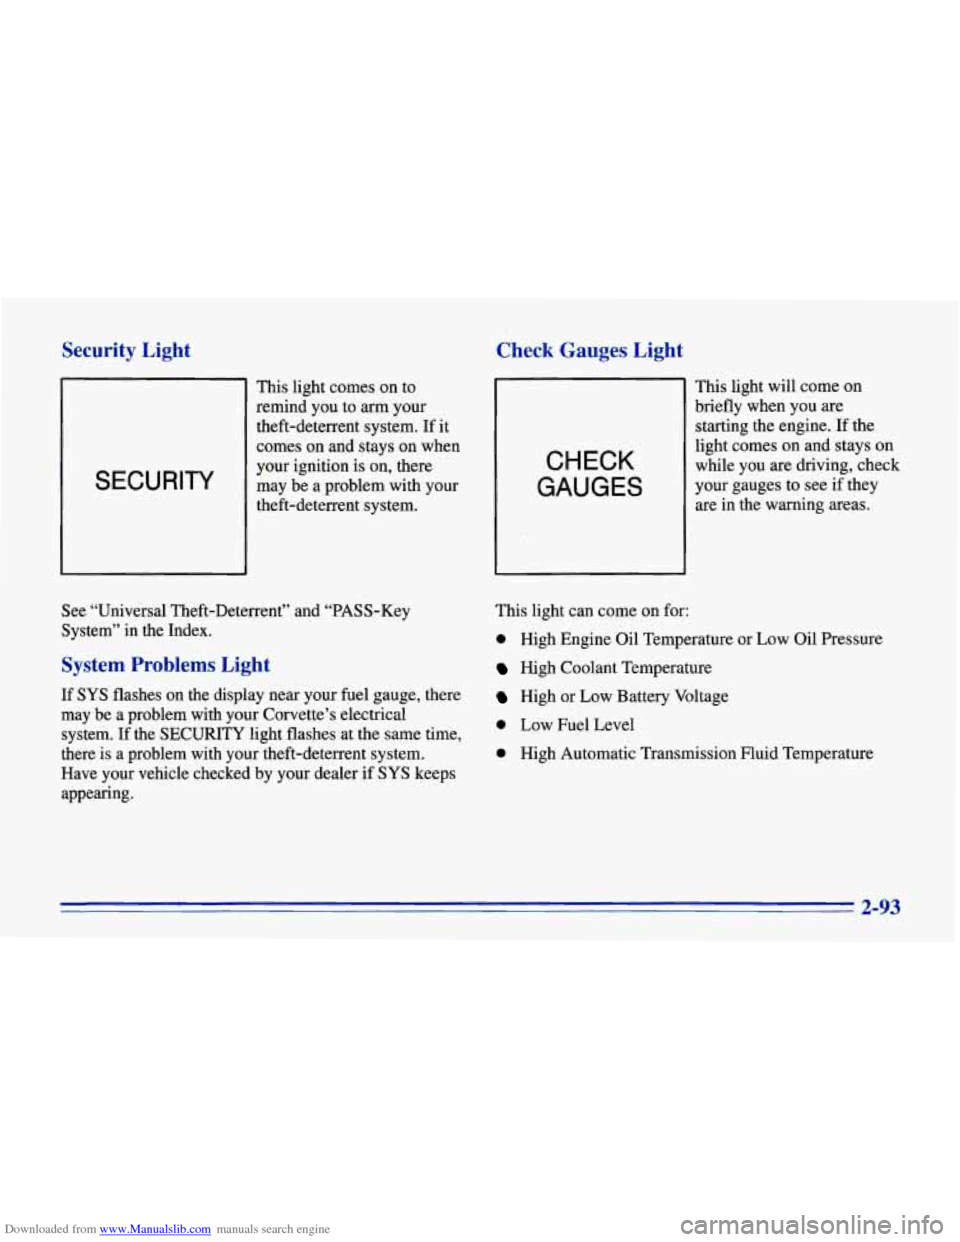
SECURITY
This light comes on to
remind you to
arm your
theft-deterrent system. If it
comes on and stays on when
your ignition is on, there
may be a problem with your
theft-deterrent system.
CHECK
GAUGES
This light will come on
briefly when you are
starting the engine.
If the
light comes on and stays on
while you are driving, check
your gauges to see if they
are in the warning areas.
See “Universal Theft-Deterrent” and “PASS-Key
System” in the Index.
System Problems Light
If SYS flashes on the display near your fuel gauge, there
may be a problem with your Corvette’s electrical
system. If the
SECURITY light flashes at the same time,
there is
a problem with your theft-deterrent system.
Have your vehicle checked by your dealer
if SYS keeps
appearing. This
light can come on for:
0 High Engine Oil Temperature or Low oil Pressure
High Coolant Temperature
High or Low Battery Voltage
0 Low Fuel Level
0 High Automatic Transmission Fluid Temperature
2-93
Page 140 of 386
Downloaded from www.Manualslib.com manuals search engine Automatic Transmission Fluid Temperature Reading
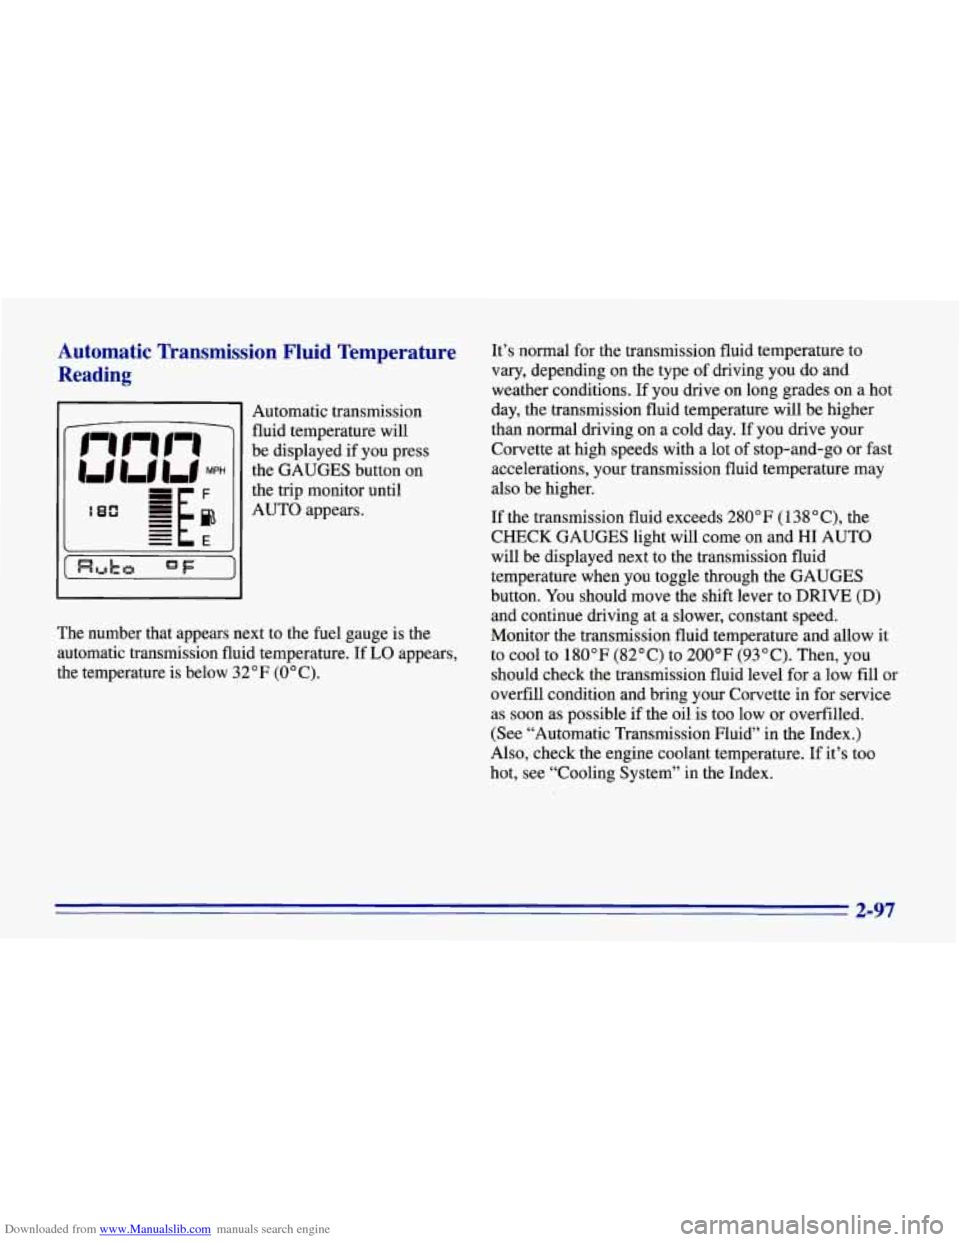
Automatic transmission
fluid temperature will
be displayed if you press
the GAUGES button on
the trip monitor until
AUTO appears.
The number that appears next to the fuel gauge is the
automatic transmission fluid temperature. If
LO appears,
the temperature is below 32°F (0°C). It’s
normal for the transmission fluid temperature to
vary, depending on the type
of driving you do and
weather conditions. If you drive on long grades on a hot
day, the transmission fluid temperature will be higher
than normal driving on a cold day. If you
drive your
Corvette at high speeds with a lot of stop-and-go or fast
accelerations, your transmission fluid temperature may
also be higher.
If the transmission fluid exceeds
280” F (1 38 “C), the
CHECK GAUGES light will come on and HI AUTO
will be displayed next to the transmission fluid
temperature when you toggle through the GAUGES
button. You should move the shift lever to DRIVE
(D)
and continue driving at a slower, constant speed.
Monitor the transmission fluid temperature and allow it
to cool to 180°F (82°C) to 200°F (93°C). Then, you
should check the transmission fluid level for a low fill or
overfill condition and bring your Corvette in for service
as soon as possible if the oil is too low or overfilled.
(See “Automatic Transmission Fluid” in the Index.)
Also, check the engine coolant temperature. If it’s too
hot, see “Cooling System” in the Index.
2-97
Page 239 of 386
Downloaded from www.Manualslib.com manuals search engine LT1 Engine Shown, LT4 Engine Similar You’ll
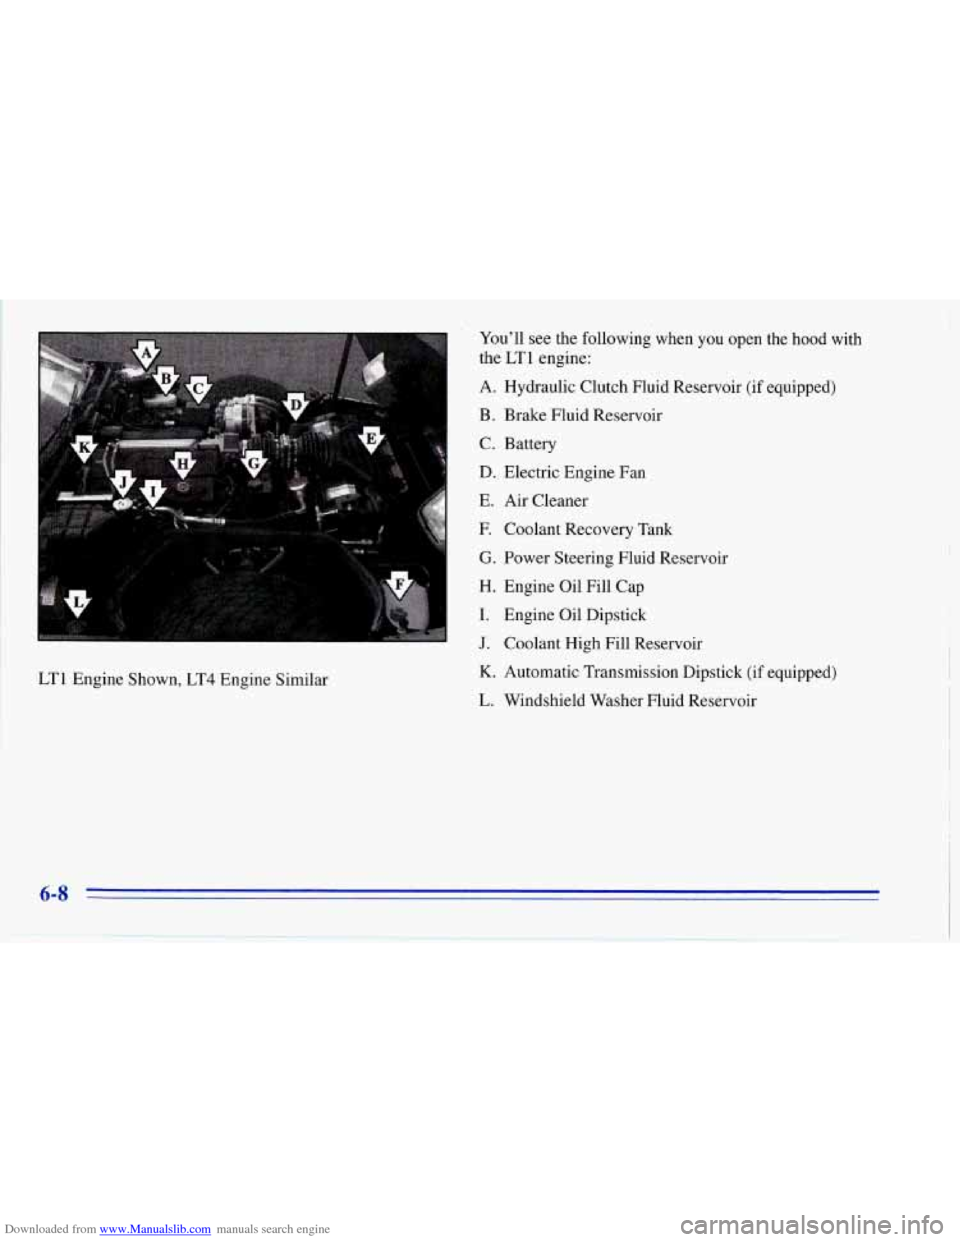
see the following when you open the hood with
the
LT1 engine:
A. Hydraulic Clutch Fluid Reservoir
(if equipped)
B. Brake Fluid Reservoir
C. Battery
D. Electric Engine Fan
E. Air Cleaner
E Coolant Recovery Tank
G. Power Steering Fluid Reservoir
H. Engine Oil Fill Cap
I. Engine Oil Dipstick
J. Coolant High Fill Reservoir
K. Automatic Transmission Dipstick (if equipped)
L. Windshield Washer Fluid Reservoir
6-8
Page 249 of 386
Downloaded from www.Manualslib.com manuals search engine Automatic Transmission Fluid
When to Check and Change
A good time to check your automatic transmission fluid
level is when the engine oil is changed.
Change both the fluid and filter every
15,000 miles
(25 000 km) if the vehicle is mainly driven under one or
more of these conditions:
In heavy city traffic where the outside temperature
In hilly or mountainous terrain.
Uses such as found in taxi, police or delivery service.
If you do not use your vehicle under any of these
conditions, change the fluid and filter at
100,000 miles
(166 000 km).
See “Scheduled Maintenance Services” in the Index.
How to Check
Because this operation can be a little difficult, you
may choose to have this done at your Corvette
dealership Service Department.
regularly
reaches 90
OF (32 O C) or higher.
If you do it yourself, be sure to follow all the instructions
here, or you could get
a false reading on the dipstick.
I NOTICE:
Too much or too little fluid can damage your
transmission.
Too much can mean that some of
the fluid could come out and fall on hot engine
parts or exhaust system parts, starting a fire. Be
sure to get an accurate reading if you check your
transmission fluid.
Wait at least 30 minutes before checking the
transmission fluid level if you have been driving:
0 When outside temperatures are above 90°F (32°C).
0 At high speed for quite a while.
In heavy traffic -- especially in hot weather.
To get the right reading, the fluid should be at normal
operating temperature, which is
180°F to 200°F
(82°C to 93°C).
Page 251 of 386
Downloaded from www.Manualslib.com manuals search engine I
Then, without shutting off the engine, follow these
steps:
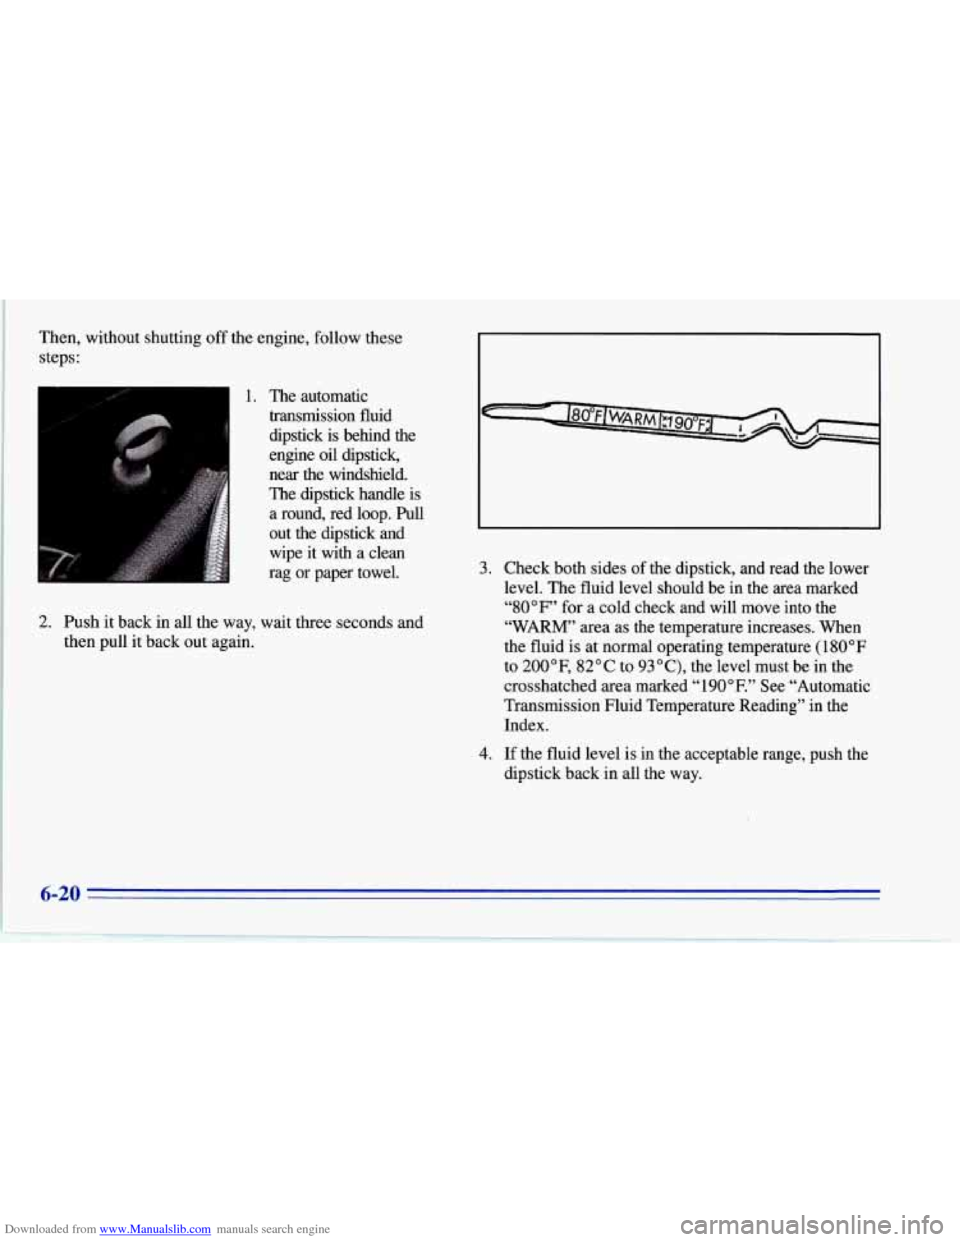
1. The automatic
transmission fluid dipstick is behind the
engine oil dipstick,
ne&- the windshield.
The dipstick handle is a round, red loop.
Pull
out the dipstick and wipe it with a clean
rag or paper towel.
2. Push it back in all the way, wait three seconds and
then pull it back out again. 3.
Check both sides
of the dipstick, and read the lower
level. The fluid level should be in the area marked
“80°F” for a cold check and will move into the
“WARM” area as the temperature increases. When
the fluid
is at normal operating temperature (180°F
to 200”F, 82°C to 93”C), the level must be in the
crosshatched area marked
“ 190°F.’’ See “Automatic
Transmission Fluid Temperature Reading” in the
Index.
4. If the fluid level is in the acceptable range, push the
dipstick back in all the way.
6-20
Page 252 of 386
Downloaded from www.Manualslib.com manuals search engine How to Add Fluid
Refer to the Maintenance Schedule to determine what
kind of transmission fluid to use. See “Recommended
Fluids and Lubricants” in the Index.
Add fluid only after checking the transmission fluid
HOT.
(A COLD check is used only as a reference.) If
the fluid level is low, add only enough of the proper
fluid to bring the level up to the
HOT area for a hot
check. It doesn’t take much fluid, generally less than a
pint
(0.5 L). Don’t overfill. We recommend you use only
fluid labeled DEXRON@-111, because fluid with that
label is made especially for your automatic transmission.
Damage caused by fluid other than DEXRON-I11 is not
covered by your new vehicle warranty.
0 After adding fluid, recheck the fluid level as
described under “How to Check.”
When the correct fluid level is obtained, push the
dipstick back in all the way.
Manual Transmission Fluid
When to Check
A good time to have it checked is when the engine oil is
changed. However, the fluid in your manual
transmission doesn’t require changing.
How to Check
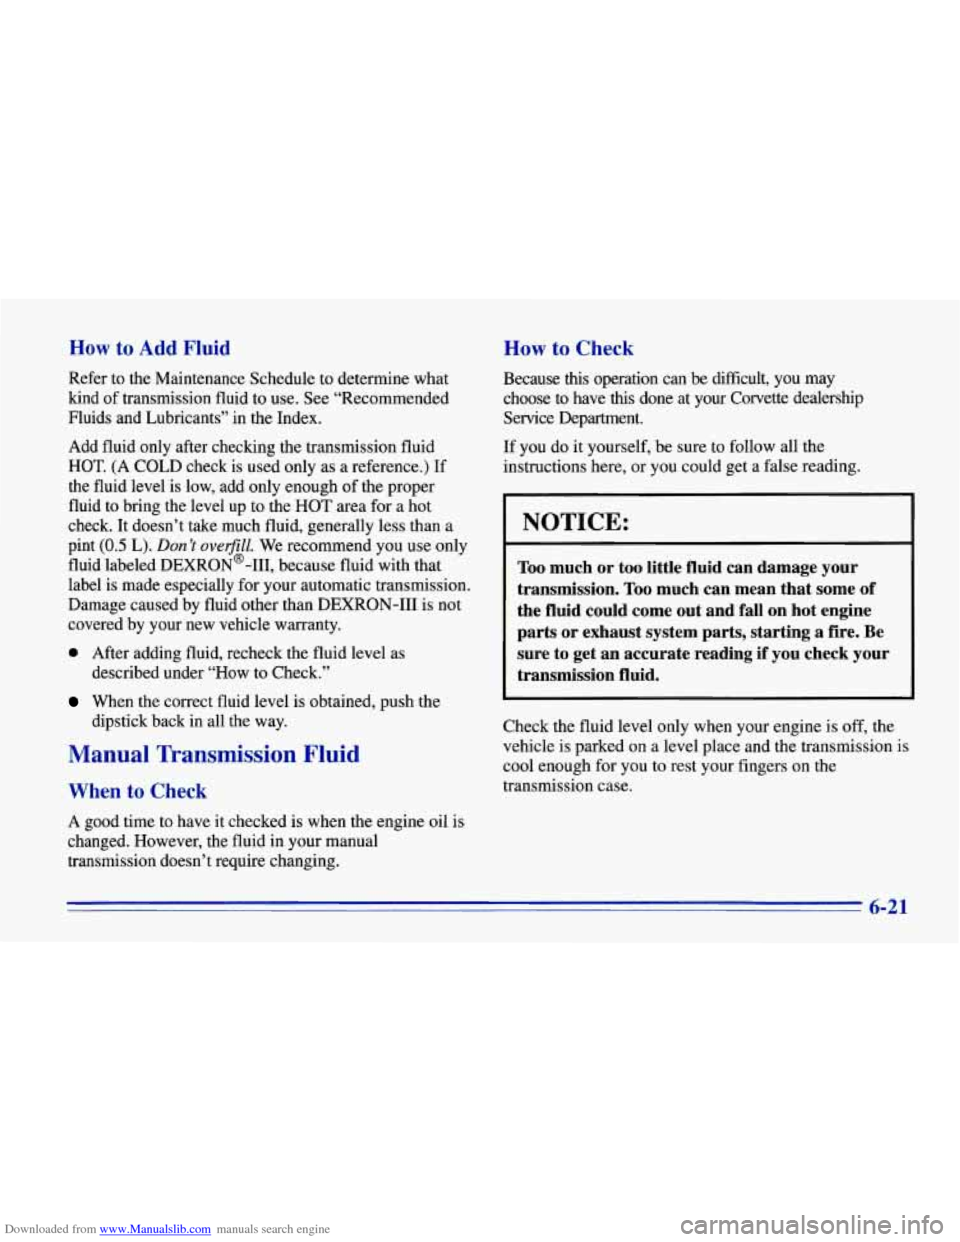
Because this operation can be difficult, you may
choose to have
this done at your Corvette dealership
Service Department.
If you do it yourself, be sure to follow all the
instructions here, or you could get a false reading.
NOTICE:
Too much or too little fluid can damage your
transmission.
Too much can mean that some of
the fluid could come out and fall on hot engine
parts or exhaust system parts, starting a fire. Be
sure to get an accurate reading
if you check your
transmission fluid.
Check the fluid level only when your engine is off, the
vehicle is parked on a level place and the transmission
is
cool enough for you to rest your fingers on the
transmission case.
6-21
Page 298 of 386
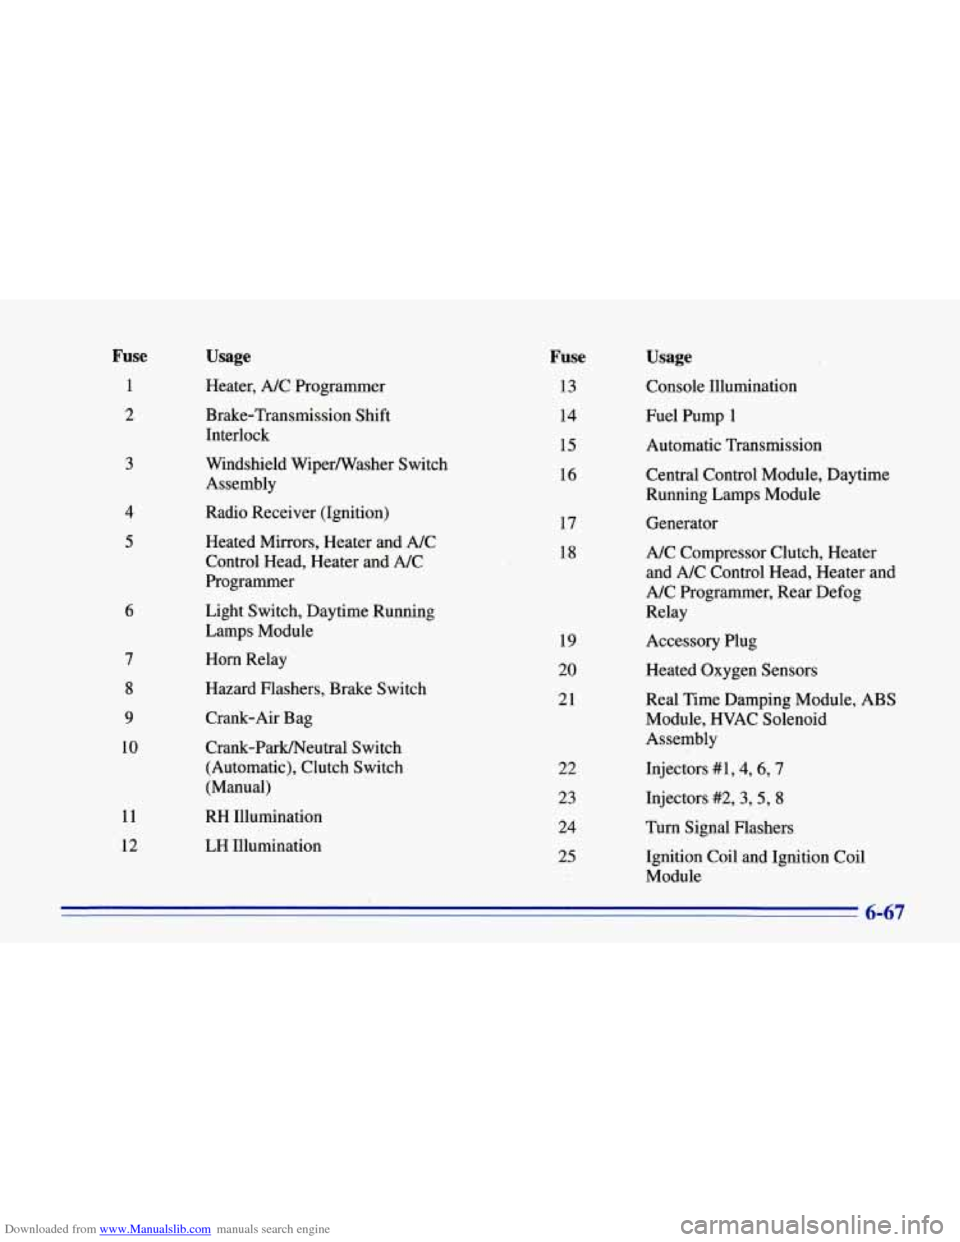
Downloaded from www.Manualslib.com manuals search engine Fuse
1
2
3
4
5
6
7
8
9
10
11
12
Usage
Heater, A/C Programmer
Brake-Transmission Shift
Interlock
Windshield WiperNasher Switch
Assembly
Radio Receiver (Ignition)
Heated Mirrors, Heater
and A/C
Control Head, Heater and A/C
Programmer
Light Switch, Daytime Running
Lamps Module
Horn Relay
Hazard Flashers, Brake Switch
Crank-Air Bag
Crank-Park/Neutral Switch
(Automatic), Clutch Switch
(Manual)
Usage
Console Illumination
Fuel Pump
1
Automatic Transmission
Central Control Module, Daytime
Running Lamps Module
Generator
A/C .Compressor Clutch, Heater
and A/C Control Head, Heater and
A/C Programmer, Rev Defog
Relay
Accessory Plug
Heated Oxygen Sensors
Real Time Damping Module, ABS
Module, HVAC Solenoid
Assembly
Injectors
#1,4,6,7
Injectors #2,3,5, 8
Turn Signal Flashers
Ignition Coil and Ignition Coil
Module
ti47
RH Illumination
LH Illumination
Fuse
13
14
15
16
17
18
19
20
21
22
23 24
25
Page 299 of 386
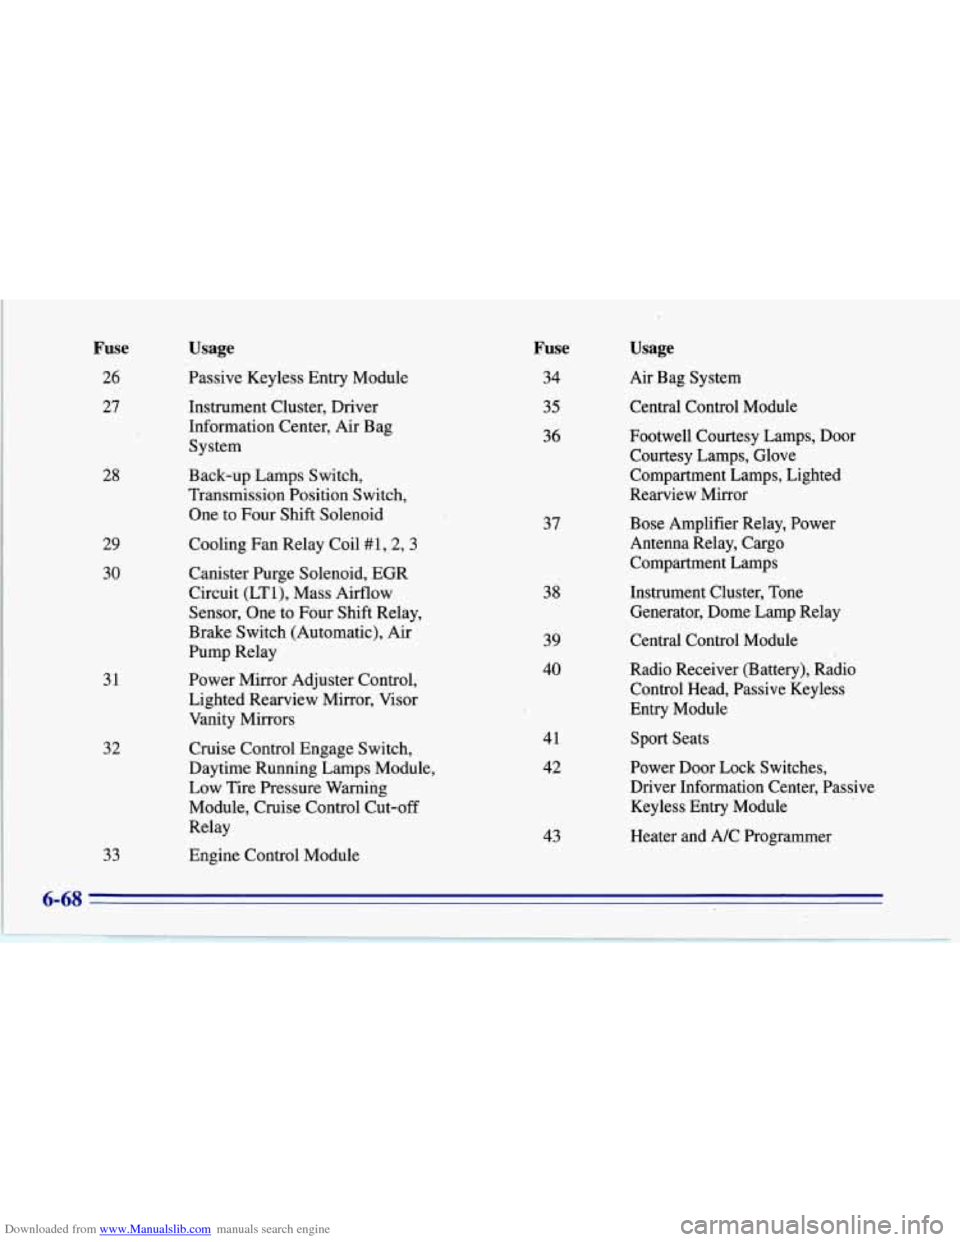
Downloaded from www.Manualslib.com manuals search engine Fuse
26 27
28
29
30
31
32
33
Usage
Passive Keyless Entry Module
Instrument Cluster, Driver
Information Center, Air Bag System
Back-up Lamps Switch,
Transmission Position Switch,
One to Four Shift Solenoid
Cooling Fan Relay Coil #1
, 2,3
Canister Purge Solenoid, EGR
Circuit (LTl), Mass Airflow
Sensor, One to Four Shift Relay,
Brake Switch (Automatic), Air
Pump Relay
Power Mirror Adjuster Control,
Lighted Rearview Mirror, Visor
Vanity Mirrors
Cruise Control Engage Switch,
Daytime Running Lamps Module,
Low Tire Pressure Warning
Module, Cruise Control Cut-off
Relay
Engine Control Module
Fuse
34
35
36
37
38
39
40
41 42
43
Usage
Air Bag System
Central Control Module
Footwell Courtesy Lamps, Door Courtesy Lamps, Glove
Compartment Lamps, Lighted
Rearview Mirror
Bose Amplifier Relay, Power
Antenna Relay, Cargo Compartment Lamps
Instrument Cluster, Tone
Generator, Dome Lamp Relay
Central Control Module
Radio Receiver (Battery), Radio
Control Head, Passive Keyless
Entry Module
Sport Seats
Power Door Lock Switches,
Driver Information Center, Passive Keyless Entry Module
Heater and A/C Programmer
6-68