1996 CHEVROLET CORVETTE fuel
[x] Cancel search: fuelPage 279 of 386
Downloaded from www.Manualslib.com manuals search engine If a tire goes flat, you won’t need to stop on the side of
the road to change the tire.
You can just keep on driving.
The shorter the distance you drive and the slower the
speed, the greater the chance that the tire will not have
to be replaced. If you drive on a deflated EMT for
distances of
50 miles (80 km) or less and at speeds of
55 mph (90 km/h) or less, there is a good chance that the
tire can be repaired. The tire can operate effectively with
no air pressure for up to 200 miles (320 km) at speeds
up to
55 mph (90 km/h), but the tire would then have to
be replaced. Also remember: When a tire is filled with
air, it provides a cushion between the road and the
wheel. Because you do not have this cushion when
driving on a deflated tire, try to avoid potholes that
could damage your wheel and require replacement of it.
Some road hazards can damage a
tire beyond repair. This
damage could occur before you’ve driven on the tire in a
deflated condition. Whenever a tire has been damaged, or
if you’ve driven any distance on a deflated
EMT, check
with a Goodyear EMT Service Center to determine
whether the tire can be repaired or should be replaced. To
maintain your vehicle’s extended mobility feature,
all
replacement tires must be Extended Mobility Tires.
See the Goodyear Extended Mobility Tire Owner’s
Manual and Limited Warranty supplied with your
Corvette for additional information.
Inflation -- Tire Pressure
The Tire-Loading Information label, which is on
the rear edge of the driver’s door, shows the correct
inflation pressures for your tires when they’re cold.
“Cold” means your vehicle has been sitting for at least
three hours or driven no more than
1 mile (1.6 km).
For competitive driving or high-speed driving (over
150 mph or 240 km/h), make sure your tires are inflated
to 35 psi
(240 kPa). When you end this type of driving,
reduce the cold inflation pressures (if necessary) to those
listed on the Tire-Loading Information label.
I NOTICE:
Don’t let anyone tell you that underinflation or
overinflation is all right. It’s not. If your tires
don’t have enough air (underinflation), you can get the following:
0 Too much flexing
Too much heat
0 Tire overloading
0 Bad wear
0 Bad handling
Bad fuel economy.
NOTICE: (Continued)
Page 292 of 386
Downloaded from www.Manualslib.com manuals search engine Underbody Maintenance
Chemicals used for ice and snow removal and, dust
control can collect on the underbody. If these
are not
removed, accelerated corrosion (rust) can occur on the
underbody parts such as fuel lines, frame, floor pan,
and exhaust system even though they have corrosion
protection.
At least every spring, flush these materials from the
underbody with plain water. Clean any areas where mud
and other debris can collect. Dirt packed in closed areas
of the frame should be loosened before being flushed.
Your dealer or an underbody vehicle washing system
can do this for you.
Fiberglass Springs
NOTICE:
I I
Don’t use corrosive or acidic cleaning agents,
engine degreasers, aluminum cleaning agents or
other harsh solvents to clean fiberglass springs;
they’ll damage the springs.
Chemical Paint Spotting
Some weather and atmospheric conditions can create a
chemical fallout. Airborne pollutants can fall upon and
attack painted surfaces on your vehicle. This damage
can take two forms: blotchy, ringlet-shaped
discolorations, and small irregular dark spots etched
into the paint surface.
Although no defect in the paint job causes this, Corvette
will repair, at no charge
to the owner, the surfaces of
new vehicles damaged by this fallout condition within
12 months or 12,000 miles (20
000 km) of purchase,
whichever occurs first.
Page 298 of 386
Downloaded from www.Manualslib.com manuals search engine Fuse
1
2
3
4
5
6
7
8
9
10
11
12
Usage
Heater, A/C Programmer
Brake-Transmission Shift
Interlock
Windshield WiperNasher Switch
Assembly
Radio Receiver (Ignition)
Heated Mirrors, Heater
and A/C
Control Head, Heater and A/C
Programmer
Light Switch, Daytime Running
Lamps Module
Horn Relay
Hazard Flashers, Brake Switch
Crank-Air Bag
Crank-Park/Neutral Switch
(Automatic), Clutch Switch
(Manual)
Usage
Console Illumination
Fuel Pump
1
Automatic Transmission
Central Control Module, Daytime
Running Lamps Module
Generator
A/C .Compressor Clutch, Heater
and A/C Control Head, Heater and
A/C Programmer, Rev Defog
Relay
Accessory Plug
Heated Oxygen Sensors
Real Time Damping Module, ABS
Module, HVAC Solenoid
Assembly
Injectors
#1,4,6,7
Injectors #2,3,5, 8
Turn Signal Flashers
Ignition Coil and Ignition Coil
Module
ti47
RH Illumination
LH Illumination
Fuse
13
14
15
16
17
18
19
20
21
22
23 24
25
Page 302 of 386
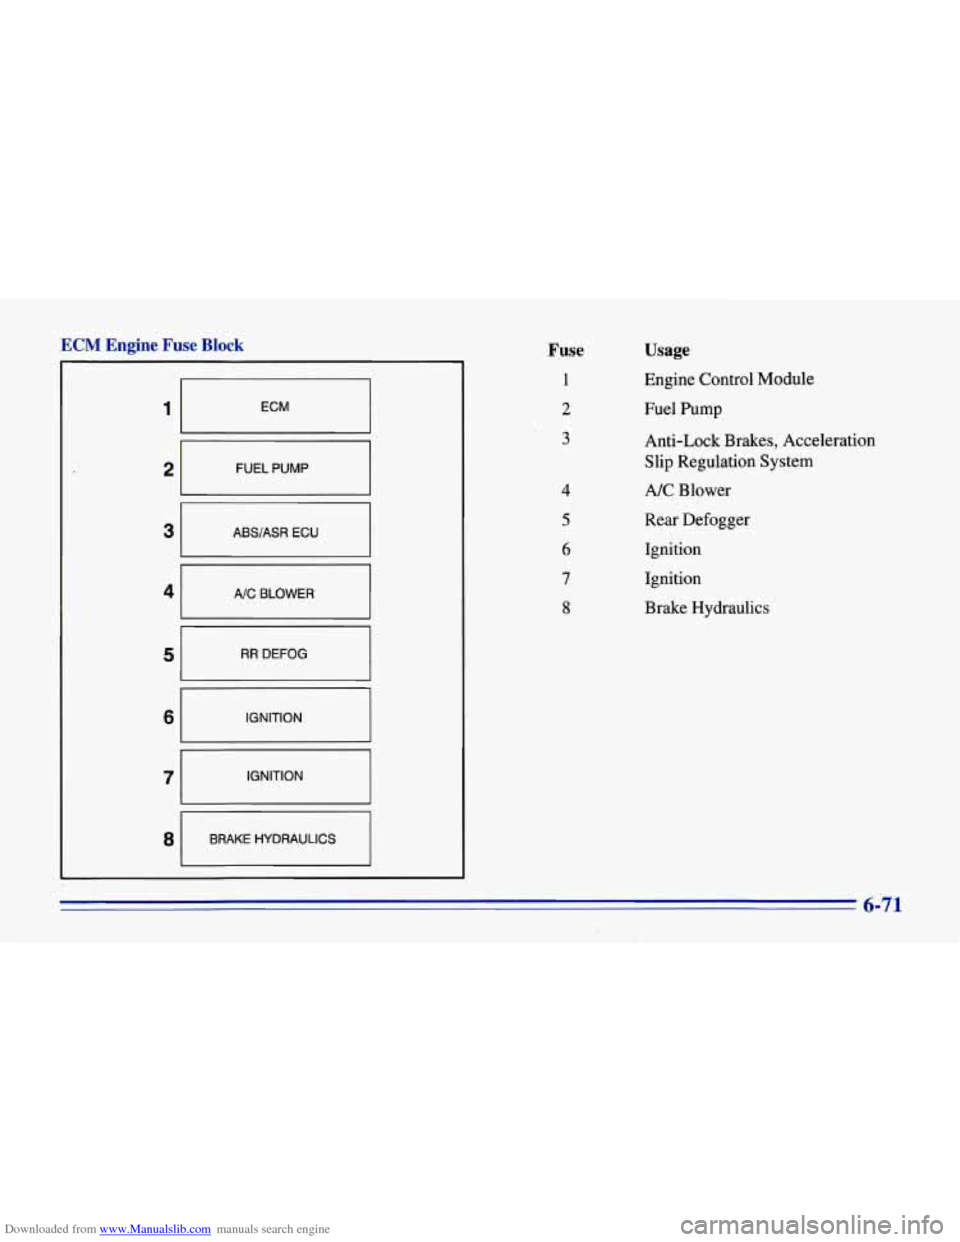
Downloaded from www.Manualslib.com manuals search engine ECM Engine Fuse Block
1
FUEL PUMP
ABS/ASR ECU
A/C BLOWER
RR DEFOG
IGNITION IGNITION
BRAKE HYDRAULICS
Fuse
1
2
3
Usage
Engine Control Module
Fuel Pump
Anti-Lock Brakes, Acceleration
Slip Regulation System
A/C Blower
Rear Defogger
Ignition
Ignition
Brake Hydraulics
6-71
Page 305 of 386

Downloaded from www.Manualslib.com manuals search engine Capacities and Specifications
Type ................................................................... V8
VIN Engine Code
LT1
................................................................... P
LT4 .................................................................... 5
Fuel Delivery ............................... Sequential Multiport Fuel Injection (SFI)
Valve Arrangement ............................................. Overhead Valve
Piston Displacement. ............................................ 350 CID (5.7L)
Bore
.................................................. 4.00 inches (101.6 mm)
Stroke .................................................. 3.48 inches (88.39 mm)
Compression Ratio LTl
............................................................. 10.5: 1
LT4 ................................................ .......... 10.67: 1
LT1, ................................................................. 300
LT4
................................................................. 330
Firing Order
................................................... 1-8-4-3-6-5-7-2
Thermostat Temperature Specification
............................... 180°F (82°C)
Horsepower
6-74
Page 307 of 386
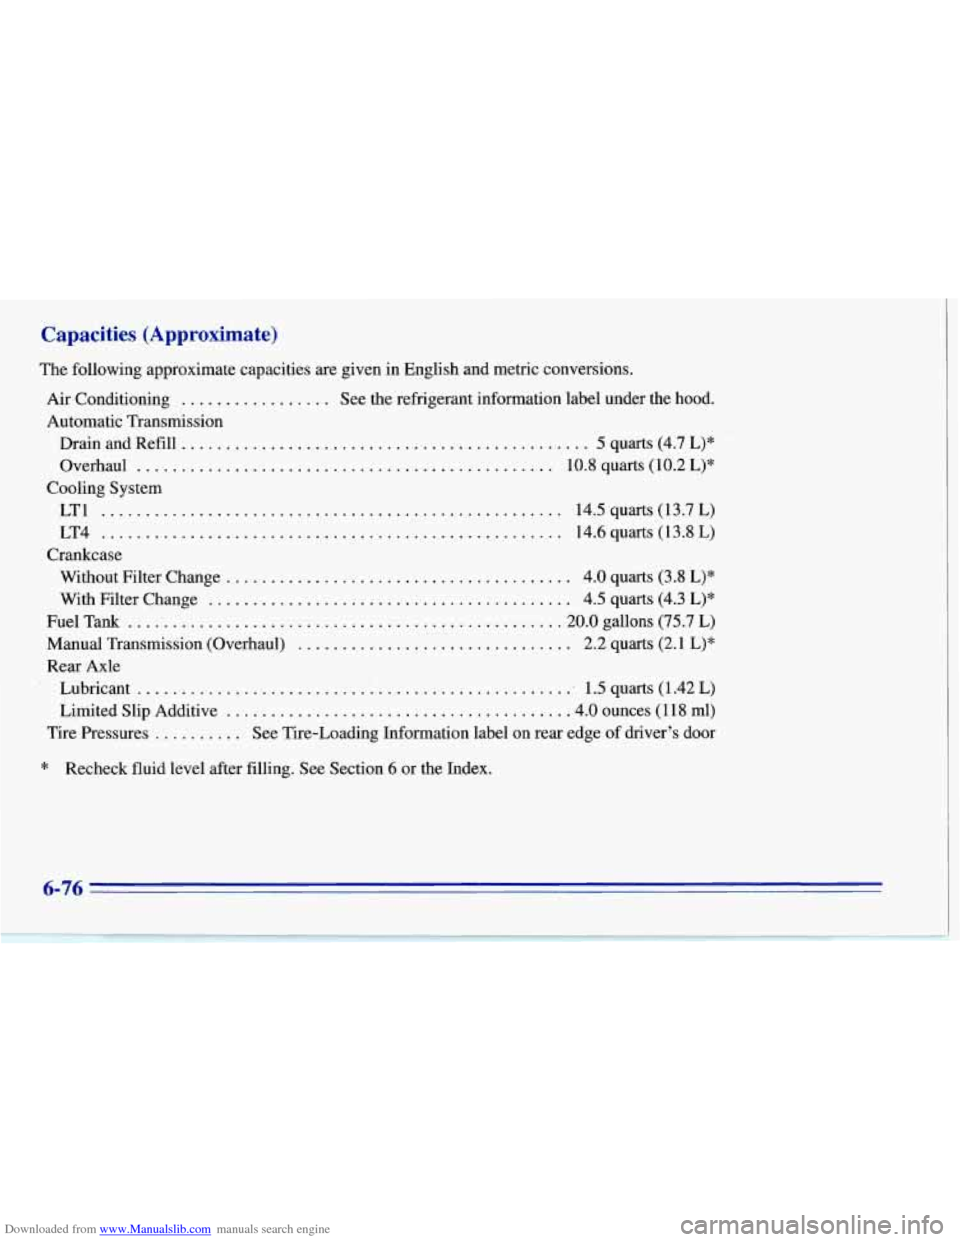
Downloaded from www.Manualslib.com manuals search engine Capacities (Approximate)
The following approximate capacities are given in English and metric conversions.
Air Conditioning ................. See the refrigerant information label under the hood.
Automatic Transmission
Drain and Refill
.............................................. 5 quarts (4.7 L)*
Overhaul
............................................. 10.8 quarts (10.2 L)*
LT1 ........... ................................... 14.5 quarts (13.7 L)
LT4
.................................................... 14.6quarts(13.8L)
Without Filter Change
....................................... 4.0 quarts (3.8 L)*
With Filter Change ......................................... 4.5 quarts (4.3 L)*
FuelTank ................................ ............. 20.0 gallons (75.7 L)
Manual Transmission (Overhaul)
............................. 2.2 quarts (2.1 L)*
Rear Axle
Lubricant
.................................................. 1.5 quarts (1.42 L)
Limited Slip Additive
...................................... .4.0 ounces (1 18 ml)
Tire Pressures
.......... See Tire-Loading Information label on rear edge of driver’s door
Cooling System
Crankcase
* Recheck fluid level after filling. See Section 6 or the Index.
6-76
Page 313 of 386
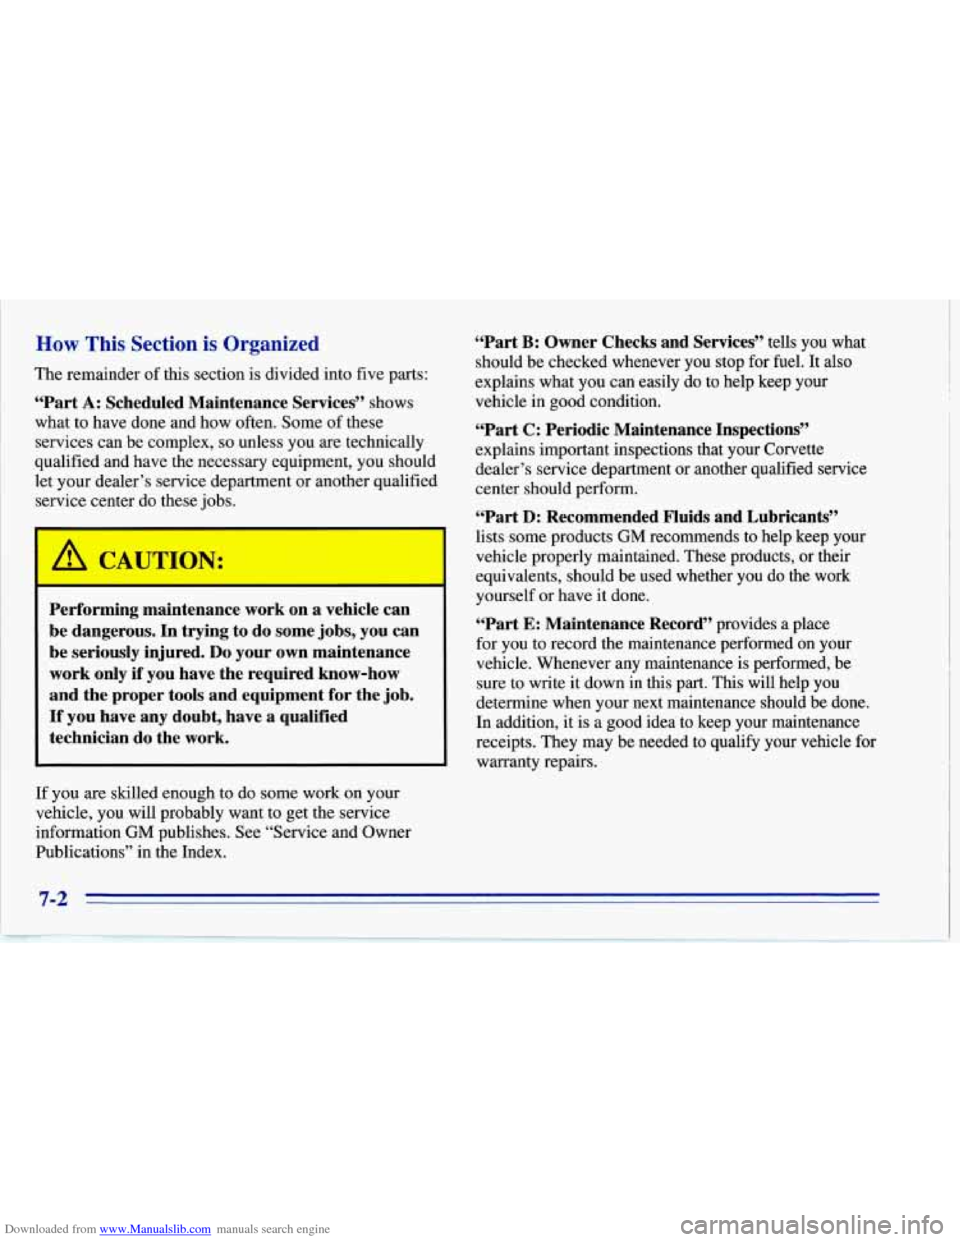
Downloaded from www.Manualslib.com manuals search engine How This Section is Organized
The remainder of this section is divided into five parts:
“Part A: Scheduled Maintenance Services” shows
what to have done and how often. Some of these
services can be complex,
so unless you are technically
qualified and have the necessary equipment, you should
let your dealer’s service department or another qualified
service center do these jobs.
Performing maintenance work on a vehicle can
be dangerous. In trying to do some jobs, you can
be seriously injured.
Do your own maintenance
work only
if you have the required know-how
and the proper tools and.equipment for the job.
If you have any doubt, have a qualified
technician do the work. “Part
B: Owner
Checks and Services’’ tells you what
should be checked whenever you stop for fuel. It also
explains what you can easily do to help keep your
vehicle in good condition.
“Part C: Periodic Maintenance Inspections”
explains important inspections that your Corvette
dealer’s service department or another qualified service
center should perform.
“Part D: Recommended Fluids and Lubricants”
lists some products GM recommends to help keep your
vehicle properly maintained. These products, or their
equivalents, should be used whether you do the work
yourself
or have it done.
“Part E: Maintenance Record’’ provides a place
for you to record the maintenance performed
on your
vehicle. Whenever any maintenance is performed, be
sure to write it down in this part.
This will help you
determine when your next maintenance should be done.
In addition, it is a good idea to keep your maintenance
receipts. They may be needed to qualify your vehicle for
warranty repairs.
If you are skilled enough to do some work on your
vehicle, you will probably want to get the service
information
GM publishes. See “Service and Owner
Publications” in the Index.
7-2
Page 314 of 386
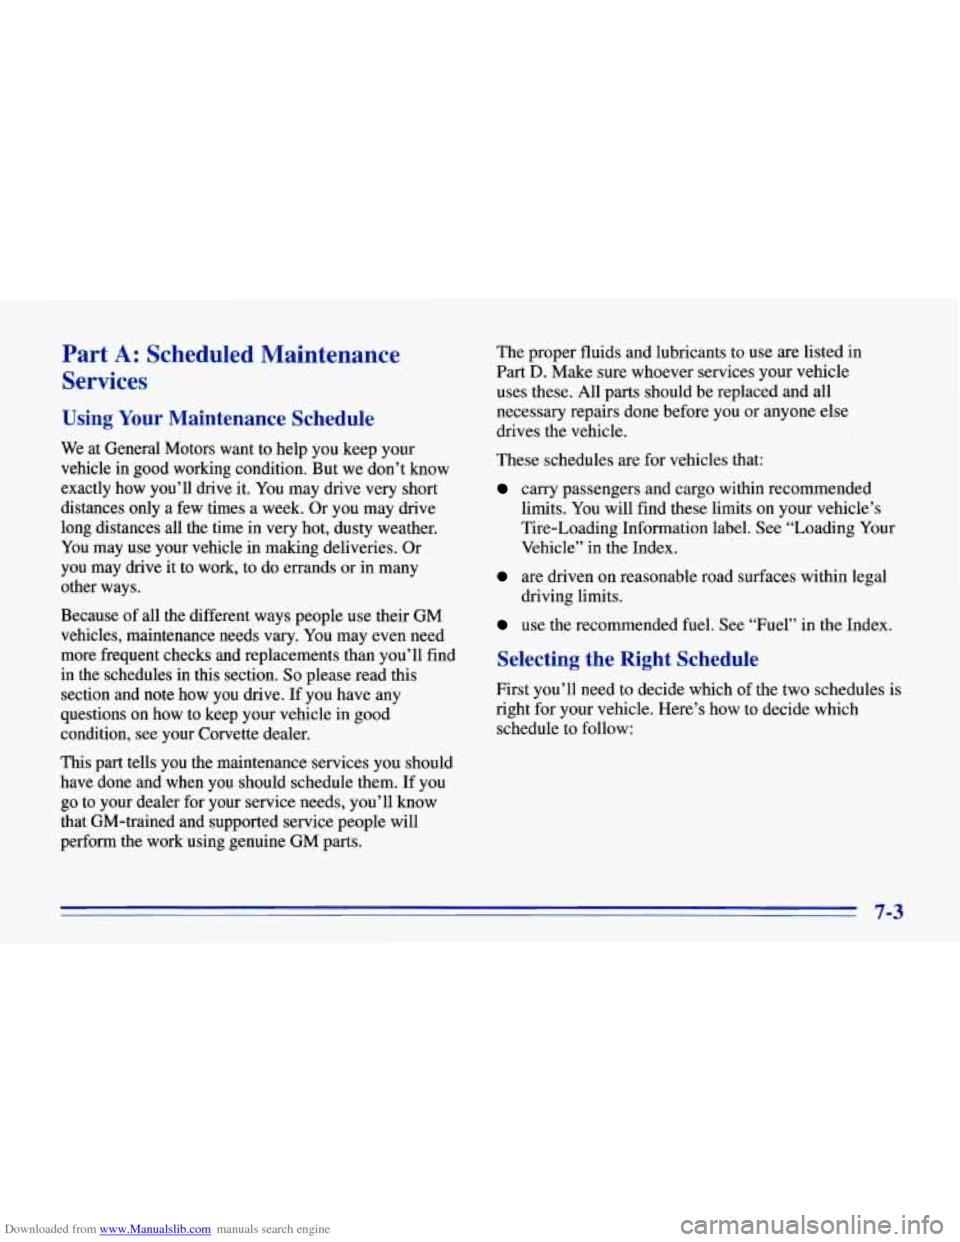
Downloaded from www.Manualslib.com manuals search engine Part A: Scheduled Maintenance
Services
Using Your Maintenance Schedule
We at General Motors want to help you keep your
vehicle in good working condition. But we don’t know
exactly how you’ll drive it. You may drive
very short
distances only a few times a week. Or you may drive
long distances all the time in very hot, dusty weather.
You may use your vehicle in making deliveries. Or
you may drive it to work,
to do errands or in many
other ways.
Because of all the different ways people use their
GM
vehicles, maintenance needs vary. You may even need
more frequent checks and replacements than you’ll find
in the schedules in this section.
So please read this
section and note how you drive. If you have any
questions
on how to keep your vehicle in good
condition, see your Corvette dealer.
This part tells you the maintenance services you should
have done and when you should schedule them. If you
go to your dealer for your service needs, you’ll know
that GM-trained and supported service people will
perform the work using genuine
GM parts. The
proper fluids and lubricants to use are listed in
Part D. Make sure whoever services your vehicle
uses these. All parts should be replaced and all
necessary repairs done before you or anyone else
drives the vehicle.
These schedules are for vehicles that:
carry passengers and cargo within recommended
limits. You will find these limits on your vehicle’s
Tire-Loading Information label. See “Loading Your
Vehicle’’ in the Index.
are driven on reasonable road surfaces within legal
driving limits.
use the recommended fuel. See “Fuel” in the Index.
Selecting the Right Schedule
First you’ll need to decide which of the two schedules is
right for your vehicle. Here’s how to decide which
schedule to follow:
7-3