Page 265 of 392
Downloaded from www.Manualslib.com manuals search engine Manual Transmission Fluid
When to Check
A good time to have it checked is when the engine oil is
changed. However,
the fluid in your manual
transmission doesn't require changing.
How to Check
Because this operation can be a little difficult, you
may choose to have this done at your GM dealer's
Service Department.
If you do it yourself, be sure to follow all the
instructions here, or
you could get a false reading.
I NOTICE: I
I
, Too much or too little fluid can dafnage your
l transmission. Too much can mean that some of
the fluid could come out and fall on hot engine
parts or exhaust system parts, starting
a fire. Be
sure to get an accurate reading if you check your
transmission fluid.
Check the fluid level only when your engine is off, the
vehicle is parked on a level place and the transmission is
cool enough for you to rest your fingers on the
transmission case.
Then, follow these steps:
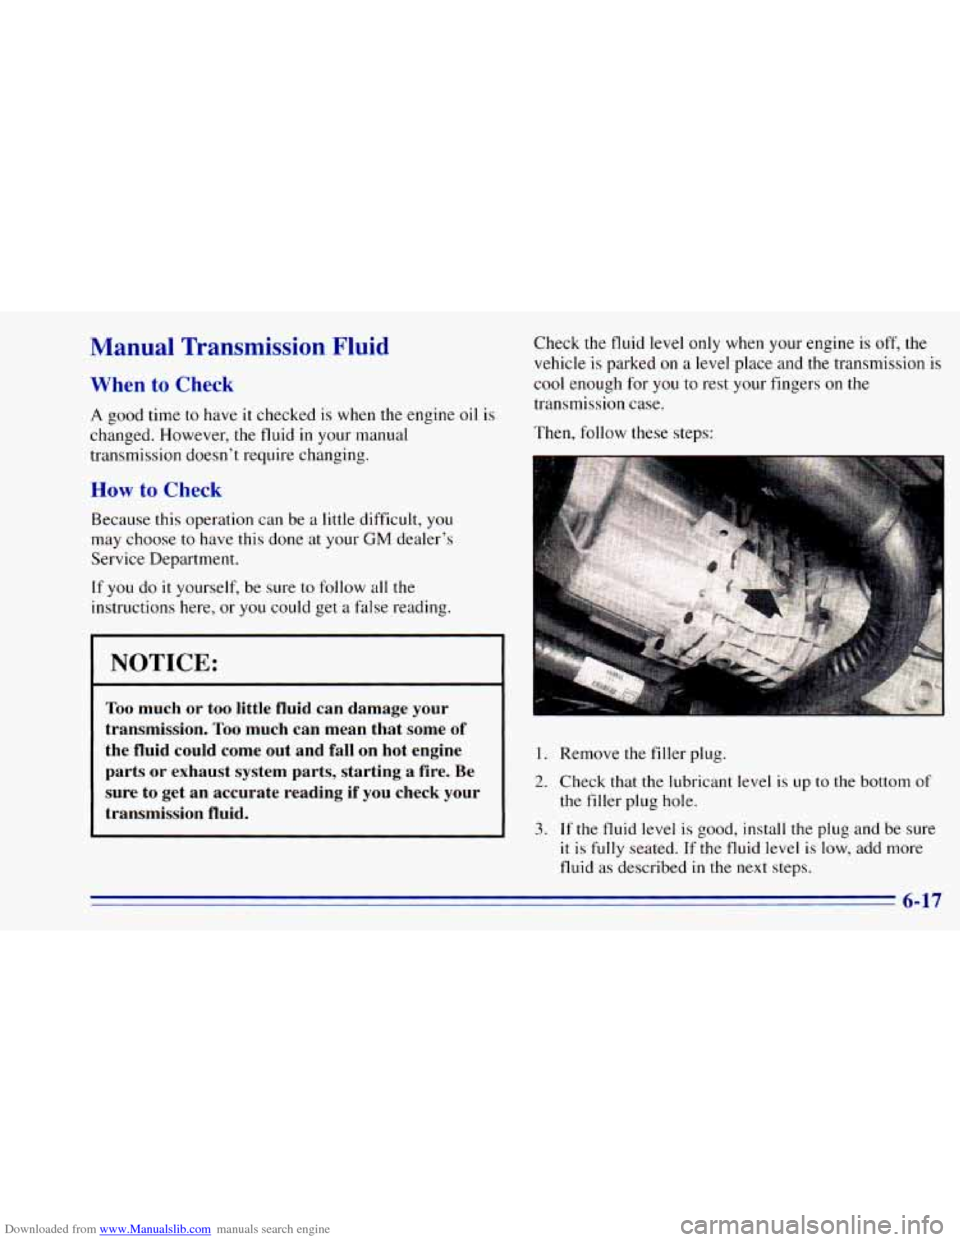
1. Remove the filler plug.
2. Check that the lubricant level is up to the bottom of
the filler plug hole.
3. , If the fluid level is good, install the plug and be sure
it is fully seated. If the fluid level is low, add more
fluid as described in
the next steps.
6-17
Page 267 of 392
Downloaded from www.Manualslib.com manuals search engine How to Check
The proper fluid should be added if the level does not
reach the bottom
of the diaphragm when it’s in place in
the reservoir. See the instructions on the reservoir cap.
Rear Axle
How to Check Lubricant
When
to Check and Change Lubricant
Refer to the Maintenance Schedule to determine how
often to check the lubricant and when to change
it. See
“Scheduled Maintenance Services”
in the Index.
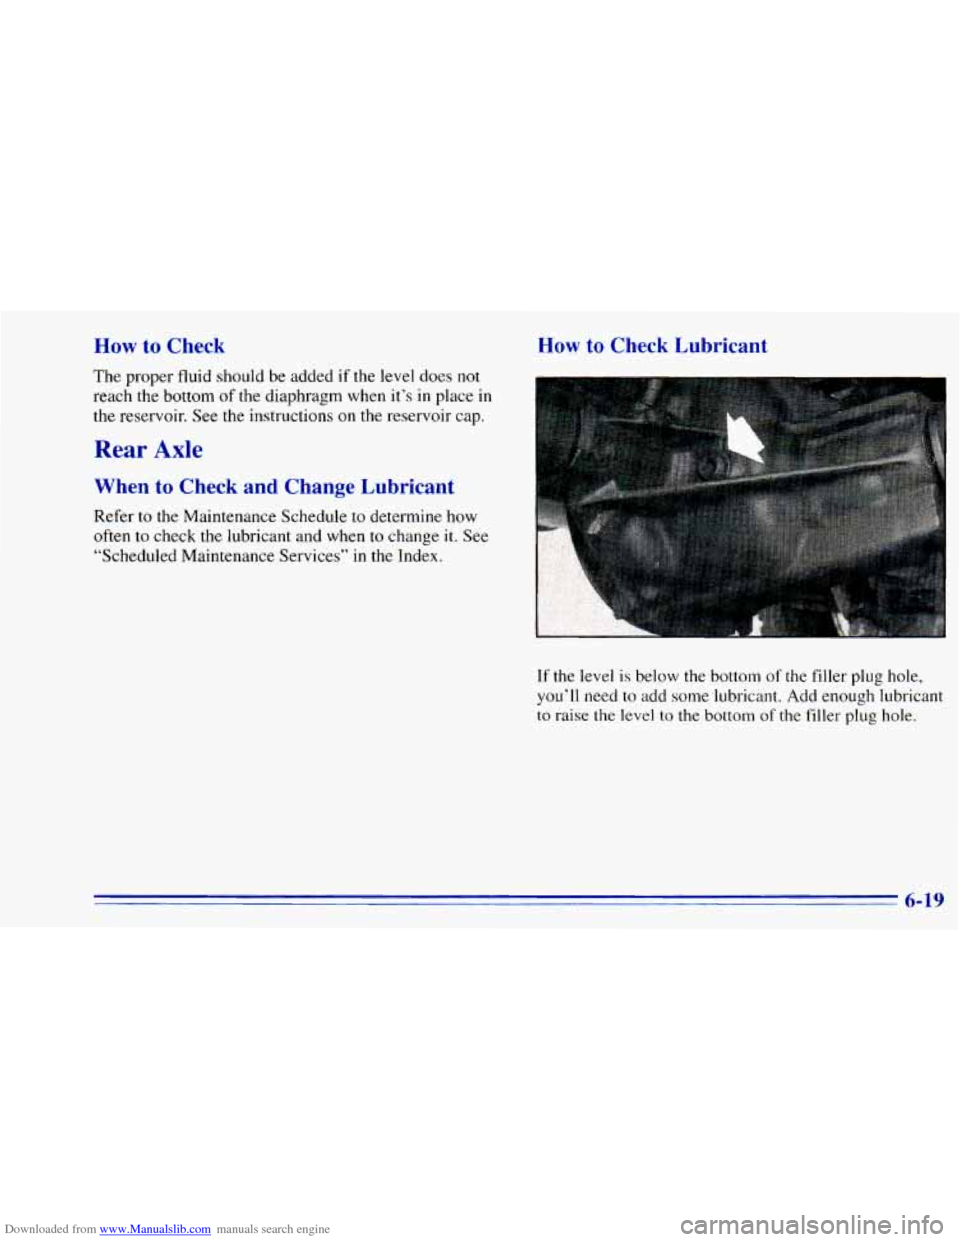
If the level is below the bottom of the filler plug hole,
you’ll need to
add some lubricant. Add enough lubricant
to raise the level to the bottom of the filler plug hole.
6-19
Page 269 of 392
Downloaded from www.Manualslib.com manuals search engine What to Use
Refer to the Maintenance Schedule to determine what
kind of lubricant to use. See “Recommended Fluids and
Lubricants” in the Index.
Front Axle
When to Check and Change Lubricant
Refer to the Maintenance Schedule to determine how
often to check the lubricant and when to change it. See
“Scheduled Maintenance Services” in the Index.
How to Check Lubricant
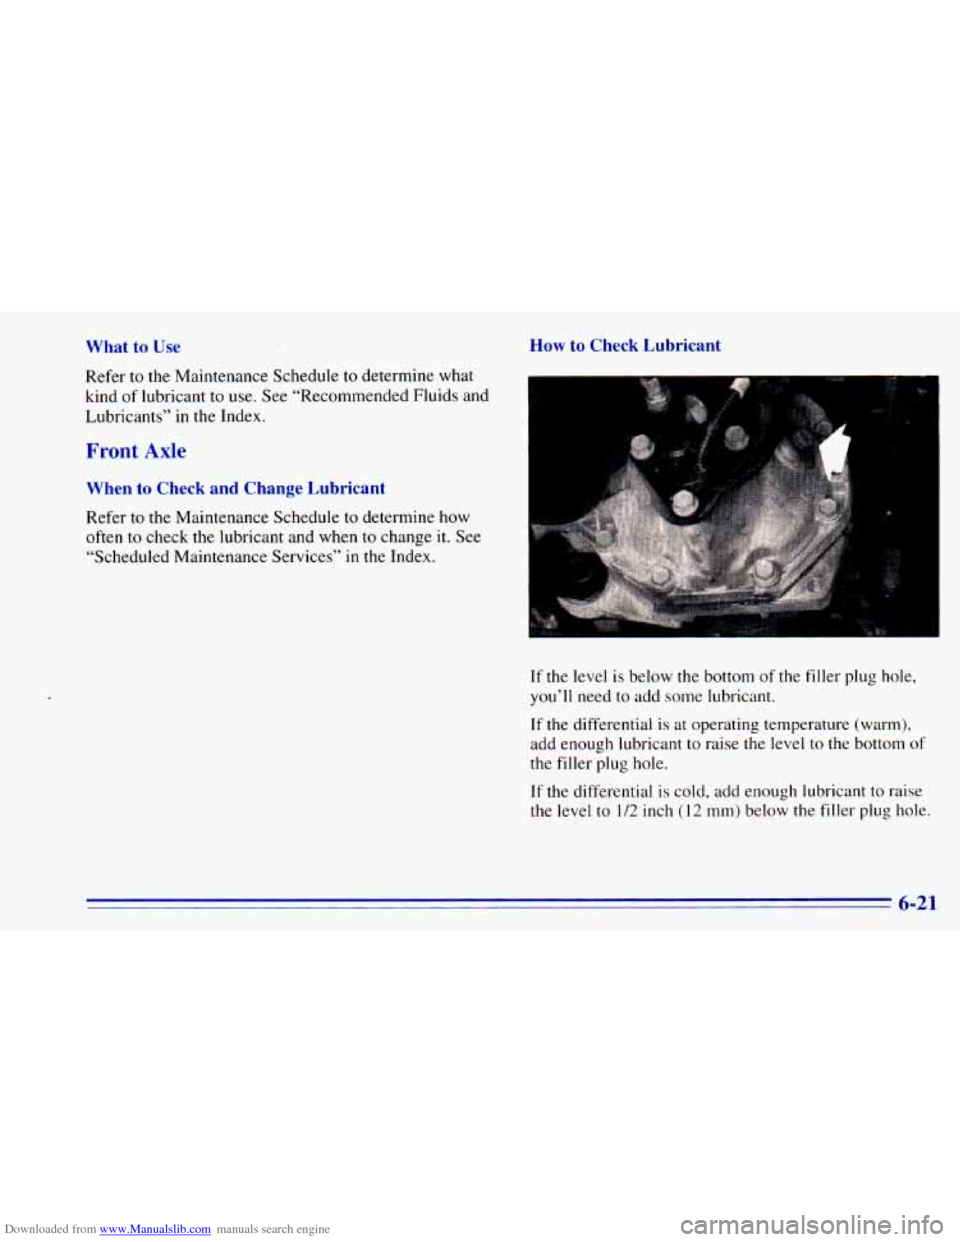
If the level is below the bottom of the filler plug hole,
you’ll need
to add some lubricant.
If the differential is at operating temperature (warm),
add enough lubricant
to raise the level to the bottom of
the filler plug hole.
If the differential is cold, add enough lubricant to raise
the level to
1/2 inch (12 mm) below the filler plug hole.
6-21
Page 270 of 392
Downloaded from www.Manualslib.com manuals search engine What to Use
Refer to the Maintenance Schedule to determine what
kind of lubricant to use. See “Recommended Fluids and
Lubricants” in the Index.
Engine Coolant
The cooling system in your vehicle is filled with new
DEX-COOL TM (orange-colored, silicate-free) engine
coolant. This coolant is designed to remain
in your
vehicle for
5 years or 100,000 miles (166 000 km),
whichever occurs first.
The following explains your cooling system and how
to add coolant when
it is low. If you have a problem
with engine overheating, see “Engine Overheating” in
the Index.
A 50/50 mixture of water and the proper coolant for
your vehicle will:
0 Give freezing protection down to -34°F (-37 “C).
Give boiling protection up to 265 “F (129°C).
0 Protect against rust and corrosion.
Help keep the proper engine temperature.
0 Let the warning lights and gages work as they should.
I 1
NOTICE:
When adding coolant it is important that you use
DEX-COOL TM (orange-colored, silicate-free)
coolant meeting
GM Specification 6277M.
If silicated coolant is added to the system,
premature engine, heater core or radiator
corrosion may result. In addition, the engine coolant
will require change sooner -- at
30,000 miles (50 000 km) or 24 months whichever
occurs first.
6-22
Page 271 of 392
Downloaded from www.Manualslib.com manuals search engine What to Use
Use a mixture of one-half
clean water (preferably
distilled) and one-half DEX-COOL
TM (orange-,colored,
silicate-free) antifreeze that meets
GM Specification
6277M, which won’t damage aluminum parts. Use
GM Engine Coolant Supplement (sealer) (GM Part
No. 3634621) with any complete coolant change. If you
use this mixture, you don’t need
to add anything else.
L
Adding only plain water to your cooli,,g system
can be dangerous. Plain water, or some other liquid like alcohol, can boil before the proper
coolant mix
will. Your vehicle’s coolant warning
system is set for the proper coolant mix. With
plain water or the wrong mix, your engine could
get too hot but you wouldn’t get the overheat
warning. Your engine could catch fire and you or
others could be burned. Use
a 50/50 mix of clean
water and
DEX-COOL TM (orange-colored.
silicate-free) antifreeze.
NOTICE:
If you use an improper coolant mix, your engine
could overheat and be badly damaged. The
repair cost wouldn’t be covered by your
warranty.
Too much water in the mix can freeze
and crack the engine, radiator, heater core and
other parts.
If you have to add coolant more than four times a year,
have your dealer check your cooling system.
NOTICE:
If you use the proper coolant, you don’t have to
add extra inhibitors or additives which claim to
improve the system. These can be harmful.
6-23
Page 279 of 392
Downloaded from www.Manualslib.com manuals search engine Some driving conditions or climates may cause a brake
squeal when the brakes are first applied or lightly
applied. This does
not mean something is wrong with
your brakes.
Free movement
of brake calipers and properly torqued
wheel nuts are necessary
to help prevent brake
pulsation. When tires
are rotated, inspect brake calipers
for movement, brake pads for wear, and evenly torque
wheel nuts in the proper sequence to GM Specifications.
Your rear drum brakes don’t have wear indicators, but if
you ever hear a rear brake rubbing noise, have the rear
should be removed and inspected each time the tires are
removed for rotation or changing. When
you have the
front brakes replaced, have the rear brakes inspected, too.
Brake linings should always be replaced as complete
axle sets.
8, brake linings inspected. Also, the rear brake drums
Brake Pedal Travel
See your dealer if the brake pedal does not return to
normal height, or if there is a rapid increase
in pedal
travel. This could
be a sign of brake trouble.
Brake Adjustment
Every time you make a brake stop, your disc brakes
adjust for wear.
If your brake pedal goes down farther than normal, your
rear drum brakes may need adjustment. Adjust them by
backing up and firmly applying the brakes
a few times.
Replacing Brake System Parts
The braking system on a modern vehicle is complex.
Its many parts have to be of top quality and work well
together if the vehicle is to have really good braking.
Vehicles we design and
test have top-quality GM brake
parts in them, as your vehicle does when it is new. When
you replace parts of your braking system -- for example,
when your brake linings wear down and
you have to
have new ones put in
-- be sure you get new genuine
GM replacement parts.
If you don’t, your brakes may no
longer work properly. For example, if someone puts in
brake linings that are wrong for your vehicle, the balance
between your front and rear brakes can change
-- for the
worse. The braking performance you’ve come to expect
can change in many other ways if someone puts in the
wrong replacement brake parts.
6-31
Page 288 of 392
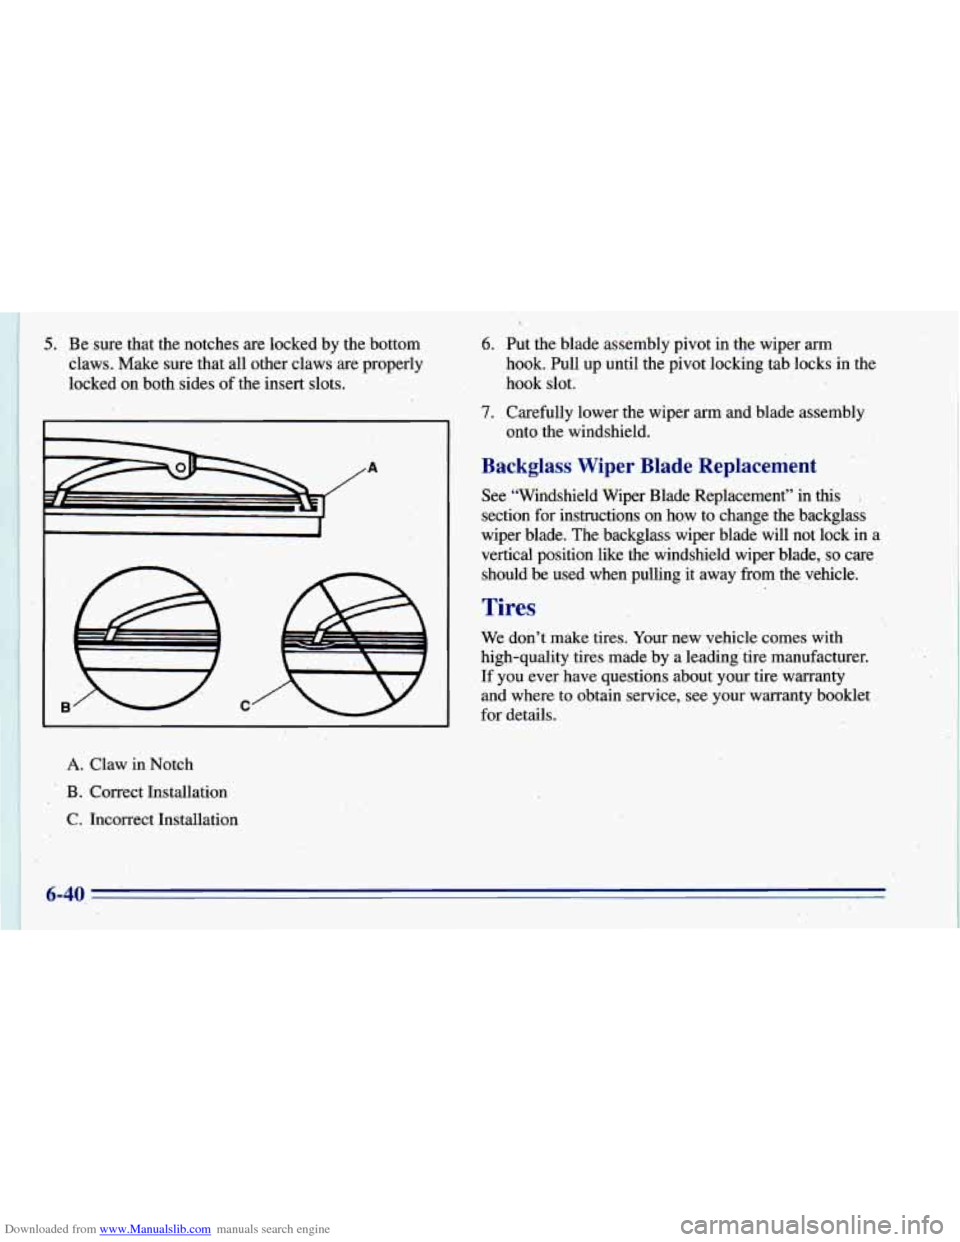
Downloaded from www.Manualslib.com manuals search engine 5. Be sure that the notches are locked by the bottom
claws. Make sure that all other claws are properly
locked on both sides of the insert slots.
C /
A. Claw in Notch
*. B. Cori-ect Installation
C. Incorrect Installation
?,
6. Put the blade assembly pivot in the wiper arm
hook. Pull up until the pivot locking tab locks in the
hook slot;
7. Carefully lower the wiper arrn and blade assembly
Backglass Wiper Blade Replacement
See “Windshield Wiper Blade Replacement” in this
section for instructions on how to change the backglass
wiper blade. The backglawwiper blade will not lock in a
vertical position like the windshield wiper blade,
so care
should
be used when pulling it away from the. vehicle.
onto the
windshield.
.I ’
Tires
We don’t make tires. Your new vehicle comes with
high-quality tires made by a leading tire manufacturer.
If you ever have questions about your tire warranty
and where to obtain service, see your warranty booklet
for details.
Page 291 of 392
Downloaded from www.Manualslib.com manuals search engine c
f
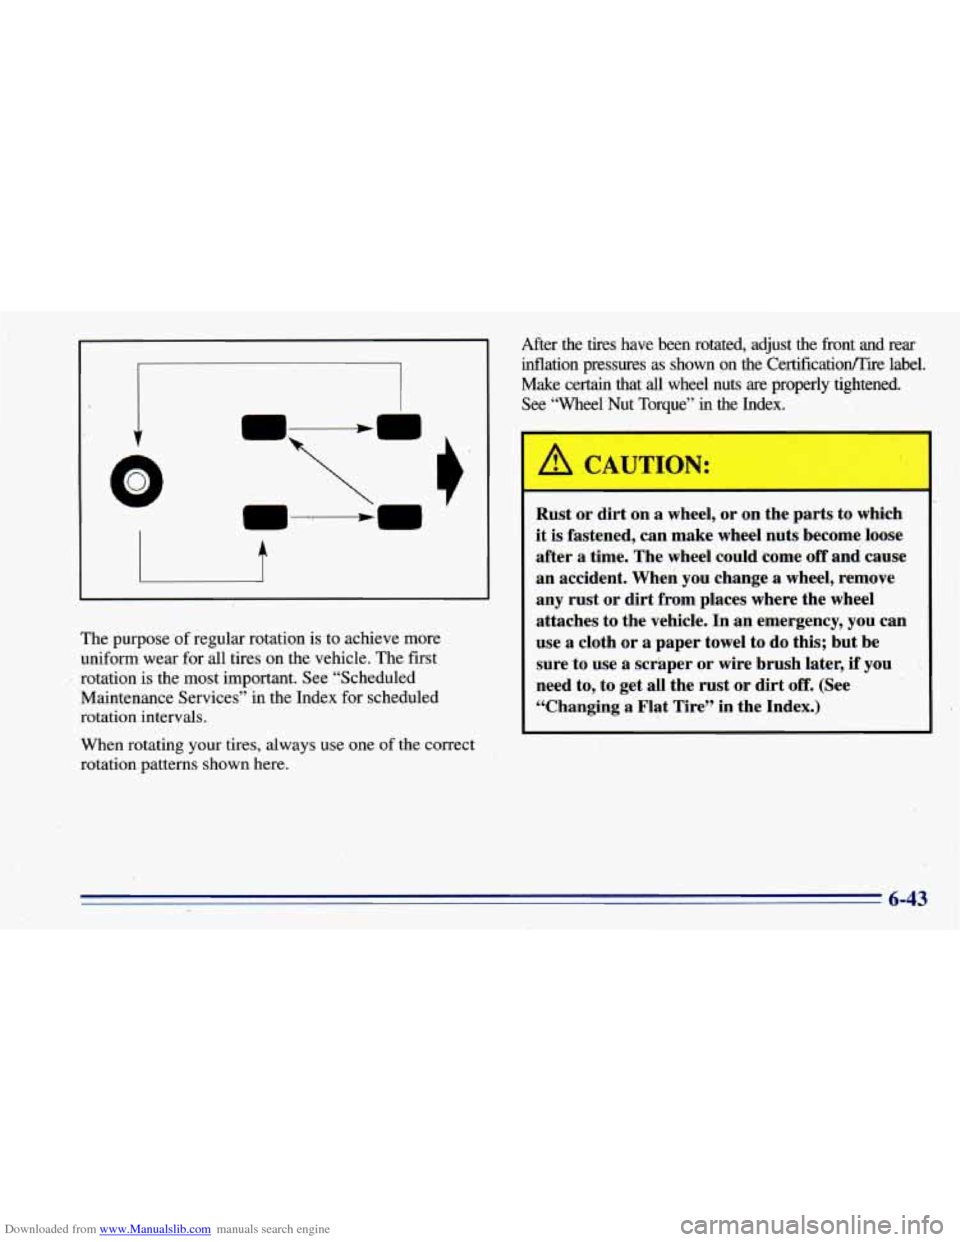
The purpose of regular rotation is to achieve more
uniform wear for all tires on the vehicle. The first
Maintenance Services” in the Index for scheduled
rotation intervals.
I rotation is the most important. See “Scheduled
When rotating your tires, always use one of the correct
rotation patterns shown here. After the tires have been rotated, adjust the front and rear
inflation pressures as shown on the
Certificatioflire label.
Make certain that
all wheel nuts are. properly tightened.
See “Wheel Nut Torque’’
in the Index.
Rust or dirt on
a wheel, or on .the parts to Which
it is fastened, can make wheel nuts become loose
after
a time. The wheel could come off and cause
an accident. When you change
a wheel, remove
any rust or dirt from places where the wheel
attaches to the vehicle. In an emergency, you can
use
a cloth or a paper towel to do this; but be
sure to use
a scraper or wire brush later, if you
need to, to get all the rust or dirt
off. (See
“Changing
a Flat Tire” in the Index.)
-_
6-43