1996 CHEVROLET ASTRO fuse
[x] Cancel search: fusePage 7 of 372

Vehicle Symbols
These are some of the symbols you may find on your vehicle.
For example,
these symbols
are used on an
original battery:
POSSIBLE A
CAUTION
INJURY
PROTECT EYES BY
SHIELDING
CAUSTIC
ACID COULD BATTERY
CAUSE
BURNS
SPARK
OR ,111,
COULD FLAME
EXPLODE BATTERY
These symbols are important
for you and
your passengers
whenever your
vehicle
is
driven:
DOOR LOCK
FASTEN SEAT
BELTS
These symbols have
to do with
your lights:
SIGNALS e
TURN
WARNING
A
HAZARD
FLASHER
FOG LAMPS
$0
These symbols are on
some of
your controls:
WIPER w
WINDSHIELD
DEFROSTER
VENTILATING FAN
(
-b
-J
These symbols are used on
warning and
indicator lights:
COOLANT -
TEMP -
CHARGING I-1
BATTERY
SYSTEM
BRAKE
(0)
COOLANT a
ENGINE OIL w,
PRESSURE
ANTI-LOCK
(@)
BRAKES
Here are some
other symbols
you may see:
FUSE
I
LIGHTER n
HORN )a(
SPEAKER
b
FUEL p3
V
Page 9 of 372
Section 1 Seats and Restraint Systems
Here you’ll find information about the seats in your
vehicle and how to use your safety belts properly.
You
can also learn about some things you should not do with
air bags and safety belts.
Seats and Seat Controls
This section tells you about the seats -- how to adjust
them, take them
out and put them back in. It also tells
you about bucket and bench seats, power seats and
head restraints.
Manual Front Seat
A CAUTION:
You can lose control of the vehicle if you try to
adjust a manual driver’s seat while the vehicle
is
moving. The sudden movement could startle and
confuse you,
or make you push a pedal when you
don’t want to. Adjust the driver’s seat only when
the vehicle
is not moving.
1-1
Page 90 of 372

Turn and Lane Change Signals
The turn signal has two upward (for right) and two
downward (for left) positions. These positions allow you
to signal a turn or a lane change.
To signal
a turn, move the lever all the way up or down.
When the
turn is finished, the lever will return automatically.
A
An arrow on the instrument
panel will flash in
the
direction of the turn or
lane change.
To signal a lane change, just raise or lower the lever
until the arrow starts to flash. Hold it there until
you
complete your lane change. The lever will return by
itself when you release
it.
As you signal a turn or a lane change, if the arrows don’t
flash
but just stay on, a signal bulb may be burned out
and other drivers won’t see your turn signal.
If a bulb is burned out, replace it to help avoid an
accident. If the arrows don’t go on at all when you
signal a turn, check the fuse (see “Fuses and Circuit
Breakers” in the Index) and for burned-out bulbs.
If you have a trailer towing option with added wiring for
the trailer lamps,
a different turn signal flasher is used.
With this flasher installed, the signal indicator will flash
even if a turn signal bulb is burned out. Check the front
and rear turn signal lamps regularly to make sure they
are working.
Headlamp High/Low Beam Changer
To change the headlamps from low beam to high or high
to low, pull the multifunction lever all the way toward
you. Then release it.
When the high beams are
on, this indicator light on
the instrument panel also
will be on.
2-30
Page 109 of 372
Sun Visors
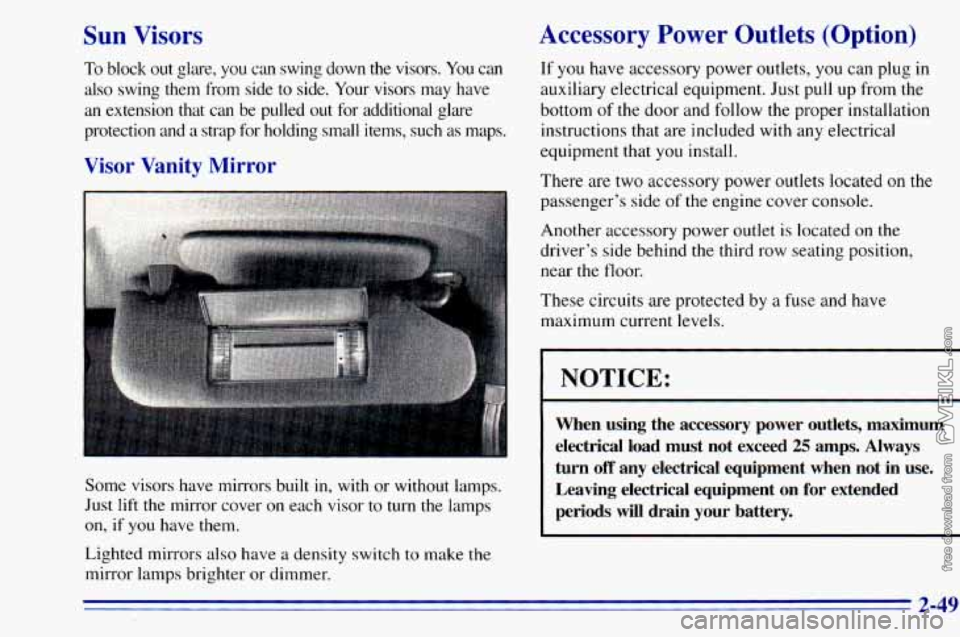
To block out glare, you can swing down the visors. You can
also swing them from side
to side. Your visors may have
an extension that can be pulled
out for additional glare
protection and
a strap for holding small items, such as maps.
Visor Vanity Mirror
I-
Some visors have mirrors built in, with or without lamps.
Just
lift the mirror cover on each visor to turn the lamps
on, if you have them.
Lighted mirrors also have a density switch to make
the
mirror lamps brighter or dimmer.
Accessory Power Outlets (Option)
If you have accessory power outlets, you can plug in
auxiliary electrical equipment. Just pull up from the
bottom
of the door and follow the proper installation
instructions that are included with any electrical
equipment that
you install.
There are two accessory power outlets located on the
passenger’s side
of the engine cover console.
Another accessory power outlet is located on the
driver’s side behind
the third row seating position,
near the floor.
These circuits are protected by
a fuse and have
maximum current levels.
I NOTICE:
~~
When using the accessory power outlets, maximum
electrical load must not exceed
25 amps. Always
turn
off any electrical equipment when not in use.
Leaving electrical equipment
on for extended
periods will drain your battery.
2-49
Page 191 of 372
Trailer Wiring Harness
If you have the optional trailering package, your vehicle
will have an eight-wire harness, including the center
high-mounted stoplamp battery feed wire. The harness
is stored on the passenger side
of the vehicle near the
rear wheel well. This harness
has a 30 amp battery feed
wire and no connector, and should be wired by a
qualified electrical technician. After choosing an
aftermarket trailer mating connector pair, have the
technician attach one connector to the eight-wire trailer
harness and the other connector to the wiring harness on
the trailer, Be sure the wiring harness on the trailer is
taped or strapped
to the trailer’s frame rail and leave it
loose enough
so the wiring doesn’t bend or break, but
not
so loose that it drags on the ground. The eight-wire
harness must be routed out
of your vehicle between the
rear door and the floor, with enough of the harness left
on both sides
so that the trailer or the body won’t pull it.
If you do not have the optional trailering package, your
vehicle will still have a trailering harness.
The harness is
located near the passenger’s side rear wheel well. It
consists of six wires that may be used
by after-market
trailer hitch installers. The technician can use the
following color code chart when connecting the wiring
harness to your trailer.
0 BROWN: Rear lamps.
YELLOW Left stoplamp and turn signal.
0 DARK GREEN: Right stoplamp and turn signal.
WHITE (Heavy Gage): Ground.
LIGHT GREEN: Back-up lamps.
0 WHITE (Light Gage): Center High-Mounted
0 BLUE: Auxiliary circuit (eight-wire harness only).
0 ORANGE: Fused auxiliary (eight-wire harness only).
xore the harness in its original place. Wrap the harness
together and
tie it neatly so it won’t be damaged.
Stoplamp.
4-37
Page 232 of 372
Doing Your Own Service Work
If you want to do some of your own service work, you’ll
want to get the proper GM Service Manual. It tells you
much more about how to service your vehicle than this
manual can.
To order the proper service manual, see
“Service and Owner Publications” in the Index.
Your vehicle has an air bag system. Before attempting
to do your own service work, see “Servicing Your
Air Bag-Equipped Vehicle” in the Index.
You should keep a record with all parts receipts and list
the mileage and the date
of any service work you
perform. See “Maintenance Record” in the Index.
I A CAUTION:
You can be injured and your vehicle could be
damaged if you try to do service work on
a
vehicle without knowing enough about it.
Be sure you have sufficient knowledge,
experience, and the proper replacement
parts and tools before you attempt any
vehicle maintenance task.
Be sure to use the proper nuts, bolts and
other fasteners. “English” and “metric”
fasteners can be easily confused. If you use
the wrong fasteners, parts can later break
or fall
off. You could be hurt.
6-2
Page 290 of 372
Electrical System
Add-on Electrical Equipment
NOTICE:
Don’t add anything electrical to your vehicle unless
you check with your dealer
first, Some electrical
equipment can damage your vehicle and the
damage wouldn’t be covered by your warranty. Some add-on electrical equipment can keep other
components from working as they should.
Your vehicle has an air bag system. Before attempting to
add anything electrical to your vehicle, see “Servicing
Your Air Bag-Equipped Vehicle” in the Index.
Headlamp Wiring
The headlamp wiring is protected by a circuit breaker in
the lamp switch. An electrical overload will cause the
lamps to
go on and off, or in some cases to remain off.
If this happens, have your headlamp wiring checked
right away.
Windshield Wiper Fuses
The windshield wiper motor is protected by a circuit
breaker and a fuse. If the motor overheats due to heavy
snow, etc., the wiper will stop until the motor cools. If
the overload is caused by some electricai problem and
not snow, etc.; be sure to get
it fixed.
Power Windows and Other Power Options
Circuit breakers in the fuse panel protect the power
windows and other power accessories. When the current
load is too heavy, the circuit breaker opens and closes,
protecting the circuit until the problem is fixed or
goes away.
6-60
Page 291 of 372
Fuses and Circuit Breakers
The wiring circuits in your vehicle are protected from
short circuits by a combination
of fuses, circuit breakers
and fusible thermal links. This greatly reduces the
chance of fires caused by electrical problems.
Look at the silver-colored band inside the fuse. If the
band is broken or melted, replace the fuse. Be sure you
replace a bad fuse with a new one
of the identical size
and rating.
If you ever have a problem
on the road and don’t have a
spare fuse,
you can borrow one that has the same
amperage. Just pick some feature of your vehicle that
you can get along without -- like the radio or cigarette
lighter
-- and use its fuse, if it is the correct amperage.
Replace it
as soon as you can.
There are two fuse blocks in your vehicle: one
is inside
the vehicle and one
is in the engine compartment.
Instrument Panel Fuse Block
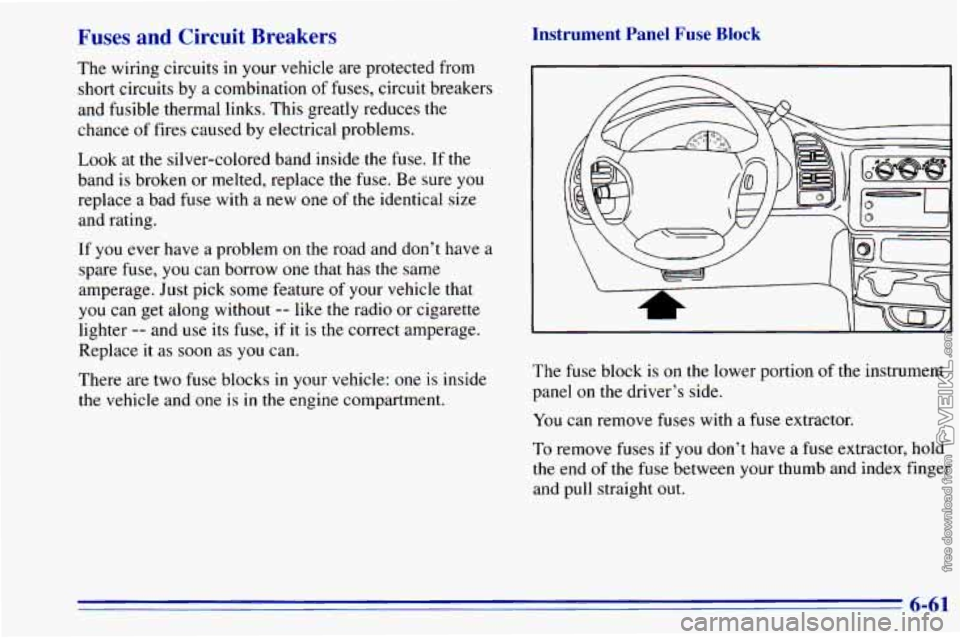
The fuse block is on the lower portion of the instrument
panel on the driver’s side.
You can remove fuses with a fuse extractor.
To remove fuses if you don’t have a fuse extractor, hold
the end of the fuse between your thumb and index finger
and pull straight out.
6-61