1996 BUICK PARK AVENUE maintenance schedule
[x] Cancel search: maintenance schedulePage 3 of 388
The 1996 Buick Park Avenue Owner’s Manual
Seats and Restraint Systems ............................................................. 1-1
Features and Controls .................................................................. 2-1
Comfort Controls and Audio Systems ..................................................... 3-1
This section tells you how to use your seats and safety belts properly. It also explains “SRS” system.
This section explains how to start and operate your Buick.
This section tells you how to adjust the ventilation and comfort controls and how to operate your
audio system.
Here you’ll find helpful information and tips about the road and how to drive under different conditions.
YourDrivingandtheRoad .............................................................. 4-1
ProblemsontheRoad .................................................................. 5-1
This section tells you what to do if you have a problem while driving, such as a flat tire or
overheated engine, etc.
Here the manual tells you how to keep your Buick’ running properly
and looking good.
This section tells you when to perform vehicle maintenance and what fluids and lubricants to use.
ServiceandAppearanceCare ............................................................ 6-1
Maintenanceschedule .................................................................. 7-1
Customer Assistance Information ........................................................ 8-1
This section tells you how to contact Buick for assistance and how to get service publications. It also
gives you information
on “Reporting Safety Defects” on page 8-7.
Index ........................................................................\
........ 9-1
Here’s an alphabetical listing of almost every subject in this manual. You can use it to quickly find
something you want
to read.
i
ProCarManuals.com
Page 211 of 388
When You Are Ready to Leave After
Parking on a Hill
1. Apply your regular brakes and hold the pedal down
while you:
Start your engine;
Shift into a gear; and
e Release the parking brake.
2. Let up on the brake pedal.
3. Drive slowly until the trailer is clear of the chocks.
4. Stop and have someone pick up and store the chocks.
Maintenance When Trailer Towing
Your vehicle will need service more often when you’re
pulling a trailer. See the Maintenance Schedule for more
on this. Things that are especially important in trailer
operation are automatic transaxle fluid (don’t overfill),
engine oil, belts, cooling system and brake adjustment.
Each
of these is covered in this manual, and the Index
will help
you find them quickly. If you’re trailering, it’s
a good idea to review these sections before you start
your trip.
Check periodically to see that all hitch nuts and bolts
are tight.
ProCarManuals.com
Page 260 of 388
Your Park Avenue Ultra has a 3800 Supercharged
engine. Buick chose supercharging rather than
turbocharging because Buick emphasizes smooth,
refined power.
The supercharger
is a device which is designed to pump
more air into the engine than it would normally use.
This air mixed with fuel creates increased engine power.
Since the supercharger is a pump and is driven from an
engine accessory drive belt, increased pressure is available at all driving conditions.
The Powertrain Control Module (PCM) works with a
vacuum control to regulate the increased pressure
required during specific driving conditions. When this increased pressure or boost is not desired, such as during
idling and light throttle cruising, the excess air that the
supercharger is pumping is routed through a bypass. All
of these controls working together provide high
performance character and fuel efficiency in the
3800 V6 Supercharged Buick engine.
The power steering pump and reservoir are mounted
on the rear (driver’s side)
of the engine block. See
“Maintenance Schedule” in the Index for when you
should check the fluid.
Engine Oil
If the CHECK OIL
LEVEL light on the
instrument panel
comes on, it means
CHECK OIL you need to check
LEVEL your engine oil level
right away.
For more information, see “Check Oil Level Light” in
the Index. You should check your engine oil level
regularly; this is an added reminder.
ProCarManuals.com
Page 266 of 388
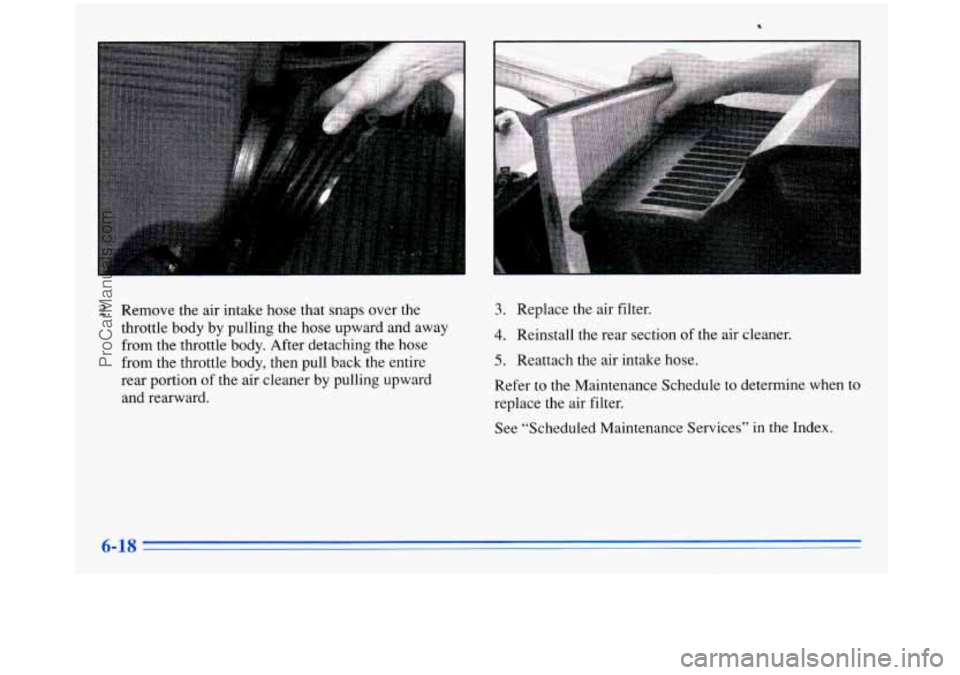
2. Remove the air intake hose that snaps over the
throttle body by pulling the hose upward and away from the throttle body. After detaching the hose
from the throttle body, then pull back the entire
rear portion
of the air cleaner by pulling upward
and rearward.
6-18
3. Replace the air filter.
4. Reinstall the rear section of the air cleaner.
5. Reattach the air intake hose.
Refer to the Maintenance Schedule to determine when to
replace the air filter.
See “Scheduled Maintenance Services”
in the Index.
ProCarManuals.com
Page 268 of 388
How to Check and Add Oil
Check oil only when the engine is cold. Allow the
engine to cool two to three hours after running.
r
I
If you remove the supercharger oil fill plug while
the engine is hot, pressure may cause hot oil to
blow out of the oil fill hole. You may be burned.
Do not remove the plug until the engine cools.
1. Remove the wiring harness shield.
2. Clean the area around the oil fill plug before
removing
it.
3. Remove the oil fill plug using a 3/16 Allen wrench.
4. The oil level is correct when it just reaches the
bottom
of the threads of the inspection hole.
5. Replace the oil plug with the O-ring in place. Torque
to
88 lb-in (10 N-m).
6. Replace wiring harness shield.
Automatic Transaxle Fluid
When to Check and Change
A good time to check your automatic transaxle fluid
level is when the engine oil is changed.
Change both the fluid and filter every
50,000 miles
(83 000 km) if the vehicle is mainly driven under one or
more
of these conditions:
0 In heavy city traffic where the outside temperature
regularly reaches
90 OF (32 O C) or higher.
0 In hilly or mountainous terrain.
0 When doing frequent trailer towing.
Uses such as found in taxi, police or delivery service.
If you do not use your vehicle under any of these
conditions, the fluid and filter do not require changing.
See “Scheduled Maintenance Services” in the
Index.
ProCarManuals.com
Page 271 of 388
How to Add Fluid
Refer to the Maintenance Schedule to determine what
kind of transaxle fluid to use. See “Recommended
Fluids and Lubricants” in the Index.
If the fluid level is low, add only enough
of the proper
fluid to bring the level into the cross-hatched area on
the dipstick.
1. Pull out the dipstick.
2. Using a long-neck funnel, add enough fluid at the
It doesn’t take much fluid, generally less than a pint
(0.5 L). Don’t ovel-fill. We recommend you use only
fluid labeled DEXRON@-111, because fluid with that
label is made especially for your automatic transaxle.
Damage caused by fluid other than DEXRON-I11 is
not covered by your new vehicle warranty.
dipstick hole to
bring it to the proper level.
After adding fluid, recheck the fluid level as
described under “How to Check.”
0 When the correct fluid level is obtained, push the
dipstick back in all the way.
Engine Coolant
The cooling system in your vehicle is filled with new
DEX-COOL
TM (orange-colored, silicate-free) engine
coolant. This coolant is designed to remain in your
vehicle for
5 years or 100,000 miles (166 000 km),
whichever occurs first.
The following explains your cooling system and how
to add coolant when
it is low. If you have a problem
with engine overheating, see “Engine Overheating” in
the Index.
A 50/50 mixture of water and the proper coolant for
your Buick will:
Give freezing protection down to -34°F (-37°C).
9 Give boiling protection up to 265 OF ( 129 O C).
Protect against rust and corrosion.
Help keep the proper engine temperature.
0 Let the warning lights and gages work as they should.
ProCarManuals.com
Page 276 of 388
Power Steering Fluid
When to Check Power Steering Fluid
It is not necessary to regularly check power steering fluid
unless you suspect there
is a leak in the system or you hear
an unusual noise. A fluid loss in this system could indicate
a problem. Have the system inspected and repaired. The
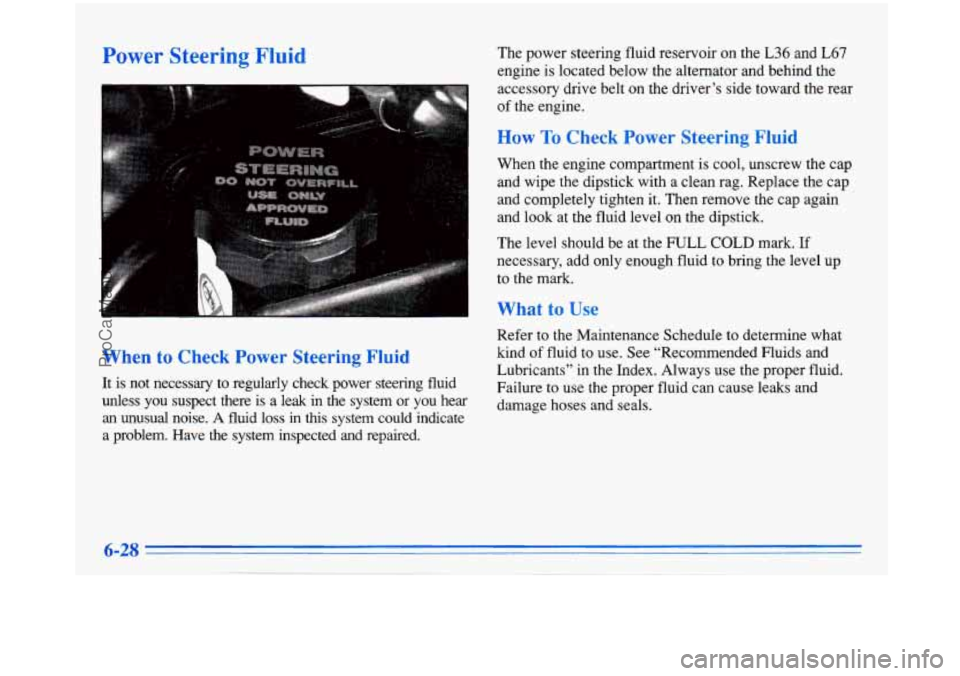
power steering fluid reservoir on the L36 and L67
engine is located below the alternator and behind the
accessory drive belt on the driver’s side toward the rear
of the engine.
How To Check Power Steering Fluid
When the engine compartment is cool, unscrew the cap
and wipe the dipstick with a clean rag. Replace the cap
and completely tighten
it. Then remove the cap again
and look at the fluid level on the dipstick.
The level should be at the FULL COLD mark.
If
necessary, add only enough fluid to bring the level up
to the mark.
What to Use
Refer to the Maintenance Schedule to determine what
kind of fluid
to use. See “Recommended Fluids and
Lubricants” in the Index. Always use the proper fluid.
Failure to use the proper fluid can cause leaks and
damage hoses and seals.
ProCarManuals.com
Page 289 of 388
Tire Inspection and Rotation ,
Tires should be inspected every 6,000 to 8,000 miles
(10 000 to 13 000 km) for any signs of unusual wear.
If unusual wear is present, rotate yourtires as soon as
possible and check wheel alignment.
Also check for
damaged tires or wheels. See “When It’s The for New
Tires” and “Wheel Replacement” later in this section for
more information. When
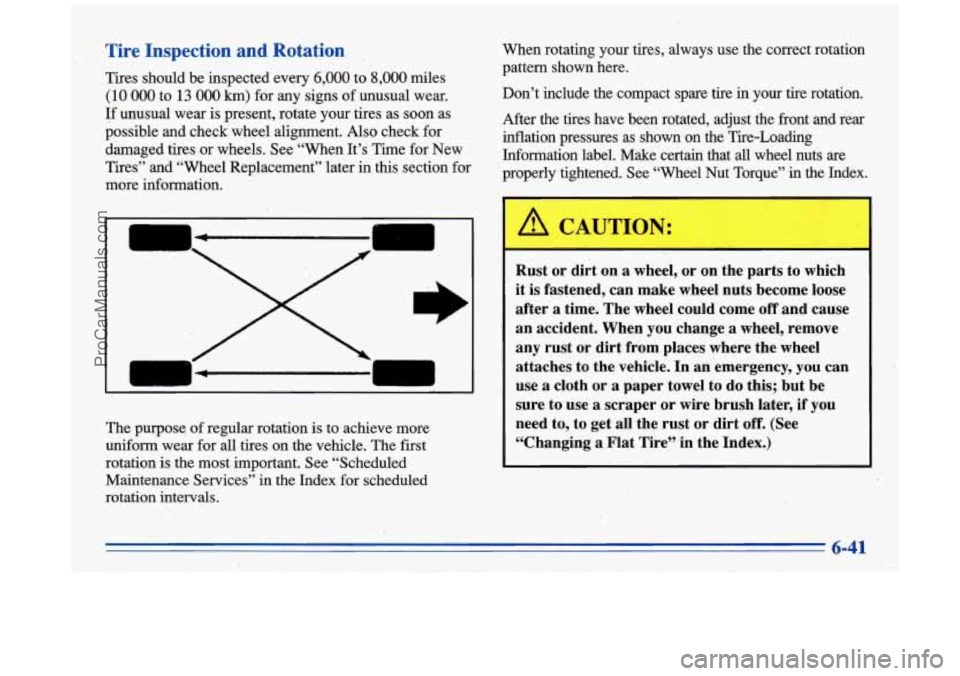
rotating your tires, always use the correct rotation
pattern shown here.
Don’t include the compact spare tire in your tire rotation.
After the tires have been rotated, adjust the front and rear
inflation pressures as shown on the Tire-Loading
Information label. Make certain that
all wheel nuts are
properly tightened. See “Wheel Nut Torque”
in the Index.
I I
The purpose of regular rotation is to achieve more
uniform wear for
all tires on the vehicle. The first
rotation is the most important. See “Scheduled
Maintenance Services”
in the Index for scheduled
rotation intervals.
A CAUTION:
I
Rust or dirt on a wheel, or on the parts to which
it
is fastened, can make wheel nuts become loose
after
a time. The wheel could come off and cause
an accident. When
you change a wheel, remove
any rust or dirt from places where the wheel
attaches
to the vehicle. In an emergency, you can
use
a cloth or a paper towel to do this; but be
sure to use a scraper or wire brush later, if you
need to, to get all the rust
or dirt off. (See
“Changing
a Flat Tire” in the Index.)
6-41
ProCarManuals.com