Page 108 of 390
Follow the proper steps to be sure your vehicle won’t
move. See “Shifting Into PARK (P)” in the Index.
If you’re pulling a trailer, see “Towing a Trailer” in the
Index.
Manual Windows
Use the manual crank to open and close the front
windows.
?ower Windows (Option)
2-38
ProCarManuals.com
Page 111 of 390
mrn Signal and Lane Change Indicator
OFF ON RESUME
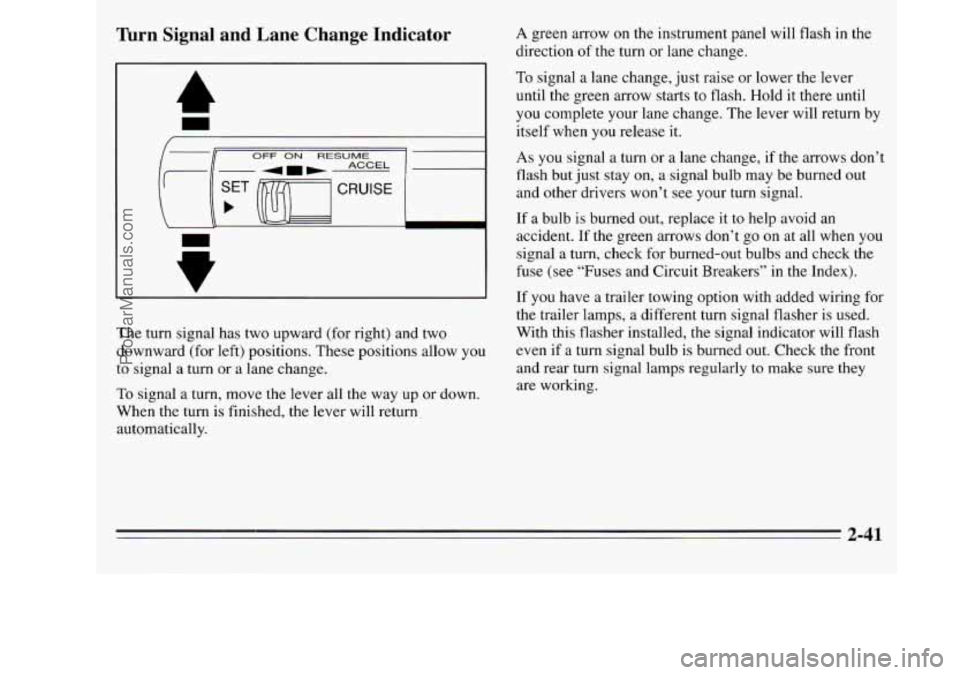
The turn signal has two upward (for right) and two
downward (for left) positions. These positions allow you
to signal a turn or a lane change.
To signal a turn, move the lever all the way up or down.
When the turn is finished, the lever will return,
automatically.
A green arrow on the instrument panel will flash in the
direction
of the turn or lane change.
To signal a lane change, just raise or lower the lever
until the green arrow starts to flash. Hold it there until
you complete your lane change. The lever will return by
itself when you release it.
As you signal a turn or a lane change, if the arrows don’t
flash but just stay on, a signal bulb may be burned out
and other drivers won’t
see your turn signal.
If a bulb
is burned out, replace it to help avoid an
accident. If the green arrows don’t go on at all when
you
signal a turn, check for burned-out bulbs and check the
fuse
(see “Fuses and Circuit Breakers” in the Index).
If you have a trailer towing option with added wiring for
the trailer lamps, a different turn signal flasher is used.
With this flasher installed, the signal indicator will flash
even if
a turn signal bulb is burned out. Check the front
and rear turn signal lamps regularly
to make sure they
are working.
2-41
ProCarManuals.com
Page 120 of 390
Headlamp High-Low Beam Changer
To change the headlamps from high to low beam, or low
to high, simply pull the turn signal lever all the way
toward you. Then release it.
When the high beams are on, a blue light on the
instrument cluster will
also be on.
Fog Lamps
Slide the lower lever on the lights control panel up to
turn
on the fog lamps, down to turn them off. An
indicator light next to the control will glow when the fog
lamps are on.
Your headlamps must be on for your fog lamps to go on.
Although your fog lamps will go off when your high
beams are on, high beams are not recommended for
driving in fog.
~
2-50
ProCarManuals.com
Page 128 of 390
Inside Daymight Rearview Mirror Convex Outside Mirror
Your passenger’s side mirror is convex.
A convex mirror’s surface is curved so you can see more
from the driver’s seat.
To reduce glare from lights behind you, pull the lever
toward you, to the night position.
To return the mirror to
the day position, push the lever away from
you.
2-58
ProCarManuals.com
Page 148 of 390
If the light comes on while you are driving, pull off the
road and stop carefully. You may notice that the pedal is
harder to push. Or, the pedal may go closer to the floor.
It may take longer
to stop. If the light is still on, or if the
anti-lock brake system warning light is flashing, have
the vehicle towed for service. (See “Anti-Lock Brake
System Warning Light” and “Towing Your Vehicle”
in
the Index.)
The brake system warning light will also come
on when
you set your parking brake, and it will stay on if your
parking brake doesn’t release fully. If it stays on after
your parking brake is fully released, it means you have a
brake problem.
Anti-Lock Brake System Warning Light
With the anti-lock brake system, this light will come on
when you start your engine and it will
stay on for three
seconds. That’s normal. If the light doesn’t come on,
have it fixed
so it will be ready to warn you if there is a
problem.
If the light flashes when you’re driving, you don’t have
anti-lock brakes and there could be
a problem with your
regular brakes. Pull
off the road and stop carefully. You
may notice that the pedal is harder to push. Or, the pedal
may go closer to the floor. It may take longer
to stop.
Have the vehicle towed for service. (See “Towing Your
Vehicle” in
the Index.)
2-78
ProCarManuals.com
Page 160 of 390
Air Conditioner
When the temperature outside is above freezing, the air
conditioner compressor will automatically condition the air when you press RECIRC (the A/C indicator light will glow),
DEFOG or DEF (the A/C indicator light will not glow).
Press A/C (the
A/C indicator light will glow) to condition
the air when you press UPPER, BI-LEV or
LOWER. To
turn off the air conditioner compressor
in these settings,
press A/C again (the indicator light will go off).
Each time
you turn on the ignition, the air conditioner
will default
to the setting you had selected before last
turning off the ignition.
When the air conditioner compressor is
on, you may
sometimes notice slight changes in your vehicle’s engine
performance and power. This
is normal. The system is
designed to help fuel economy while
it maintains the
desired cooling level.
The air conditioner removes moisture from the air,
so
you may sometimes notice water dripping from under
your vehicle when it is idling or after it has been turned
off. This is normal.
On very hot days,
your vehicle will cool down more
quickly and economically if you open the windows long
enough
to let hot, inside air escape. For all settings, adjust
the temperature control lever and fan speed as desired.
Directional Controls
RECIRC: Press to get maximum cooling or quick
cool-down
on very hot days. This setting recirculates
much of the air inside your vehicle. It should not be
used for long periods
of time because the air may
become too cold and dry.
Slide the temperature control lever down to the coolest
setting and adjust the fan speed as desired.
UPPER: For normal cooling on hot days, press A/C
along with UPPER. This setting cools outside air and
directs it through the instrument panel outlets. Adjust
the temperature of the air with the temperature control
lever.
BI-LEV: This setting is designed for use on sunny days
when the air is only moderately warm or cool. On days
like these, the sun may adequately warm your upper
body, but your lower body may
not be warm enough.
The BI-LEV setting directs outside air into your vehicle
in two ways. Cooler air is directed toward your upper
body through the front instrument panel outlets, while
warmed air is directed through the heater ducts at your
feet. At times this temperature difference may be more
apparent than others. For best results, slide the
temperature control lever to the middle position, and
then adjust for comfort.
3-2
ProCarManuals.com
Page 164 of 390
LOW MED
REAR FAN
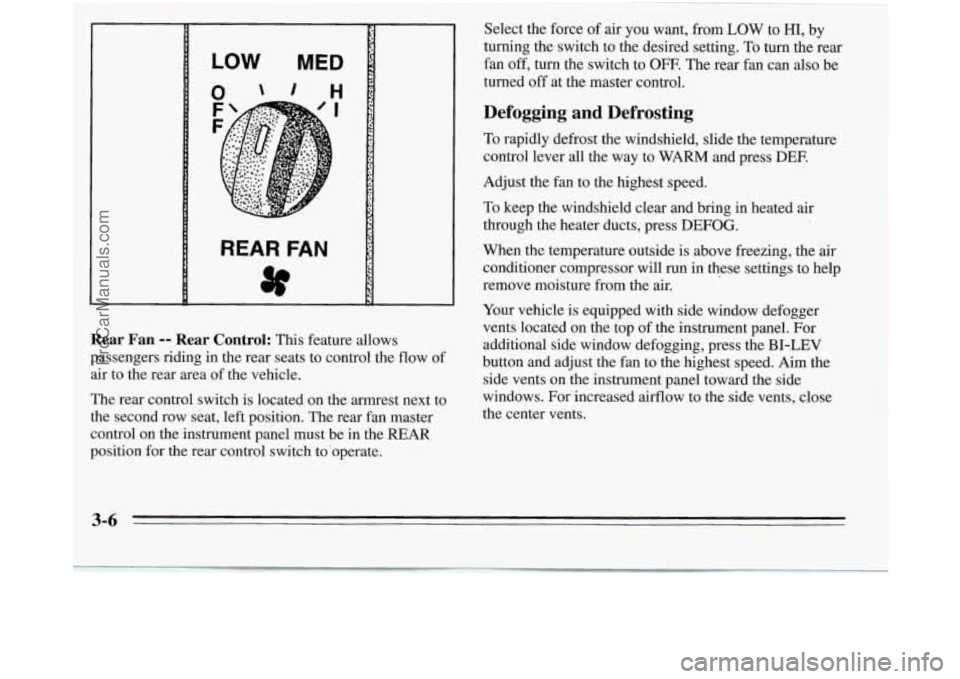
Rear Fan -- Rear Control: This feature allows
passengers riding in the rear seats to control the flow
of
air to the rear area of the vehicle.
The rear control switch is located on the armrest next to
the second row seat, left position. The rear fan master
control on the instrument panel must
be in the REAR
position for the rear control switch to'operate.
~~
Select the force of air you want, from LOW to HI, by
turning the switch
to the desired setting. To turn the rear
fan off, turn the switch to
OFF. The rear fan can also be
turned off at the master control.
Defogging and Defrosting
To rapidly defrost the windshield, slide the temperature
control lever all the way to WARM and press DEE
Adjust the fan to the highest speed.
To keep the windshield clear and bring
in heated air
through the heater ducts, press
DEFOG.
When the temperature outside is above freezing, the air
conditioner compressor will run in these settings to help
remove moisture from the air.
Your vehicle is equipped with side window defogger
vents located on the top of the instrument panel. For
additional side window defogging, press the
BI-LEV
button and adjust the fan to the highest speed. Aim the
side vents on the instrument panel toward the side
windows. For increased airflow to the side vents, close
the center vents.
3-6 -
ProCarManuals.com
Page 213 of 390
Towing a Trailer
NOTICE:
Pulling a trailer improperly can damage your vehicle and’result in costly repairs not covered by
your warranty.
To pull a trailer correctly, follow
the advice‘in this part, and see your Oldsmobile
retailer for important information about towing a trailer with your vehicle.
Your vehicle can tow a trailer. To identify what the
vehicle trailering capacity is for your vehicle, you
should read the information in “Weight of the Trailer”
that appears later in this section. But trailering is
different than just driving your vehicle by itself.
Trailering means changes in handling, durability, and
fuel economy. Successful, safe trailering takes correct
equipment, and it has to be used properly.
That’s the reason for this section. In it are many
time-tested, important trailering tips and safety rules.
Many of these are important for your safety and that of
your passengers.
So please read this section carefully
before you pull a trailer.
Load-pulling components such as the engine, transaxle,
wheel assemblies, and tires are forced to work harder
against the drag of the added weight. The engine is
required
‘to operate ai relatively highei speeds and under
greater loads, generating extra heat. What’s more, the
trailer adds considerably to wind resistance, increasing
the pulling requirements.
4-31
ProCarManuals.com