Page 21 of 390
Replacing Rear Bucket Seats CAUTION
-
-
- ~~ h
SECURELY LATCH SEAT IN mnoN TO HELP AVOID PERSONAL INJURY.
SHOWN. SEE OWNERS MANUAL FOR
ADDITIONAL INFORMATION.
Follow the diagram on the back of the seats to replace
the seats in their proper location.
The
LEFT ONLY seats fit only in the left positions. The
RIGHT ONLY seats fit only in the right positions. The
CENTER OR LEFT seat fits in the center position and
in either left position.
Don’t
try to place the seats in backward, because they
won’t latch that way.
1-11
ProCarManuals.com
Page 22 of 390
I. With the entire seat tilted forward, place the front
hooks
of the seat latch onto the front floor pins.
2. Firmly press the rear hooks onto the rear floor pins.
The seat should lock into position.
3. Push and pull on the seat to check that it is locked.
4. Lift the upper lever and pull up on the seatback until
it locks upright. Push and pull on the seatback
to be
sure that it is locked.
5. Check to see that you have put the seats into the
proper location, according to the label
on each seat.
If not, the seats may not latch properly, and your
passengers may not have the proper safety belt.
1-12
ProCarManuals.com
Page 28 of 390

How to Wear Safety Belts Properly
Adults
This part is only for people of adult size.
Be aware that there are special things to know about
safety belts and children. And there are different rules
for smaller children and babies.
If a child will be riding
in your Oldsmobile, see the part of this manual called
“Children.” Follow those rules for everyone’s.
protection.
First, you’ll want to know which restraint systems your
vehicle has.
We’ll start with the driver position.
Driver Position
This part describes the driver’s restraint system.
Lap-Shoulder Belt
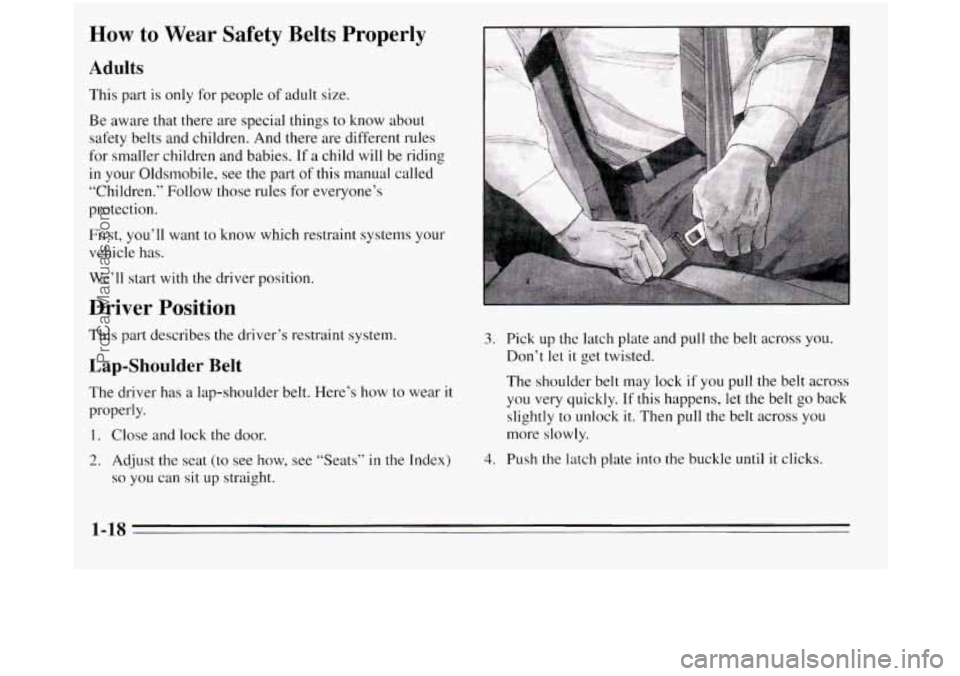
The driver has a lap-shoulder belt. Here’s how to wear it
properly.
1. Close and lock the door.
2. Adjust the seat (to see how, see “Seats” in the Index)
so you can sit up straight.
3. Pick up the latch plate and pull the belt across you.
Don’t let it get twisted.
The shoulder belt may lock if you pull the belt across
you very quickly,
If this happens, let the belt go back
slightly to unlock
it. Then pull the belt across you
more slowly.
4. Push the latch plate into the buckle until it clicks.
1-1s
ProCarManuals.com
Page 47 of 390
4. Position and release it the same way as the lap part
of a lap-shoulder belt.
If the belt isn’t long enough, see “Safety Belt
Extender” at the end of this section. Make Sure the
release button on the buckle is positioned
so you
would be able to unbuckle the safety belt quickly if
you ever had to.
0
I ADDITIONAL INFORMATION. rnGUOaQ1OOO
-
SECURELY IATCH SEAT IN LOCATION SHOWN. SEE OWNERS MANUAL FOR
The center position bucket seat is a CENTER OR LEFT
type seat. Because it is the only bucket seat with a lap
belt, and has a buckle
on only one side, there are certain
places a CENTER
OR LEFT type bucket seat should,
and should not, be used. See “Seats” in the Index. If the
CENTER OR LEFT bucket seat is used on the left side
of the vehicle, the person sitting there should use the
lap-shoulder belt. It works the same
way as the driver’s
safety belt. See “Driver Position” in the Index.
1-37
ProCarManuals.com
Page 50 of 390

Built-In Child Restraint (Option)
Each seat that has the built-in child restraint option fits in\
only one location in your vehicle.
To find out where a seat
that has a built-in child restraint must be located in your
vehicle,
see “Removable Rear Bucket Seats” in the Index.
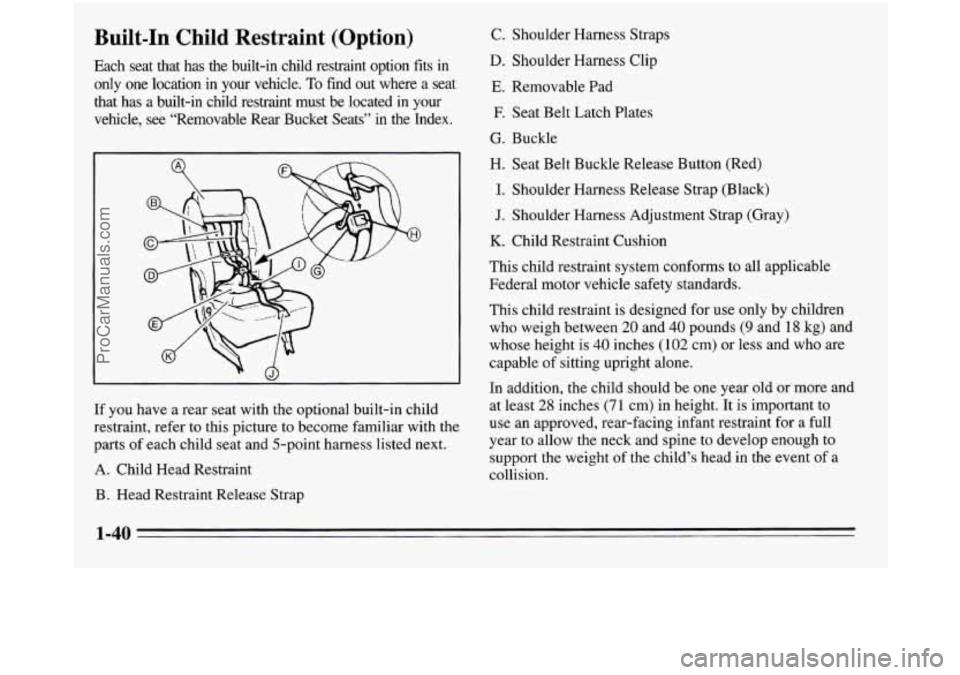
11 you have a rear seat with the optional built-in child
restraint, refer to this picture to become familiar with the
parts
of each child seat and 5-point harness listed next.
A. Child Head Restraint
B. Head Restraint Release Strap C.
Shoulder Harness Straps
D. Shoulder Harness Clip
E. Removable Pad
E Seat Belt Latch Plates
G. Buckle
H. Seat Belt Buckle Release Button (Red)
I. Shoulder Harness Release Strap (Black)
J. Shoulder Harness Adjustment Strap (Gray)
K. Child Restraint Cushion
This child restraint system conforms
to all applicable
Federal motor vehicle safety standards.
This child restraint
is designed for use only by children
who weigh between
20 and 40 pounds (9 and 18 kg) and
whose height is
40 inches (102 cm) or less and who are
capable of sitting upright alone.
In addition, the child should be one year old or more and
at least 28 inches (71 cm) in height. It is important to
use an approved, rear-facing infant restraint for a full
year to allow the neck and spine to develop enough to
support the weight of the child’s head in the event
of a
collision.
1-40
ProCarManuals.com
Page 136 of 390

To remove the ashtray for cleaning, close the lid, then
grasp the rear edge of the ashtray with your fingertips
and pull up and out, in a rocking motion.
To use the lighter, push it in all the way and let go.
When it’s ready, it will pop back by itself.
NOTICE:
Don’t hold a cigarette lighter in with your hand
while
it is heating. If you do, it won’t be able to
back away from the heating element when it’s
ready. That can make
it overheat, damaging the
lighter and the heating element.
NOTICE:
Don’t put papers and other things that burn into
your ashtrays.
If you do, cigarettes or other
smoking materials could set them
on fire, causing
damage.
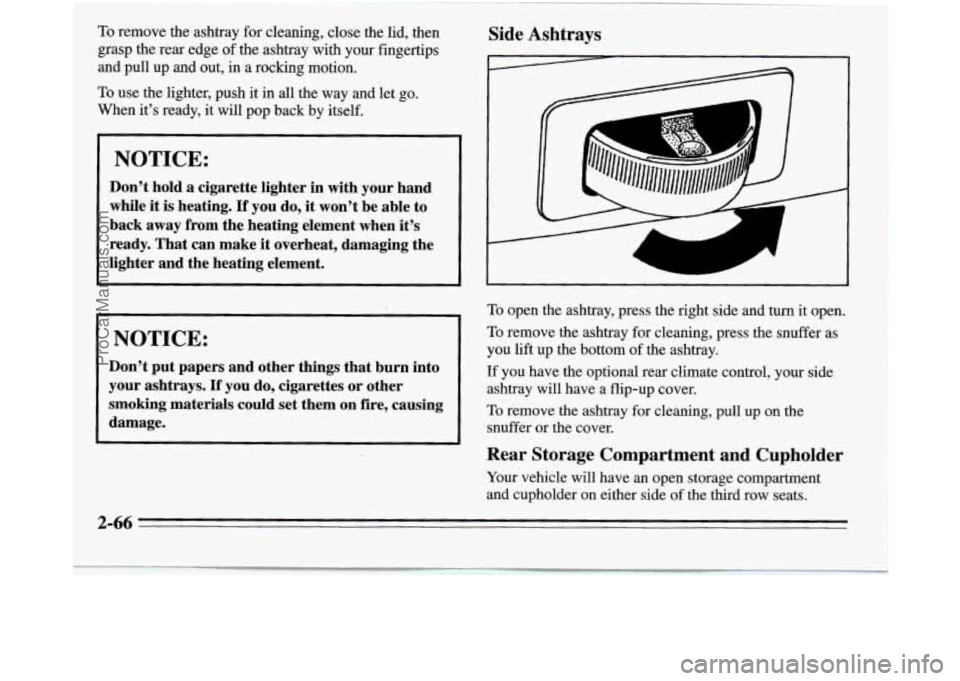
Side Ashtrays
L
To open the ashtray, press the right side and turn it open.
To remove the ashtray for cleaning, press the snuffer as
you lift up the bottom
of the ashtray.
If you have the optional rear climate control, your side
ashtray
will have a flip-up cover.
To remove the ashtray for cleaning, pull up on the
snuffer or the cover.
Rear Storage Compartment and Cupholder
Your vehicle will have an open storage compartment
and cupholder on either side of the third row seats.
2-66
ProCarManuals.com
Page 161 of 390

LOWER: This setting brings in most of the heated air through
the heater ducts, and some through the defroster vents.
DEFOG: This mode is particularly useful during cold or
inclement weather, because of your Silhouette’s larger
windshield area. Press this button to direct warmed
air to
the windshield and through the heater ducts.
DEF: Press this button to direct most of the warmed air
to the windshield and side window vents.
Rear Fan
OFF LO MED HI
Your vehicle will have a rear air outlet and a rear fan. To
maximize airflow to the rear of your vehicle, place the
left second row bucket seat in the forward position (see
“Adjusting Rear Seats” in the Index). This uncovers the
rear air outlet.
Please keep the area around the base of
the center
instrument panel console, and the area between and
under the front seats, free of objects. This could obstruct
airflow to the rear.
The control for the rear fan is located below the audio
system. Select LOWER, BI-LEV or DEFOG to direct
airflow
to the rear air outlet and to the rear side windows.
Use the temperature control lever to adjust the temperature
setting. Select the force
of air you want, from LO to HI, by
sliding the rear fan control to the desired setting.
To maintain a comfortable temperature in the rear area
without making the front passengers uncomfortable, adjust
the front fan speed first, then adjust the temperature setting.
To turn off the rear fan, slide the control to OFF.
3-3
ProCarManuals.com
Page 163 of 390

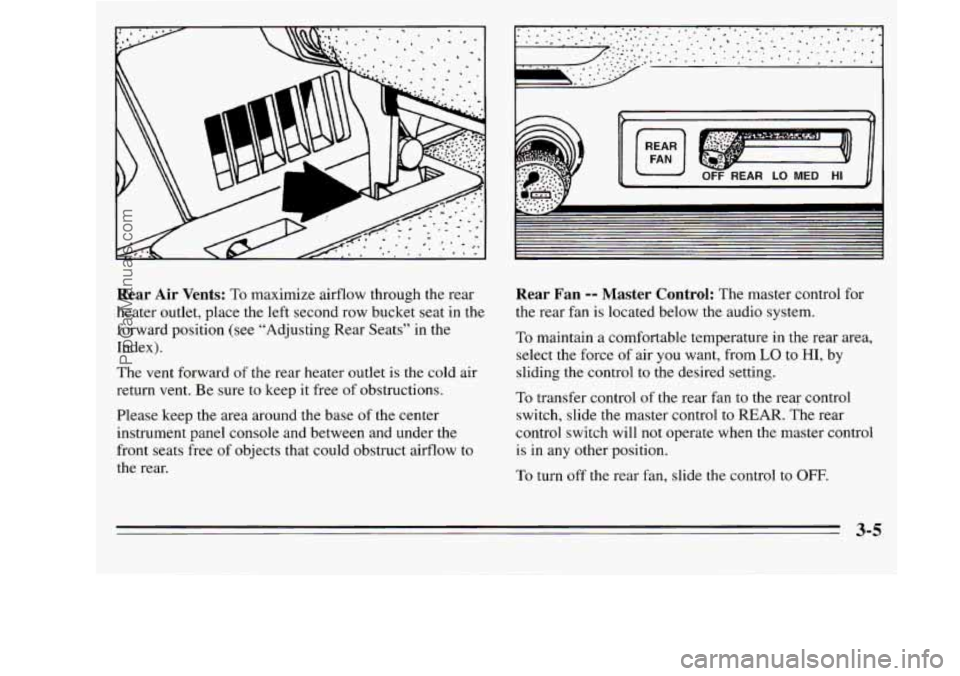
Rear Air Vents: To maximize airflow through the rear
heater outlet, place the left second row bucket seat in the
forward position (see “Adjusting Rear Seats” in the
Index).
The vent forward
of the rear heater outlet is the cold air
return vent. Be sure
to keep it free of obstructions.
Please keep the area around the base
of the center
instrument panel console and between and under the
front seats free
of objects that could obstruct airflow to
the rear.
I
OFF REAR LO MED HI
Rear Fan -- Master Control: The master control for
the rear fan is located below the audio system.
To maintain a comfortable temperature in the rear area,
select the force of air you want, from
LO to HI, by
sliding the control
to the desired setting.
To transfer control
of the rear fan to the rear control
switch, slide the master control
to REAR. The rear
control switch will not operate when the master control
is in any other position.
To turn off
the rear fan, slide the control to OFF.
3-5
ProCarManuals.com