1995 HONDA ODYSSEY brakes
[x] Cancel search: brakesPage 36 of 240
Indicator Lights
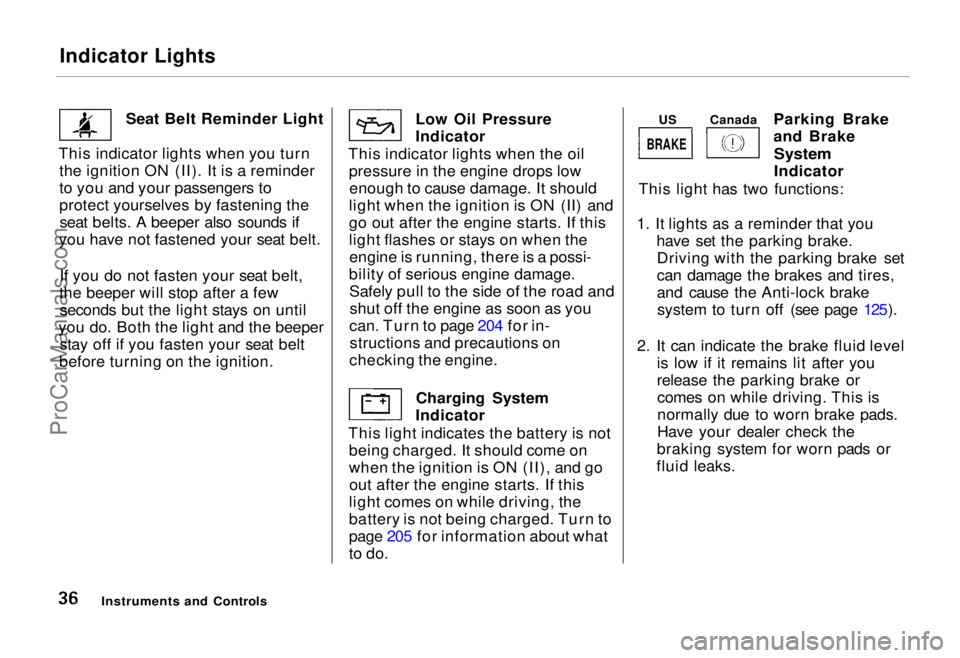
Seat Belt Reminder Light
This indicator lights when you turn the ignition ON (II). It is a reminder
to you and your passengers to
protect yourselves by fastening theseat belts. A beeper also sounds if
you have not fastened your seat belt.
If you do not fasten your seat belt,
the beeper will stop after a few seconds but the light stays on until
you do. Both the light and the beeper stay off if you fasten your seat belt
before turning on the ignition. Low Oil Pressure
Indicator
This indicator lights when the oil pressure in the engine drops lowenough to cause damage. It should
light when the ignition is ON (II) and
go out after the engine starts. If this
light flashes or stays on when the engine is running, there is a possi-
bility of serious engine damage. Safely pull to the side of the road andshut off the engine as soon as you
can. Turn to page 204 for in- structions and precautions on
checking the engine.
Charging System
Indicator
This light indicates the battery is not being charged. It should come on
when the ignition is ON (II), and goout after the engine starts. If this
light comes on while driving, the
battery is not being charged. Turn to
page 205 for information about what
to do. Parking Brake
and Brake
System
Indicator
This light has two functions:
1. It lights as a reminder that you have set the parking brake.Driving with the parking brake set
can damage the brakes and tires,
and cause the Anti-lock brakesystem to turn off (see page 125).
2. It can indicate the brake fluid level is low if it remains lit after you
release the parking brake orcomes on while driving. This is
normally due to worn brake pads.
Have your dealer check the
braking system for worn pads or
fluid leaks.
Instruments and Controls
BRAKE
US
CanadaProCarManuals.comMain Menu Table of Contents s t
Page 68 of 240
Parking Brake, Digital Clock
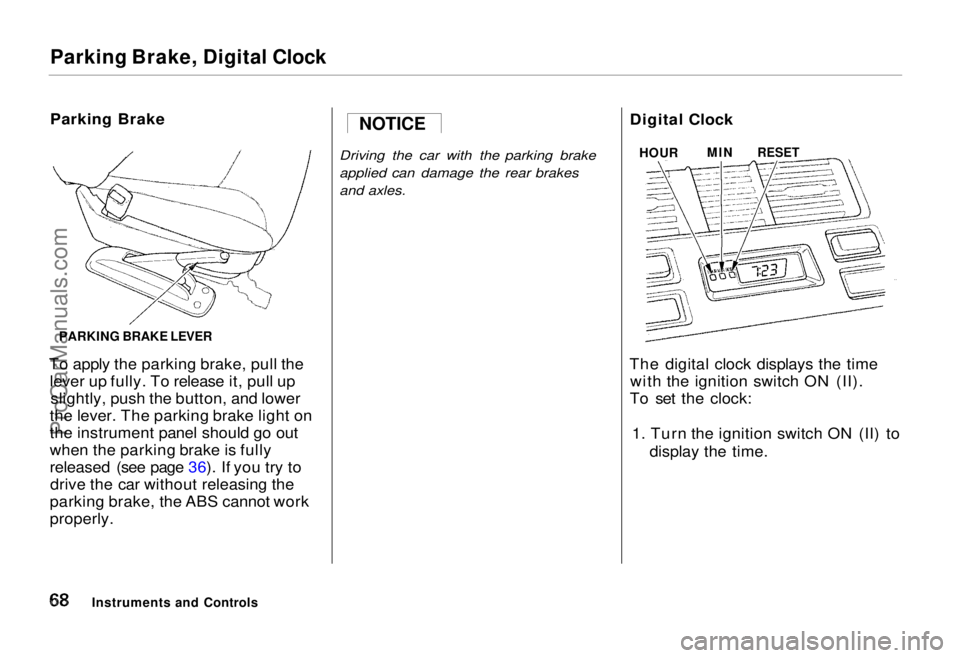
Parking Brake
To apply the parking brake, pull the lever up fully. To release it, pull upslightly, push the button, and lower
the lever. The parking brake light on
the instrument panel should go out
when the parking brake is fully
released (see page 36). If you try to drive the car without releasing the
parking brake, the ABS cannot work
properly.
Driving the car with the parking brake
applied can damage the rear brakes
and axles.
Digital Clock
The digital clock displays the time with the ignition switch ON (II).
To set the clock:
1. Turn the ignition switch ON (II) to display the time.
Instruments and Controls NOTICE
HOUR
MIN
RESET
PARKING BRAKE LEVERProCarManuals.comMain Menu Table of Contents s t
Page 108 of 240
Break-in Period, Gasoline
Break-in Period
Help assure your car's future
reliability and performance by paying extra attention to how you drive
during the first 1,000 km (600 miles).
During this period:
Avoid full-throttle starts and rapid
acceleration.
If you need to add oil, use the engine oil recommended in this
owner's manual.
Avoid hard braking. New brakes need to be broken-in by moderate
use for the first 300 km (200
miles).
You should follow these same re- commendations with an overhauledor exchanged engine, or when the
brakes are relined.
Gasoline
Your Honda operates most effec- tively on unleaded gasoline with a
pump octane number of 86 or higher.Use of a lower octane gasoline can
cause a persistent, heavy metallic
rapping noise in the engine that can
lead to mechanical damage.
We recommend gasolines containing detergent additives that help prevent
fuel system and engine deposits.
Using gasoline containing lead will
damage your car's emission controls.
This contributes to air pollution and can void certain parts of your
warranty. Oxygenated Fuels
Some conventional gasolines are
being blended with alcohol or an ether compound. These gasolines
are collectively referred to as
oxygenated fuels. To meet clean airstandards, some areas of the United
States and Canada use oxygenated
fuels to help reduce emissions.
If you use an oxygenated fuel, besure it is unleaded and meets the
minimum octane rating requirement.
Before using an oxygenated fuel, try
to confirm the fuel's contents. Some states/provinces require this
information to be posted on the
pump.
Before DrivingProCarManuals.comMain Menu Table of Contents s t
Page 117 of 240
Driving
This section gives you tips on starting the engine under various
conditions, and how to operate the
automatic transmission. It also includes important information on
your car's braking system and facts
you need if you are planning to tow a trailer.
Preparing to Drive......................... 118
Starting the Engine........................ 119
Starting in Cold Weather at High Altitude ..................... 119
Automatic Transmission............... 120 Shift Lever Positions................. 120
Maximum Speeds...................... 123
Shift Lock Release..................... 123
The Braking System...................... 124 Brake Wear Indicators.............. 124
Brake System Design................ 124
Anti-lock Brakes........................ 125
Driving in Bad Weather................ 126
Towing a Trailer............................ 128
DrivingProCarManuals.comMain Menu s t
Page 124 of 240
The Braking System
Your Honda is equipped with disc brakes at all four wheels. The
braking system is power-assisted to reduce the effort needed on the
brake pedal.
Put your foot on the brake pedal only
when you intend to brake. Resting
your foot on the pedal keeps the brakes applied lightly, causing them
to build up heat. Heat build-up canreduce how well your brakes work. It
also keeps your brake lights on all
the time, confusing drivers behind
you.
Constant application of the brakes
when going down a long hill builds up heat and reduces their effective-
ness. Use the engine to assist the
brakes by downshifting to a lower
gear and taking your foot off the accelerator pedal. Check your brakes after driving
through deep water. Apply the
brakes moderately to see if they feel normal. If not, apply them gently and
frequently until they do. Since a
longer distance is needed to stop
with wet brakes, be extra cautious and alert in your driving.
Brake Wear Indicators
All four brakes have audible brake wear indicators.
When the brake pads need replacing, you will hear a distinctive metallic "screeching" sound when you apply
the brakes. If you do not have the
brake pads replaced, they will begin screeching all the time.
Your brakes may sometimes squeal or squeak when you apply them
lightly. Do not confuse this with the
brake wear indicators. They make a
very audible "screeching". Brake System Design
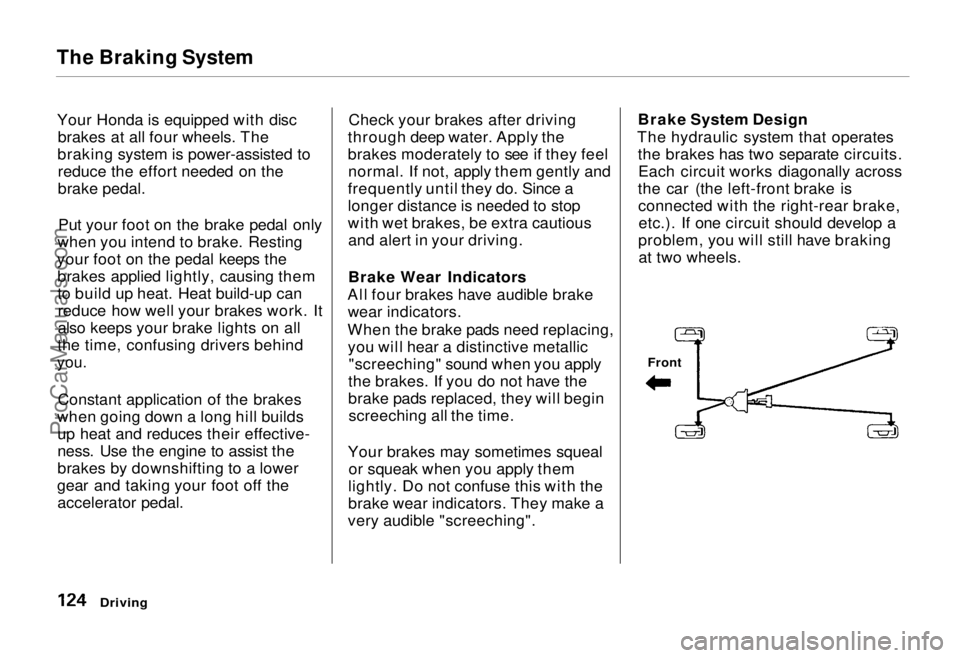
The hydraulic system that operates the brakes has two separate circuits.Each circuit works diagonally across
the car (the left-front brake is connected with the right-rear brake,etc.). If one circuit should develop a
problem, you will still have braking at two wheels.
Driving
FrontProCarManuals.comMain Menu Table of Contents s t
Page 125 of 240
The Braking System
If this happens, you will immediately
notice that the brake pedal goes down much farther and you need to
press on it much harder. A much
longer distance will be needed to stop the car.
Slow the car by downshifting to a
lower gear and removing your foot
from the accelerator pedal. Pull to the side of the road as soon as it issafe. Because of the longer stopping
distance needed, brake system
failure is very hazardous. It is best to
have your car towed, but if you must drive the car in this condition, be
extremely cautious. Have your car
repaired as soon as possible.
Anti-lock Brakes
All U.S. models and the Canadian six-passenger model have an Anti-lockBrake System (ABS) as standard
equipment. It is optional on the
Canadian seven-passenger model.
ABS helps you maintain steering control. It does this by helping you to
prevent the wheels from locking up and skidding.
The ABS is always "On". It requires no special effort or driving technique.
You will feel a pulsation in the brake pedal when the ABS activates.
Activation varies with the amount of traction your tires have. On dry
pavement, you will need to press on
the brake pedal very hard before you
feel the pedal pulsation that means
the ABS has activated. However, youmay feel the ABS activate immedi-
ately if you are trying to stop on
snow or ice. Under all conditions, the
ABS is helping to prevent the wheels from locking so you can retainsteering control. You should con-
tinue to press on the brake pedal
with the same force.
You may feel a slight movement of the brake pedal just after you start
the engine. This is the ABS working. ABS INDICATOR*
* U.S. indicator shown
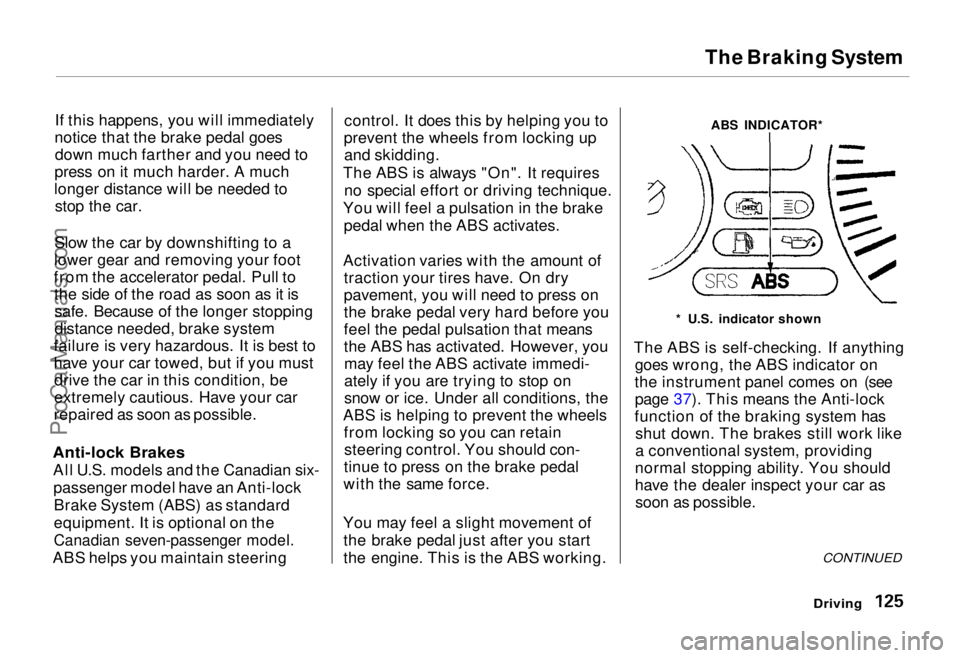
The ABS is self-checking. If anything goes wrong, the ABS indicator on
the instrument panel comes on (see page 37). This means the Anti-lock
function of the braking system has shut down. The brakes still work like
a conventional system, providing
normal stopping ability. You should
have the dealer inspect your car as soon as possible.
CONTINUED
DrivingProCarManuals.comMain Menu Table of Contents s t
Page 126 of 240
The Braking System, Driving in Bad Weather
A car with ABS may require a longer
distance to stop on loose or uneven
surfaces than an equivalent car with-
out Anti-lock. The ABS cannot make
up for road conditions or bad judg-
ment. It is still your responsibility to
drive at reasonable speeds for
weather and traffic conditions, and to leave a margin of safety.
For a technical description of the
ABS hardware, refer to page 220. Driving in Bad Weather
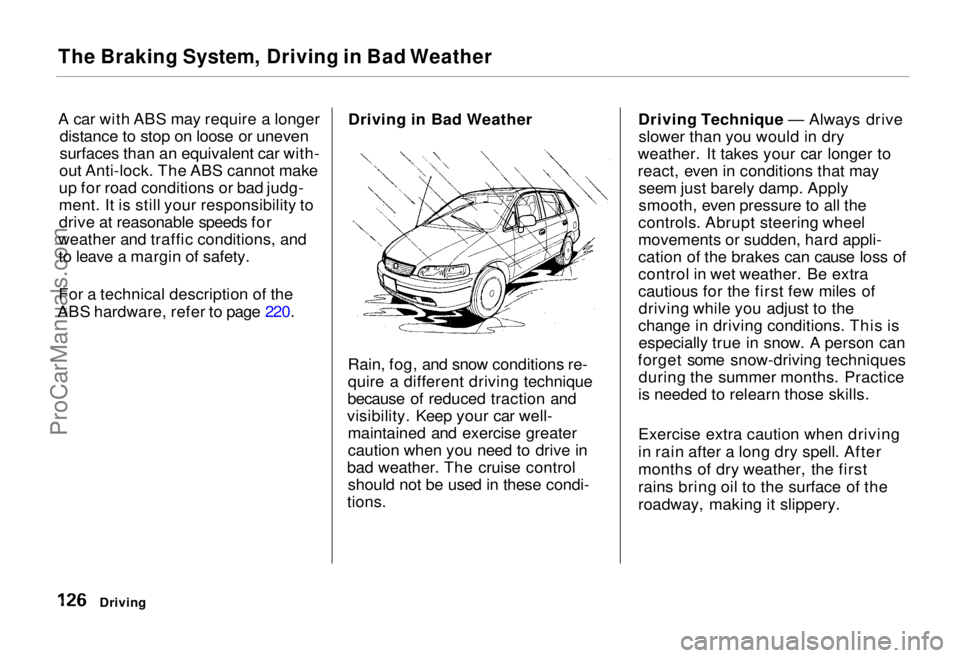
Rain, fog, and snow conditions re-
quire a different driving technique
because of reduced traction and
visibility. Keep your car well- maintained and exercise greater
caution when you need to drive in
bad weather. The cruise control should not be used in these condi-
tions. Driving Technique — Always drive
slower than you would in dry
weather. It takes your car longer to
react, even in conditions that may seem just barely damp. Apply
smooth, even pressure to all the
controls. Abrupt steering wheel
movements or sudden, hard appli-
cation of the brakes can cause loss of
control in wet weather. Be extra
cautious for the first few miles of driving while you adjust to the
change in driving conditions. This is especially true in snow. A person can
forget some snow-driving techniques during the summer months. Practice
is needed to relearn those skills.
Exercise extra caution when driving
in rain after a long dry spell. After
months of dry weather, the first
rains bring oil to the surface of the
roadway, making it slippery.
DrivingProCarManuals.comMain Menu Table of Contents s t
Page 130 of 240

Towing a Trailer
MirrorsMany states and provinces have laws
requiring special outside mirrors
when you are towing a trailer. Check
the laws in your area. You may want
to install mirrors, even if they are not required. Hook up the trailer and see
how much it obscures your ability to see behind you with the standard
mirrors. If you cannot see directly
behind you, or have a large blind spot next to the trailer or the car,
you should install mirrors intended for towing.
Connecting the Trailer
Most trailers that have a gross
weight of 450 kg (1,000 Ibs) do not have their own braking system. If
you are thinking of getting a trailer that does have brakes, make sure
they are electrically-operated. There
are no provisions in your car to tap
into its hydraulic braking system.
Any attempt to attach the trailer's brakes to your car's hydraulicsystem, no matter how successful it
may seem, will lower braking effectiveness and create a potential
hazard.
Always use a safety chain when
towing a trailer. Connect the safetychain securely at both ends. Makesure the chain crosses under the
tongue so it will catch the trailer if it
becomes unhitched. Leave enough slack in the chain so it can't bind in asharp turn. Do not let it drag on the
ground.
DrivingProCarManuals.comMain Menu Table of Contents s t