1995 CADILLAC FLEETWOOD manual radio set
[x] Cancel search: manual radio setPage 10 of 306
Downloaded from www.Manualslib.com manuals search engine advances such as air suspension, memory seat, '
automatic electric door locks, transistor radio, a b;
stainless steel roof and low profile tires.
I
~ ....
For the 1948 model, Cadillac introduced the legendary
tail
fin which once more set the trend in automotive
styling for nearly
two decades. This was closely
followed with the two door hardtop Coupe DeVille and
the industry's first modern overhead valve, high compression V8 engine on the 1949 model.
Engineering innovations, conveniences and styling dominated the
'50s and '60s. Cruise control, automatic
climate control, tilt and telescoping steering wheels,
twilight sentinel and four door hard tops all debuted in
these years. In 1957 the Eldorado Brougham featured
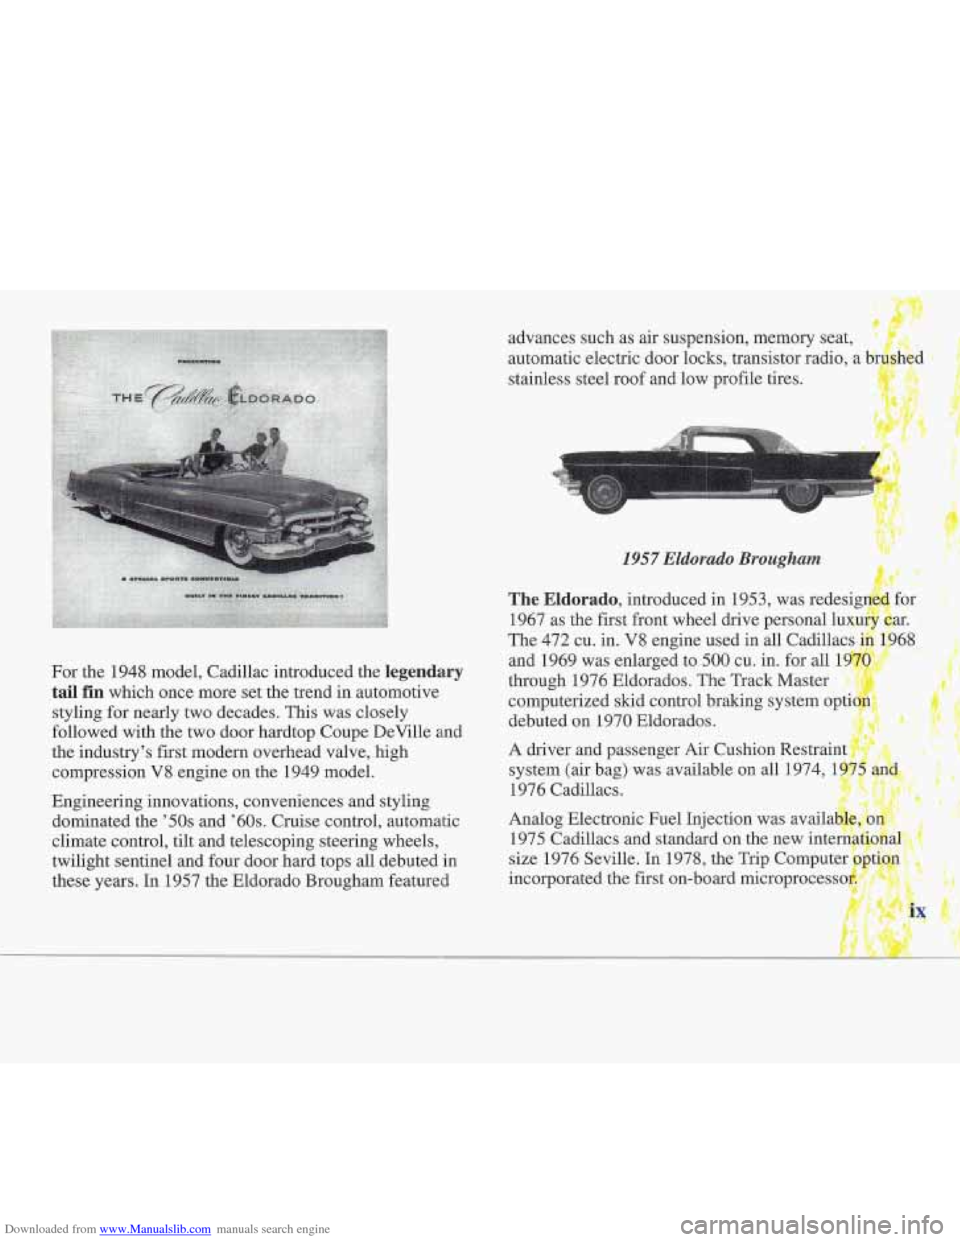
1957 Eklorado Brougham
The Eldorado, introduced in 1953, was
1967 as the first front wheel drive perso
The 472 cu. in. V8 engine used in all Cadilla
and 1969 was enlarged to
500 cu. in. for all 1
through 1976 Eldorados. The Track Ma
computerized skid control braking
sys
debuted on 1970 Eldorados.
A driver and passenger Air Cushion Restraint
system (air bag) was available on all 1974,
1
1976 Cadillacs.
Analog Electronic
Fuel Injection was
1975 Cadillacs and standard on the ne
Page 132 of 306
Downloaded from www.Manualslib.com manuals search engine AM-FM Stereo with Cassette Player
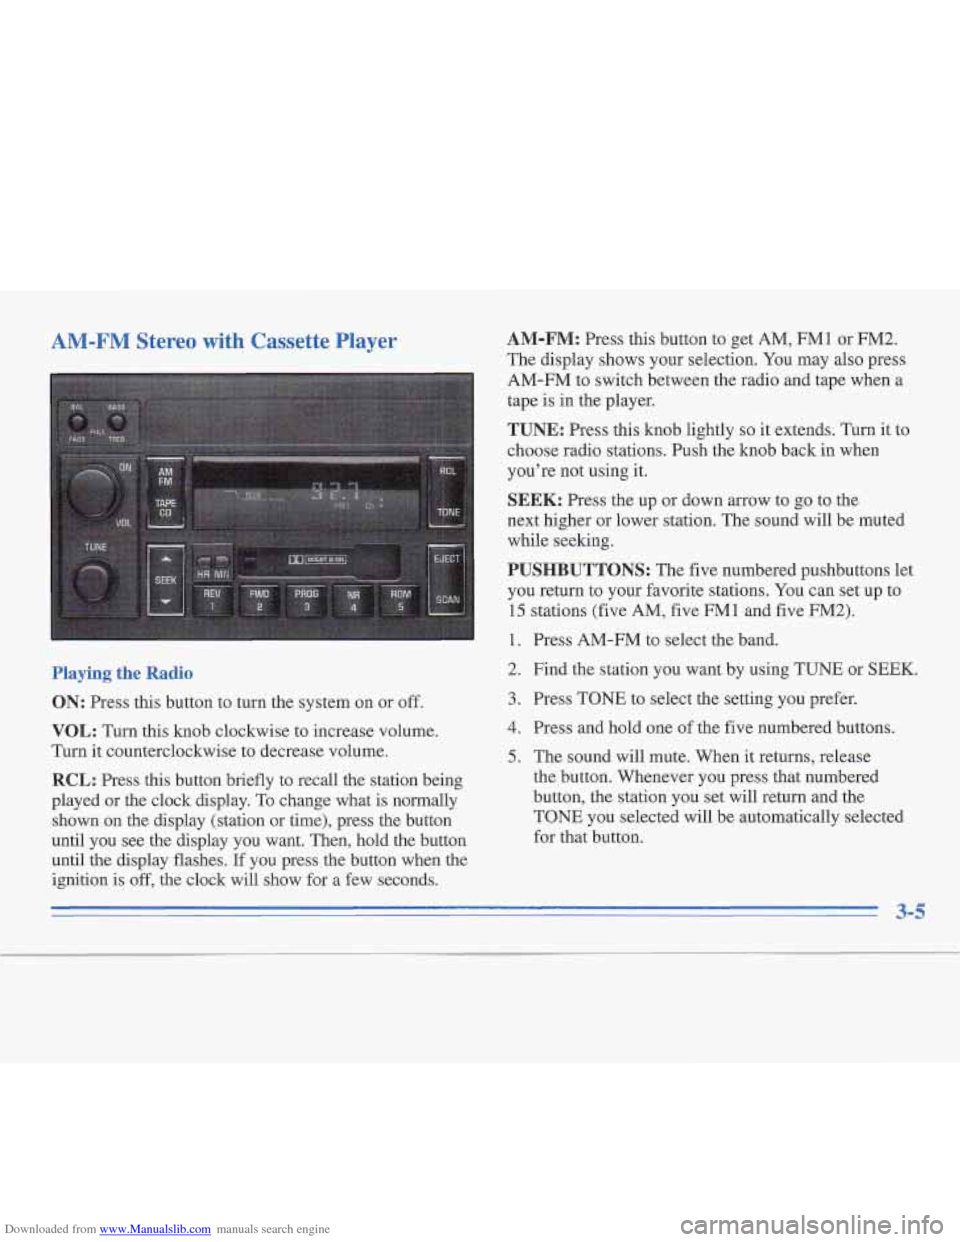
Playing the Radio
ON: Press this button to turn the system on or off.
VOL: Turn this knob clockwise to increase volume.
Turn it counterclockwise to decrease volume.
RCL: Press this button briefly to recall the station being
played or the clock display. To change what is normally
shown
on the display (station or time), press the button
until you see the display you want. Then, hold the button
until the display flashes.
If you press the button when the
ignition
is off, the clock will show for a few seconds.
AM-FM: Press this button to get AM, FM1 or FM2.
The display shows your selection. You may also press
AM-FM to switch between the radio and tape when a
tape
is in the player.
TUNE: Press this knob lightly so it extends. Turn it to
choose radio stations. Push the knob back in when
you’re not using it.
SEEK: Press the up or down arrow to go to the
next higher or lower station. The sound will be muted
while seeking.
PUSHBUTTONS: The five numbered pushbuttons let
you return to your favorite stations. You can set up to
15 stations (five AM, five FMl and five FM2).
1. Press AM-FM to select the band.
2. Find the station you want by using TUNE or
SEEK.
3. Press TONE to select the setting you prefer.
4. Press and hold one of the five numbered buttons.
5. The sound will mute. When it returns, release
the button. Whenever you press that numbered
button,
the station you set will return and the
TONE you selected will be automatically selected
for that button.
3-5
Page 133 of 306
Downloaded from www.Manualslib.com manuals search engine TONE: This feature allows you to choose preset treble
and bass equalization settings designed for jazz, vocal,
pop, rock and classical stations. JAZZ will appear on the
display when you first press TONE. Each time you press
it, another setting will appear on the display. Press
it
again after classic appears, and MANUAL will appear.
Tone control will return to the TREB and BASS knobs.
Also, if you use the TREB and BASS knobs, control
will return to them and MANUAL will appear.
SCAN: Press and release this button to listen to stations
for a few seconds. The radio will go to a station, stop for
a few seconds, then go on to the next station. Press
SCAN again to stop scanning. The sound will be muted
while scanning, and SCAN will appear on the display. If
you press SCAN
for more than two seconds, the radio
will change to PSCAN mode. PSCAN will appear on
the display.
PSCAN: Press SCAN for more than two seconds for
PSCAN to appear on the display. The radio will go to
the first preset station, stop for a few seconds, then
go to the next preset station. Press SCAN again to
stop scanning.
BASS: Press this knob lightly so it extends. Turn the
knob clockwise to increase bass and counterclockwise to
decrease bass. The middle position is a detent. Push the
knob back in when you’re not using
it.
TREB: Press this knob lightly so it extends. Then pull
the knob all the way out. Turn it clockwise to increase
treble and counterclockwise to decrease treble. The
middle position is a detent. Push the knob back in when
you’re not using it.
BAL: Press this knob lightly so it extends. Turn the
knob to move the sound to the left or right speakers. The
middle position is a detent and balances the speakers.
Push the knob back in when you’re not using it.
FADE: Press this knob lightly so it extends. Then pull
the knob all the way out. Turn it to move the sound to
the front or rear speakers. The middle position is a
detent and balances the speakers. Push the knob back in
when you’re not using it.
Playing a Cassette Tape
The longer side with the tape visible should face to the
right. If the ignition is on, but the radio
is off, the tape
will begin playing. If you hear nothing or hear a garbled
sound the tape may not be in squarely. Press EJECT to
remove the tape and start over.
3-6
Page 134 of 306
Downloaded from www.Manualslib.com manuals search engine If ERR or E and a number appear on the display, the
tape won’t play because of an error.
E10: The tape is tight and the player can’t turn the
tape hubs. Remove the tape. Hold the tape with the
open end down and try to
turn the right hub
counterclockwise with a pencil. Turn the tape over
and try to turn the right hub. If the hubs do not turn
easily, your tape may be damaged and should not be
used in
the player. Try a new tape to make sure your
player is working properly.
Ell: The tape is broken.
a E12: There is a communication problem.
While the tape is playing, use the VOL, FADE, BAL,
TREB and BASS controls just as you do for the radio.
Other controls may have different functions when a tape
is inserted. The display will show TP and an arrow to
show which side of
the tape is playing.
Your tape bias is set automatically. When a metal
or
chrome tape is inserted, HI BIAS appears on the display.
If you want to insert a tape when the ignition is off, first
press EJECT or RCL.
SEEK: Press the up or down arrow to search for the
next or previous selection
on the tape. Your tape must
have at least three seconds of silence between each selection for
SEEK to work. The sound
will be muted
while seeking.
SCAN: Press this button to listen to each selection for a
few seconds. The tape will go to the next selection, stop
for a few seconds, then go to the next selection. Press
SCAN again to stop scanning. The sound will be muted
while scanning and SCAN will appear
on the display.
REV (1): Press this button to reverse rapidly to another
part of the tape. Press it again to play the tape. While
reversing the tape, the radio will play. Use the TUNE
knob to change the radio station while reversing.
FWD (2): Press this button to advance quickly to
another part of the tape. Press the button again to
play the tape. While forwarding the tape, the radio
will play. Use the TUNE knob to change the radio
station while reversing.
PROG (3): Press this button to change the side of the
tape that is playing.
NR (4): Press this button to reduce background noise.
The double-D symbol will appear on the display.
Dolby@ Noise Reduction is manufactured under a
license from Dolby Laboratories Licensing Corporation.
Dolby and the doable-D symbol are trademarks of
Dolby Laboratories Licensing Corporation.
3-7
Page 135 of 306
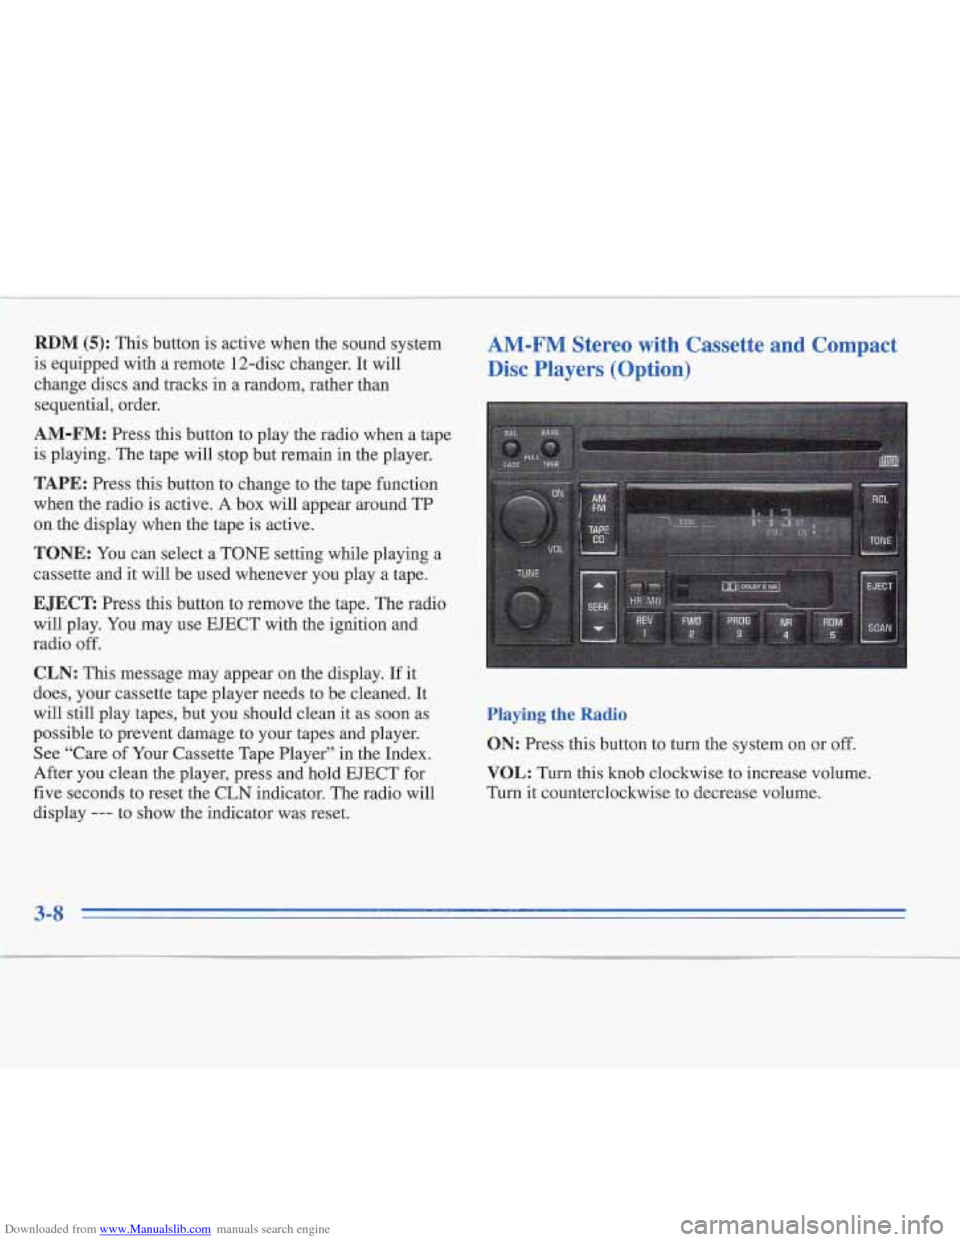
Downloaded from www.Manualslib.com manuals search engine RDM (5): This button is active when the sound system
is equipped with a remote 12-disc changer. It will
change discs and tracks in a random, rather than
sequential, order.
AM-FM: Press this button to play the radio when a tape
is playing. The tape will stop but remain in the player.
TAPE: Press this button to change to the tape function
when the radio is active.
A box will appear around TP
on the display when the tape is active.
TONE: You can select a TONE setting while playing a
cassette and it will be used whenever you play a tape.
E JECE Press this button to remove the tape. The radio
will play. You may use
EJECT with the ignition and
radio
off.
CLN: This message may appear on the display. If it
does, your cassette tape player needs to be cleaned.
It
will still play tapes, but you should clean it as soon as
possible
to prevent damage to your tapes and player.
See “Care of Your Cassette Tape Player” in the Index.
After you clean the player, press and hold
EJECT for
five seconds to reset the
CLN indicator. The radio will
display
--- to show the indicator was reset.
AM-FM Stereo with Cassette and Compact
Disc Players (Option)
Playing the Radio
ON: Press this button to turn the system on or off.
VOL: Turn this knob clockwise to increase volume.
Turn it counterclockwise
to decrease volume.
3-8
Page 136 of 306
Downloaded from www.Manualslib.com manuals search engine RCL: Press this button briefly to recall the station being
played or
the clock display. To change what is normally
shown on
the display (station or time), press the button
until you see the &splay you want. Then, hold the button
until the display flashes.
If you press the button when the
ignition is
off, the clock will show for a few seconds.
AM-FM: Press this button to get AM, FMl or FM2.
The display shows your selection. You may also press
AM-FM to switch between the radio and tape when a
tape is in the player.
TUNE: Press this knob lightly so it extends. Turn it to
choose radio stations. Push the knob back in when
you're not using it.
SEEK: Press the up or down arrow to go to the
next higher or lower station. The sound will be muted
while seeking.
PUSHBUTTONS: The five numbered pushbuttons let
you return to your favorite stations. You can set up to
15 stations (five AM, five FM1 and five
FM2).
1. Press AM-FM to select the band.
2. Find the station you want by using TUNE or SEEK.
3. Press TONE to select the setting you prefer.
4. Press and hold one of the five numbered buttons.
5. The sound will mute. When it returns, release
the button. Whenever you press that numbered
button, the station you set will return and the
TONE you selected will be automatically selected
for that button.
TONE: This feature allows you to choose preset treble
and bass equalization settings designed for jazz, vocal,
pop, rock and classical stations. JAZZ will appear on the
display when you first press TONE. Each time you press
it, another setting will appear on the display. Press
it
again after classic appears, and MANUAL will appear.
Tone control will return to the TREB and BASS knobs.
Also, if you use the TREB and BASS knobs, control
will return to them and MANUAL will appear.
SCAN: Press and release this button to listen to stations
for a few seconds. The radio will go to a station, stop for
a few seconds, then go on to the next station. Press
SCAN again to stop scanning. The sound will be muted
while scanning, and SCAN will appear on the display.
If
you press SCAN for more than two seconds, the radio
will change to PSCAN mode. PSCAN will appear on
the display.
PSCAN: Press SCAN for more than two seconds for
PSCAN to appear
on the display. The radio will go to the
first preset station, stop for a few seconds, then go to the
next preset station. Press SCAN again to stop scanning.
3-9
Page 137 of 306
Downloaded from www.Manualslib.com manuals search engine BASS: Press this knob iightiy so it extends. Turn the
knob clockwise to increase bass and counterclockwise to
decrease bass. The rniddle position is a detent. Push
the
knob back in when you’re not using it.
TREB: Press this knob lightly so it extends. Then pull
the knob all the way out. Turn it clockwise to increase
treble and counterclockwise to decrease treble. The
middle position is a detent. Push the knob back in when
you’re not using it.
BAL: Press this knob lightly so it extends. Turn the
knob to move the sound to the left or right speakers. The
middle position
is a detent and balances the speakers.
Push the knob back in when you’re not using it.
FADE: Press this knob lightly so it extends. Then pull
the knob all the way out. Turn it to move the sound to
the front or rear speakers. The middle position is a
detent and balances the speakers. Push the knob back in
when you’re not using it.
Playing a Cassette Tape
The longer side with the tape visible should face to the
right. If the ignition is on, but the radio is off, the tape
will begin playing.
If you hear nothing or hear a garbled
sound, the tape may not be in squarely. Press EJECT to
remove the tape and start over. IfEl?R
or E and a number appear on the display, the
tape won’t play because of an error.
ElO: The tape is tight and the player can’t turn the
tape hubs. Remove the tape. Hold the tape with the
open end down and try to turn the right hub
counterclockwise with a pencil. Turn the tape over
and try to turn the right hub. If the hubs do not turn
easily, your tape may be damaged and should not be
used in the player. Try a new tape to make sure your
player is working properly.
Ell: The tape is broken.
E12: There is a communication problem.
While the tape is playing, use the
VOL, FADE, BAL,,
TREB and BASS controls just as you do for the radio.
Other controls may have different functions when a tape
is inserted. The display will show TP and an arrow to
show which side of the tape is playing.
Your tape bias is set automatically. When
a metal or
chrome tape is inserted, HI BIAS appears on the display.
If you want to insert a tape when the ignition is off, first
press EJECT or RCL.
3-11
Page 138 of 306
Downloaded from www.Manualslib.com manuals search engine SEEK: Press the up or down arrow to search for the
next or previous selection on the tape. Your tape must
have at least three seconds of silence between each
selection for
SEEK to work. The sound will be muted
while seelung.
SCAN: Press this button to listen to each selection for a
few seconds. The tape will go
to the next selection, stop
for a few seconds, then go to the next selection. Press
SCAN again to stop scanning. The sound will be muted
while scanning and SCAN will appear on the display.
REV (1): Press this button to reverse rapidly to another
part of the tape. Press it again to play the tape. While
reversing the tape, the radio will play. Use the
TUNE
knob to change the radio station while reversing.
FWD (2): Press this button to advance quickly to
another part of
the tape. Press the button again to
play the tape. While forwarding the tape, the radio will
play. Use the TUNE knob to change the radio station
while reversing.
PROG (3): Press this button to change the side of the
tape that is playing.
NR (4): Press this button to reduce background noise.
The double-D symbol will appear on the display. Dolby@ Noise Reduction
is manufacturea unaer a
license
from Dolby Laboratories Licensing Corporation.
Dolby and the double-D symbol
are trademarks of
Dolby Laboratories Licensing Corporation.
AM-FM: Press this button to play the radio when a tape
is playing. The tape will stop but remain in the player.
TAPE: Press this button to change to the tape function
when the radio is active. A box will appear around TP
on the display when the tape is active.
TONE: You can select a TONE setting while playing
a cassette tape and it will be used whenever you play
a tape.
EJECT Press this button to remove the tape. The radio
will play. You may use EJECT with the ignition and
radio
off.
CLN: This message may appear on the display. If it
does, your cassette tape player needs to be cleaned. It
will still play tapes, but you should clean it as soon as
possible to prevent damage to your tapes and player.
See “Care of Your Cassette Tape Player” in the Index.
After you clean the player, press and hold EJECT for
five seconds to reset
the CLN indicator. The radio will
display
--- to show the indicator was reset.
3-11