1995 BUICK REGAL display
[x] Cancel search: displayPage 129 of 340
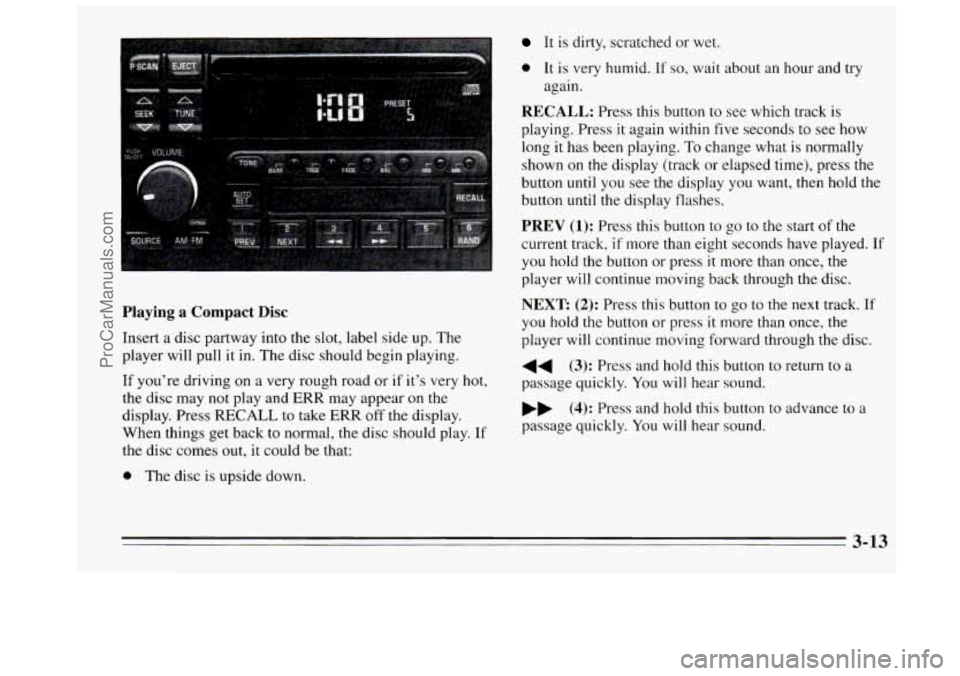
Playing a Compact Disc
Insert a disc partway into the slot, label side up. The
player will pull it in. The disc should begin playing.
If you’re driving on
a very rough road or if it’s very hot,
the disc may not play and
ERR may appear on the
display. Press RECALL to take ERR off the display.
When things get back to normal, the disc should play.
If
the disc comes out, it could be that:
0 The disc is upside down.
It is dirty, scratched or wet.
0 It is very humid. If so, wait about an hour and try
again.
RECALL: Press this button to see which track is
playing. Press it again within five seconds
to see how
long it has been playing. To change what is normally
shown on the display
(track or elapsed time), press the
button until you see the display you want, then hold the
button until the display flashes.
PREV (1): Press this button to go to the start of the
current track, if more than eight seconds have played. If
you hold the button or press it more than once, the
player will continue moving back through the disc.
NEXT (2): Press this button to go to the next track. If
you hold the button or press it more than once, the
player will continue moving forward through the disc.
44 (3): Press and hold this button to return to a
passage quickly. You will hear sound.
bb (4): Press and hold this button to advance to a
passage quickly.
You will hear sound.
3-13
ProCarManuals.com
Page 130 of 340
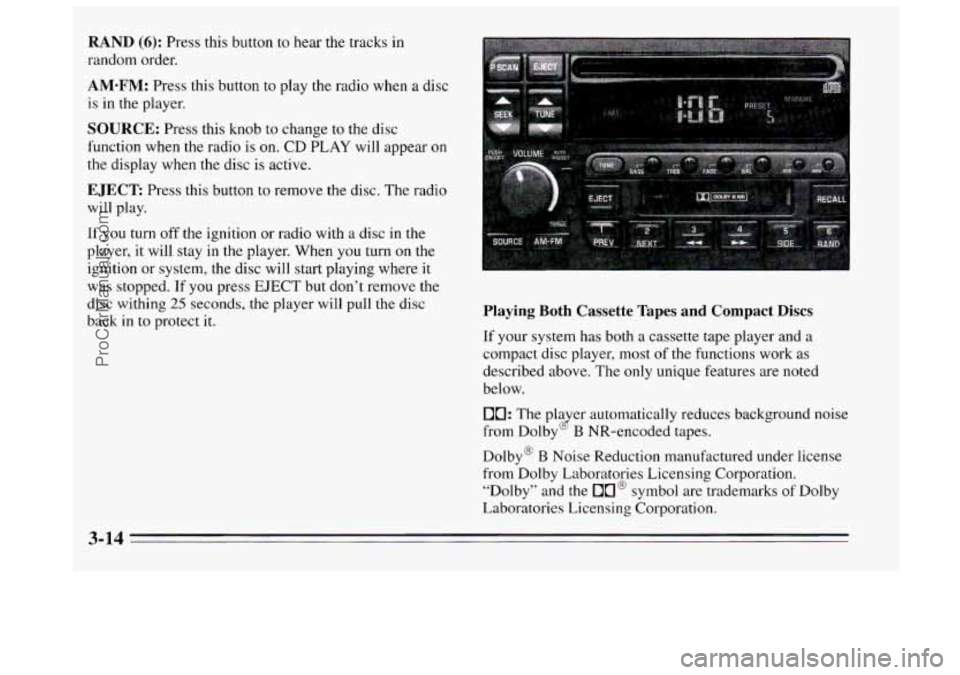
RAND (6): Press this button to hear the tracks in
random order.
AM-FM: Press this button to play the radio when a disc
is
in the player.
SOURCE: Press this knob to change to the disc
function when
the radio is on. CD PLAY will appear on
the display when the disc is active.
EJECT: Press this button to remove the disc. The radio
will play.
If
you turn off the ignition or radio with a disc in the
player, it will stay in the player. When you turn
on the
ignition or system, the disc will start playing where
it
was stopped. If you press EJECT but don’t remove the
disc withing
25 seconds, the player will pull the disc
back
in to protect it. Playing Both Cassette Tapes and Compact Discs
If your system has both a cassette tape player and a
compact disc player, most of the functions work as
described above. The only unique features are noted
below.
10: The pla er automatically reduces background noise
from Dolby
B NR-encoded tapes. (2
Dolby@ B Noise Reduction manufactured under license
from Dolby Laboratories Licensing Corporation. “Dolby” and the
On@ symbol are trademarks of Dolby
Laboratories Licensing Corporation.
3-14
ProCarManuals.com
Page 131 of 340
AUTO PRESET Press it and the system will set the 12
strongest
FM or the 6 strongest AM stations on your
preset buttons. To return to
the stations you manually
set, press the AUTO PRESET button again. (This button
performs
the same function as AUTO SET described
above.)
EJECT The system has two EJECT buttons. Press the
button near the CD slot to remove a disc. Press the button
near the tape slot to remove a tape. The radio will play.
SOURCE: Press this knob to change to the tape or disc
function when the radio
is on. If both a tape and a disc are
installed, the system
will first go to tape play; TAPE will
appear on the display. If SOURCE is pressed again, the
system
will go to disc play; CD will appear on the display.
THEFTLOCK TM
Your system has this feature if it shows Theftlock on its
face. THEFTLOCK
is a theft-deterrent feature that can
be used or ignored.
If you ignore it, your system will
play normally.
If you use it, your system can’t be turned
on if it is stolen because it locks anytime battery power
is removed.
To unlock it, a code must be entered.
These instructions will tell you how to enter a code into
your system. They also
tell you how to unlock the
system with your code and how to shut off the
THEFTLOCK system.
Entering a Code
1. Write down any number from 000 to 1999. This is
your code.
2. Turn the ignition to ACC or RUN.
3. Turn the radio off.
4. Press the I and 4 preset buttons at the same time and
hold
until “- - - ” shows on the display.
You
now have only I5 seconds between each of the
following steps.
5. Press MIN and “000” will appear on the display.
6. Press MIN again and hold until the last two digits of
your code appear.
7. Press and hold HRS until the first digit or digits of
your code appear.
8. Press AM-FM after you make sure the code matches
the one you wrote down. “rEP” will appear on the
display, meaning you should repeat steps
5 through 7.
9. After you repeat the steps, press AM-FM. SEC
should appear on the display, meaning your system is
secured. If your ignition is off, THEFTLOCK will
flash
in the display.
Store
the paper with your code written on it in a safe place.
3-15
ProCarManuals.com
Page 132 of 340
Unlocking the System
If battery power is removed for any reason, LOC will
appear
on the display when power is reapplied. You will
need to enter your code to unlock the system. You have
only
15 seconds between each of the following steps.
1.
2.
3.
4.
5.
Turn the ignition on. LOC will appear on the display.
Press
MIN and “000” will appear on the display.
Press MTN again and hold
until the last two digits of
your code appear.
Press and
hold HRS until the first digit or digits of
your code appear.
Press
AM.FM after you make sure the code matches
the one you wrote down.
SEC should appear on the
display, meaning you can now use your system, and
it is secured.
Disabling THEFTLOCK
If you want to turn off THEFTLOCK, you will need to
enter your code. If you lose or forget your code, see
your dealer.
1.
2.
3.
4.
5.
Press the 1 and 4 preset buttons at the same time and
hold
until SEC shows on the display.
You now have only
I5 seconds between each of the
following steps.
Press MIN and
“000” will appear on the display.
Press MIN again and hold
until the last two digits of
your code appear.
Press and hold
HRS until the first digit or digits of
your code appear.
Press
AMaFM after you make sure the code matches
the one you wrote down. ‘9- - -” should appear on the
display, meaning your system is u1xecure.d.
ProCarManuals.com
Page 134 of 340
Care of Your Cassette Tape Player
A tape player that is not cleaned regularly is subject to
reduced sound quality, ruining the cassette, or damaging
the mechanism. Tape cassettes that are
not properly
stored in their plastic cases away from contaminants,
direct sunlight, and extreme heat may not operate
properly and could cause premature failure of the tape
player.
Your tape player should be cleaned with every
50 hours
of use to provide optimum performance. Your radio may
display Cln to indicate that
you have used your tape
player for
50 hours without resetting the tape clean
timer. If you notice a reduction in sound quality,
regardless
of when the tape player was last cleaned, try
playing a different cassette to see if the tape or the tape
player is at fault.
Tf the second cassette results in no
improvement
in sound quality, try cleaning the tape
player.
Proper tape player cleaning should be done with a
scrubbing action, nonabrasive cleaner cassette. This is a
wet-type cleaning system that uses
a cleaning cassette
with pads which scrub the tape head as the hubs of the
cleaner cassette turn.
To properly clean your tape player,
follow
the instructions with the cleaning cassette. If you
use this type of cleaner, the radio may display an error
and eject the cartridge. This is normal and is the result of an
added feature
in the tape player that detects broken
tapes. If an error occurs, you
will need to insert the
cleaning cassette at least three times to thoroughly clean
the tape player.
You may prefer to use a non-scrubbing action, wet-type
cleaner. This type
of cleaner uses a fabric belt to clean
the tape head. This type of cleaner cassette will not
cause an error,
but it may not clean the tape player as
thoroughly as the scrubbing type cleaner.
A scrubbing action cleaner is available through your
dealer
(GM Part No. 12344600).
Cassettes are subject to wear and the sound quality may
degrade over time. Always verify that the cassette tape
is in good condition and the tape player is clean before
obtaining service on your tape player.
Care of Your Compact Discs
Handle discs carefully. Store them in their original cases
or other protective cases and away from direct sunlight
and dust.
If the surface of a disc is soiled, dampen a
clean, soft cloth
in a mild, neutral detergent solution and
clean
it, wiping from the center to the edge.
Be sure never
to touch the signal surface when handling
discs. Pick up discs
by grasping the outer edges or the
edge of the hole and the outer edge.
ProCarManuals.com
Page 257 of 340

r use
16
19
21
23
24 2s
Description
REAR DEFOG -- HVAC Control
Assembly Rear Window Defogger Switch
POWER ACCESSORY
#1-- Antenna
Relay, Power Mirror Switch, Door Lock
Switches, Door Handle Switches
AIR BAG
-- Sensing and Diagnostic
Module (SDM)
STOPLAMPS
-- TCCBrake Switch
HVAC #2
-- HVAC Control Assembly,
Solenoid Box
CTSY LAMPS
-- Vanity Mirrors, I/P
Courtesy Lamps, UP Compartment Lamp,
Trunk Courtesy Lamp, Header Courtesy
and Reading Lamp,
US Lighted Rearview
Mirror, Dome and Reading Lamp,
Quarter Courtesy Lamps
Fuse
29
30
32
33
37
3s
39
Description
WIPER -- Wiper Switch
TURN SIGNAL
-- Turn Signal Flasher
POWER LOCKS
-- Door Lock Relay
ABS -- Electronic Brake Control Module
(EBCM), ABS Relay
AUXILIARY POWER
RADIO
-- Radio, Steering Wheel Radio
Switches
I/P ELECTRONICS IGNITION FEED --
Headlamp Switch, Cruise Control
Cut-Out Switch, Sensing and Diagnostic
Module (SDM), TCCBrake Switch,
Instrument Cluster, Chime Module,
Second Gear Start Switch, Head-Up
Display (HUD) Switch, Daytime Running
Lamps Module (with DRL)
6-49
I
ProCarManuals.com