1995 BUICK REGAL radio
[x] Cancel search: radioPage 12 of 340
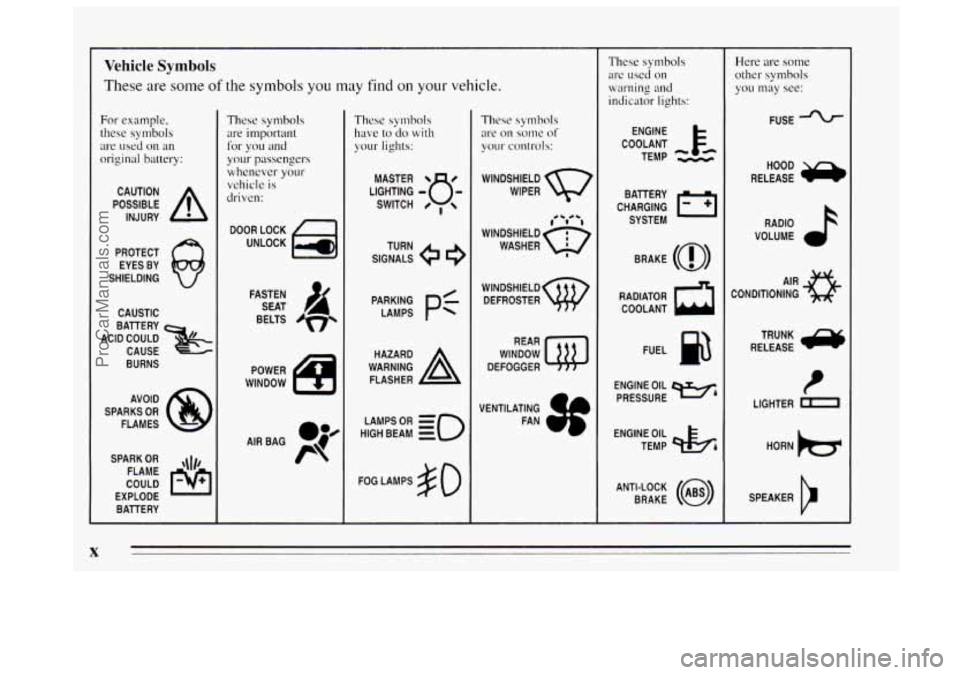
Vehicle Symbols
These are some of the symbols you may find on your vehicle.
For example,
these symbols
are used
on an
original battery:
POSSIBLE A
CAUTION
INJURY
PROTECT EYES BY
SHIELDING
CAUSTIC
BATTERY
CAUSE
BURNS
ACID COULD
x
AVOID
SPARKS
OR
FLAMES
SPARK
OR ,\I/,
COULD FLAME
EXPLODE BATTERY
These symbols are important
for you and
your passengers whenever your
vehicle
is
driven:
DOOR LOCK
UNLOCK
BELTS
4
These symbols
have
to do with
your lights:
SIGNALS e
TURN
POWER
WINDOW
HIGH LAMPSoR BEAM
= =o
FOG LAMPS $0
These symbols
are on
some of
your controls:
WINDSHIELD
WIPER
1. *td -1
WINDSHIELD c)
WASHER a
WINDSHIELD DEFROSTER
WINDOW
DEFOGGER
VENTILATING FAN
These symbols
are used on
warning and
indicator lights:
COOLANT F-
TEMP --
ENGINE
CHARGING BATTERY
SYSTEM
BRAKE
(0)
RADIATOR COOLANT
a
FUEL
ENGINE OIL
PRESSURE
w4
TEMP OIL 4%
ANTI-LOCK (@)
BRAKE
Here are some other symbols
you may
see:
FUSE
RADIO
VOLUME
AIR
CONDITIONING
TRUNK
e
RELEASE
t
LIGHTER n
SPEAKER
b
X
ProCarManuals.com
Page 67 of 340
Remote Lock Control (Option)
If your Buick has this option, you can lock and unlock your
doors or unlock your trunk from
up to 30 feet (9 m) away
using the key chain transmitter supplied with your vehicle.
Your Remote Lock Control operates
on a radio
frequency subject to Federal Communications
Commission (FCC) Rules.
This device complies
with Part 15 of the FCC Rules.
Operation is subject
to the following two conditions:
(1 ) This device may not cause harmful interference, and
(2) This device must accept any interference received,
including interference that may cause undesired operation.
Should interference to this system occur,
try this:
Check to determine if battery replacement is necessary.
See the instructions on battery replacement.
0 Check the distance. You may be too far from your
vehicle. This product has a maximum range.
0 Check the location. Other vehicles or objects may be
blocking the signal.
0 See your Buick dealer or a qualified technician for service.
Changes
or modifications to this system by other than an
authorized service facility could void authorization to
use this equipment.
Operation
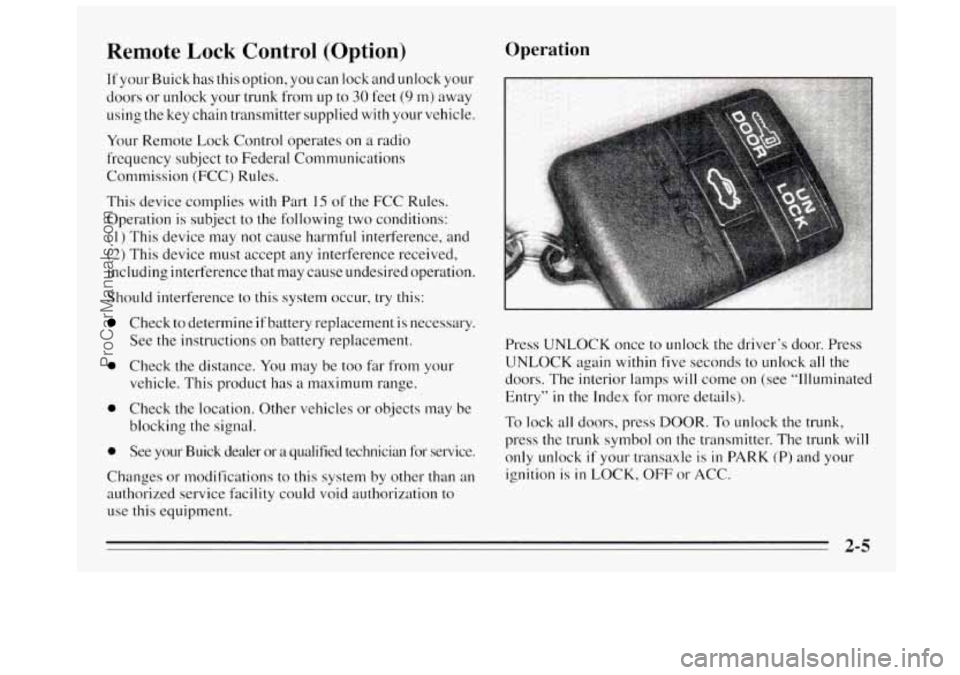
Press UNLOCK once to unlock the driver’s door. Press
UNLOCK again within five seconds to unlock all the
doors. The interior lamps
will come on (see “Illuminated
Entry”
in the Index for more details).
To lock all doors, press DOOR. To unlock the trunk,
press the trunk symbol on the transmitter. The
trunk will
only unlock if your transaxle is in PARK (P) and your
ignition is
in LOCK, OFF or ACC.
2-5
ProCarManuals.com
Page 72 of 340
New Vehicle “Break-In”
NOTICE:
Your modern Buick doesn’t need an elaborate
“break-in.” But it will perform better in the long
run if you follow these guidelines:
Don’t drive at any one speed -- fast or
slow
-- for the first 500 miles (804 km).
Don’t make full-throttle starts.
200 miles (322 km) or so. During this time
your new brake linings aren’t yet broken
in. Hard stops with new linings can mean
premature wear and earlier replacement.
Follow this “breaking-in” guideline every
time you get new brake linings.
Don’t tow a trailer during “break-in.” See
“Towing a Trailer’’ in the Index for more
information.
Avoid making hard stops for the first
Ignition Switch
U
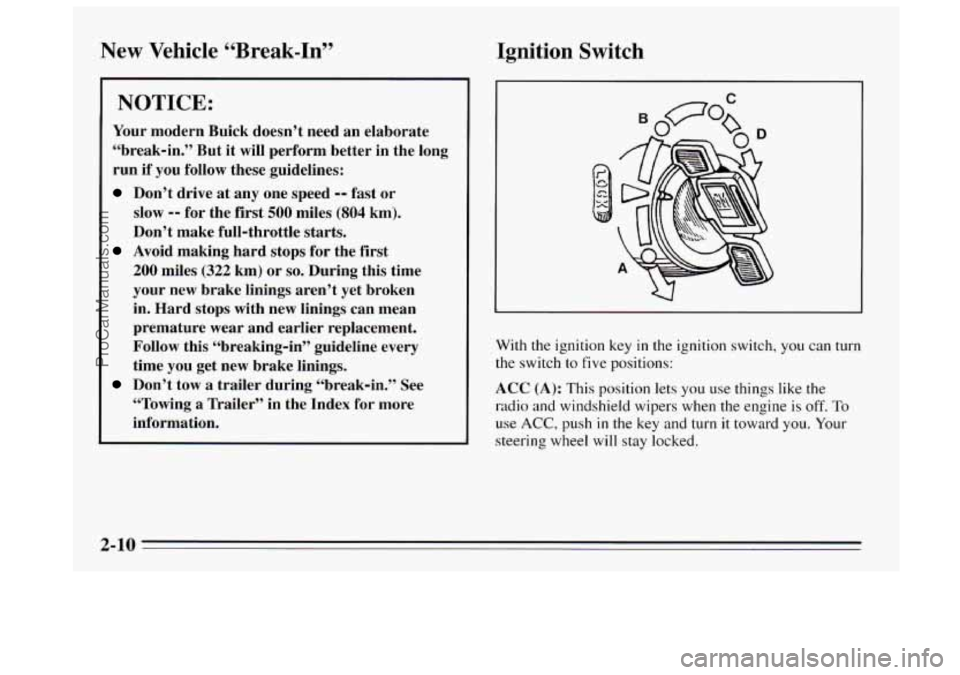
With the ignition key in the ignition switch, you can turn
the switch
to five positions:
ACC (A): This position lets you use things like the
radio and windshield wipers when the engine is
off. To
use ACC, push in the key and turn it toward you. Your
steering wheel will stay locked.
2-10
ProCarManuals.com
Page 107 of 340
0 It takes a little more or less fuel to fill up than the
gage indicated. For example, the gage may have
indicated the tank was half full, but it actually took
a little more or less than half the tank’s capacity to
fill it.
0 The gage moves a little when you turn a corner or
Low Fuel Light
speed up.
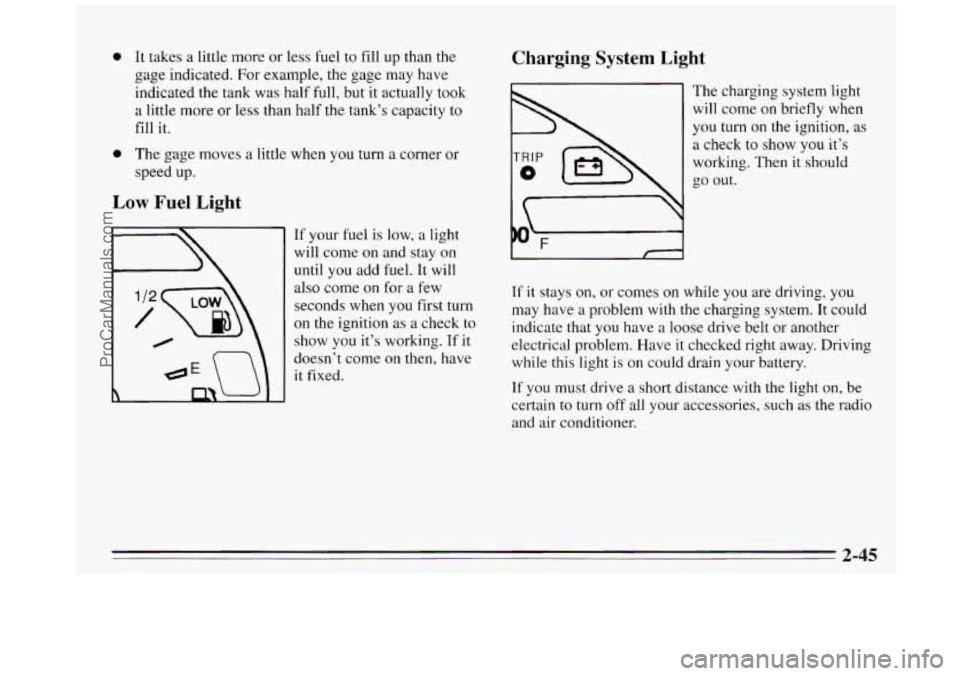
If your fuel is low, a light
will come on and stay on
until you add fuel. It will
also come on for a few
seconds when
you first turn
on the ignition as a check to
show you it’s working.
If it
doesn’t come on then, have
it fixed.
Charging System Light
The charging system light
will come on briefly when
you turn on the ignition, as
a check
to show you it’s
worlung. Then it should
g0
Out.
If it stays on, or comes on while you are driving, you
may have a problem with
the charging system. It could
indicate that
you have a loose drive belt or another
electrical problem. Have it checked right away. Driving
while this light is on could drain your battery.
If you must drive a short distance with the light on, be
certain
to turn off all your accessories, such as the radio
and air conditioner.
2-45
ProCarManuals.com
Page 122 of 340
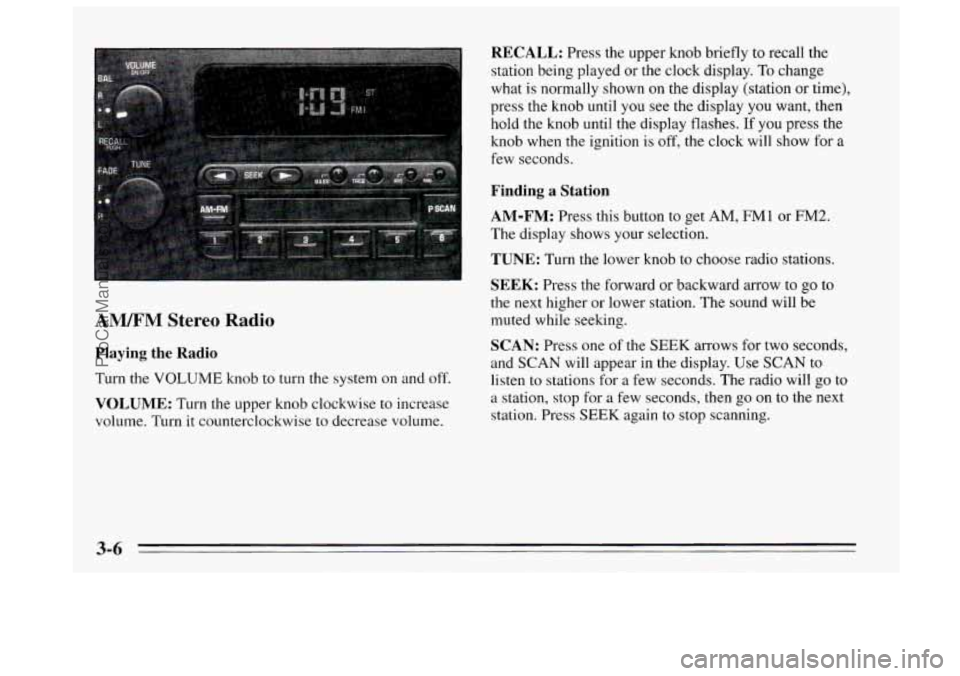
AM/FM Stereo Radio
Playing the Radio
Turn the VOLUME knob to turn the system on and off.
VOLUME: Turn the upper knob clockwise to increase
volume. Turn it counterclockwise to decrease volume.
RECALL: Press the upper knob briefly to recall the
station being played or the clock display.
To change
what is normally shown
on the display (station or time),
press the knob until you see the display
you want, then
hold the knob until the display flashes. If you press the
knob when
the ignition is off, the clock will show for a
few seconds.
Finding a Station
AM-FM:
Press this button to get AM, FMI or FM2.
The display
shows your selection.
TUNE: Turn the lower knob to choose radio stations.
SEEK: Press the forward or backward arrow to go to
the
next higher or lower station. The sound will be
muted while seeking.
SCAN: Press one of the SEEK arrows for two seconds,
and SCAN will appear in the display. Use SCAN to listen to stations for
a few seconds. The radio will go to
a station, stop for a few seconds, then
go on to the next
station. Press SEEK again to stop scanning.
3-6
ProCarManuals.com
Page 123 of 340
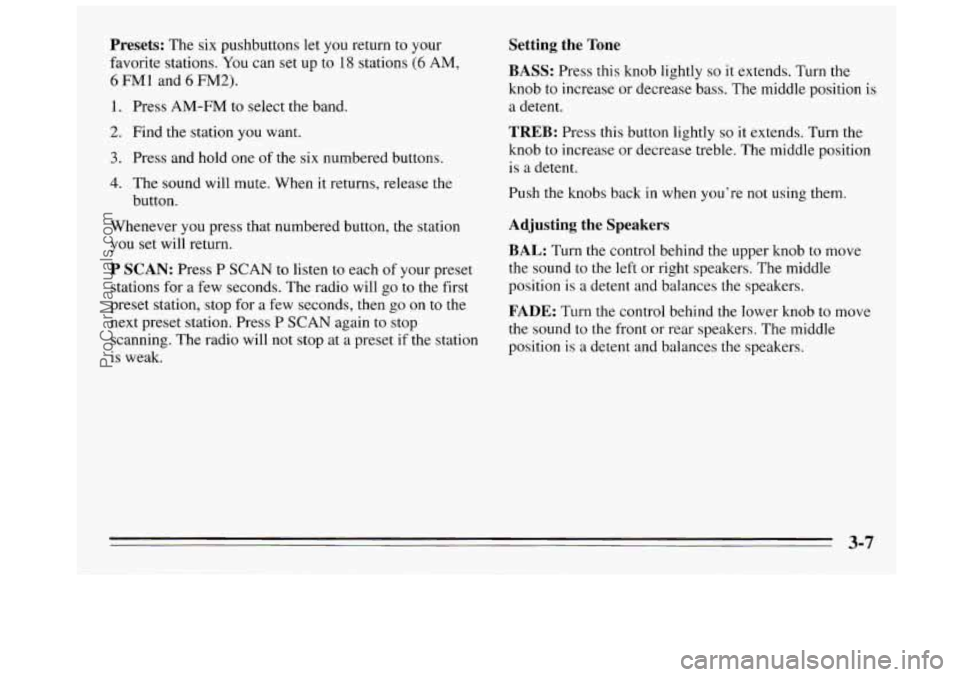
Presets: The six pushbuttons let you return to your
favorite stations. You can set up
to 18 stations (6 AM,
6 FMl and 6 FM2).
1. Press AM-FM to select the band.
2. Find the station you want.
3. Press and hold one of the six numbered buttons.
4. The sound will mute. When it returns, release the
button.
Whenever you press that numbered button, the station
you set will return.
P SCAN: Press P SCAN to listen to each of your preset
stations for a few seconds. The radio will
go to the first
preset station, stop for a few seconds, then
go on to the
next preset station. Press
P SCAN again to stop
scanning. The radio will not stop at a preset
if the station
is weak.
Setting the Tone
BASS:
Press this knob lightly so it extends. Turn the
knob to increase or decrease bass. The middle position is
a detent.
TREB: Press this button lightly so it extends. Turn the
knob
to increase or decrease treble. The middle position
is a detent.
Push the knobs back
in when you’re not using them.
Adjusting the Speakers
BAL:
Turn the control behind the upper Knob to move
the sound to the left or right speakers. The middle
position
is a detent and balances the speakers.
FADE: Turn the control behind the lower knob to move
the sound to the front or rear speakers. The middle
position is
a detent and balances the speakers.
ProCarManuals.com
Page 124 of 340
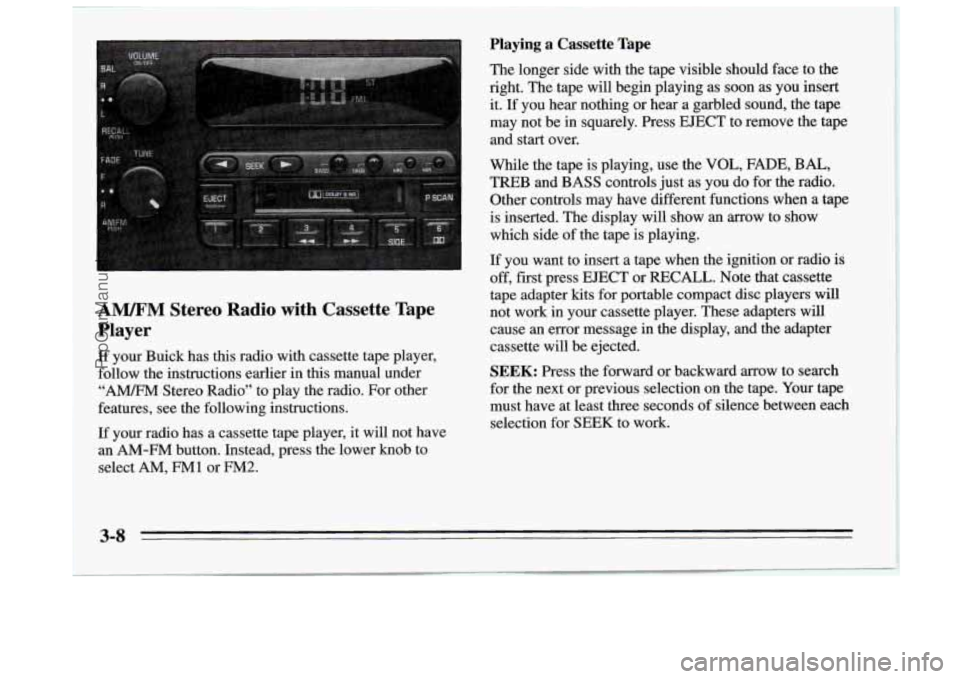
A". Stereo Radio with Cassette Tape
Player
If your Buick has this radio with cassette tape player,
follow the instructions earlier in
this manual under
"A" Stereo Radio" to play the radio. For other
features, see the following instructions.
If your radio has a cassette tape player, it will not have
an
AM-FM button. Instead, press the lower knob to
select
AM, FMl or FM2.
Playing a Cassette Tape
The longer side with the tape visible should face to the
right. The tape
will begin playing as soon as you insert
it. If you hear nothing or hear a garbled sound, the tape
may not be in squarely. Press
EJECT to remove the tape
and start over.
While the tape is playing, use the
VOL, FADE, BAL,
TREB and BASS controls just as you do for the radio.
Other controls may have different functions when a tape
is inserted. The display will show an arrow to show
which side of the tape is playing.
If you want to insert a tape when the ignition or radio is
off, fist press
EJECT or RECALL. Note that cassette
tape adapter kits for portable compact disc players will
not work in your cassette player. These adapters will
cause an error message in the display, and the adapter
cassette will be ejected.
SEEK: Press the forward or backward arrow to search
for the next or previous selection on the tape. Your tape
must have at least three seconds of silence between each
selection for
SEEK to work.
3-8
ProCarManuals.com
Page 125 of 340
44 (3): Press this button to reverse the tape rapidly.
Press it again to return to playing speed. The radio will
play while the tape reverses.
bb (4): Press this button to advance quickly to another
part of the tape. Press the button again to return
to playing
speed. The radio will play while the tape advances.
SIDE (5): Press this button to change the side of the
tape that is playing.
on (6): Press this button to reduce background noise.
The display will show either
OFF or ON for a few
seconds when you press the butt.on.
Dolby@
B Noise Reduction manufactured under license
from Dolby Laboratories Licensing Corporation.
“Dolby” and the
on@ symbol are trademarks of Dolby
Laboratories Licensing Corporation.
EJECT: Press this button to remove the tape. The radio
will play.
Cln: This message may appear on the display. If it does,
your cassette tape player needs to be cleaned. It will still
play tapes, but you should clean
it as soon as possible to
prevent damage
to your tapes and player. See “Care of
Your Cassette Tape Player” in the Index. After you clean
the player, press and hold EJECT for five seconds to
reset the Cln indicator.
“- - -” will appear in the display
to show the indicator was reset.
AM/FM Stereo Radios with Automatic Tone
Control
If your Buick has a radio with Automatic Tone Control,
the instructions below will explain how to use the radio.
To find out if your radio has Automatic Tone Control,
look for a
TONE button. If the system has one, you have
Automatic Tone Control. If not, see the systems
explained earlier
in this section.
Playing the Radio
Press the VOLUME knob to turn the system on and off.
VOLUME: Turn this knob clockwise to increase
volume. Turn
it counterclockwise to decrease volume.
RECALL: Press this button briefly to recall the station
being played or the clock display. To change what is
normally shown on the display (station or time), press
the button until you see the display
you want, then hold
the button
until the display flashes. If you press the
button when the ignition
is off, the clock will show for a
few seconds.
Finding a Station
AM-FM:
Press this button to get AM, FMl or FM2.
The display shows your selection.
3-9
ProCarManuals.com