Page 6 of 276
A Step Ahead
!
I
In 1966, Toronado made front-wheel-
drive news, including Motor Trend’s
“Car of the Year.’’ Still breaking new
ground, the 1974
“Toro” became the first
car equipped with
a production “air bag.”
Recent Oldsmobile engineerhg
has
created exciting advancements like
the responsive Quad
4 engine. Versions of
the 4-cylinder, 16-valve Quad 4 propelled
Oldsmobiles on roads and racetracks to
new standards
of economy and
performance. Today, the all-wheel-drive security
of SmartTrak in the Oldsmobile Bravada
continues that proud tradition
of
rneaningfid technology.
ProCarManuals.com
Page 7 of 276
The Security of
Owner Satisfaction
J. D. Rock
General Manager 've
ProCarManuals.com
Page 19 of 276
I. G
Removing LEFT ONLY and CENTER
OR LEFT Seats:
1. Lift the upper lever to fold the
seatback forward.
2. Push down on the rear release bar
The entire seat will tilt forward.
3. Then, from behind the seat, squeeze
the front release bar toward the
crossbar. The seat will release from
the floor pins. adjusting Rear Seats
Each rear seat location has two sets of
floor pins. Seats equipped with the
built-in child restraint option must be
secured in the rear set of floor pins.
Seats that don’t have the built-in child
restraint can be secured in either set of
floor pins. Move the position
of these
seats up or back to provide a little more
room behind or in front of a seat.
17
ProCarManuals.com
Page 25 of 276
LapShoulder Belt
The driver has a lap-shoulder belt.
Here’s how to wear it properly.
1. Close and lock the door.
2. Adjust the seat (to see how, see Seats
in the Index) so you can sit up
straight.
3. Pick up the latch plate and pull the
belt across
you. Don’t let it get
twisted.
until it clicks.
4. Push the latch plate into the buckle
If the belt stops before it reaches the
buckle, tilt the latch plate and keep
pulling until you can buckle the belt.
Pull up on the latch plate to make sure
it is secure.
If the belt isn’t long enough, see Safety
Belt Extender
at the end of this section.
Make sure the release button on the
buckle is positioned
so you would be
able to unbuckle the safety belt quickly
if you ever had to.
1
23
ProCarManuals.com
Page 33 of 276

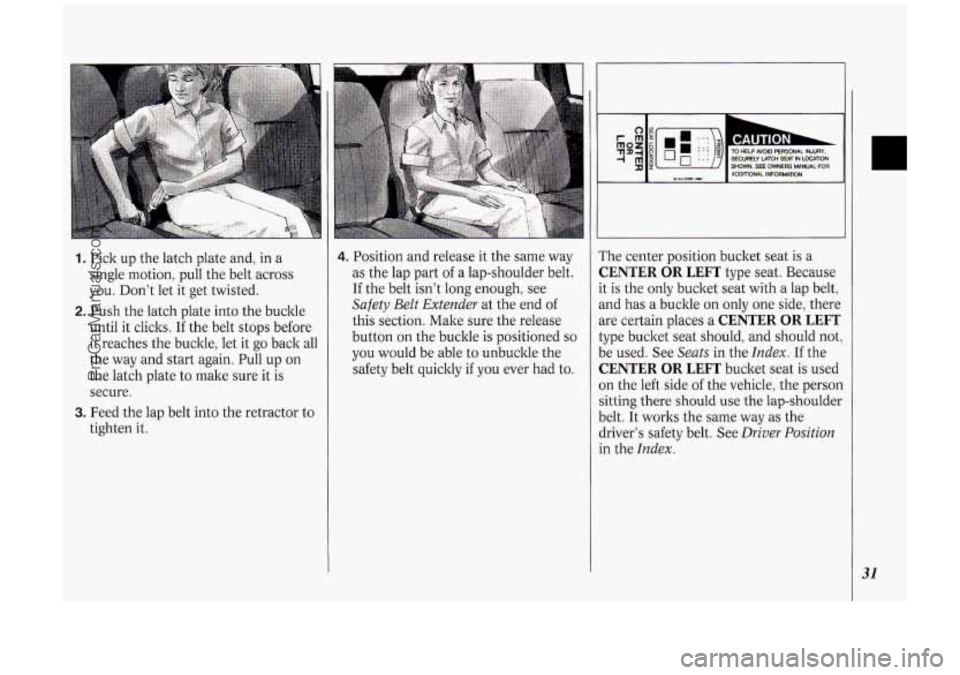
1. Pick up the latch plate and, in a
single motion, pull the belt across
you. Don’t let it get twisted.
2. Push the latch plate into the buckle
until it clicks.
If the belt stops before
it reaches the buckle,
let it go back all
the way and start again. Pull up on
the latch plate to make sure it is
secure.
tighten it.
3. Feed the lap belt into the retractor to
4. Position and release it the same way
as the lap part of a lap-shoulder belt.
If the belt isn’t long enough, see
Safety BeZt Extender at the end of
this section. Make sure the release
button on the buckle is positioned
so
you would be able to unbuckle the
safety belt quicltly if you ever had to. ’he
center position bucket seat is
a
:ENTER OR LEFT type seat. Because
t is the only bucket seat with a lap belt,
Lnd has a buckle on only one side, there
re certain places a
CENTER OR LEFT
ipe bucket seat should, and should not,
e used. See
Seats in the Index. If the
:ENTER OR LEFT bucket seat is used
n the left side
of the vehicle, the person
itting there should use the lap-shoulder
elt. It works the same way as the
river’s safety belt. See
Driver Position
I the Index.
31
ProCarManuals.com
Page 34 of 276
Seats & Restraint Systems
32
Sear Seat Outside Passenger
Dositions
Lap-Shoulder Belt
The positions next to the windows have
ap-shoulder belts. Here’s how
to wear
me properly.
1. Pick up the latch plate and pull the
belt across you. Don’t let it get
twisted.
until
it clicks.
2. Push the latch plate into the buckle If
the belt stops before it reaches the
buckle, tilt the latch plate and keep
pulling until you can buclde it.
Pull up on the latch plate to make sure
it is secure.
If the belt
is not long enough, see Safety
Belt Extender at the end of this section.
Make sure the release button on the
buckle
is positioned so you would be
able to unbuckle the safety belt quickly
if you ever had to.
ProCarManuals.com
Page 37 of 276
A
I Built-In Child Restraint
(OPT/ON)
If you have a rear bucket seat with the
optional built-in child restraint, see the
Owner’s Manual Supplement that came
with your vehicle for information on use
and appearance care. To find out where
a seat that has the built-in child
restraint must be located in your
vehicle? see
Removable Rear Bucket
Seats
in the Index.
I Child Restraints
Be sure to follow the instructions for the
restraint.
You may find these
instructions on the restraint itself or in a
booltlet, or both. These restraints use
the belt system in your vehicle, but the
child also has to be secured within the
restraint to help reduce the chance of
personal injury. The instructions that
come with the infant or child restraint
will show you how to do that.
35
ProCarManuals.com
Page 38 of 276

Seats & Restraint Systems
36
Where to Put the Restraint
Accident statistics show that children
are safer if they are restrained in the
rear rather than the front seat. We at
General Motors therefore recommend
that you put your child restraint in the
rear seat unless the child
is an infant
and you’re the only adult in the vehicle.
In that case, you might want to secure
the restraint in the front seat where you
can keep an eye on the baby.
Wherever you install it, be sure to
secure the child restraint properly.
Keep in mind that an unsecured child
restraint can move around in
a collision
or sudden stop and injure people in the
vehicle. Be sure
to properly secure any
child restraint in your vehicle
- even
when
no child is in it.
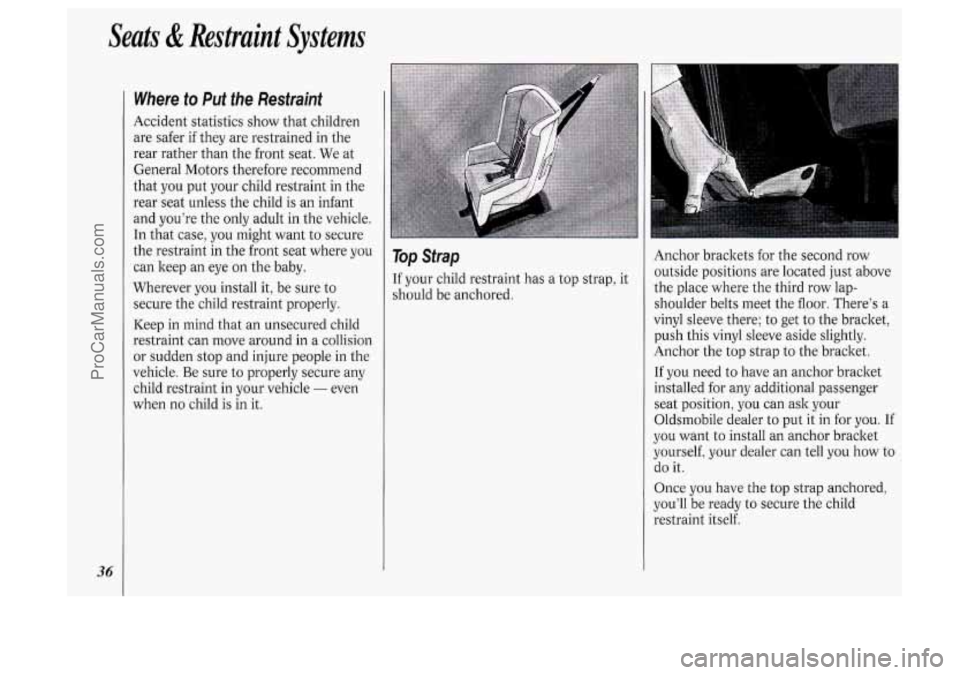
Top Strap
If your child restraint has a top strap, it
should be anchored. Anchor
brackets for the second row
outside positions are located just above
the place where the third row lap-
shoulder belts meet the floor. There’s a
vinyl sleeve there; to get to the bracket,
push this vinyl sleeve aside slightly.
Anchor the top strap to the bracket.
If you need to have an anchor bracket
installed for any additional passenger seat position, you can ask your
Oldsmobile dealer to put it in for you. If
you want to install an anchor bracket
yourself, your dealer can tell you
how to
do it.
Once you have the top strap anchored,
you’ll be ready to secure the child
restraint itself.
ProCarManuals.com