1994 CHEVROLET SUBURBAN four wheel drive
[x] Cancel search: four wheel drivePage 210 of 385
9. Attach the cable at least 18 inches (45 cm) away from the dead battery,
but not near engine parts that move. The electrical connection
is just as
good there, but the chance of sparks getting back to the battery is much
less.
10. Now start the vehicle with the good battery and run the engine for
awhile.
1 1. Try to start the vehicle with the dead battery.
If it won't start after a few tries, it probably needs service.
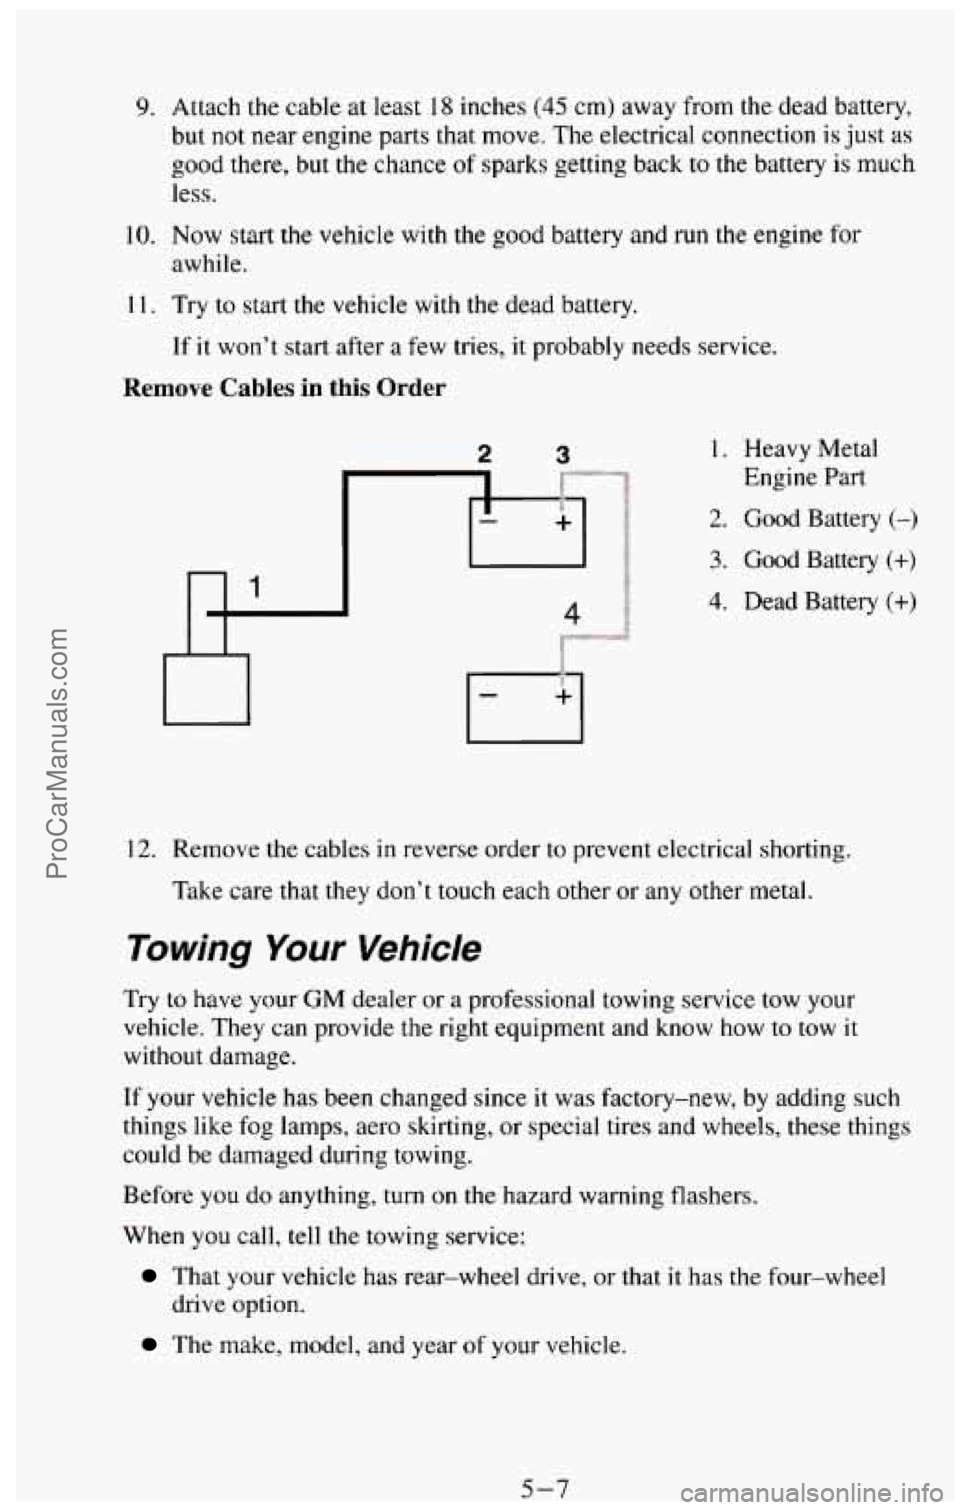
Remove Cables in this Order
1. Heavy Metal
Engine Part
2. Good Battery (-)
3. Good Battery (+)
4. Dead Battery (+)
12. Remove the cables in reverse order to prevent electrical shorting.
Take care that they don't touch each other
or any other metal.
Towing Your Vehicle
Try to have your GM dealer or a professional towing service tow your
vehicle. They can provide the right equipment and know how
to tow it
without damage.
If your vehicle has been changed since
it was factory-new, by adding such
things like fog lamps, aero skirting, or special tires and wheels, these things
could
be damaged during towing.
Before
you do anything, turn on the hazard warning flashers.
When you call,
tell the towing service:
That your vehicle has rear-wheel drive, or that it has the four-wheel
drive option.
The make, model, and year of your vehicle.
5-7 ProCarManuals.com
Page 212 of 385
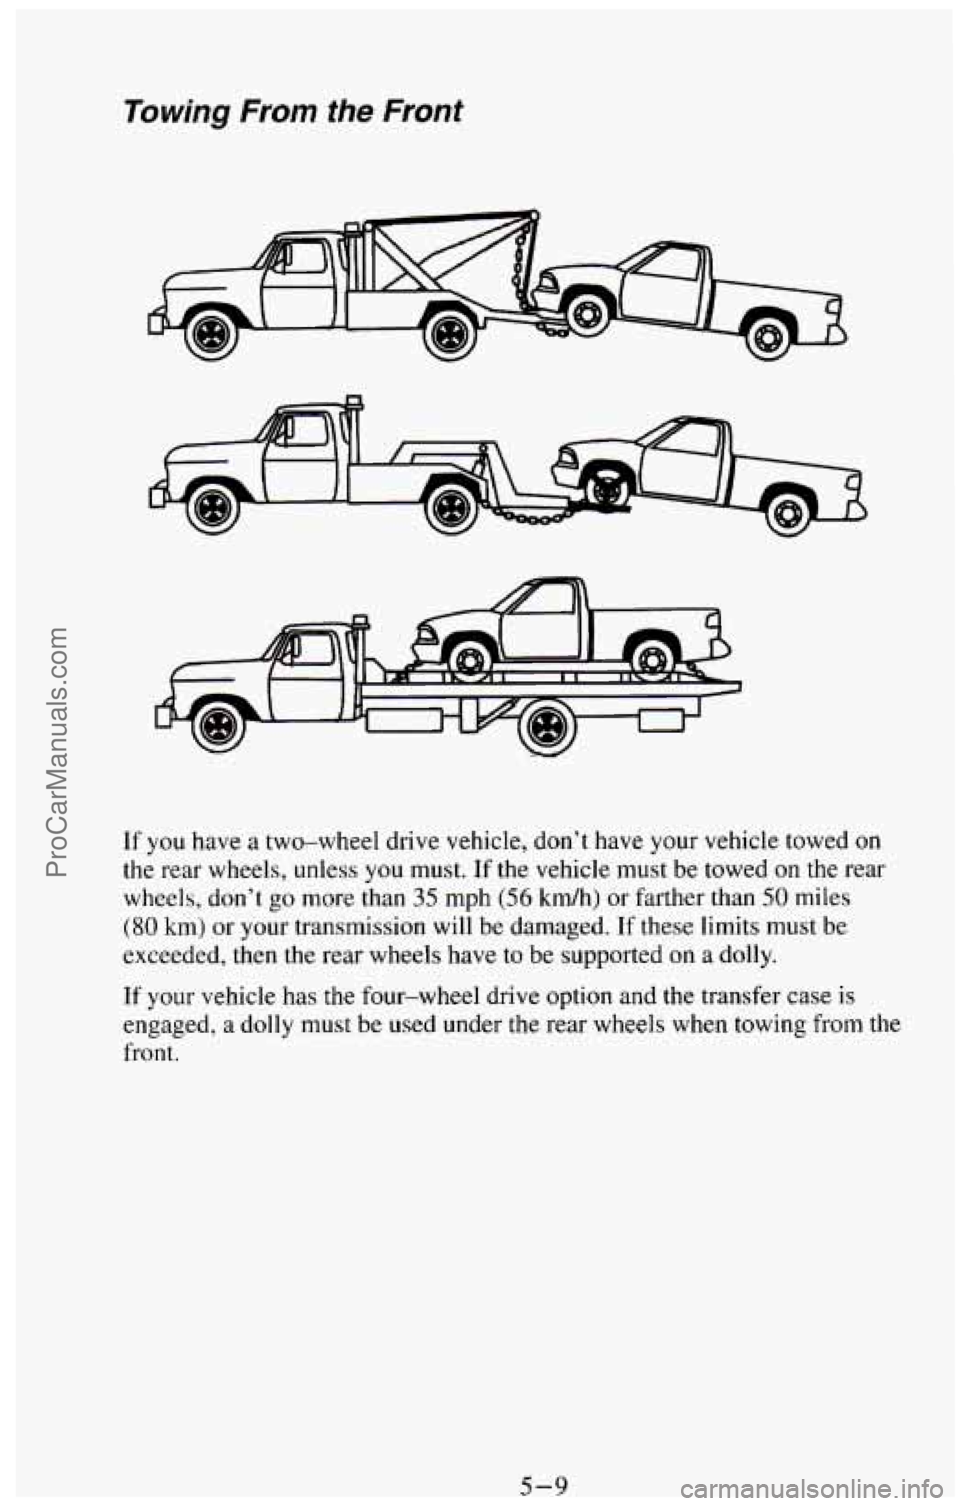
Towing From the Front
If you have a two-wheel drive vehicle, don’t have your vehicle towed on
the rear wheels, unless you must. If the vehicle must be towed on the rear
wheels, don’t
go more than 35 mph (56 km/h) or farther than 50 miles
(80 km) or your transmission will be damaged. If these limits must be
exceeded, then the rear wheels have to be supported on a dolly.
If your vehicle has
the four-wheel drive option and the transfer case is
engaged, a dolly must be used under the rear wheels when towing from the
front.
5-9 ProCarManuals.com
Page 279 of 385
Whai to Use
Refer to the Maintenance Schedule to determine what kind of lubricant to
use. See “Recommended Fluids and Lubricants” in the Index.
Four- Wheel Drive
Most lubricant checks in this section also apply to four-wheel-drive
vehicles. However, they have two additional systems that need lubrication.
Transfer Case
When to Check Lubricant
Refer to the Maintenance Schedule to determine how often to check the
lubricant.
See “Periodic Maintenance Inspections” in the Index.
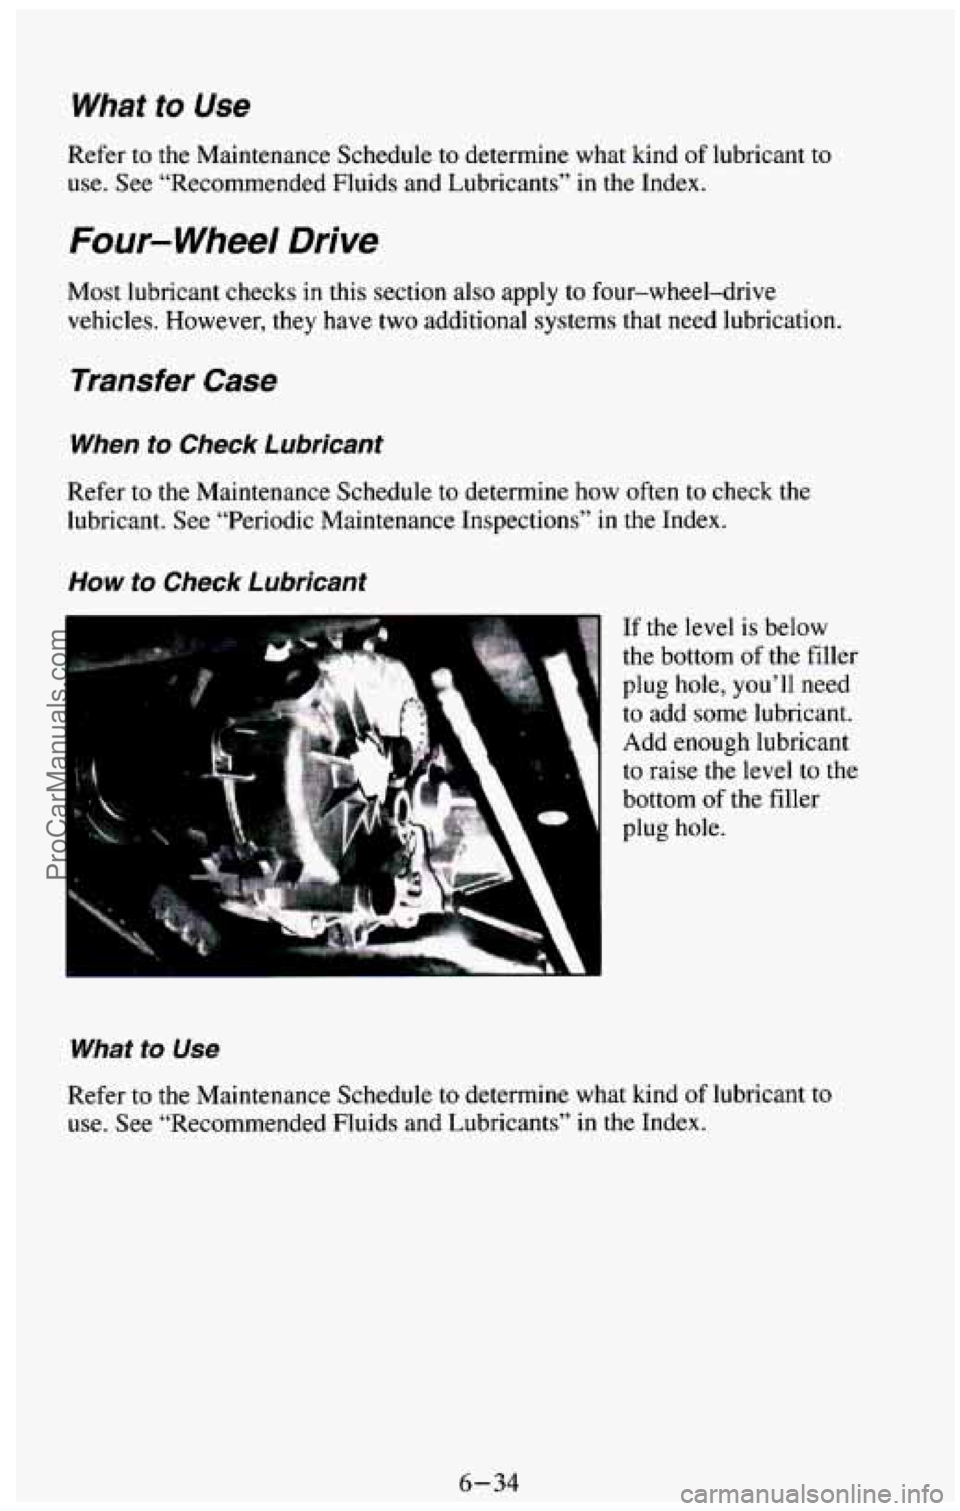
How to Check Lubricant
What to Use
If the level is below
the bottom of the filler
plug hole, you’ll
need
to add some lubricant.
Add enough lubricant
to raise the level to
the
bottom of the filler
plug hole.
Refer to the Maintenance Schedule
to determine what kind of lubricant to
use. See “Recommended Fluids and Lubricants” in the Index.
6-34
ProCarManuals.com
Page 328 of 385

Service Replacement Part and Filter
Recommendations -Gas Engines
Engine
VIN
Oil Filter
Air Cleaner Filter
PCV Valve
Spark Plugs‘%
Fuel Filter
Radiator Cap
5.7L
K
PF353‘
A348C
cv774c
.CR43TS
GF48 1
RC36
$Four Wheel Drive Vehicle -use a
PFS 1 oil filter
*Use AC copper-cored resister type spark plugs
Service Replacement Part and Filter
Recommendations -Diesel Engines
Engine
VIN
Oil Filter
Air Cleaner
Fuel Filter
Surge Tank Cap 6.5L
S”
PF3S
A917C
TP
I 006
RC33
7.4L
N
PF35
A348C
cv774c
.CR43TS
GF48
I
RC36
6.5L
F”
PF35
A9 17C
TP
1006
RC33
*Heavy Duty Emission Engine
Air Conditioning Refrigerants
Not all air conditioning refrigerants are the same. If the air conditioning
system
in your vehicle needs refrigerant, be sure the proper refrigerant is
used. If you’re not sure, ask your GM dealer. For additional information, see
your “Warranty and Owner Assistance Information” booklet.
Air Conditioning Refrigerant Capacity
TYPE
Refrigerant R 134A
Refrigerant
R 134A
QTY
Front A/C 3.0 lbs. (1.360 kg)
Front and Rear A/C
4.25 Ibs. (I .927 kg)
6-83
ProCarManuals.com
Page 330 of 385
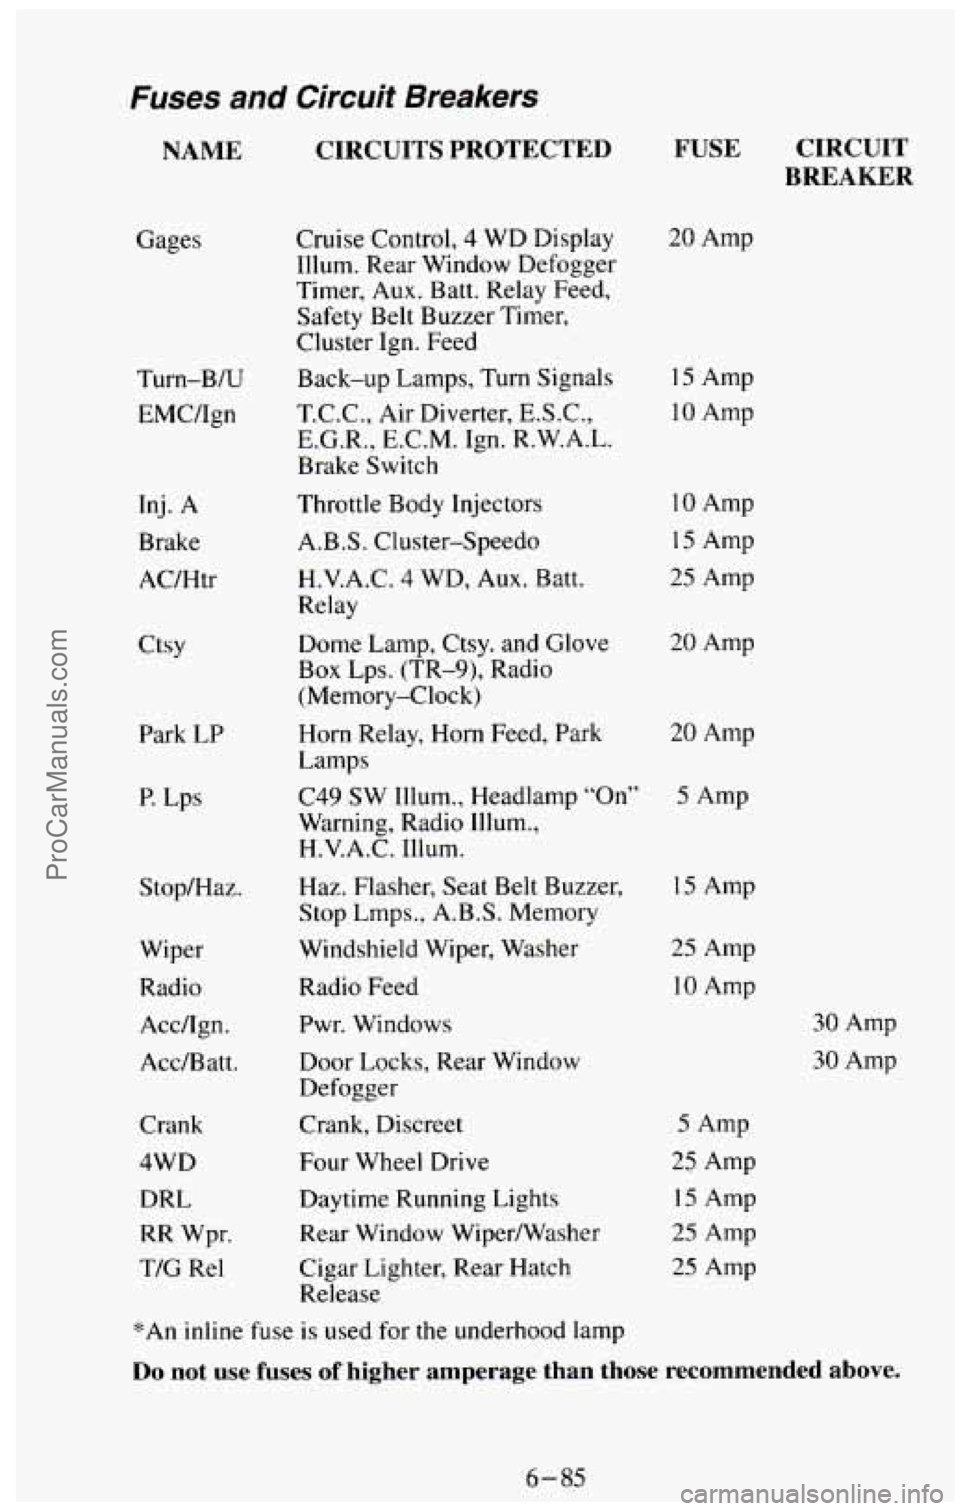
Fuses and Circuit Breakers
NAME CIRCUITS PROTECTED
Gages Turn-B/U
EMC/Ign
Inj. A
Brake
AC/Htr
Ctsy Park
LP
P. Lps
Stop/Haz.
Wiper
Radio Acc/Ign.
Acc/Batt.
Crank
4WD DRL
RR Wpr.
TIC Re1 Cruise Control,
4 WD Display
Illum. Rear Window Defogger
Timer, Aux. Batt. Relay Feed,
Safety Belt Buzzer Timer,
Cluster Ign. Feed
Back-up Lamps, Turn Signals
T.C.C., Air Diverter, E.S.C.,
E.G.R., E.C.M. Ign. R.W.A.L.
Brake Switch
Throttle Body Injectors
A.B.S. Cluster-Speed0
H.V.A.C.
4 WD, Aux. Batt.
Relay
Dome Lamp, Ctsy. and Glove
Box Lps. (TR-9), Radio
(Memory-Clock)
FUSE CIRCUIT
BREAKER
20 Amp
15 Amp
10 Amp
10 Amp
15 Amp
25 Amp
20 Amp
Horn Relay,
Horn Feed, Park 20 Amp
Lamps
C49 SW Illum., Headlamp
“On” 5 Amp
Warning, Radio Illum.,
H.V.A.C.
Illum.
Haz. Flasher, Seat Belt Buzzer,
Stop
Lmps., A.B.S. Memory
Windshield Wiper, Washer
Radio Feed Pwr. Windows
Door Locks, Rear Window
Defogger
Crank, Discreet
Four Wheel Drive
Daytime Running Lights
Rear Window Wipermasher
Cigar Lighter, Rear Hatch
Release
15 Amp
25 Amp
10 Amp
5 Amp
25 Amp
15 Amp
25 Amp
25 Amp
30 Amp
30 Amp
*An inline fuse is used for the underhood lamp
Do not use fuses of higher amperage than those recommended above.
6-85
ProCarManuals.com
Page 331 of 385
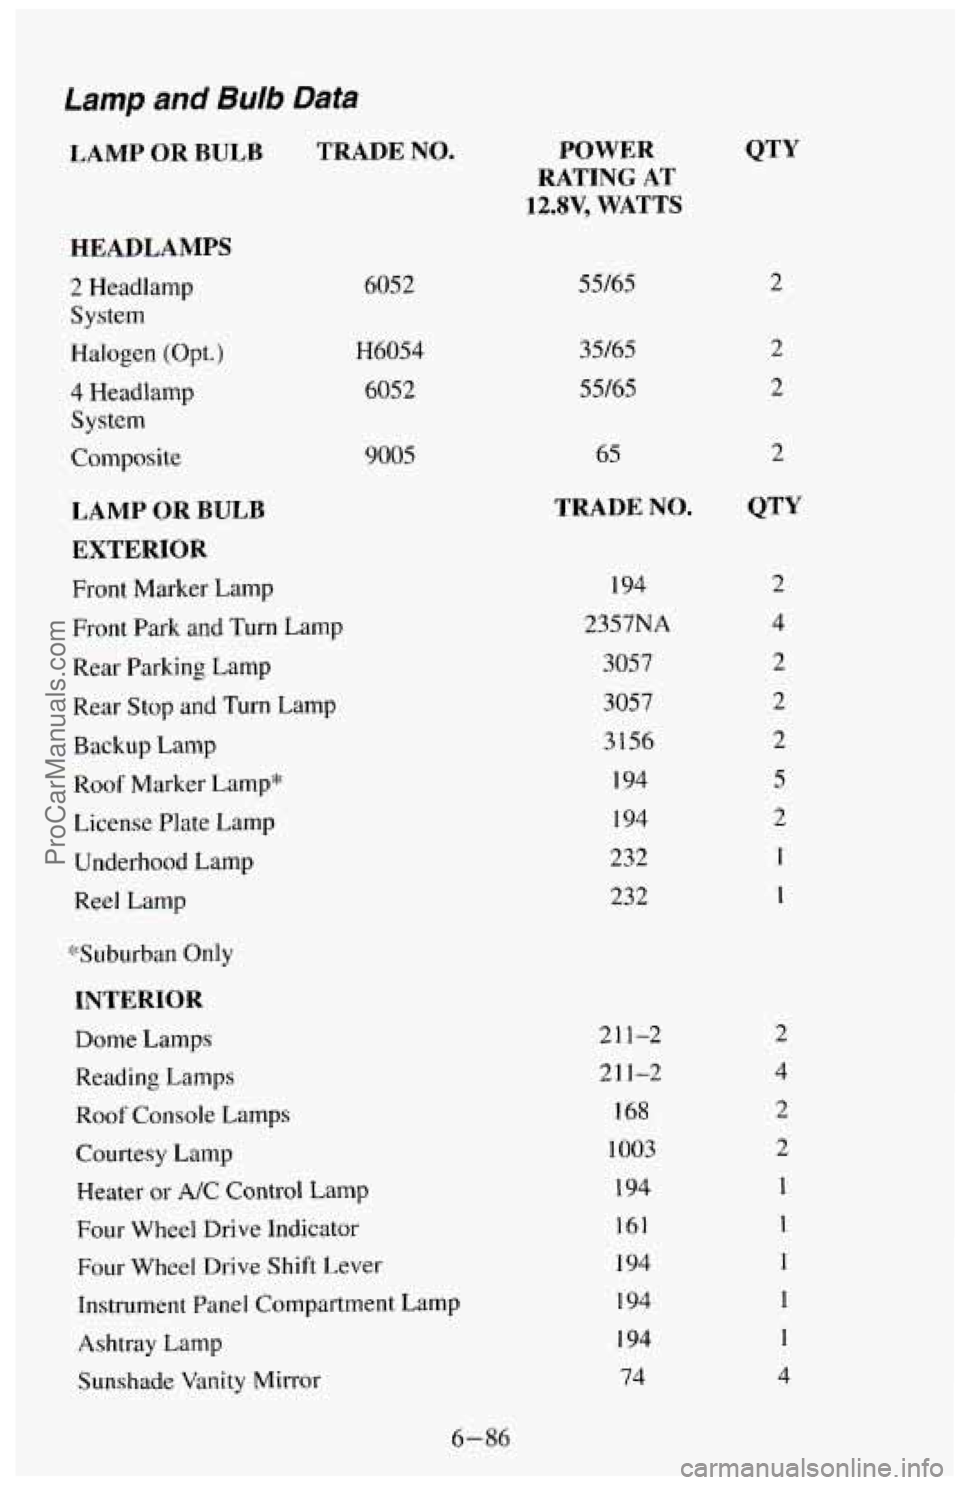
Lamp and Bulb Data
LAMP OR BULB TRADE NO.
HEADLAMPS
2 Headlamp
System
Halogen
(Opt.)
4 Headlamp
System
Composite
LAMP OR BULB
EXTERIOR
Front Marker Lamp
Front Park
and Turn Lamp
Rear Parking Lamp
Rear Stop and Turn Lamp
Backup Lamp
Roof Marker Lamp"
License Plate Lamp
Underhood Lamp
Reel Lamp
*Suburban Only 6052
H6054 6052
9005
INTERIOR
Dome Lamps
Reading Lamps
Roof Console Lamps
Courtesy Lamp
Heater
or A/C Control Lamp
Four Wheel Drive Indicator
Four Wheel Drive Shift Lever
Instrument Panel Compartment Lamp
Ashtray Lamp
Sunshade
Vanity Mirror
POWER
RATING AT
12.8V, WATTS
55/65
35/65 55/65
65
TRADE NO.
194
2357NA
3057 3057
3156
194 194
232 232
211-2
21 1-2
I68
1003
194
161
194
194
194
74
i
2
2
2
2
4
2
2
2
5
2
1
1
2
4 2
2
1
1
1
1
1
4
6-86
ProCarManuals.com
Page 336 of 385
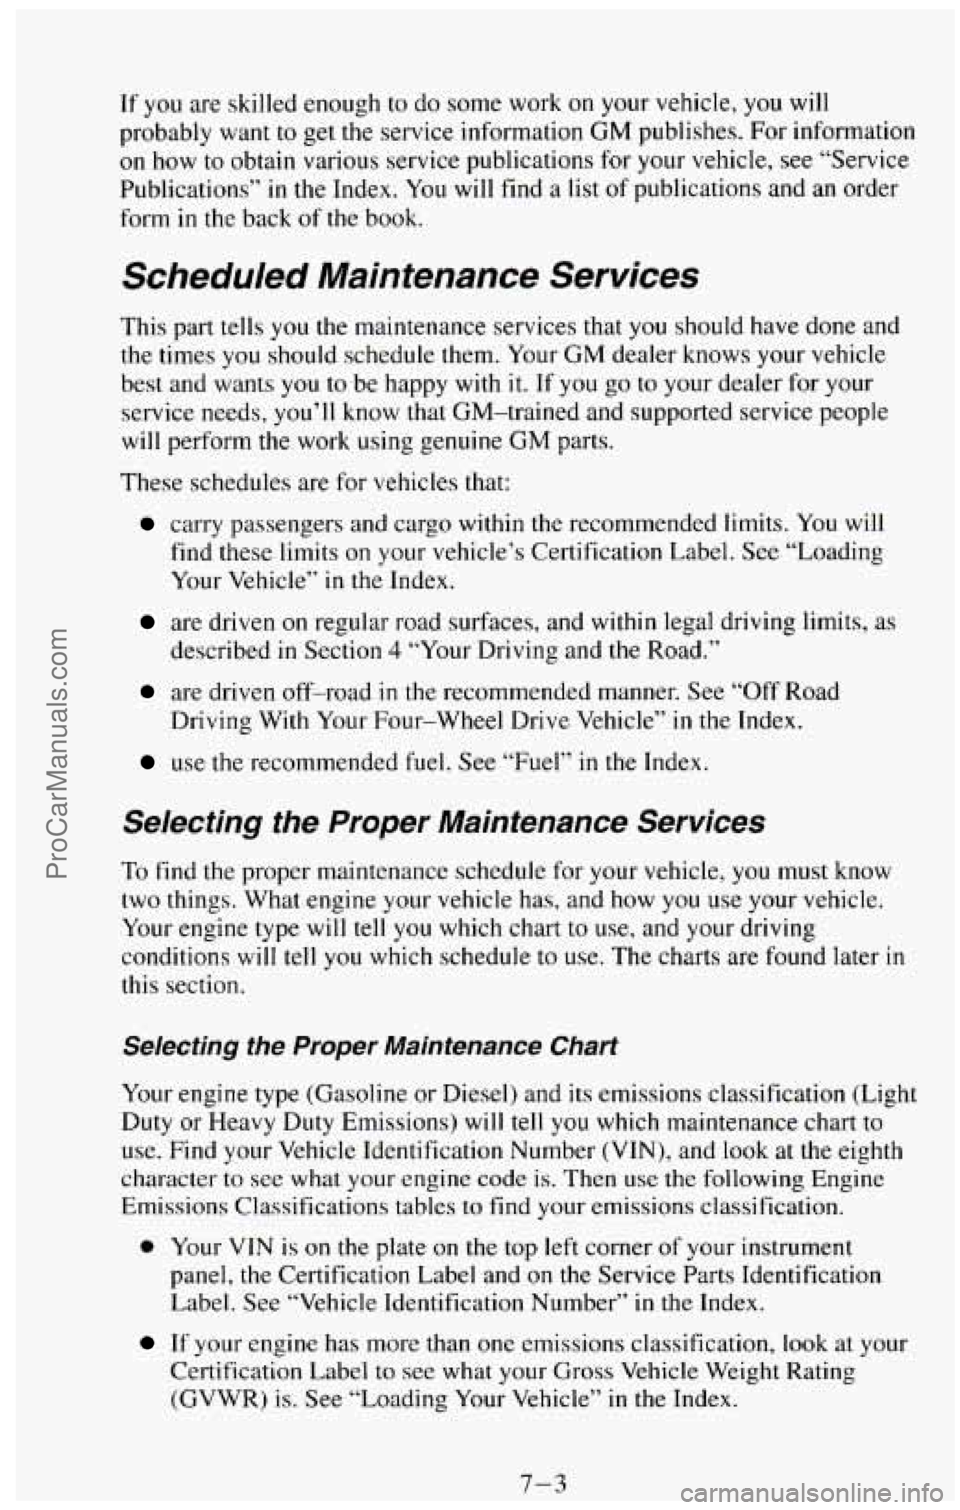
If you are skilled enough to do some work on your vehicle, you will
probably want
to get the service information GM publishes. For information
on how to obtain various service publications for your vehicle, see “Service
Publications”
in the Index. You will find a list of publications and an order
form
in the back of the book.
Scheduled Maintenance Services
This part tells you the maintenance services that you should have done and
the times you should schedule them. Your GM dealer knows your vehicle
best and wants
you to be happy with it. If you go to your dealer for your
service needs, you’ll know that GM-trained and supported service people
will perform the work using genuine GM parts.
These schedules are for vehicles that:
carry passengers and cargo within the recommended limits. You will
find these limits
on your vehicle’s Certification Label. See “Loading
Your Vehicle”
in the Index.
are driven on regular road surfaces, and within legal driving limits, as
described in Section 4 “Your Driving and the Road.”
are driven off-road in the recommended manner. See “Off Road
Driving With Your Four-wheel Drive Vehicle”
in the Index.
use the recommended fuel. See “Fuel” in the Index.
Selecting the Proper Maintenance Services
To find the proper maintenance schedule for your vehicle, you must know
two things. What engine your vehicle has, and
how you use your vehicle.
Your engine type will tell
you which chart to use, and your driving
conditions will tell
you which schedule to use. The charts are found later in
this section.
Selecting the Proper Maintenance Chart
Your engine type (Gasoline or Diesel) and its emissions classification (Light
Duty or Heavy Duty Emissions) will tell
you which maintenance chart to
use. Find your Vehicle Identification Number (VIN), and look at the eighth
character to see what your engine code
is. Then use the following Engine
Emissions Classifications tables
to find your emissions classification.
0 Your VIN is on the plate on the top left corner of your instrument
panel, the Certification Label and
on the Service Parts Identification
Label. See “Vehicle Identification Number” in the Index.
If your engine has more than one emissions classification, look at your
Certification Label to see what your Gross Vehicle Weight Rating
(GVWR)
is. See “Loading Your Vehicle” in the Index.
7-3 ProCarManuals.com
Page 357 of 385
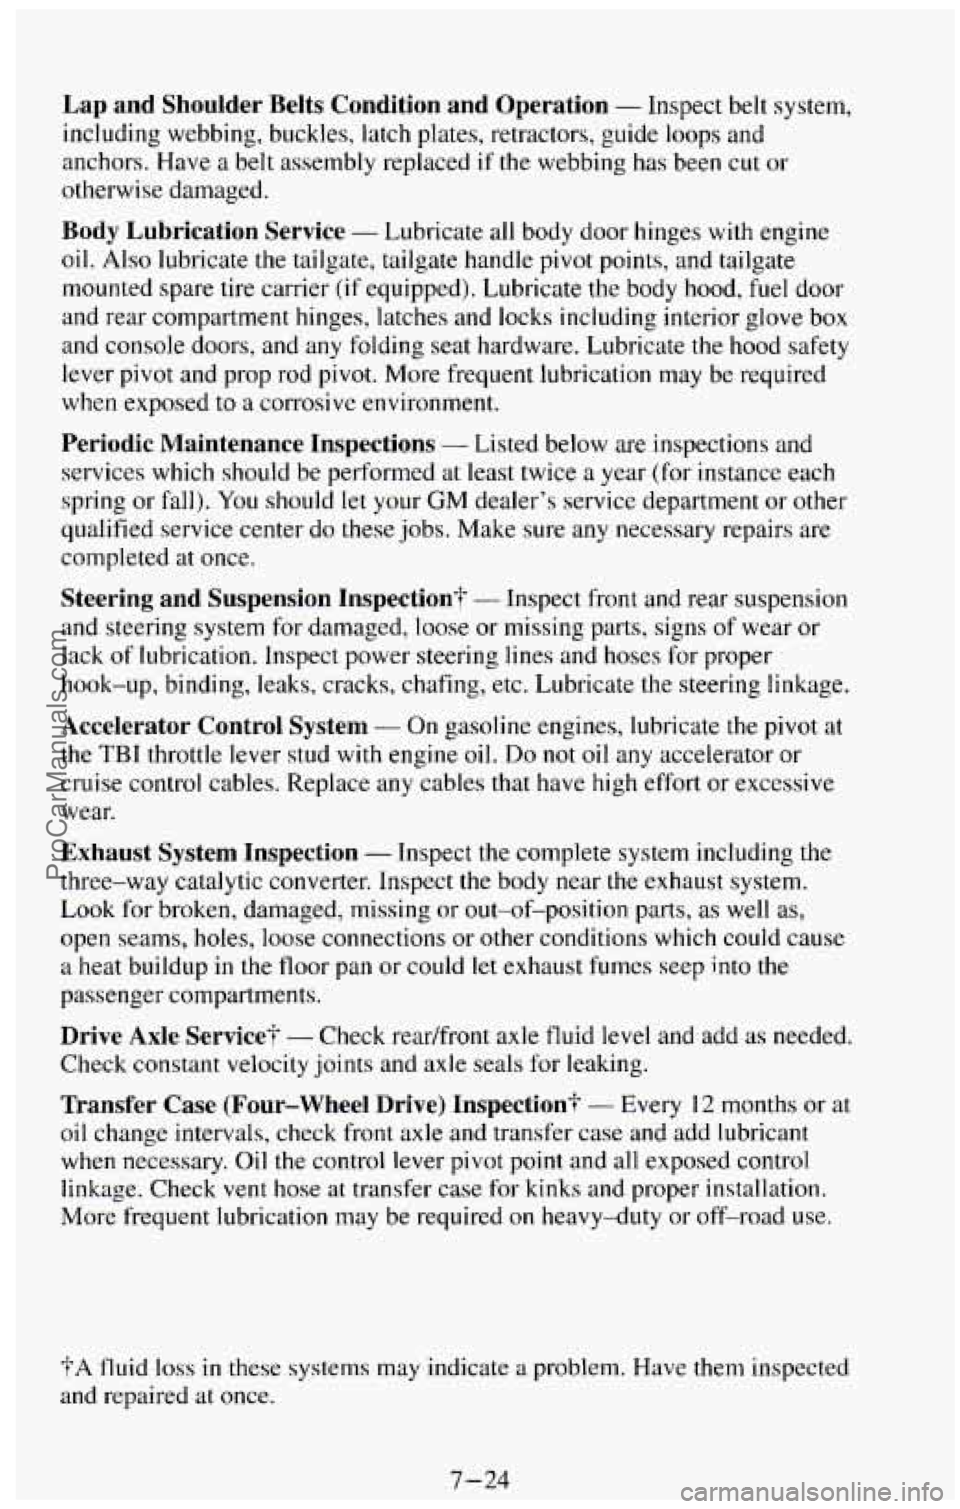
Lap and Shoulder Belts Condition and Operation - Inspect belt system,
including webbing, buckles, latch plates, retractors, guide loops\
and
anchors. Have
a belt assembly replaced if the webbing has been cut or
otherwise damaged.
Body Lubrication Service - Lubricate all body door hinges with engine
oil.
Also lubricate the tailgate, tailgate handle pivot points, and tailgate
mounted spare tire carrier (if equipped). Lubricate the body hood,
fuel door
and rear compartment hinges, latches and locks including interior glove box
and console doors, and any folding seat hardware. Lubricate the hood safety
lever pivot and prop rod pivot. More frequent lubrication may be required
when exposed to
a corrosive environment.
Periodic Maintenance Inspections - Listed below are inspections and
services which should be performed at least twice
a year (for instance each
spring or fall). You should let your
GM dealer’s service department or other
qualified service center do
these jobs. Make sure any necessary repairs are
completed at once.
Steering and Suspension Inspection? - Inspect front and rear suspension
and steering system for damaged, loose or missing parts, signs
of wear or
lack of lubrication. Inspect power steering lines and hoses for proper
hook-up, binding, leaks, cracks, chafing, etc. Lubricate the steering linkage.
Accelerator Control System - On gasoline engines, lubricate the pivot at
the
TBI throttle lever stud with engine oil. Do not oil any accelerator or
cruise control cables. Replace any cables that have high effort or excessive
wear.
Exhaust System Inspection - Inspect the complete system including the
three-way catalytic converter. Inspect the body near
the exhaust system.
Look for broken, damaged, missing or out-of-position parts,
as well as,
open seams, holes, loose connections or other conditions which could cause
a heat buildup
in the floor pan or could let exhaust fumes seep into the
passenger compartments.
Drive Axle Service? - Check readfront axle tluid level and add as needed,
Check constant velocity joints and axle seals for leaking.
Transfer Case (Four-wheel Drive) Inspection+ - Every 12 months or at
oil change intervals, check front axle and transfer case and add lubricant
when necessary. Oil the control lever pivot point and all exposed control
linkage. Check
vent hose at transfer case for kinks and proper installation.
More frequent lubrication may be required on heavy-duty or off-road use.
?A fluid loss in these systems may indicate a problem. Have them inspected
and repaired at once.
7-24
ProCarManuals.com