1994 CHEVROLET CORVETTE cooling
[x] Cancel search: coolingPage 155 of 274
Downloaded from www.Manualslib.com manuals search engine Problems on the Road
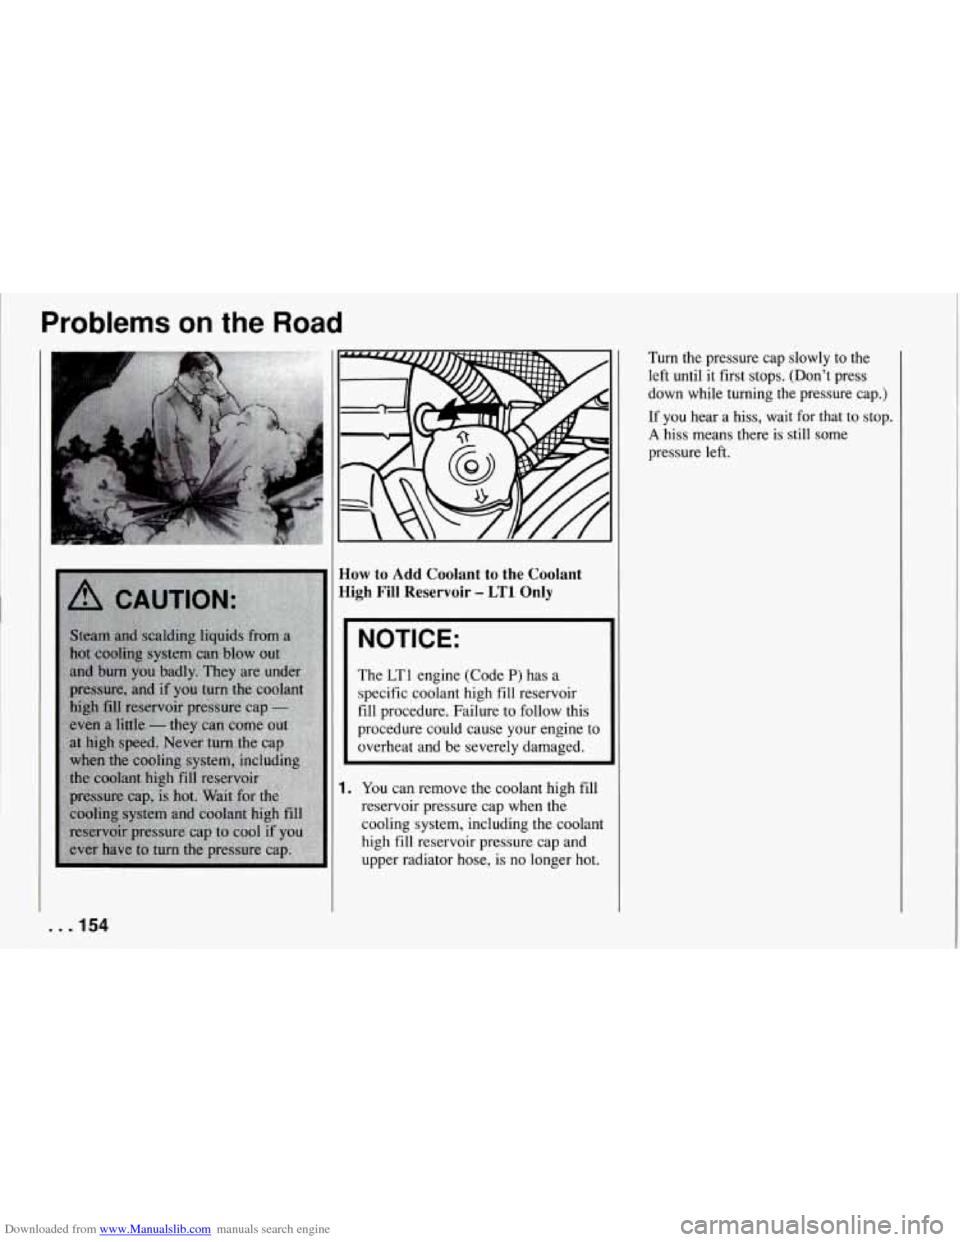
How to Add Coolant to the Coolant
High
Fill Reservoir - LT1 Only
NOTICE:
I
The LT1 engine (Code P) has a
specific coolant high fill reservoir
fill procedure. Failure to follow this
procedure could cause your engine to
overheat and be severely damaged.
1. You can remove the coolant high fill
reservoir pressure cap when the
cooling system, including the coolant
high fill reservoir pressure cap and
upper radiator hose,
is no longer hot. Turn the pressure cap slowly to
the
left until
it first stops. (Don't press
down while turning the pressure cap.)
If
you hear a hiss, wait for that to stop.
A hiss means there is still some
pressure left.
. . .I54
Page 158 of 274
Downloaded from www.Manualslib.com manuals search engine How to Add Coolant to the Coolant
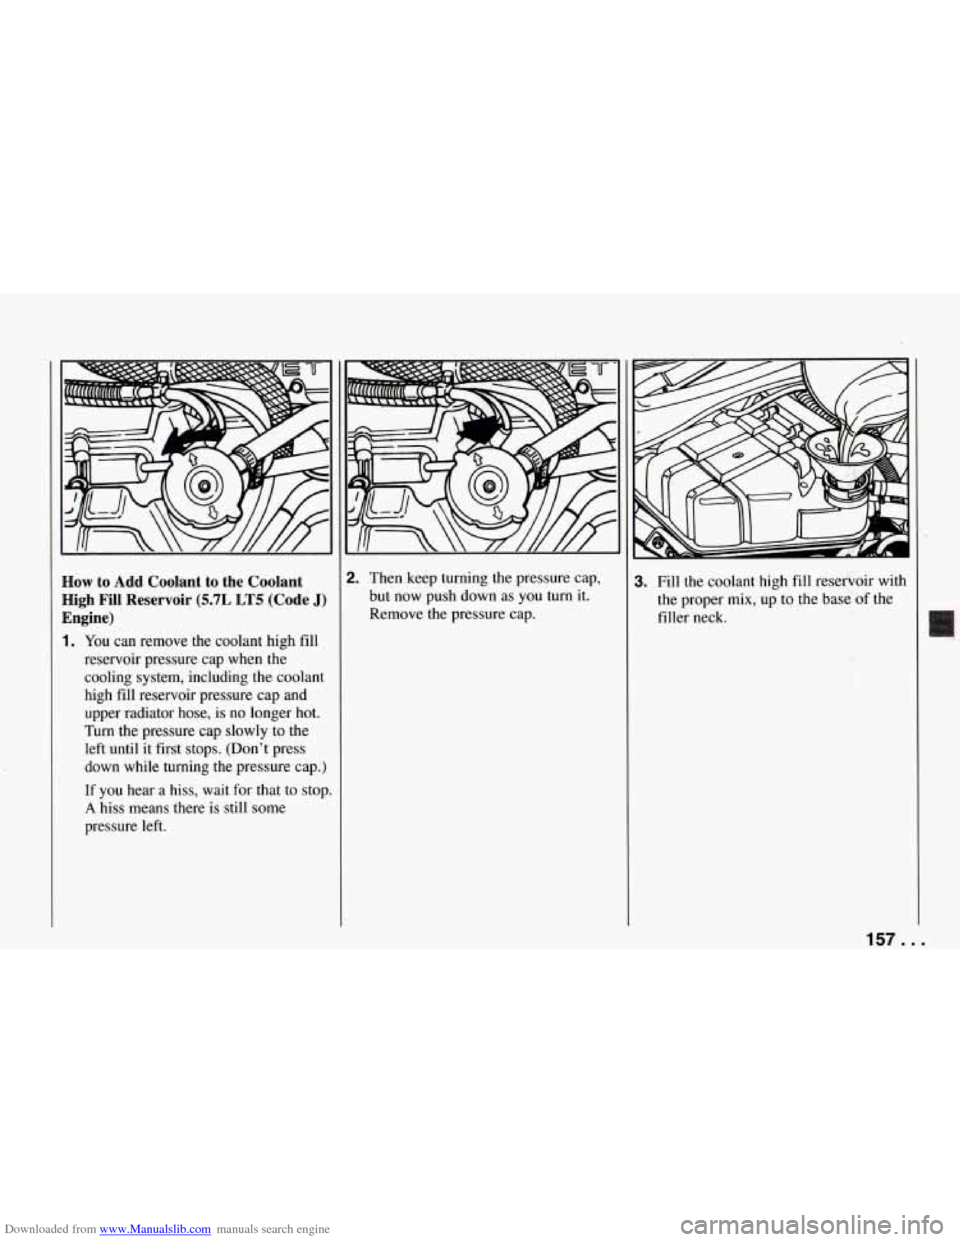
High Fill Reservoir
(5.7L LT5 (Code J)
Engine)
1. You can remove the coolant high fill
reservoir pressure cap when the
cooling system, including the coolant
high fill reservoir pressure cap
and
upper radiator hose, is no longer hot.
Turn the pressure cap slowly to the
left until it first stops. (Don’t press
down while turning the pressure cap.)
If you hear a hiss, wait for that to stop.
A hiss means there is still some
pressure left.
2. Then keep turning the pressure cap,
but now push down as you turn it.
Remove the pressure cap. 3. Fill the coolant high fill reservoir with
the proper mix, up to the base of the
filler neck.
157 ...
Page 189 of 274
Downloaded from www.Manualslib.com manuals search engine Service and Appearance Care
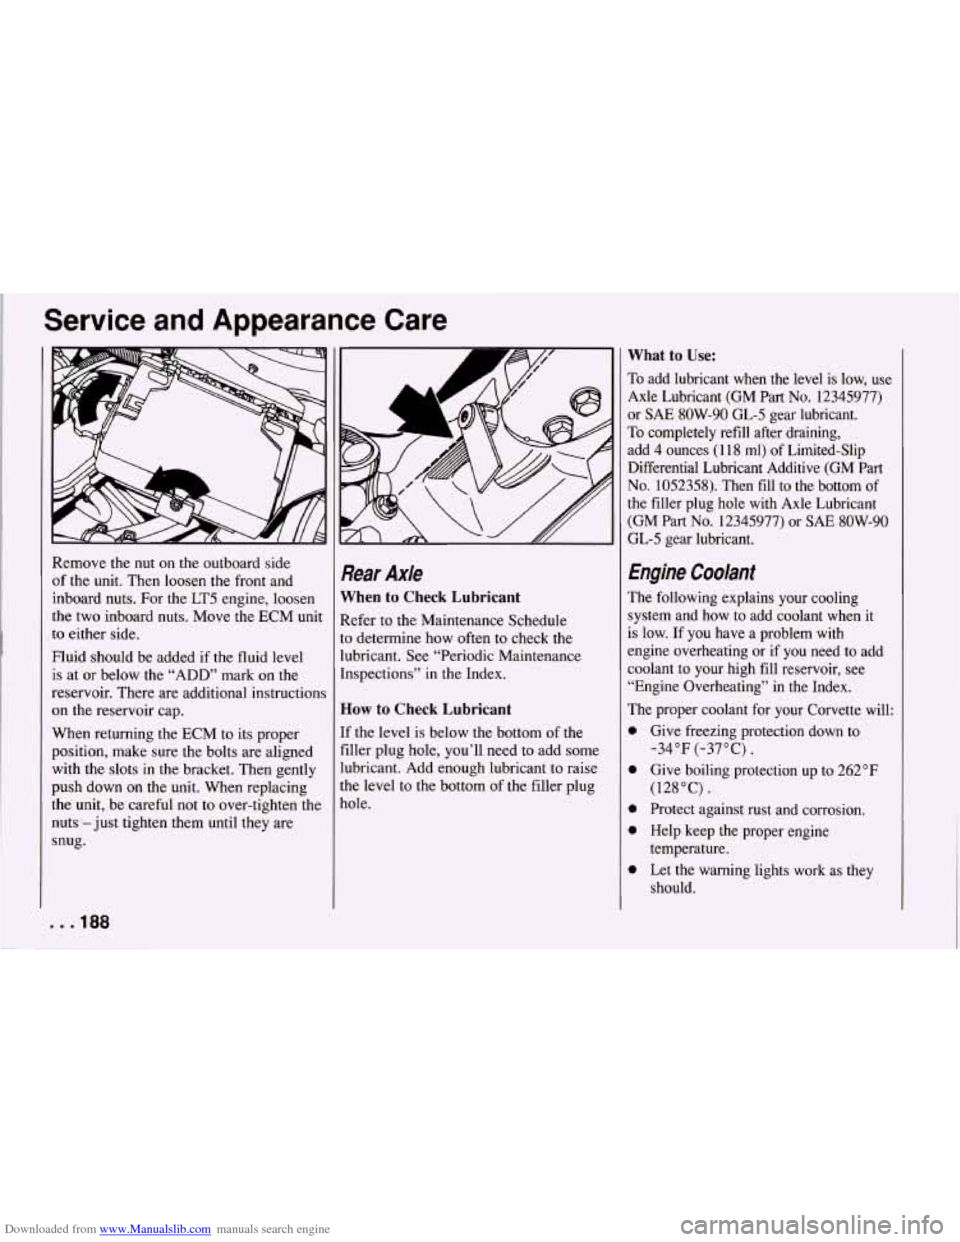
Remove the nut on the outboard side
of the unit. Then loosen the front and
inboard nuts. For the LT5 engine, loosen
the two inboard nuts. Move the ECM unit
to either side.
Fluid should be added if the fluid level
is at or below the “ADD” mark on the
reservoir. There are additional instructions
on the reservoir cap.
When returning the ECM to its proper
position, make sure the bolts are aligned
with the slots in the bracket. Then gently
push down on the unit. When replacing
the unit, be careful not to over-tighten the
nuts -just tighten them until they are
snug.
. . * 188
Rear Axle
When to Check Lubricant
Refer to the Maintenance Schedule
to determine how often to check the
lubricant. See “Periodic Maintenance
Inspections” in the Index.
How to Check Lubricant
If the level is below the bottom of the
filler plug hole, you’ll need to add some
lubricant. Add enough lubricant to raise
the level to the bottom of the filler plug
hole.
What to Use:
To add lubricant when the level is low, use
Axle Lubricant (GM Part
No. 12345977)
or
SAE 8OW-90 GL-5 gear lubricant.
To completely refill after draining,
add 4 ounces (1 18 ml) of Limited-Slip
Differential Lubricant Additive (GM Part
No. 1052358). Then fill to the bottom of
the filler plug hole with Axle Lubricant
(GM Part
No. 12345977) or SAE 8OW-90
GL-5 gear lubricant.
Engine Coolant
The following explains your cooling
system and how to add coolant when
it
is low. If you have a problem with
engine overheating or
if you need to add
coolant to your high fill reservoir, see
“Engine Overheating” in the Index.
The proper coolant for your Corvette will:
0
0
0
0
0
Give freezing protection down to -34°F (-37°C).
Give boiling protection up to 262°F
(128°C).
Protect against rust and corrosion.
Help keep the proper engine
temperature.
Let the warning lights work as they
should.
Page 210 of 274
Downloaded from www.Manualslib.com manuals search engine If you need to replace any of your wheels,
wheel bolts, or wheel nuts, replace them
only with new
GM original equipment
parts. This way,
you will be sure to have
the right wheel, wheel bolts, and wheel
nuts for your Corvette.
NOTICE:
The wrong wheel can also cause
problems with bearing life, brake
cooling, speedometer/odometer
calibration, headlight aim, bumper
height, vehicle ground clearance, and
tire clearance to the body and chassis.
lrire Chains
FICE:
I
Don't use tire chains; they can
damage your vehicle.
Used Replacement Wheels
209 . .
Page 222 of 274

Downloaded from www.Manualslib.com manuals search engine 23 - Injectors #2, 3, 5, 8 (LTI);
Secondary Injector Relays (#1,2
(LT5); Secondary SF1 Control
Modules (LT5)
(10 Amp.)
24 - Turn Signal Flashers (10 Amp.)
25 - Ignition Coil and Ignition Coil
26 - Passive Keyless Entry Module
27 - Instrument Cluster; Driver Module (10 Amp.)
(5 Amp.)
Information Center; Air Bag Derm; Acceleration Slip Regulation
Switch
(15 Amp.)
Transmission Position Switch; One
to Four Shift Solenoid
(10 Amp.)
29 - Primary Cooling Fan Relay Coil;
Secondary Cooling Fan Relay Coil
28 - Backup Lights Switch;
(5 Amp.)
30 - Direct Ignition Module; Camshaft Sensor; Canister Purge Solenoid;
Throttle Position Sensor Buffer
Module; EGR Circuit (LT1);
31
32
Secondary Air Inlet Solenoid
(LT5); Electronic Ignition Control
Module (LT5); One to Four Shift
Relay
( 10 Amp.)
Power Mirror Adjuster Control;
Lighted Rearview Mirror; Visor
Vanity Mirrors
(5 Amp.)
Cruise Control Engage Switch;
Daytime Running Lights Module;
Low Tire Pressure Warning
Module
(5 Amp.)
33 - Engine Control Module (5 Amp.)
34 - Air Bag System (15 Amp.)
35 - Central Control Module (5 Amp.)
36 - Footwell Courtesy Lights; Door
Courtesy Lights; Glove
Compartment Lights; Lighted
Rearview Mirror
(5 Amp.)
37 - Bose Amplifier Relay; Power
Antenna Relay; Cargo
Compartment Lights
(20 Amp.)
Relay
(5 Amp.)
38 - LCD; Tone Generator; Dome Light
39 - Central Control Module (5 Amp.)
40 - Radio Receiver Box (Battery);
Radio Control Head; Passive
Keyless Entry Module
(5 Amp.)
41 - Sport Seat (10 Amp.)
42 - Power Door Lock Switches; Driver
Information Center; Passive
Keyless Entry Module
(20 Amp.)
43 - A/C Programmer (5 Amp.)
44 - Cigar Lighter; Accessory Plug
45 - Hatch or Deck Lid Release Relay
K - Power Seats (30 Amp. Circuit
L - Blank
M - Power Windows (30 Amp: Circuit
N - Blank
P - Blank
(15 Amp.)
(25 Amp.)
Breaker)
Breaker)
221 . I
Page 223 of 274
Downloaded from www.Manualslib.com manuals search engine Service and Appearance Care
. . .222
1 I INTERIOR LIGHTING
20A I
I RH HDLP 30A I I I
h 3 5 I SECONDARY COOLING FAN
40A I
6 I EXTERIOR LIGHTING
60A
I
7 piiiFiAAccsy
I
AIR PUMP
20A I
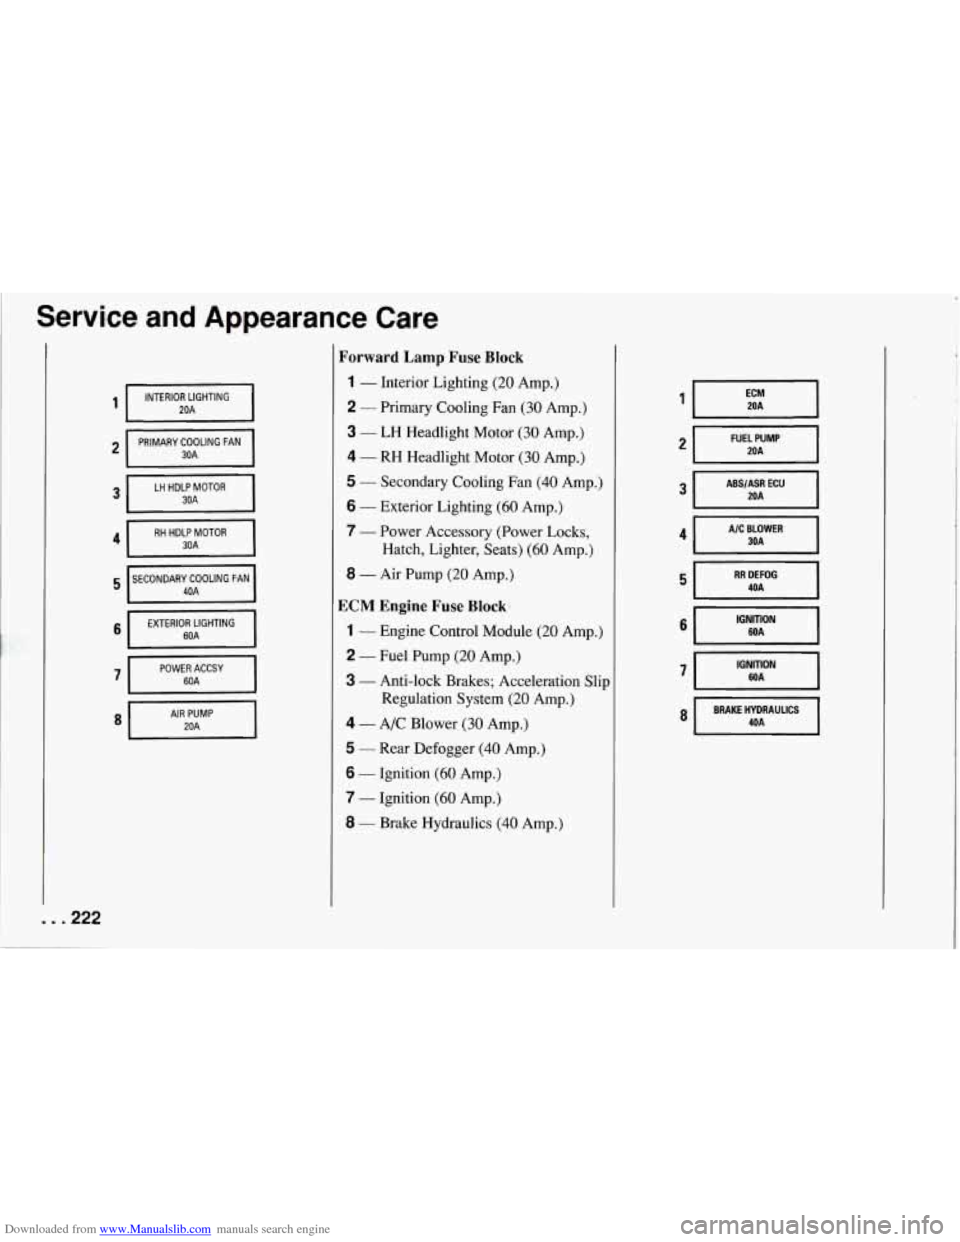
Forward Lamp Fuse Block
1 - Interior Lighting (20 Amp.)
2 - Primary Cooling Fan (30 Amp.)
3 - LH Headlight Motor (30 Amp.)
4 - RH Headlight Motor (30 Amp.)
5 - Secondary Cooling Fan (40 Amp.)
6 - Exterior Lighting (60 Amp.)
7
- Power Accessory (Power Locks, Hatch, Lighter, Seats)
(60 Amp.)
8 - Air Pump (20 Amp.)
ECM Engine Fuse Block.
1 - Engine Control Module (20 Amp.)
2 - Fuel Pump (20 Amp.)
3 - Anti-lock Brakes; Acceleration Slip
Regulation System
(20 Amp.)
4 - A/C Blower (30 Amp.)
5 - Rear Defogger (40 Amp.)
6 - Ignition (60 Amp.)
7 - Ignition (60 Amp.)
8 - Brake Hydraulics (40 Amp.)
FUEL PUMP
ABS/ASR ECU
A/C BLOWER
IGNITION WA I
8 I BRAKE HYDRAULICS 4OA I
Page 227 of 274
Downloaded from www.Manualslib.com manuals search engine l Service and Appearance Care
Capacities (Approximate)
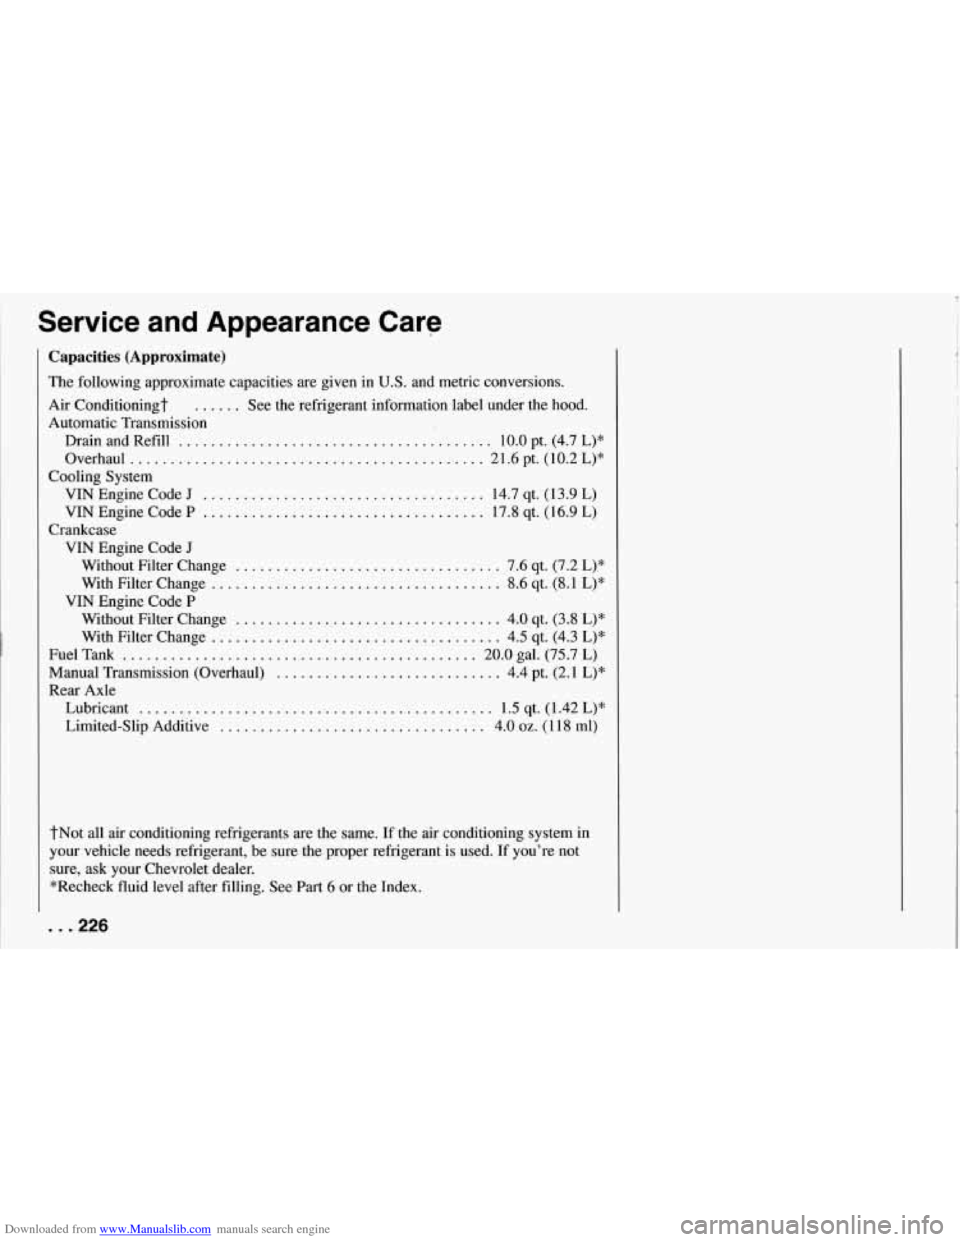
The following approximate capacities are given in U.S. and metric conversions.
Air Conditioningt
...... See the refrigerant information label under the hood.
Automatic Transmission
Drain and Refill
....................................... 10.0 pt. (4.7 L)*
Overhaul
............................................ 21.6 pt. (10.2 L)*
VIN Engine Code J ................................... 14.7 qt. (1 3.9 L)
VIN Engine Code
P ................................... 17.8 qt. (16.9 L)
VIN Engine Code J
Cooling System
Crankcase Without Filter Change
................................. 7.6 qt. (7.2 L)*
With Filter Change
.................................... 8.6 qt. (8.1 L)*
Without Filter Change ................................. 4.0 qt. (3.8 L)*
With Filter Change .................................... 4.5 qt. (4.3 L)*
Fuel Tank ............................................ 20.0 gal. (75.7 L)
Manual Transmission (Overhaul)
............................ 4.4 pt. (2.1 L)*
Rear Axle
Lubricant
............................................ 1.5 qt. (1.42 L)*
Limited-Slip Additive
................................. 4.0 oz. (1 18 ml)
VIN Engine
Code
P
tNot all air conditioning refrigerants are the same. If the air conditioning system in
your vehicle needs refrigerant, be sure the proper refrigerant is used. If you’re not
sure, ask your Chevrolet dealer.
*Recheck fluid level after filling. See Part
6 or the Index.
.. .226
Page 233 of 274
Downloaded from www.Manualslib.com manuals search engine Maintenance Schedule
Section A: Scheduled Maintenance Services (Cont.)
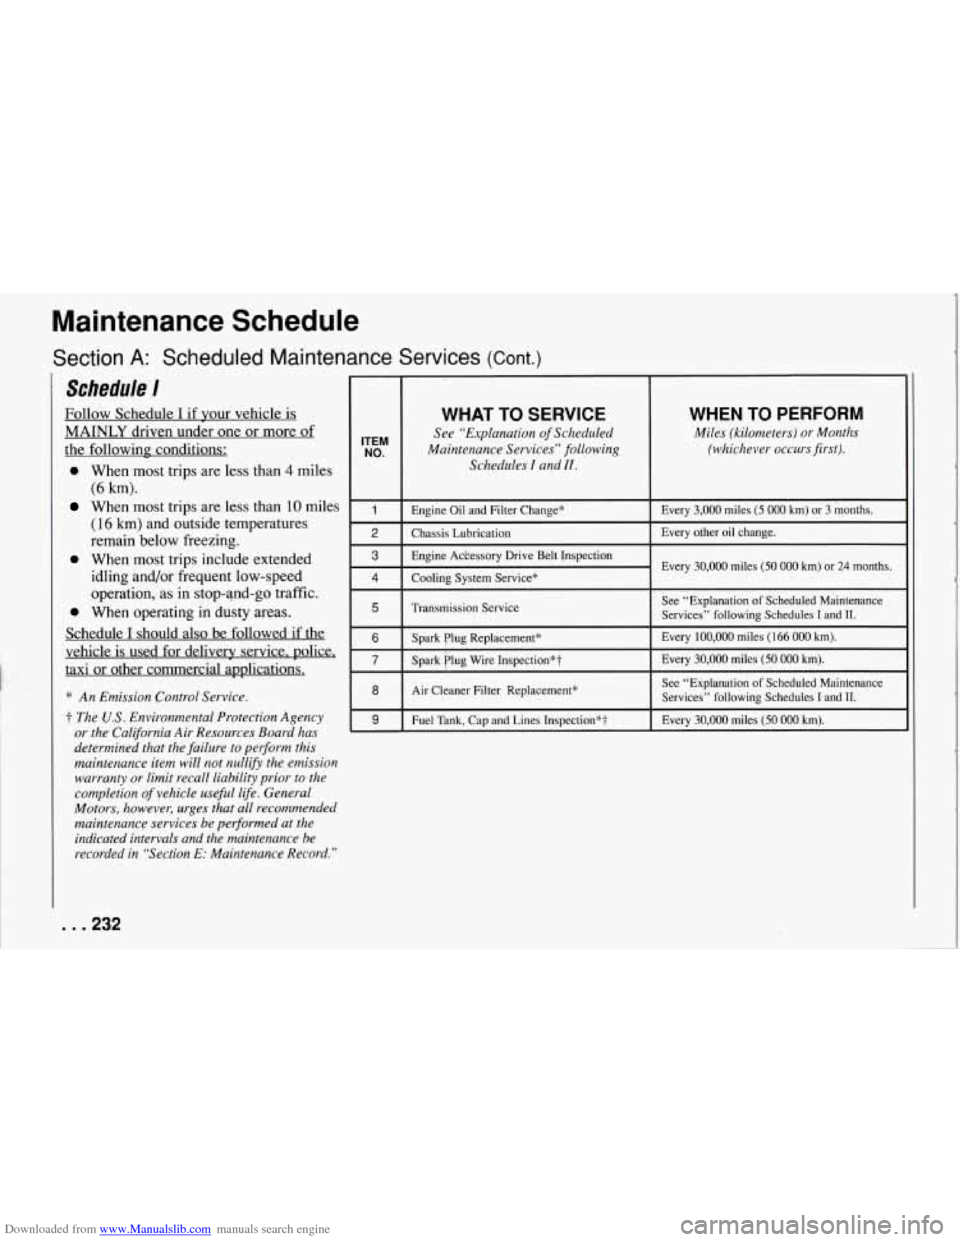
Schedule I
Follow Schedule I if your vehicle is
MAINLY driven under one or more of
the following conditions:
0 When most trips are less than 4 miles
(6 km).
When most trips are less than 10 miles
(16 km) and outside temperatures
remain below freezing.
0 When most trips include extended idling and/or frequent low-speed
operation, as in stop-and-go traffic.
0 When operating in dusty areas.
Schedule
I should also be followed if the
vehicle
is used for delivery service. police,
taxi or other commercial applications.
* An Emission Control Service.
t The U.S. Environmental Protection Agency
or the California Air Resources Board has
determined that the failure to perform this
maintenance item will not nullify the emission warranty or limit recall liability prior to the
completion
of vehicle usefil life. General
Motors, however, urges that all recommended
maintenance services be performed at the
indicated intervals and the maintenance be
recorded in “Section E: Maintenance Record.”
WHAT TO SERVICE
See “Explanation of Scheduled
Schedules
I and II.
ITEM NO. Maintenance Services” following
WHEN TO PERFORM
Miles (kilometers) or Months
(whichever occurs first).
I I
1 I Engine Oil and Filter Change* 1 Every 3,000 miles (5 000 km) or 3 months.
2 I Chassis Lubrication I Every other oil change.
3
Cooling System Service” 4
Engine Adkessory Drive Belt Inspection
Every 30,000 miles (50 000 km) or 24 months.
5 I Transmission Service I
See “Explanation of Scheduled Maintenance
Services” following Schedules
I and 11.
6
7
Every 100,000 miles (166 000 km).
Spark Plug Replacement*
Every
30,000 miles (50 000 km).
Spark flug Wire Inspection*?
8 I Air Cleaner Filter Replacement* I
See “Explanation of Scheduled Maintenance
Services” following Schedules
I and 11.
9 I Fuel Tank, Cap and Lines Inspection*t Every 30,000 miles (50 000 km).
. . .232