1994 CHEVROLET CAVALIER service schedule
[x] Cancel search: service schedulePage 2 of 243
Downloaded from www.Manualslib.com manuals search engine OChevrolet Cavalier I994 Owner’s Manual
Table of Contents
I
Part I
Part 2
Part 3
Seats & Restraint Systems.................. 1.,1
Features & Controls.. ........................... 41
Comfort Controls
& Audio Systems.... 91
Part 4 Your Driving and the Road ................ 107
Part 5 Problems on the Road ....................... 127
Part 6
Part 7
Part 8
Maintenance Schedule ...................... 203
Customer Assistance Information
.... 221
Includes “Reporting Safety Defects” on page 224
Y
Part 9
Service Station Information .... Last Page
Printed in USA 10234005 B First Edition
Page 7 of 243
Downloaded from www.Manualslib.com manuals search engine Using Your 7994 Chevrolet
Owner’s Manual
Many people read their owner’s
manual
from beginning to end when
they first receive their new vehicle. This
will help you learn about the
features and controls for your vehicle.
In this manual, you’ll find that
pictures and words work together
to explain things quickly.
There are nine parts with thumb-tabbed
pages in this manual. Each part begins
with a brief list of contents,
so you can
usually tell at a glance if that part
contains the information you want.
You can bend the manual slightly to
reveal the tabs that help you find a part.
Part 1: Seats & Restraint Systems
This part tells you how to use your seats
and safety belts properly.
Part 2 Features & Controls
This part explains how to start and
operate your Chevrolet
.
Part 3: Comfort Controls & Audio
Systems
This part tells you how to adjust the
ventilation and comfort controls and
how to operate your audio system.
Part 4 Your Driving and the Road
Here you’ll find helpful information and
tips about the road and how
to drive
under different conditions.
Part 5: Problems on the Road
This part tells you what to do if you
have a problem while driving, such as a
flat tire or engine overheating.
Part 6: Service & Appearance Care
Here the manual tells you how to keep
your Chevrolet running properly and
looking good.
Part 7: Maintenance Schedule
This part tells you when to perform
vehicle maintenance and what fluids
and lubricants to use.
Page 166 of 243
Downloaded from www.Manualslib.com manuals search engine Engine Coolant Heater (Engine Block Heater)
An engine coolant heater can be a big
help if you have to park outside in very
cold weather,
0°F (-18°C) or colder. If
your vehicle has this option, see
Engine
Coolant Heater
in the Index.
What to Do with Used Oil
Did you know that used engine oil
contains certain elements that may be
unhealthy for your
skin and could even
cause cancer? Don’t let used oil stay on
your skin for very long. Clean your
skin
and nails with soap and water, or a
good hand cleaner. Wash or properly
throw away clothing or rags containing
used engine oil. (See the manufacturer’s
warnings about the use and disposal of
oil products.) Used oil
can be a real threat.,t.o the
environment. If you change your
own
oil, be sure to drain all free-flowing oil
from the filter before disposal. Don’t
ever dispose of oil by putting it in the
trash, pouring it
on the ground, into
sewers, or into streams or bodies of
water. Instead, recycle it by taking it to
a place that collects used oil.
If you
have a problem properly disposing of
your used oil, ask your dealer, a service
station or a local recycling center for
help.
Air Cleaner
Refer to the Maintenance Schedule to
determine when to replace the air filter.
See
Scheduled Maintenance Services in
the
Index.
-
NOTICE:
If the air cleaner is off, a backfire
can cause a damaging engine fire.
And,
dirt can easily get into your
engine, which will damage
it.
Always have the air cleaner in place
when you’re driving.
I
Page 168 of 243
Downloaded from www.Manualslib.com manuals search engine I Automatic Transaxle Fluid
1 When to Check and Change
A good time to check your automatic
transaxle fluid level is when the engine
oil is changed. Refer to the Maintenance
Schedule to determine when to change
your fluid. See
Scheduled Maintenance
Services
in the Index.
How to Check
Because this operation can be a little
difficult, you may choose to have this
done at your Chevrolet dealership
Service Department.
If you do it yourself, be sure to follow
all the instructions here, or
you could
get a false reading on the dipstick.
NOTICE:
~. , ,'
Too much or too little fluid can
damage your transaxle.
Too much can
mean that some of the fluid could
come out and fall on hot engine parts
or exhaust system, starting a fire.
Be sure to get an accurate reading
if
you check your transaxle fluid.
Wait at least
30 minutes before
checking the transaxle fluid level
if you
have been driving:
When outside temperatures are above
At high speed for quite a while.
In heavy traffic - especially in hot
To get the right reading, the fluid
should be at normal operating
temperature, which is 180°F to 200°F
(82°C to 93°C).
Get the vehicle warmed up by driving
about 15 miles (24 lun) when outside
temperatures are above
50°F (10.C). If
it's colder than 50°F (lOOC), you may
have to drive longer.
90°F
(32°C).
weather.
To check the fluid level
Park your vehicle on a level place.
With the parking brake applied, place
With your foot on the brake pedal,
the
shift lever in
P (Park).
move the shift lever through each gear
range, pausing for about three
seconds in each range. Then, position
the shift lever in
P (Park).
Let the engine run at idle for three to
five minutes.
Then, without shutting off the engine,
follow these steps:
1. Pull out the dipstick and wipe it with
2. Push it back in all the way, wait three
a clean rag or
paper towel.
seconds and then pull it back out
again.
3. Check both sides of the dipstick, and
read the lower level. The fluid level
must be in the cross-hatched area.
4. If the fluid level is in the acceptable
range, push the dipstick back in all
the way.
Page 169 of 243
Downloaded from www.Manualslib.com manuals search engine Service & Appearance Care
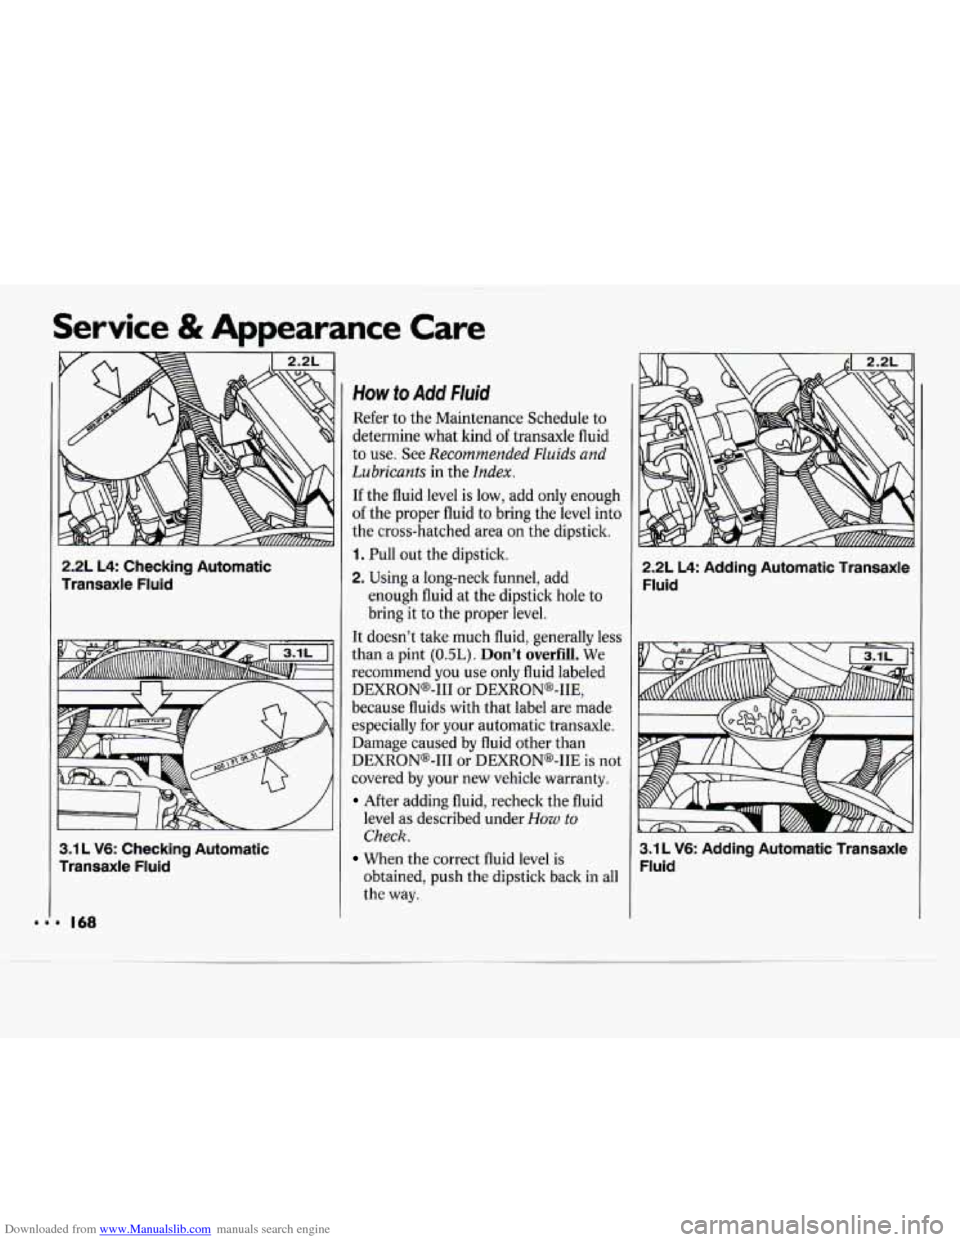
2.2L L4: Checking Automatic
Transaxle Fluid
3.1 L V6: Checking Automatic
Transaxle Fluid
. 168
How to Add fluid
Refer to the Maintenance Schedule to
determine what kind of transaxle fluid
to use. See
Recommended Fluids and
Lubricants in the Index.
If the fluid level is low, add only enough
of the proper fluid to bring the level into
the cross-hatched area
on the dipstick.
1. Pull out the dipstick.
2. Using a long-neck funnel, add
enough fluid at the dipstick hole
to
bring it to the proper level.
It doesn’t take much fluid, generally less
than a pint
(0.5L). Don’t overfill. We
recommend you use only fluid labeled
DEXRONo-111 or DEXRONB-HE,
because fluids with that label are made
especially for your automatic transaxle.
Damage caused by fluid other than
DEXRONO-I11
or DEXRONB-IIE is not
covered by your new vehicle warranty.
After adding fluid, recheck the fluid
level as described under
How to
Check.
obtained, push the dipstick back in all
the way.
When the correct fluid level is
2.2L L4: Adding Automatic Transaxle
Fluid
3.1 L V6: Adding Automatic Transaxle
Fluid
Page 170 of 243
Downloaded from www.Manualslib.com manuals search engine Manual Transaxle Fluid
When to Check
A good time to have it checked is when
the engine oil is changed. However, the
fluid in your manual transaxle doesn't
require changing.
How to Check
Because this operation can be a little
difficult, you may choose to have this
done at a Chevrolet dealership Service
Department.
If you do it yourself, be sure to follow
all the instructions here, or you could
get a false reading on the dipstick.
NOTICE:
Too much or too little fluid can
damage your transaxle.
Too much
can mean that some of the fluid
could come out and fall on hot'
engine parts or exhaust system,
starting a fire. Be sure to get an
accurate reading if you check your
transaxle fluid. Check
the fluid level only when your
engine is off, the vehicle is parked on a
level place and the transaxle is cool
enough for you to rest your fingers on
the transaxle case.
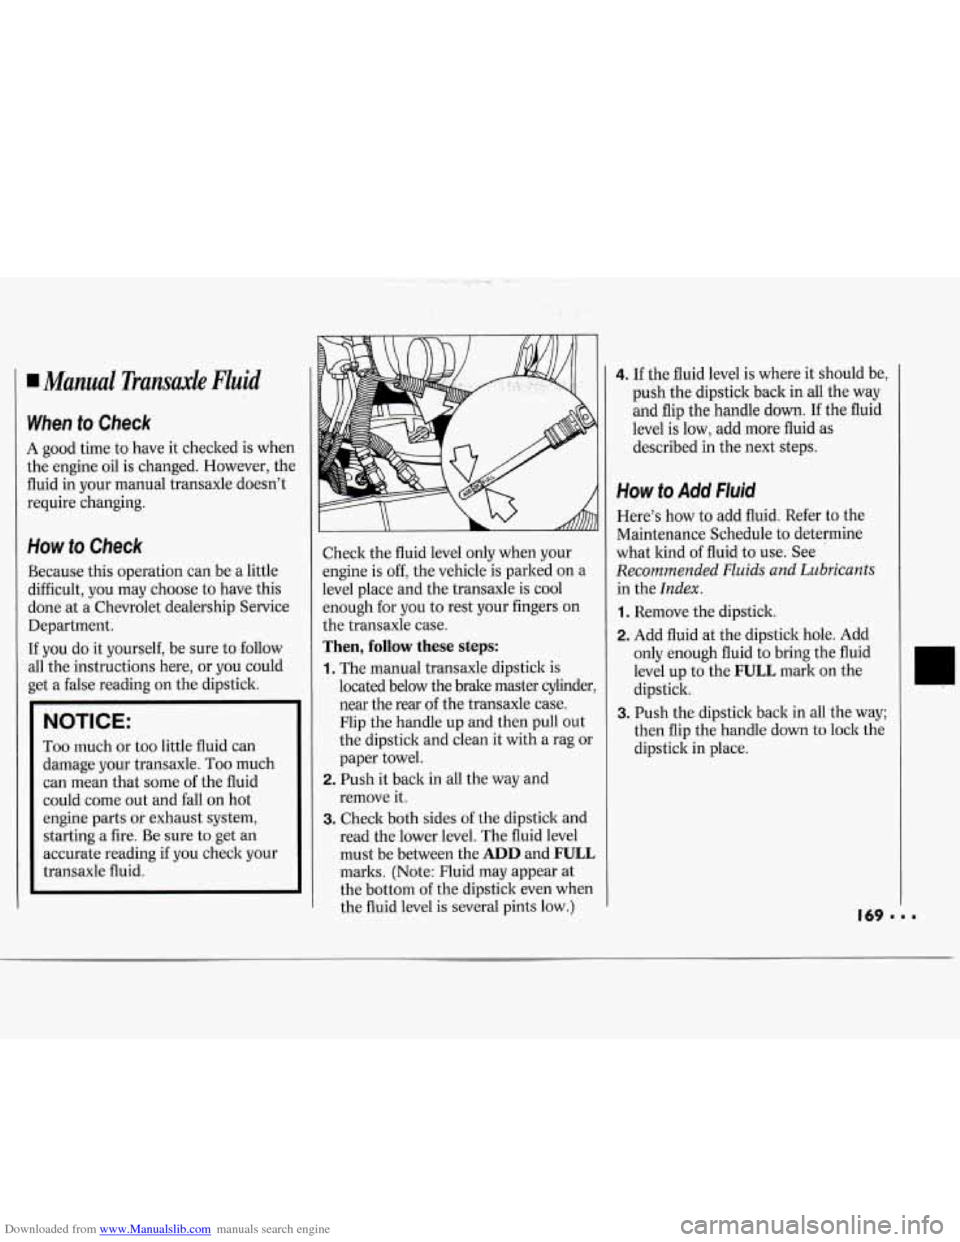
Then, follow these steps:
1. The manual transaxle dipstick is
located below the brake master cylinder
near the rear of the transaxle case.
Flip the handle up and then pull out
the dipstick and clean it with a rag or
paper towel.
2. Push it back in all the way and
remove it.
3. Check both sides of the dipstick and
read the lower level. The fluid level
must be between the
ADD and FULL
marks. (Note: Fluid may appear at
the bottom of the dipstick even when
the fluid level is several pints low.)
4. If the fluid level is where it should be,
push the dipstick back in all the way
and flip the handle down.
If the fluid
level is low, add more fluid as
described in the next steps.
How to Add Fluid
Here's how to add fluid. Refer to the
Maintenance Schedule to determine
what kind of fluid to use. See
Recommended Fluids and Lubricants
in the Index.
1. Remove the dipstick.
2. Add fluid at the dipstick hole. Add
only enough fluid to bring the fluid
level up to the
FULL mark on the
dipstick.
3. Push the dipstick back in all the way;
then flip the handle down
to lock the
dipstick in place.
Page 171 of 243
Downloaded from www.Manualslib.com manuals search engine ~~ ~ Service & Appearance Care
170
I Hydraulic Clutch
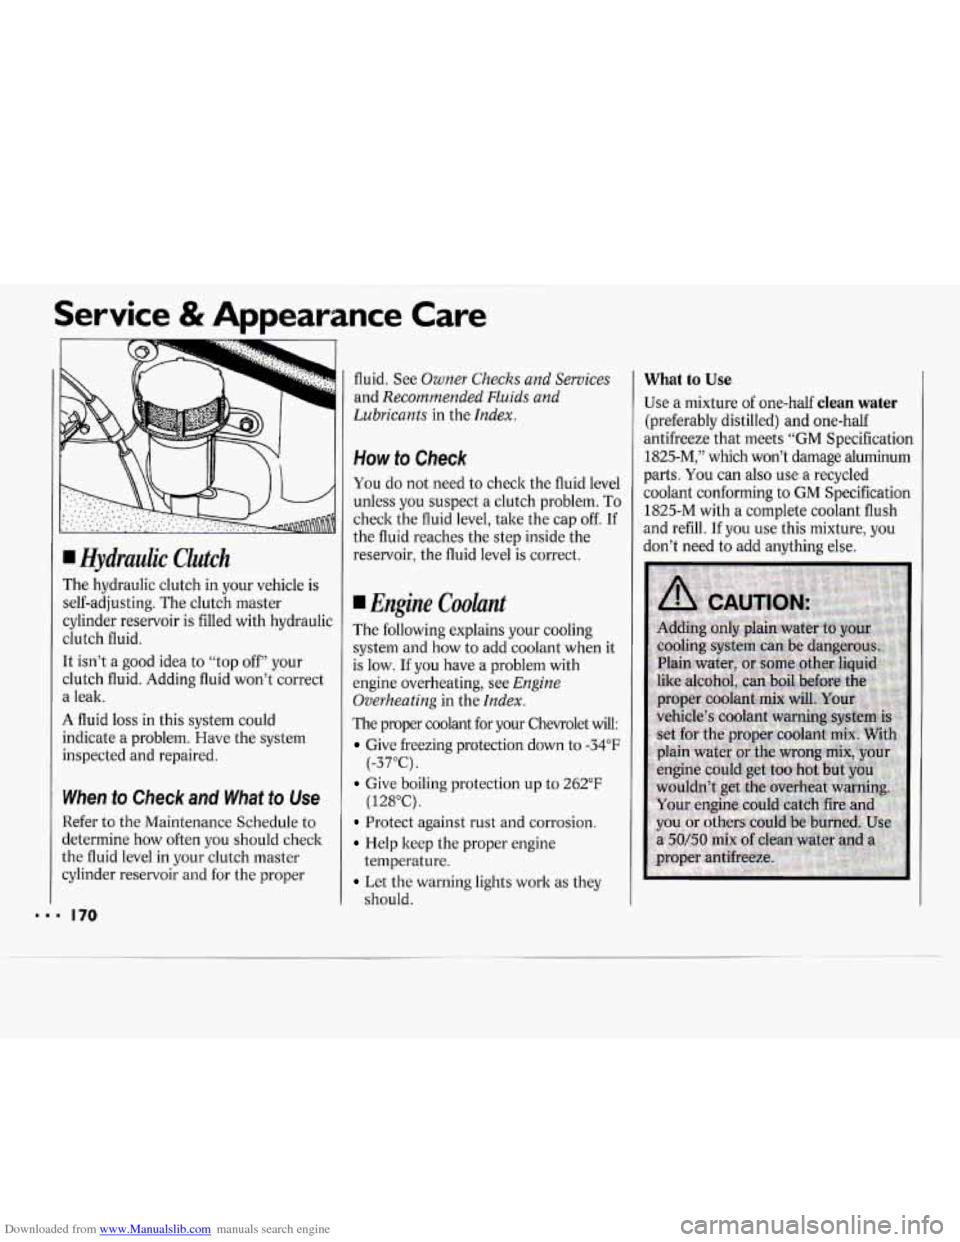
The hydraulic clutch
in your vehicle is
self-adjusting. The clutch master
cylinder reservoir is filled with hydraulic
clutch fluid.
It isn’t
a good idea to “top off” your
clutch fluid. Adding fluid won’t correct
a leak.
A fluid loss in this system could
indicate a problem. Have the system
inspected and repaired.
When to Check and What to Use
Refer to the Maintenance Schedule to
determine how often
you should check
the fluid level in your clutch master
cylinder reservoir and for the proper fluid. See
Owner Checks and
Services
and Recommended Fluids and
Lubricants
in the Index.
How to Check
You do not need to check the fluid level
unless you suspect a clutch problem.
To
check the fluid level, take the cap off. If
the fluid reaches the step inside the
reservoir, the fluid level is correct.
I Engine Coolunt
The following explains your cooling
system and how
to add coolant when it
is low.
If you have a problem with
engine overheating, see
Engine
Overheating
in the Index.
The proper coolant for your Chevrolet will:
Give freezing protection down to -34°F
Give boiling protection up to 262°F
Protect against rust and corrosion.
Help keep the proper engine
Let the warning lights work as they
(-37°C).
(128°C).
temperature.
should.
What to Use
Use a mixture
of one-half clean water
(preferably distilled) and one-half
antifreeze that meets “GM Specification
1825-M,” which won’t damage aluminum
parts. You can also use a recycled
coolant conforming to GM Specification
1825-M with
a complete coolant flush
and refill. If you use this mixture, you
don’t need to add anything else.
Page 184 of 243
Downloaded from www.Manualslib.com manuals search engine When to Check
Check your tires once a month or more.
Don't forget your compact spare tire. It
should be at
60 psi (420 1tPa).
How to Check
Use a good quality pocket-type gage to
check tire pressure. Simply looking at
the tires
will not tell you the pressure,
especially if you have radial tires
-
which may look properly inflated even if
they're underinflated.
If your tires have valve caps, be sure to
put them back on. They help prevent
leaks by keeping out dirt and moisture.
x
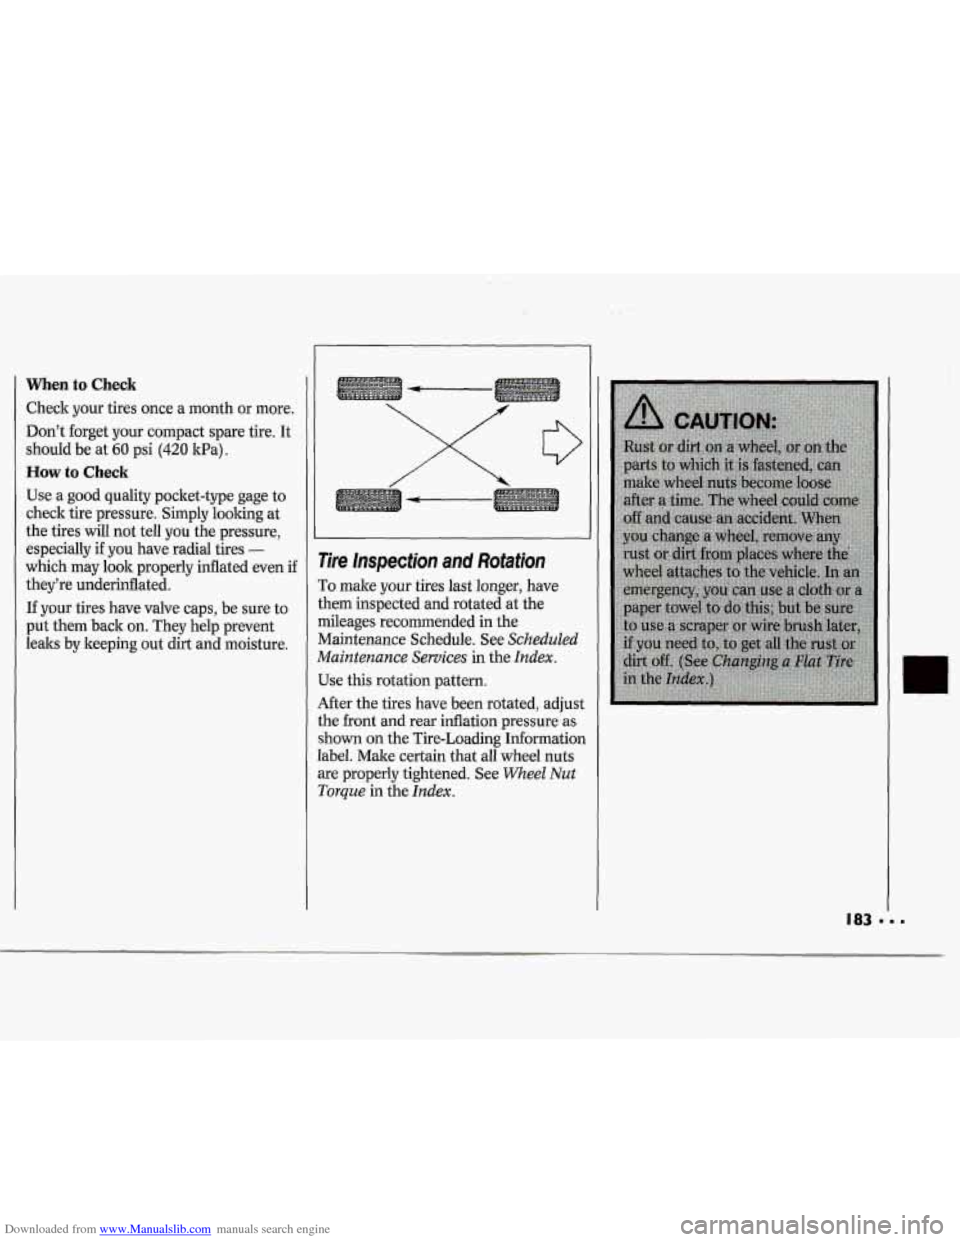
Tire lnspection and Rotation
To make your tires last longer, have
them inspected and rotated at the
mileages recommended in the
Maintenance Schedule. See
Scheduled
Maintenance Services
in the Index.
Use this rotation pattern.
After the tires have been rotated, adjust
the front and rear inflation pressure as
shown on the Tire-Loading Information
label. Make certain that all wheel nuts
are properly tightened. See
Wheel Nut
Torque in the Index.