1994 CHEVROLET CAVALIER check oil
[x] Cancel search: check oilPage 170 of 243
Downloaded from www.Manualslib.com manuals search engine Manual Transaxle Fluid
When to Check
A good time to have it checked is when
the engine oil is changed. However, the
fluid in your manual transaxle doesn't
require changing.
How to Check
Because this operation can be a little
difficult, you may choose to have this
done at a Chevrolet dealership Service
Department.
If you do it yourself, be sure to follow
all the instructions here, or you could
get a false reading on the dipstick.
NOTICE:
Too much or too little fluid can
damage your transaxle.
Too much
can mean that some of the fluid
could come out and fall on hot'
engine parts or exhaust system,
starting a fire. Be sure to get an
accurate reading if you check your
transaxle fluid. Check
the fluid level only when your
engine is off, the vehicle is parked on a
level place and the transaxle is cool
enough for you to rest your fingers on
the transaxle case.
Then, follow these steps:
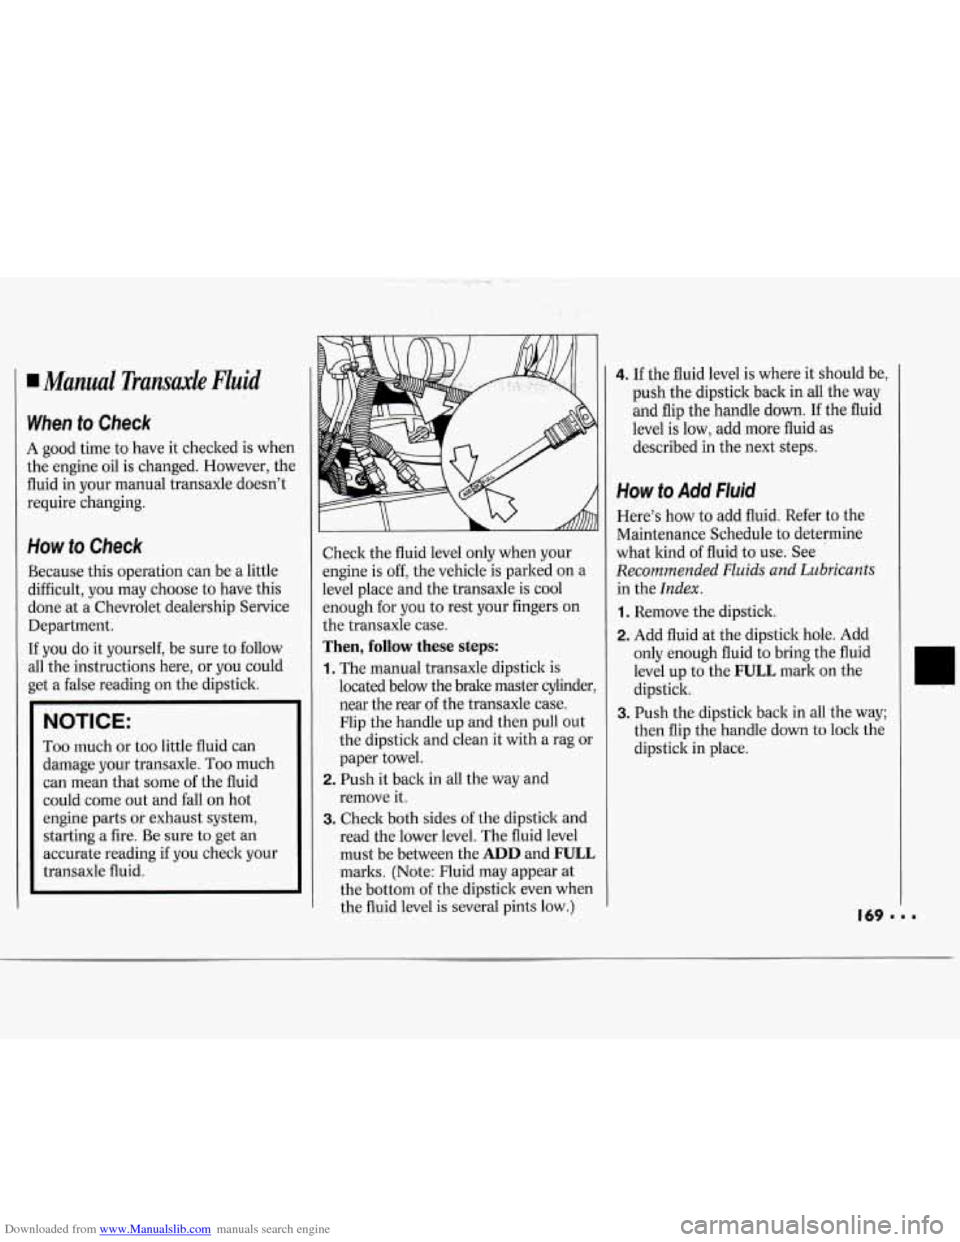
1. The manual transaxle dipstick is
located below the brake master cylinder
near the rear of the transaxle case.
Flip the handle up and then pull out
the dipstick and clean it with a rag or
paper towel.
2. Push it back in all the way and
remove it.
3. Check both sides of the dipstick and
read the lower level. The fluid level
must be between the
ADD and FULL
marks. (Note: Fluid may appear at
the bottom of the dipstick even when
the fluid level is several pints low.)
4. If the fluid level is where it should be,
push the dipstick back in all the way
and flip the handle down.
If the fluid
level is low, add more fluid as
described in the next steps.
How to Add Fluid
Here's how to add fluid. Refer to the
Maintenance Schedule to determine
what kind of fluid to use. See
Recommended Fluids and Lubricants
in the Index.
1. Remove the dipstick.
2. Add fluid at the dipstick hole. Add
only enough fluid to bring the fluid
level up to the
FULL mark on the
dipstick.
3. Push the dipstick back in all the way;
then flip the handle down
to lock the
dipstick in place.
Page 171 of 243
Downloaded from www.Manualslib.com manuals search engine ~~ ~ Service & Appearance Care
170
I Hydraulic Clutch
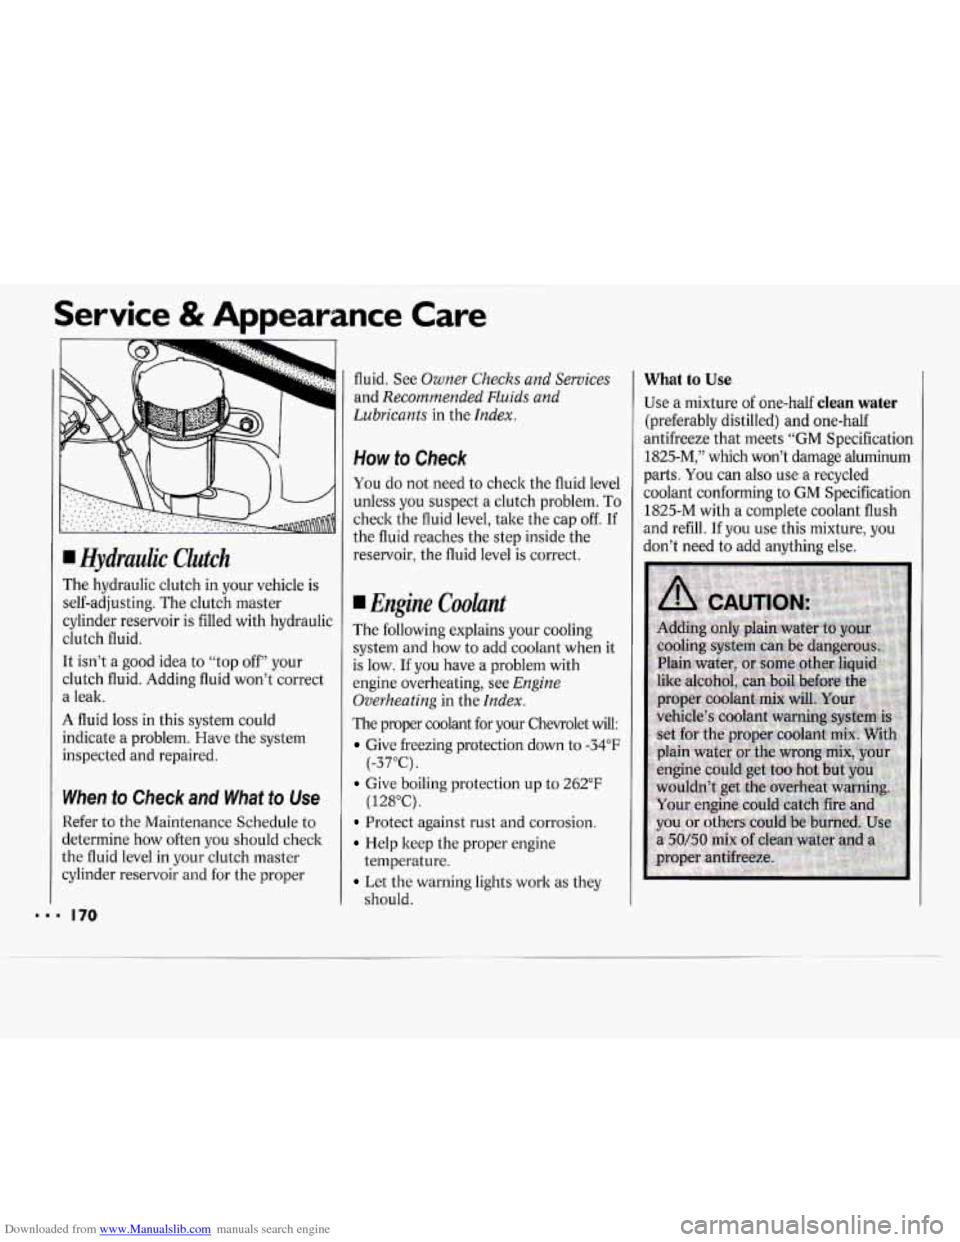
The hydraulic clutch
in your vehicle is
self-adjusting. The clutch master
cylinder reservoir is filled with hydraulic
clutch fluid.
It isn’t
a good idea to “top off” your
clutch fluid. Adding fluid won’t correct
a leak.
A fluid loss in this system could
indicate a problem. Have the system
inspected and repaired.
When to Check and What to Use
Refer to the Maintenance Schedule to
determine how often
you should check
the fluid level in your clutch master
cylinder reservoir and for the proper fluid. See
Owner Checks and
Services
and Recommended Fluids and
Lubricants
in the Index.
How to Check
You do not need to check the fluid level
unless you suspect a clutch problem.
To
check the fluid level, take the cap off. If
the fluid reaches the step inside the
reservoir, the fluid level is correct.
I Engine Coolunt
The following explains your cooling
system and how
to add coolant when it
is low.
If you have a problem with
engine overheating, see
Engine
Overheating
in the Index.
The proper coolant for your Chevrolet will:
Give freezing protection down to -34°F
Give boiling protection up to 262°F
Protect against rust and corrosion.
Help keep the proper engine
Let the warning lights work as they
(-37°C).
(128°C).
temperature.
should.
What to Use
Use a mixture
of one-half clean water
(preferably distilled) and one-half
antifreeze that meets “GM Specification
1825-M,” which won’t damage aluminum
parts. You can also use a recycled
coolant conforming to GM Specification
1825-M with
a complete coolant flush
and refill. If you use this mixture, you
don’t need to add anything else.
Page 192 of 243
Downloaded from www.Manualslib.com manuals search engine Clean the outside of the windshield
with GM Windshield Cleaner, Bon-Ami
Powder@ (GM Part
No. 1050011). The
windshield is clean
if beads do not form
when you rinse it with water.
Clean the blade by wiping vigorously
with a cloth soaked in full strength
windshield washer solvent. Then rinse
the blade with water.
Wiper blades should be checked on a
regular basis and replaced when worn.
Cleuning tbe Outside of Your
Chevrolet
The paint finish on your vehicle
provides beauty, depth of color, gloss
retention and durability.
Washing Your Vehicle
The best way to preserve your vehicle’s
finish is to keep it clean by washing it
often with lukewarm or cold water.
Don’t wash your vehicle in the direct
rays
of the sun. Don’t use strong soaps
or chemical detergents. Use liquid hand,
dish or car washing (mild detergent) soaps. Don’t
usecleaning
8 @o&-that
contain acid
or abrasives. 31 cleaning
agents should be flushed promptly and
not allowed to dry on the surface, or
they could stain.
Dry the finish with a
soft, clean chamois or a 100% cotton
towel to avoid surface scratches and
water spotting.
High pressure car washes may cause
water to enter your vehicle.
Finish Care
Occasional waxing or mild polishing of
your Chevrolet may be necessary to
remove residue from the paint finish.
You can get GM approved cleaning
products from your dealer.
Your Chevrolet has a ‘Lbasecoat/clearcoat”
paint finish. The clearcoat gives more
depth and gloss to the colored basecoat.
Always use waxes and polishes that are
non-abrasive and made for a
basecoat/clearcoat paint finish.
NOTICE:
Machine compounding or
aggressive polishing on a
basecoat/clearcoat. paint finish may
dull the finish or leave swirl marks.
Rxtured-Surjace Bumper
Covers
WL AND RS MODELS)
Cleaning with a brush, a soft terry cloth
or a commercial car wash is
recommended for normal dirt. Never
use a wire brush or abrasives.
Avoid applying wax or polish to the
textured-surface bumper covers.
To
remove wax, a commercially available
wax solvent should be used. Tar and Oil
Remover (GM Part
No.1050172) is also
recommended. It’s also recommended
for cleaning difficult
soils like road tar
and oil.
Also recommended are solvent-
type fabric cleaners such as GM
Part
No. 1050214.
191 ...
Page 197 of 243

Downloaded from www.Manualslib.com manuals search engine Service & Appearance Care
Vse Usage 1
196
Fuse
INST LPS
ECM
DR UNLK
CIG LTR
RDO 2
GAUGES
PIUTURN
HTR-A/C
WIPER
F/P
RDO
1
CTSY
WDO CRUISE
TURN-B/U S/LP
FTP
ACC HDLP
Rating
(AMP.)
5
10
10
15
10
10
15
25
25
10
10
15
30
10
15
20
20
30
20
Circuitry
Instrument Panel Lamps
Electronic Control Module, Fuel Injectors
Automatic Door Unlock (Remove to Disable)
Cigarette Lighter, Glove Box Light
Radio Power
Gages, Audio Warning System, Cluster Telltales, TCC,
Rear Defogger Relay, Brake Transaxle Shift Interlock,
Multiport Fuel Injection
Park and Turn Lamps
Heater and A/C Power, Daytime Running Lights
(Canada), Anti-Lock Brakes
Windshield Wipers
Fuel Pump Radio Memory, Digital Clock
Interior Lights, Horn, Power Locks, Audible Warning
System, Remote Liftgate Release, Check Oil Light
Power Window (Circuit Breaker)
Cruise Control
Turn Signal, Back-Up Lamps
Stop Lamps, Hazard Flashers
Flash-To-Pass
Power Locks, Rear Window Defogger (Circuit Breaker)
Headlamp (Circuit Breaker)
Page 211 of 243
Downloaded from www.Manualslib.com manuals search engine Maintenance Schedule
Explanation of Scheduled
Maintenance Services
Following are explanations of the
services listed in Schedule
I and
Schedule 11.
The proper fluids and lubricants to use
are listed in Section
D. Make sure
whoever services your vehicle uses
these. All parts should be replaced and
all necessary repairs done before you or
anyone else drives the vehicle.
ITEM SERVICE
NO.
1. Engine Oil and Filter Change* -
Always use SH or SG Energy
Conserving I1 oils of proper viscosity.
The
“SH” or “SG” designation may
be shown alone or in combination
with others, such as “SH/CD,”
“SH,
SG, CD,” “SG/CD,” etc. To
determine the preferred viscosity for
your vehicle’s engine (e.g., SAE 5W-
30 or SAE 10W-30), see
Engine Oil
in the Index.
the suspension and steering linkage.
Lubricate the transaxle shift linkage.
Inspection - For proper wear and
maximum tire life, rotate your tires
following the instructions in this
manual. See
Tires, Inspection G
Rotation in the Index. Check the
tires for uneven wear or damage. If
you see irregular or premature wear,
check the wheel alignment. Check for
damaged wheels also.
2. Chassis Lubrication - Lubricate
3. Tire and Wheel Rotation and
4. Engine Accessory Drive Belt(s)
Inspection
* - Inspect the belt (s)
for cracks, fraying, wear and proper
tension. Replace as needed. (Belts
can have many small cracks in
individual ribs without affecting
performance.)
5. Cooling System Service* - Drain,
flush and refill the system with new
or approved recycled coolant
conforming to
GM Specification
1825M. Keep coolant at the proper
mixture as specified. See
Coolant in
the
Index. This provides proper
freeze and boil protection, corrosion
inhibitor level and maintains proper
engine operating temperature.
Inspect hoses and replace if they are
cracked, swollen or deteriorated.
Tighten screw-type hose clamps.
Clean the outside of the radiator and
air conditioning condenser. Wash the
pressure cap and neck.
To help ensure proper operation, we
recommend a pressure test
of both the
cooling system and the pressure cap.
Page 212 of 243
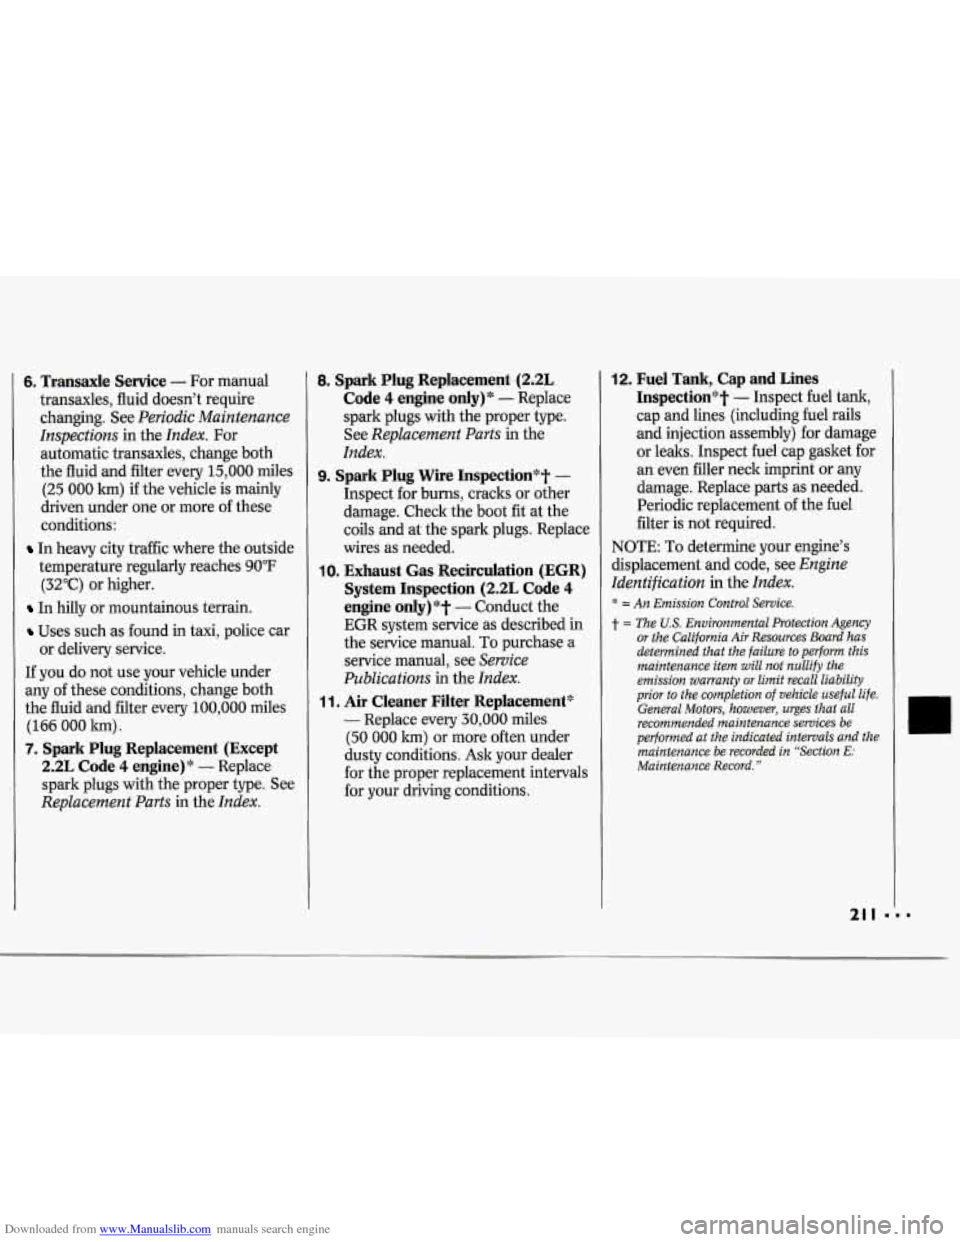
Downloaded from www.Manualslib.com manuals search engine 6, Transaxle Service - For manual
transaxles, fluid doesn’t require
changing. See
Periodic Maintenance
Inspections
in the Index. For
automatic transaxles, change both
the fluid and filter every 15,000 miles
(25
000 km) if the vehicle is mainly
driven under one or more of these
conditions:
In heavy city traffic where the outside
temperature regularly reaches 90°F
(32°C) or higher.
In hilly or mountainous terrain.
Uses such as found in taxi, police car
If you do not use your vehicle under
any of these conditions, change both
the fluid and filter every 100,000 miles
(166
000 lun).
7. Spark Plug Replacement (Except
2.2L Code
4 engine)* - Replace
spark plugs with the proper type. See
Replacement Parts in the Index.
or delivery service.
8. Spark Plug Replacement (P.2L
Code 4 engine only)* - Replace
spark plugs with the proper type.
See
Replacement Parts in the
Index.
9. Spark Plug Wire Inspection*t -
Inspect for burns, cracks or other
damage. Check the boot
fit at the
coils and at the spark plugs. Replace
wires as needed.
IO. Exhaust Gas Recirculation (EGR)
System Inspection (2.2L Code
4
engine only)*? - Conduct the
EGR system service as described
in
the service manual. To purchase a
service manual, see
Service
Publications
in the Index.
1 1. Air Cleaner Filter Replacement*‘
- Replace every 30,000 miles
(50
000 km) or more often under
dusty conditions. Ask your dealer
for the proper replacement intervals
for your driving conditions.
12. Fuel Tank, Cap and Lines
Inspection’#t
- Inspect fuel tank,
cap and lines (including fuel rails
and injection assembly) for damage
or leaks. Inspect fuel cap gasket for an even filler neck imprint or any
damage. Replace parts as needed.
Periodic replacement of the fuel
filter is not required.
NOTE: To determine your engine’s
displacement and code, see
Engine
Identification
in the Index.
* = An Emission Control Service.
t = The U.S. Environmental Protection Agency
or the California Air Resources Board has
determined that the failure to perform this
maintenance item will not nullify the
emission warranty
or limit recall liability
prior to the completion of vehicle useful life.
General Motors, however, urges that all
recommended maintenance services be
performed at the indicated intervals and the
maintenance be recorded in “Section
E:
Maintenance Record.”
Page 213 of 243
Downloaded from www.Manualslib.com manuals search engine Maintenance Schedule
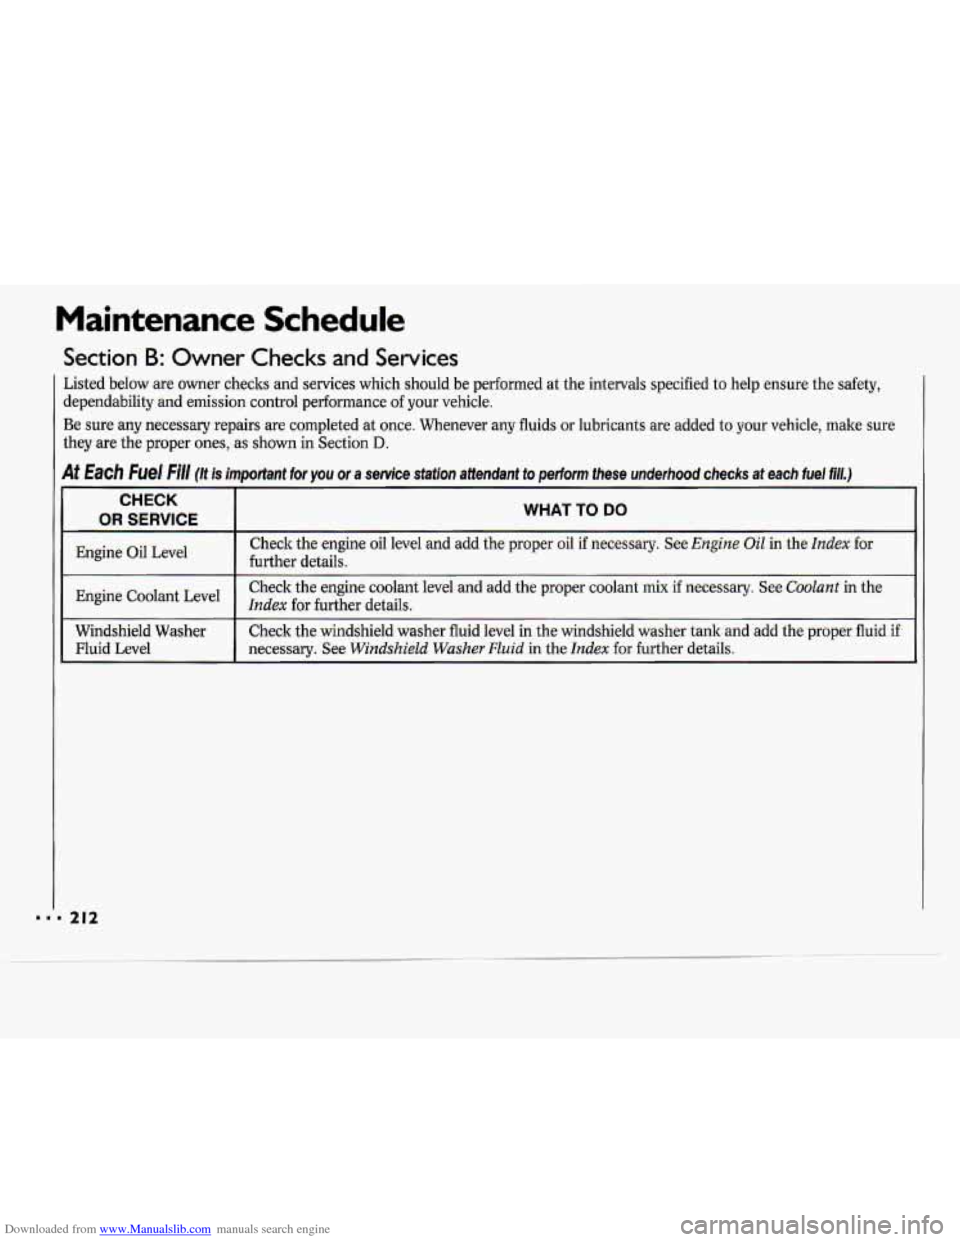
Section B: Owner Checks and Services
hted below are owner checks and services which should be performed at the intervals specified to help ensure the safety,
lependability and emission control performance of your vehicle.
3e sure any necessary repairs are completed at once. Whenever any fluids or lubricants are added to your vehicle, make sure
hey are the proper ones, as shown in Section
D.
Each he/ (It is important for you or a service station attendant to perform these underhood checks at each fuel fill.)
CHECK
OR SERVICE I WHAT TO DO
Engine Oil Level
I
Check the engine oil level and add the proper oil if necessary. See Engine Oil in the Index for
further details.
I
Check the engine coolant level and add the proper coolant mix if necessary. See Coolant in the
Engine Index for further details.
Windshield Washer Check the windshield washer fluid level in the windshield washer tank and add the proper fluid if
Fluid Level necessary. See
Windshield Washer Fluid in the Index for further details. 1
Page 234 of 243
Downloaded from www.Manualslib.com manuals search engine Index
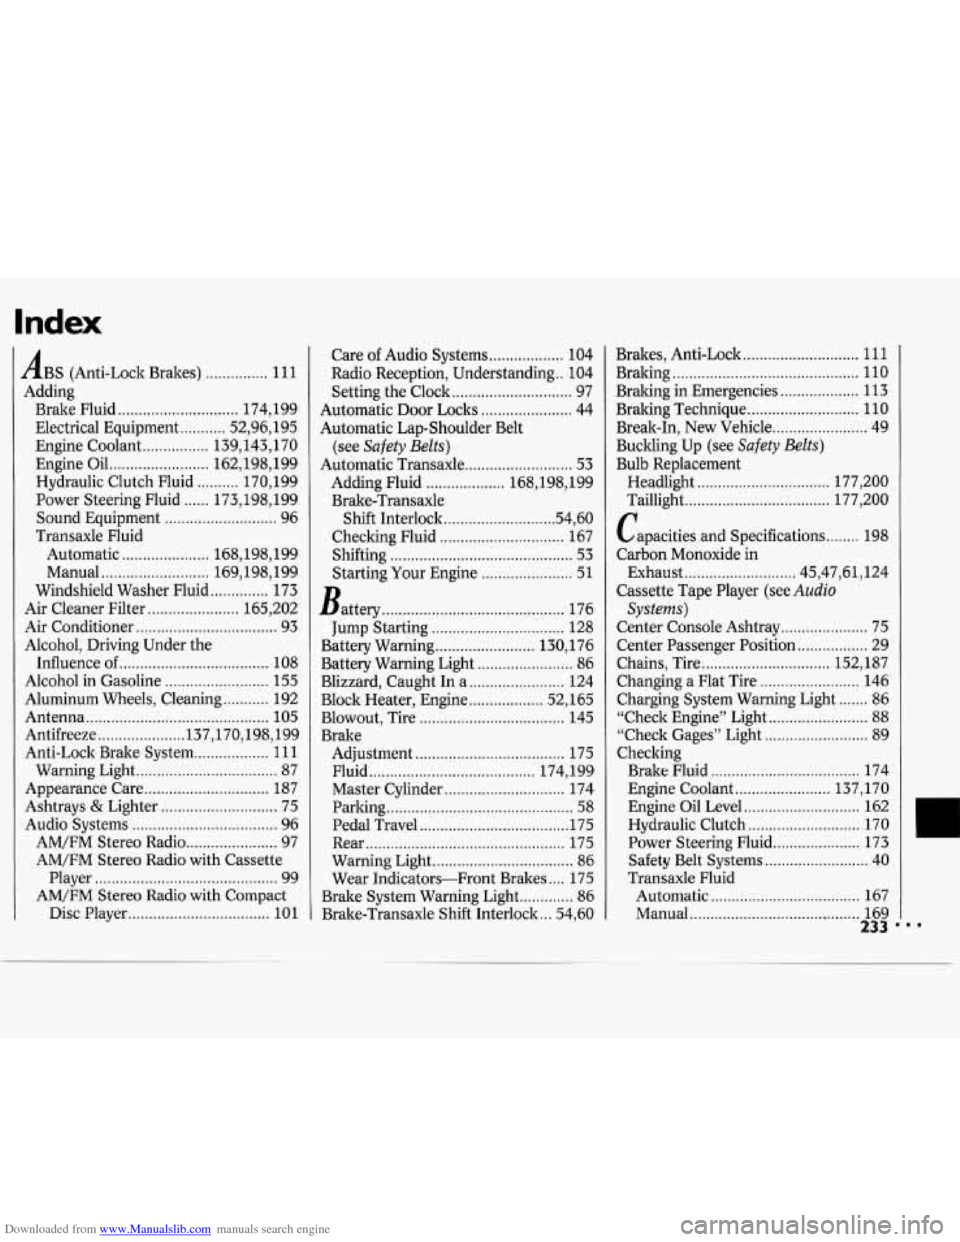
ABS (Anti-Lock Brakes) ............... 11 1
Adding
Brake Fluid
............................. 174. 199
Engine Coolant
................ 139.143. 170
Engine Oil
........................ 162,198, 199
Hydraulic Clutch Fluid
.......... 170, 199
Power Steering Fluid
...... 173,198, 199
Sound Equipment ........................... 96
Transaxle Fluid
Automatic
..................... 168,198, 199
Manual
.......................... 169,198, 199
Windshield Washer Fluid
.............. 173
Air Cleaner Filter
...................... 165, 202
Air Conditioner
.................................. 93
Alcohol. Driving Under the
Influence of
.................................... 108
Alcohol in Gasoline
......................... 155
Antenna ............................................ 105
Antifreeze ..................... 137,170,198, 199
Anti-Lock Brake System
.................. 111
Warning Light .................................. 87
Appearance Care
.............................. 187
Ashtrays & Lighter ............................ 75
Audio Systems
................................... 96
AM/FM Stereo Radio
...................... 97
AM/FM Stereo Radio with Cassette
Player
............................................ 99
AM/FM Stereo Radio with Compact
Disc Player
.................................. 101
Electrical
Equipment
........... 52.96. 195
Aluminum Wheels, Cleaning
........... 192 Care
of Audio
Systems .................. 104
Radio Reception. Understanding
.. 104
Setting the Clock
............................. 97
Automatic Door Loclts
...................... 44
Automatic Lap-Shoulder Belt
(see
Safety Belts)
Automatic Transaxle .......................... 53
Adding Fluid ................... 168.198. 199
Brake-Transaxle Shift Interlock..
........................ .54. 60
Checking Fluid
.............................. 167
Shifting
............................................ 53
Starting Your Engine ...................... 51
Battery
............................................ 176 .
Jump Starting ................................ 128
Battery Warning
........................ 130. 176
Battery Warning Light
....................... 86
Blizzard. Caught In
a ....................... 124
Block Heater. Engine
.................. 52. 165
Blowout. Tire
................................... 145
Brake Adjustment
.................................... 175
Fluid
........................................ 174. 199
Master Cylinder ............................. 174
Parking
............................................. 58
Pedal Travel .................................... 175
Rear
................................................ 175
Warning Light
.................................. 86
Wear Indicators-Front Brakes .... 175
Brake System Warning Light
............. 86
Brake-Transaxle Shift Interlock ... 54. 60 Brakes. Anti-Lock
............................ 111
Bralcing ............................................. 110
Bralcing in Emergencies
................... 113
Braking Technique ........................... 110
Break-In. New Vehicle
....................... 49
Buckling
Up (see Safety Belts)
Bulb Replacement
Headlight
................................ 177, 200
Taillight
................................... 177, 200
Capacities and Specifications
........ 198
Carbon Monoxide in
Exhaust
........................... 45,47,61, 124
Cassette Tape Player (see
Audio
Systems)
Center Console Ashtray ..................... 75
Center Passenger Position
................. 29
Chains, Tire
............................... 152, 187
Changing
a Flat Tire ........................ 146
Charging System Warning Light
....... 86
“Check Engine” Light ........................ 88
“Check Gages” Light ......................... 89
Checking
Brake Fluid
.................................... 174
Engine Coolant
....................... 137, 170
Engine Oil Level
............................ 162
Hydraulic Clutch
........................... 170
Power Steering Fluid
..................... 173
Safety Belt Systems
......................... 40
Transaxle Fluid
Automatic
.................................... 167
Manual
................................ ,. ........ 169
233