1994 BMW M3 remove seats
[x] Cancel search: remove seatsPage 456 of 759

640-10
HEATING
AND
AIR
CONDITIONING
i
El
Radio
Antenna
Rear
.
,
si,-
Left
side
I
d
1
.
Rear
vents
2
.
Fresh
air
3
.
Face-level
vents
4
.
Recirculation
5
.
Footwell
vents
0013017
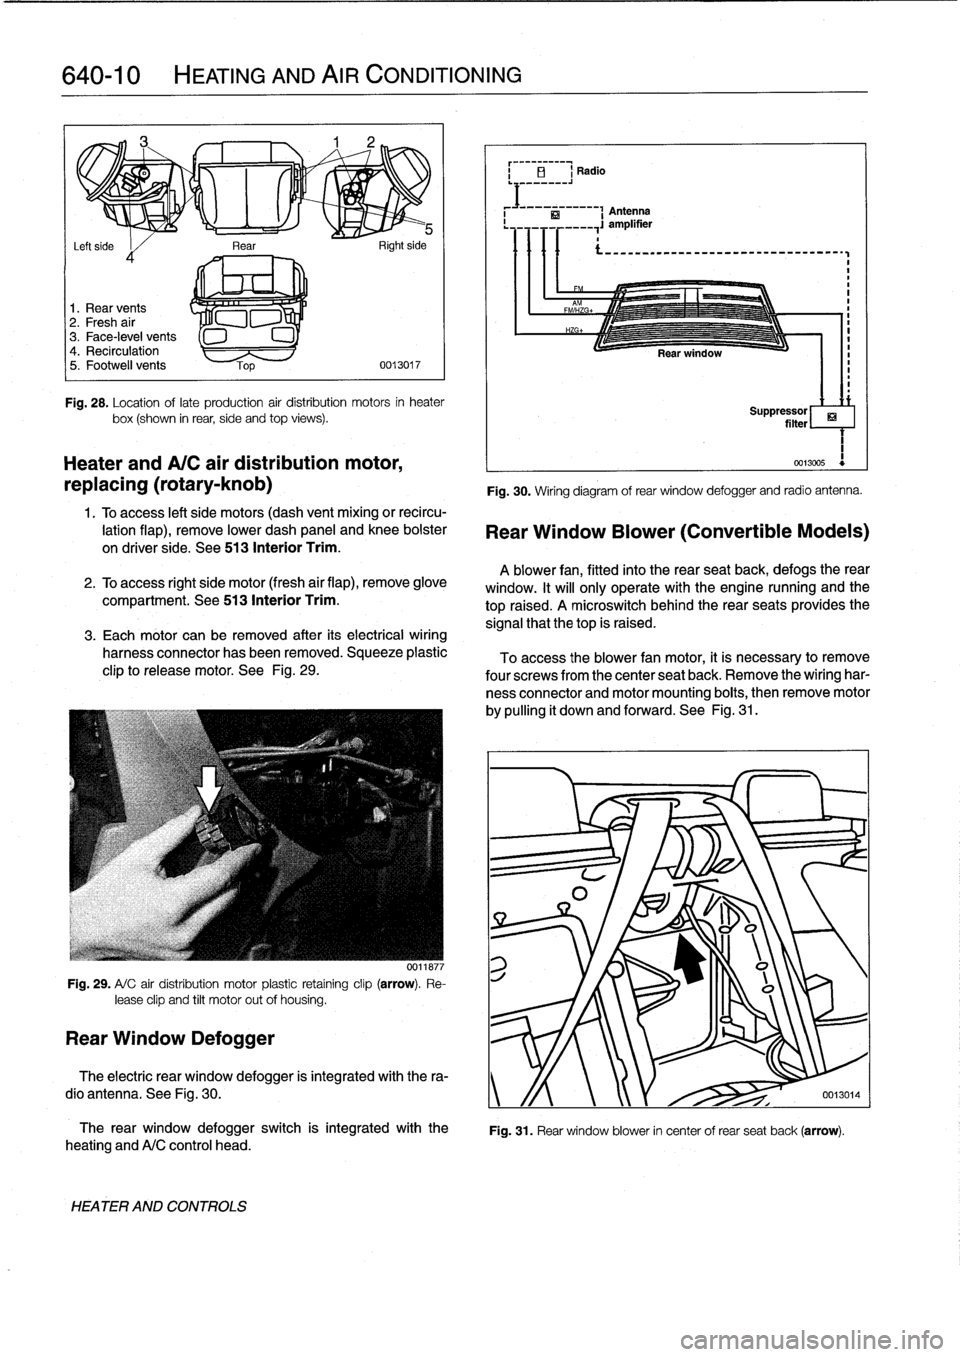
Fig
.
28
.
Location
oflate
production
air
distribution
motors
in
heater
box(shown
in
rear,
side
and
top
views)
.
Heater
andA/C
air
distribution
motor,
replacing
(rotary-knob)
1
.
Toaccess
left
side
motors
(dash
vent
mixing
or
recircu-
lation
flap),
remove
lower
dash
panel
and
knee
bolster
on
driver
side
.
See
513
Interior
Trim
.
2
.
To
access
right
side
motor
(fresh
air
flap),
remove
glove
compartment
.
See513
Interior
Trim
.
3
.
Each
motor
can
be
removed
after
its
electrical
wiring
harness
connector
has
been
removed
.
Squeeze
plastic
clip
to
release
motor
.
See
Fig
.
29
.
Fig
.
29
.
A/
C
air
distribution
motor
plastic
retaíning
clip
(arrow)
.
Re-
lease
clip
and
tilt
motor
out
of
housing
.
Rear
Window
Defogger
0011877
The
rear
window
defogger
switch
is
integrated
with
the
heating
andA/C
control
head
.
HEATER
AND
CONTROLS
Fig
.
30
.
Wiring
diagram
of
rear
window
defogger
and
radio
antenna
.
Rear
Window
Blower
(Convertible
Models)
A
blower
fan,
fitted
into
the
rear
seatback,
defogs
therear
window
.
It
will
only
operate
with
the
engine
nunning
and
the
top
raised
.
A
microswitch
behindthe
rear
seats
provides
the
signal
that
thetop
is
raised
.
To
access
the
blower
fan
motor,
it
is
necessary
to
remove
four
screwsfrom
the
center
seat
back
.
Remove
the
wiring
har-
ness
connector
and
motor
mounting
boits,
then
remove
motor
by
pulling
it
down
and
forward
.
See
Fig
.
31
.
ri
Suppressor
filter
1
0013005
Fig
.
31
.
Rear
window
blower
in
center
of
rear
seat
back
(arrow)
.
The
electric
rear
window
defogger
is
integrated
with
the
ra-
dio
antenna
.
See
Fig
.
30
.
y
/f
0013014
Page 472 of 759

720-2
SEAT
BELTS
WARNING
-
"
For
maximum
protection
from
injury,
seat
belts
should
be
replaced
as
a
set
(including
all
hard-
ware),
if
they
are
subject
to
occupant
loading
in
a
collision
.
"
Seat
belts
should
not
be
modified
or
repaired
.
The
seat
belt
anchorage
points
should
not
be
changed
or
modified
.
"
Do
notbleach
or
dye
seat
belt
webbing
.
Webbing
that
is
severely
fadedor
re-dyed
will
not
meet
the
strength
requirements
of
a
collision
and
must
be
replaced
.
"
Seat
belts
shouldbe
periodically
inspected
for
webbing
defects
suchas
cuts
or
pulled
threads
.
FRONT
SEATBELT
ASSEMBLY
Automatic
Front
Seat
Belt
Lock
Tensioners
The
procedure
for
disabling
the
mechanical
spring
tension-
er
used
on
early
cars
is
covered
below
.
On
cars
with
thepyro-
technic(explosive
device)
tensioners,
the
orange
harness
connectorshould
be
removed
from
the
tensioner
any
time
the
seat
is
removed
.
WARNING
-
Both
the
mechanical
and
the
pyrotechnictensioners
are
powerful
devíces
and
shouldbehandled
with
extreme
care
.
Mechanical
spring
tensioner,
disarming
1
.
Remove
front
seat
.
See
520
Seats
.
2
.
Disarm
tensioner-electrically
adjustableseats
:
"
Working
at
side
of
seat,
turn
activating/deactivating
screw
clockwise
until
display
changes
from
green
to
red
.
See
Fig
.
2
.
"
Before
reinstalling
seat,
turn
screw
until
display
chang-
esback
to
green
.
NOTE-
Green
is
armed
.
Red
is
disarmed
.
3
.
Disarm
tensioner-manually
adjustable
seats
:
"
Cut
wíre
tie
next
to
tab
on
bowden
cable
.
See
Fig
.
3
.
"
Turn
and
lift
tabto
disengage
cable
housing
from
seat
bracket
.
"
Disconnect
cable
end
from
seat
lever
.
"
When
reinstalling,
correctly
engage
tab
end
of
cable
into
seat
bracket
and
fasten
in
position
using
new
wíre
tie
.
FRONT
SEATBELT
ASSEMBLY
0012737
Fig
.
2
.
Electrically
adjustable
front
seat
.
Turn
screw
(A)
to
disarm
me-
chanical
tensioner
.
Display
B
tucos
from
green
to
red
.
F19
.3
.
Manuallyadjustablefrontseat
.Turnandlifttab(arrow)todis-
Page 474 of 759

720-
4
SEAT
BELTS
REAR
SEAT
BELT
ASSEMBLY
On
4-door
E36
models,
there
are
two
3-point
shoulder
belts
and
a
center
lap
beltin
back
.
On
2-doormodels,
there
is
no
center
rear
lap-belt
.
In
models
with
the
stationary
rear
seat
back,
the
shoulder
belt
reels
are
bolted
to
themiddle
of
the
parcel
shelf
.
In
modeis
with
fold-down
rearseat
back,
the
shoulder
belt
reels
are
at-
tached
to
the
folding
seat
back
.
The
rearseat
belt
assemblies
are
shown
in
Fig
.
7
.
Fig
.
7
.
Detafs
of
rearseat
belt
assembly
.
Seats
.
REAR
SEA
T
BELT
ASSEMBLY
1
.
Remove
rear
seat
cushion
and
backrest
.
See
520
2
.
Remove
plastictrim
cover
over
shoulder
belt
reels
from
rear
window
shelf
.
See
Fig
.
8
.
3
.
Remove
rear
window
shelf
.
See
Fig
.
9
.
4
.
Unbolt
andremove
shoulder
belt
reels
.
NOTE-
The
shoulder
belt
anchor
belts
also
hold
thecenter
lap-
belt
in
place(where
applicable)
.
Be
sure
to
note
relative
positions
of
metal
belt-end
anchors
in
order
to
reas-
semble
correctly
.
body
next
to
rear
door
frame
.
8
.
Installation
is
reverse
of
removal
.
5
.
Remove
shoulder
belt
anchor
bolt
frombeneath
rear
seat
.
WARNING
-
Alignment
tabs
on
seat
belt
reels
must
be
rein-
stalled
in
their
original
positions
Fig
.
8
.
Remove
rear
shoulder
belt
reel
trim
cover
from
rear
window
shelf
.
Unclip
plastic,
then
slide
off
shoulder
belts
as
shown
by
arrows
.
Rear
seat
belt,
removing
and
installing
Fig
.
9
.
Remove
rear
window
shelf
.
Speaker
grilles
and
third
brake
(fixed
seat
back
modeis)
light
socket
will
have
to
be
removed
.
The
front
of
the
shelf
lifts
offits
clips
(black
arrows)
before
the
shelf
slides
forward
.
6
.
On
4-door
models
:
Unbolt
shoulder
belt
lock
bolt
from
7
.
On
2-door
models
:
Remove
rearside
panel
asde-
scribed
in
411
Doors
.
Unbolt
shoulder
belt
lock
bolt
from
body
nextto
quarter
panel
.
Tightening
Torques
"
Rear
seat
belt
reelbolt,
anchor
bolt,
or
lock
boltto
body
.
.
.....
.
...
...
.
48
Nm
(36
ft-Ib)
Page 475 of 759

Rear
seat
belt,
removing
and
installing
(foid-down
seat
back
modeis)
1
.
Remove
rear
seat
cushion
.
See
520
Seats
.
2
.
Remove
shoulder
belt
anchor
bolt
from
beneath
rear
seat
.
NOTE
-
The
shoulder
belt
anchor
bolts
alsohold
the
center
lap-belt
in
place
(where
applicable)
.
Be
sure
to
note
relative
positions
of
metal
belt-end
anchors
in
order
to
reas-
semble
correctly
.
3
.
On
4-door
models
:
Unbolt
shoulder
belt
lock
bolt
from
body
nextto
rear
door
frame
.
4
.
On
2-door
models
:
Remove
rearside
panel
as
de-
scribed
in
411
Doors
.
Unbolt
shoulder
belt
lock
bolt
from
body
next
to
quarter
panel
.
5
.
Unlock
and
flip
down
folding
rear
seat
backrest
.
Re-
move
trim
plug
from
back
of
cushion
(luggage
compart-
ment
side)
.
6
.
Remove
seat
beltreelbolt
andwasher
.
See
Fig
.
10
.
Fig
.
10
.
Rear
seat
beltreelbolt
(arrow)
.
0012676
7
.
Gently
pry
off
plastic
trim
at
top
of
backrest
and
pull
out
seat
beltreel
from
seat
.
NOTE-
The
seat
beltreel
is
held
snugly
by
the
backrest
cush-
ion
.
Moderate
force
will
be
needed
to
pulí
ít
out
.
8
.
Installation
is
reverse
of
removal
.
Tightening
Torques
"
Rear
seat
beltreel
bolt,
anchor
bolt,
or
lock
boltto
body
...............
48
Nm
(36
ft-Ib)
Center
rear
lap-belt,
removing
and
installing
1
.
Remove
rear
seat
cushion
.
See520
Seats
.
2
.
Remove
shoulder
belt
anchor
bolts
from
beneath
rear
seat
.
3
.
Installation
is
reverse
of
removal
.
SEAT
BELTS
720-
5
NOTE-
The
shoulderbeltanchorbolts
also
hold
the
centerlap-
belt
in
place
.
Be
sure
to
note
relative
positions
of
metal
belt-end
anchors
in
order
to
reassemble
correctly
.
WARNING
-
Alignment
tabs
on
seat
belt
reels
must
be
rein-
stalled
in
their
original
positions
.
Tightening
Torques
"
Lap-belt
reelbolt
or
lock
boltto
body
.
48
Nm
(36
ft-Ib)
REAR
SEATBELT
ASSEMBLY
Page 481 of 759

Fig
.
8
.
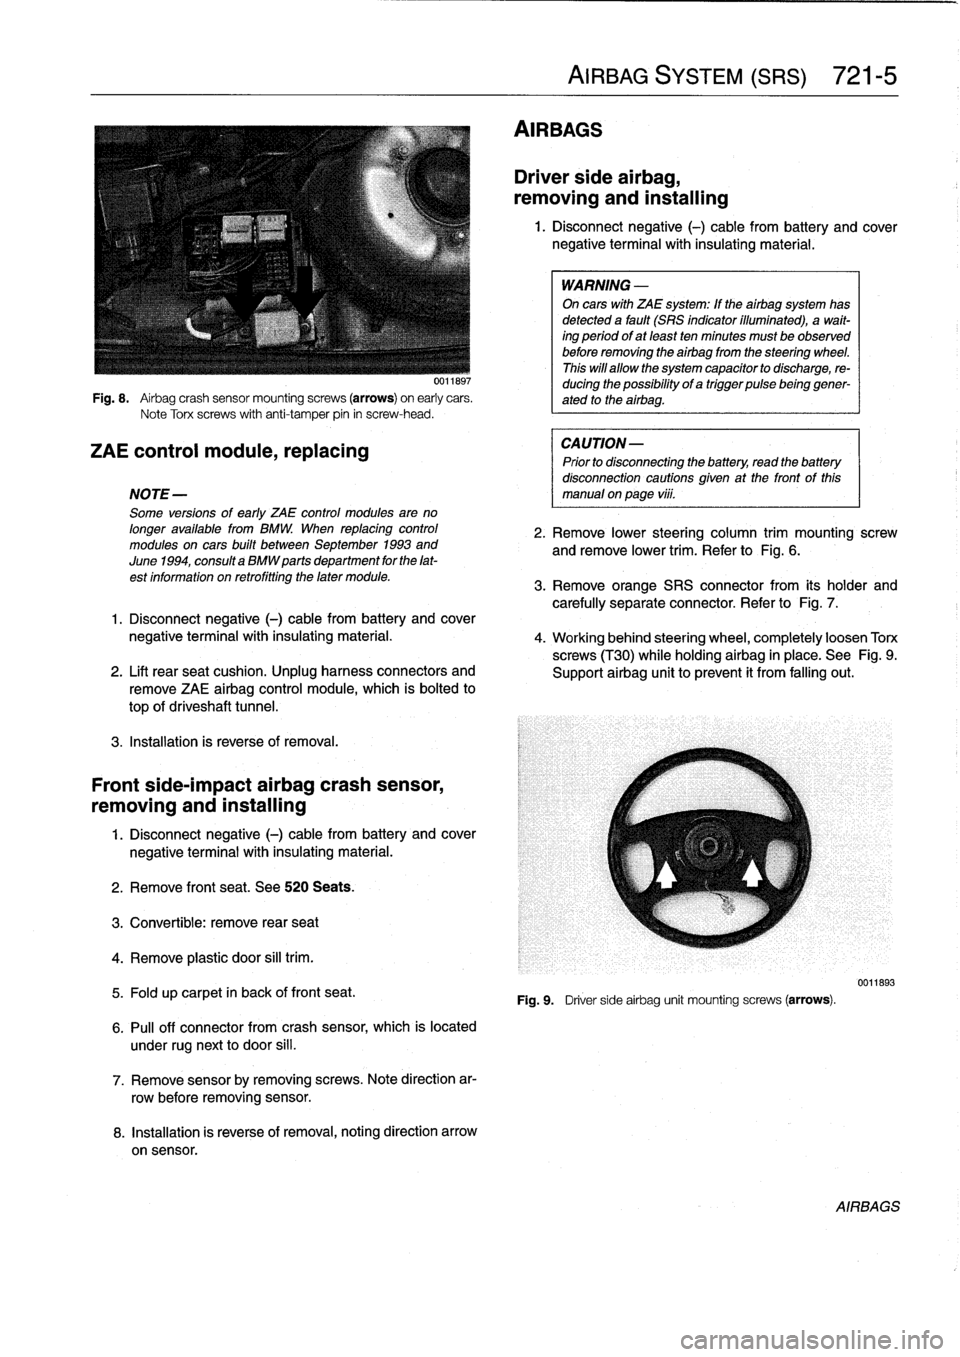
Airbag
crash
sensor
mountingscrews
(arrows)
on
early
cars
.
Note
Torx
screws
with
anti-tamper
pin
in
screw-head
.
ZAE
control
module,
replacing
NOTE-
Some
versions
of
early
ZAE
control
modules
are
no
longer
available
from
BMW
.
When
replacing
control
modules
on
cars
built
between
September
1993
and
June
1994,
consulta
BMW
parts
department
for
the
lat-
est
information
on
retrofitting
the
later
module
.
3
.
Remove
orange
SRS
connector
from
its
holder
and
carefully
separate
connector
.
Refer
to
Fig
.
7
.
1
.
Disconnect
negative
(-)
cable
from
battery
and
cover
negative
terminalwith
insulating
material
.
4
.
Working
behind
steering
wheel,
completely
loosen
Torx
screws
(T30)
while
holdingairbag
in
place
.
See
Fig
.
9
.
2
.
Lift
rearseat
cushion
.
Unplug
harness
connectors
and
Support
airbag
unit
toprevent
it
from
falling
out
.
remove
ZAE
airbag
control
module,
which
is
bolted
to
top
of
driveshaft
tunnel
.
3
.
Installation
is
reverse
of
removal
.
Front
side-impact
airbag
crash
sensor,
removing
and
installing
1
.
Disconnect
negative
(-)
cable
from
battery
and
cover
negative
terminal
with
insulating
material
.
2
.
Remove
front
seat
.
See520
Seats
.
3
.
Convertible
:
remove
rear
seat
4
.
Remove
plastic
door
sill
trim
.
5
.
Fold
up
carpet
in
back
of
front
seat
.
6
.
Pull
off
connector
from
crash
sensor,
which
is
located
under
rugnext
to
door
si¡¡
.
7
.
Remove
sensorby
removing
screws
.
Note
direction
ar-
row
before
removing
sensor
.
8
.
Installation
is
reverse
of
removal,noting
direction
arrow
on
sensor
.
AIRBAGS
AIRBAG
SYSTEM
(SRS)
721-
5
Driver
side
airbag,
removing
and
installing
1
.
Disconnect
negative
(-)
cable
from
battery
and
cover
negative
terminal
with
insulating
material
.
WARNING
-
On
cars
with
ZAE
system
:
If
theairbag
system
has
detected
a
fault
(SRS
indicator
illuminated),
a
wait-
ing
period
ofat
least
ten
minutes
must
be
observed
before
removing
the
airbag
from
the
steering
wheel
.
This
will
allow
the
system
capacitor
to
discharge,
re-
ducing
the
possibility
of
a
trigger
pulsebeinggener-
ated
to
the
airbag
.
CAUTION-
Prior
to
disconnecting
the
battery,
read
the
battery
disconnection
cautions
given
at
the
front
of
this
manual
on
page
vi¡¡
.
2
.
Remove
lower
steering
column
trim
mounting
screw
andremove
lower
trim
.
Refer
to
Fig
.
6
.
Fig
.
9
.
Driver
sideairbag
unit
mounting
screws
(arrows)
.
0011893
AIRBAGS