1993 CHEVROLET ASTRO PASSENGER brake
[x] Cancel search: brakePage 257 of 345
Downloaded from www.Manualslib.com manuals search engine To get the right reading, the fluid should be at normal operating temperature,
which is
180°F to 200°F (82°C to 93°C).
To check transmission fluid hot: Get the vehicle warmed up by driving
about
15 miles (24 km) when outside temperatures are above 50°F (10°C). If
it's colder than 50°F (lO'C), drive the vehicle in D (Third Gear) until the
engine temperature gage moves and then remains steady for ten \
minutes.
Then follow the hot check procedures.
To check transmission fluid cold: A cold check is made after the vehicle
has been sitting for
8 hours or more with the engine off and is used only as
a reference. Let the engine run at idle for
5 minutes if outside temperatures
are
50°F (1 0°C) or more. If it's colder than 50°F (lO"C), you may have to
idle the engine longer.
A hot check must follow when fluid is added during a
cold check.
To check the fluid hot or cold:
Park your vehicle on a level place.
Place the shift lever in P (Park) with the parking brake applied.
With your foot on the brake pedal, move the shift lever throu\
gh each
gear range, pausing for about three seconds in each range. Then,
position the shift lever in
P (Park).
Let the engine run at idle for three minutes or more.
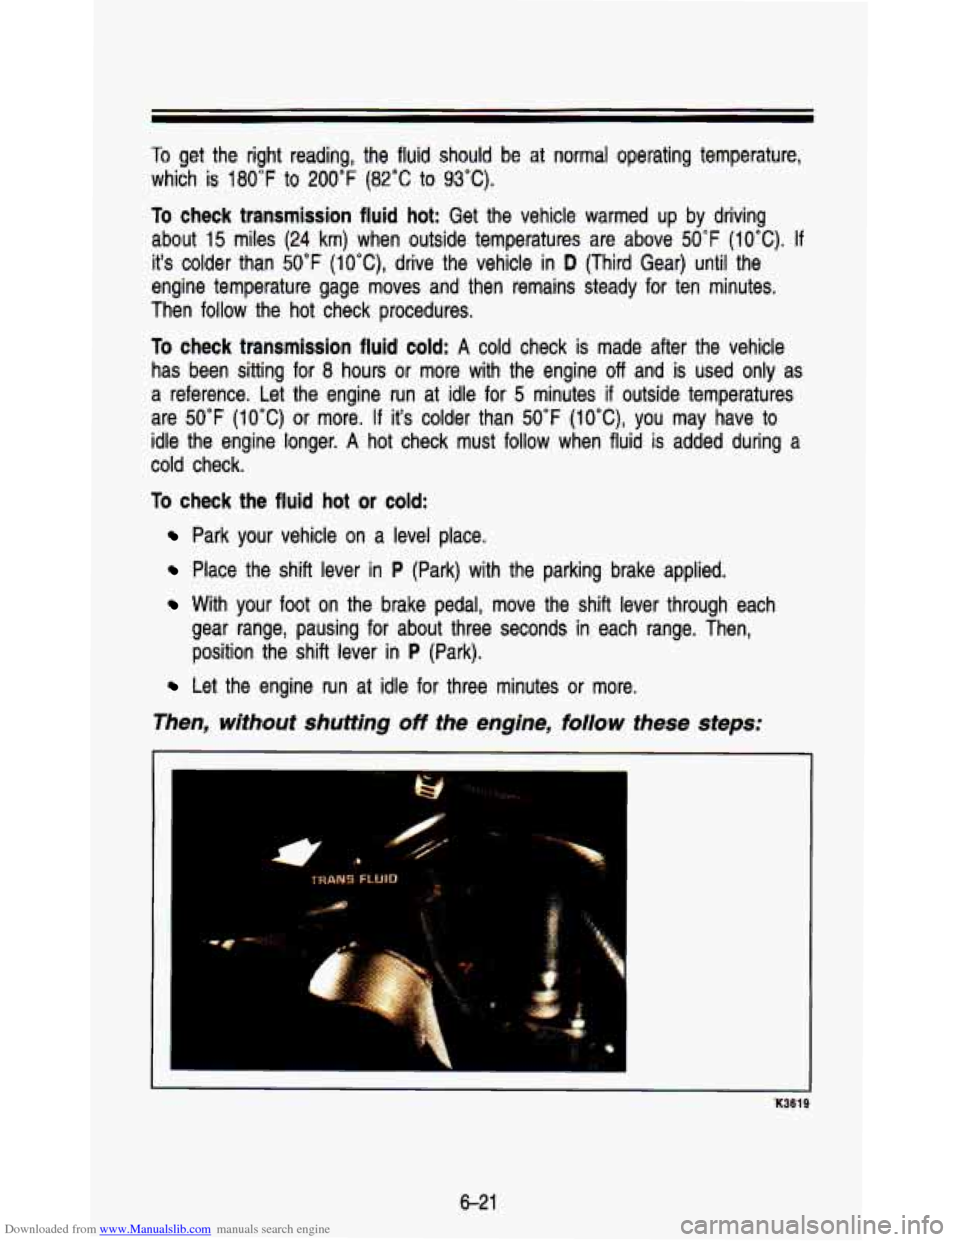
Then, without shutting off the engine, follow these steps:
K3619
6-21
Page 268 of 345
Downloaded from www.Manualslib.com manuals search engine Service & Appearance Care
0
I.
I
When using a concentrated washer fluid, follow the manufacturer'\
s instructions for adding water.
Don't mix water with ready-to-use washer fluid. Water can cause\
the
solution
to freeze and damage your washer fluid tank and other parts
of the washer system. Also, water doesn't clean as well as washer\
I
fluid.
Fill your washer fluid tank only 314 full"when it's'vety cold. This
allows for expansion, which could damage the tank
if it is completely I
full.
"L..:.i: , , I_ y:~ i; P .. .. . . .. . .... . *>,: " 2 ..., .- .. .. ;'r : ,y*: , '-I 1' .:a,' ...j , .I' _I .~ ,.., <:':,.YY<..'.% , , .', < .. c7~ Ij
" .,. , , ...j. .. :,,;,.: >: :,:. I, ~,~. .,. ._
Don't use radiator antifreeze in your windshield washer. It can
damage your washer system and paint.
I
Brake Master Cylhder
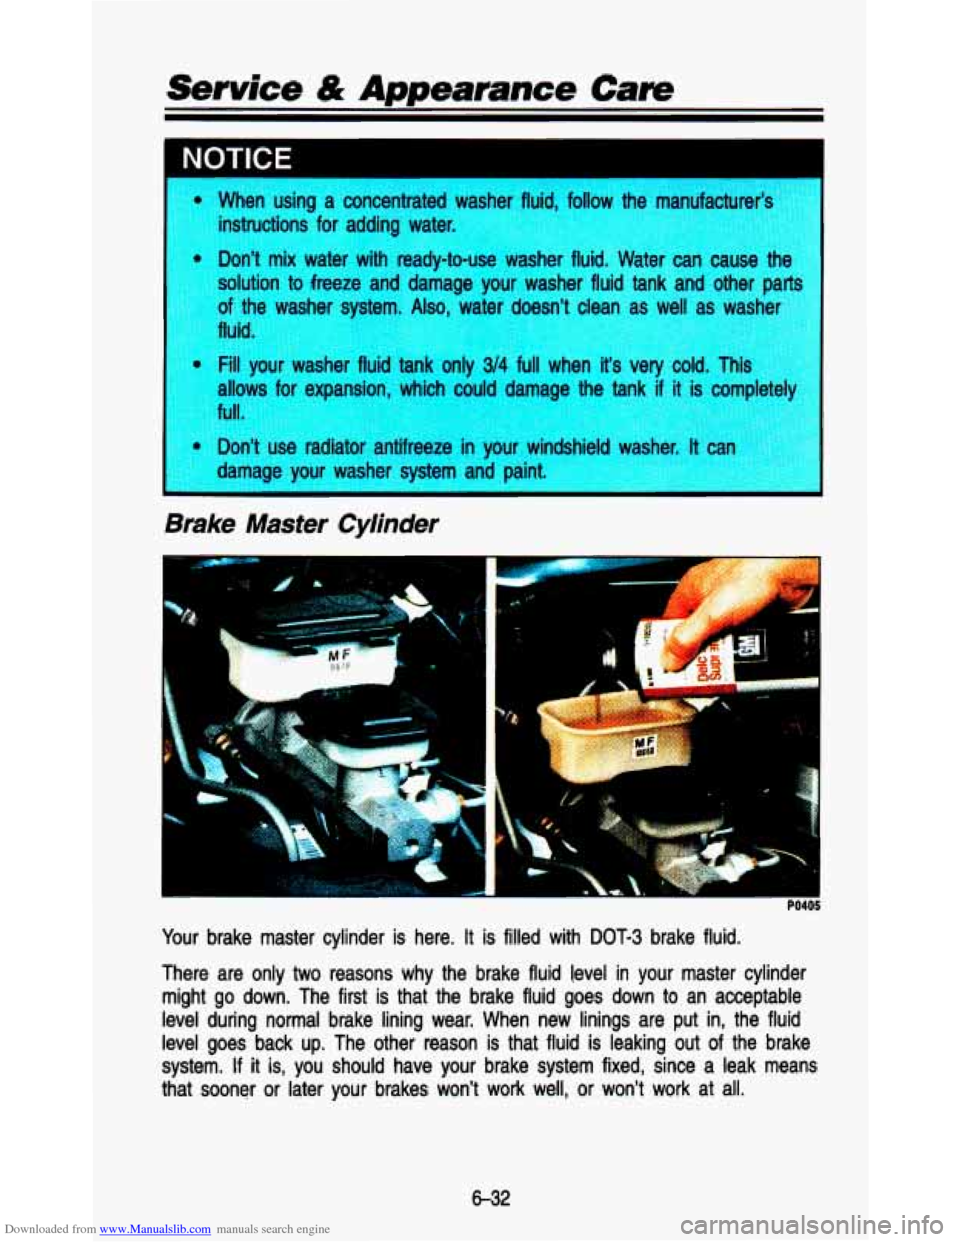
Your brake master cylinder is here. It is filled with DOT-3 brake fluid.
There are only
two reasons why the brake fluid level in your master cylinder
might go down. The first is that the brake fluid goes down to an acceptable
level during normal brake lining wear. When new linings are put in, the fluid
level goes back up. The other reason is that fluid is leaking out of the brake
system.
If it is, you should have your brake system fixed, since a leak mea\
ns
that sooner or later your brakes won't work well, or won't wo\
rk at all.
6-32
Page 269 of 345
Downloaded from www.Manualslib.com manuals search engine So, it isn’t a good idea to “top off’ your brake fluid. Adding brake fluid won’t
correct a leak.
If you add fluid when your linings are worn, then you’ll have \
too much fluid when you get new brake linings. You should add (or remove)
brake fluid, as necessary, only when work is done on the brake hydraulic
system.
If you have too much brake fluid, it can spill on the engine. The fluid I
will burn if the engine is hot enough. You or others could be burned,
and your vehicle could be damaged. Add brake fluid only when work
is done on the brake hydraulic system.
I
Refer to the Maintenance Schedule to determine when to check your brake
fluid. See “Periodic Maintenance Inspections” in the Index.
To Check Brake Fluid:
You can check the brake fluid without taking off the cap. Just look at the
windows on the brake fluid reservoir. The fluid levels should be above
MIN. If
they aren’t, have your brake system checked to see if there is a leak.
After work is done on the brake hydraulic system
, make sure the levels are
above
MIN and below the top of each window.
What To Add:
When you do need brake fluid, use only DOT-3 brake fluid-such \
as Delco
Supreme
ll@ (GM Part No. 1052535), Use new brake fluid from a sealed
container only.
brake
fLlu lamagn lehicle
Replacing
Brake System Parts
The braking system on a modern vehicle is complex. Its many parts have to
be
of top quality and work well together if the vehicle is to have really good
braking. Vehicles we design and test have top-quality
GM brake parts in
them, as your vehicle does when
it is new. When you replace parts of your
6-33
Page 270 of 345
Downloaded from www.Manualslib.com manuals search engine Service & Appearance Care
braking system-for example, when your brake linings wear down and you
have
to have new ones put in-be sure you get new genuine GM
replacement parts.
If you don’t, your brakes may no longer work properly. For
example,
if someone puts in brake linings that are wrong for your vehicle, the
balance between your front and rear brakes can change, for the\
worse. The
braking performance you’ve come to expect can change in many\
other ways
if someone puts in the wrong replacement brake parts.
Hydro-Boost Brake System (Hydraulic Pump)
The power steering pump is also used as the Hydro-Boost pump. \
Refer to
“Power Steering Fluid” in this section when. checking the fluid level or adding
fluid.
Fluid Leak Check
After the vehicle has been parked for awhile, inspect the surf\
ace beneath the
vehicle for water, oil, fuel or other fluids. Water dripping f\
rom the air
conditioning system is normal. If you notice fuel leaks or fumes, the causes
should be found and corrected at once.
Battery
Every new GM vehicle has
add water
to one of these,
a Delco Freedom@ battery.
the original battery’s label. a Delco Freedom@ battery. You never have
to
When it’s time for a new battery, we recommend
Get one that has the catalog number shown on
Vehicle Storage
If you’re not going to drive your vehicle for 25 days or more, take off the
black, negative
(-) cable from the battery. This will help keep your battery
from running down.
I CAUTION
For more informarlon on vehicle storage, contact your dealer’\
s service
department, or write to:
Adistra Corporation 171 Hamilton Street Plymouth,
MI 48170
General Motors
of Canada, Limited
Customer Services Department
Oshawa, Ontario L1 J5Z6
In
Canada, write
to:
6-34
Page 302 of 345
Downloaded from www.Manualslib.com manuals search engine Service & Appearance Care
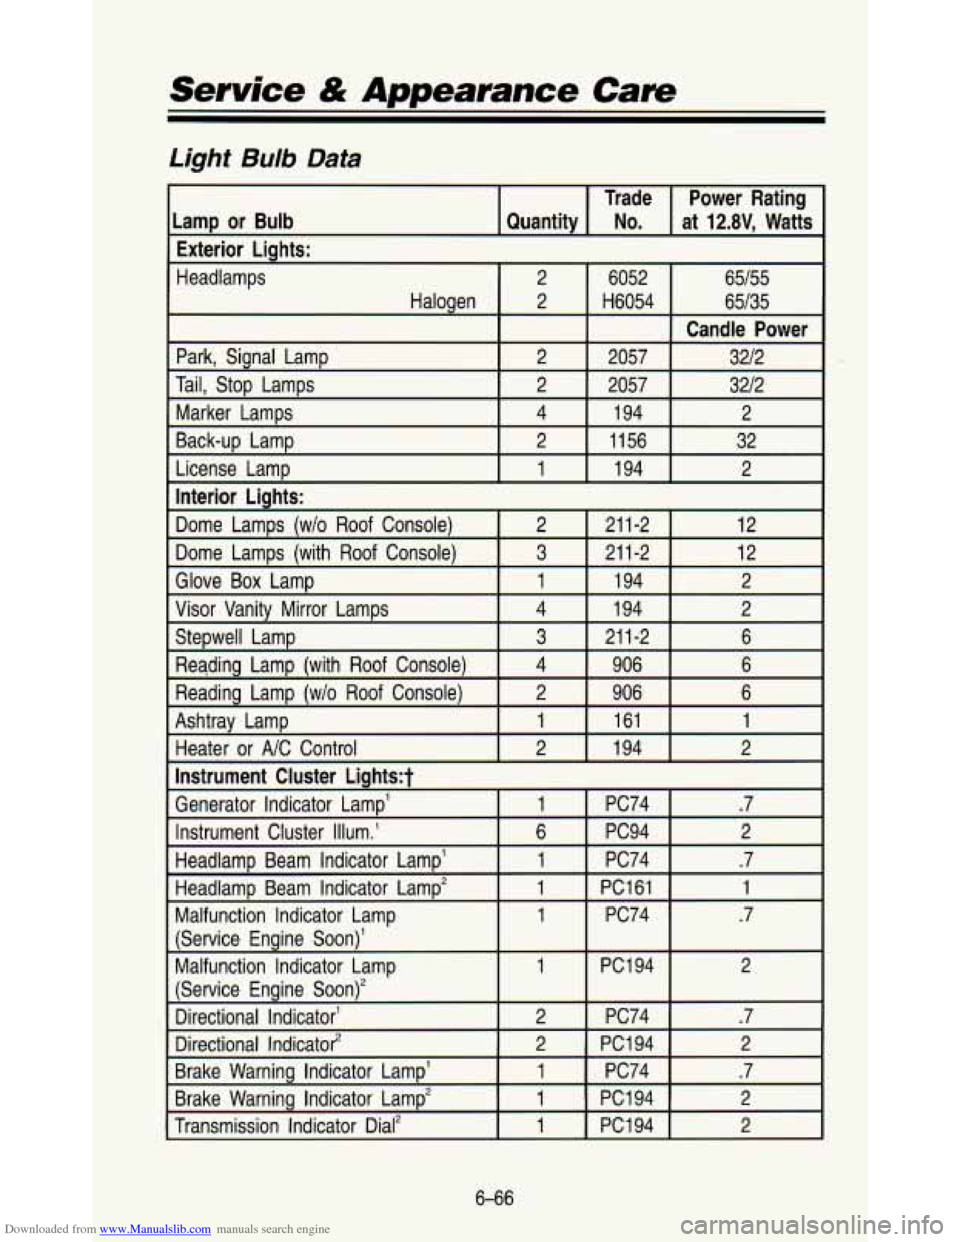
Light Bulb Data
Trade at
12.8V, Watts No. Quantity
Lamp or Bulb Power Rating
Exterior Lights:
Headlamps 2
6052 65/55
Halogen 65/35
H6054
2
Park, Signal Lamp 2 2057 3212
Tail, Stop Lamps 2
2057
1 94
4
Marker Lamps 3212
12
211-2
3 Dome Lamps (with Roof Console) 12 211-2 2
Dome Lamps (w/o Roof Console)
Interior Lights:
2
194
1 License
Lamp 32
1156
2 Back-up Lamp 2
Candle Power
I Glove Box LamD Ill 194 I 2
I Visor Vanity Mirror Lamps I 4 I 194 I 2
Stepwell Lamp
2
Reading Lamp
(wlo Roof Console) 6 906
4
Reading Lamp (with
Roof Console) 6 21
1-2
3
2 1 94 2
Heater or NC Control
1 161 1 Ashtray Lamp 6 906
Instrument Cluster
Lightst
Generator Indicator Lamp’
2
PC94 6
Instrument Cluster Illum.’ .? PC74
1
Headlamp Beam Indicator Lamp’
2
PC1
94 2 Directional Indicato?
.? PC74
2
Directional Indicator‘
(Service Engine Soon)*
2 PC1 94 1
Malfunction Indicator Lamp
(Service
Engine Soon)’
.7 PC74 1 Malfunction Indicator Lamp
1 PC161 1 Headlamp Beam Indicator Lamp‘ .7
PC74
1
Brake Warning Indicator Lamp’
1
Brake Warning Indicator Lamp2 .7
PC74
1
2 PC1 94
1
Transmission Indicator Dial2
2 PC1 94
6-66
Page 304 of 345

Downloaded from www.Manualslib.com manuals search engine Service & Appearance Care
Fuses and Circuit Breakers Usage
Name
Inst. Lps.
Pwr. Acc.
Horn-Dm.
Gages
Aux. Htr. NC
Stop-Haz.
Tail Lps.
Turn
BIU
Htr. NC
Radio
ECM B
ECM
I
Pwr. Wdo.
Wiper
Brake
Fog Lamps***
DRL**
Pow. Mirrors*
Trailer*
Circuits Protected
Instrument Panel Lamps, Radio Dial
Lamps, Heater Lamps
Power Door Locks, Power Seat
Horn Relay, Digital Clock, Cigarette
Lighter, Dome Lights, Radio Memory,
Glove Box Lamp
Instrument Cluster Gages, Brake
Switch, Audio Alarm, Headlight Switch
Illumination, Ash Tray Illumination,
Cruise Control
Auxiliary Heater-Rear NC
(if equipped)
Stop Lamps, Hazard Flash, Digital
Instrument Cluster
Headlamp Switch, Tail and Parking
Lamps
Direction Signal Flash, Back Up
Lamps
Front Heater
& Air Conditioning
Radio
Engine Control Module
Engine Control Module
Power Windows
Windshield Wiper
Anti-Lock Brake System,
Speedometer
Fog Lamps
Canadian Daytime Running Lights
Power Mirror
Trailer Wirina Harness
Fuse
10 Amp
30 Amp
20 Amp
25 Amp
20 Amp
20 Amp
20 Amp
20 Amp
10 Amp
10 Amp
10 Amp
25 Amp
15 Amp
15 Amp
10 Amp
3 Amp
30 Amr,
Circuit
Breaker
30 Amp
30 Amp
*In-line fuse.
**Canada only.
“*In-line fuse (certain models).
TO007
6-68
Page 312 of 345
Downloaded from www.Manualslib.com manuals search engine Scheduled Maintenance Services
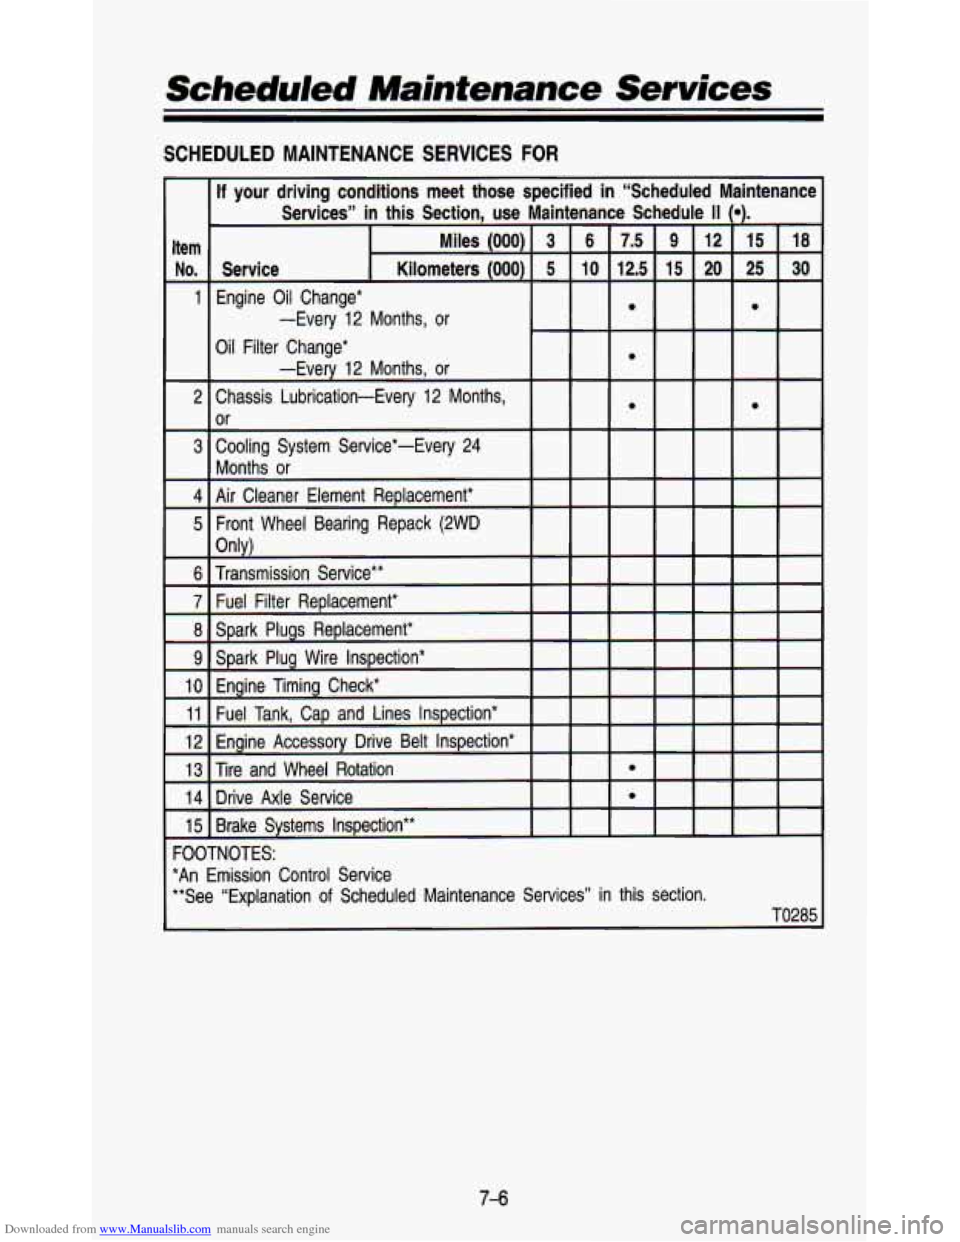
SCHEDULED MAINTENANCE SERVICES FOR
13
14
15
-
-
-
If your driving conditions meet those specified in “Scheduled Ma\
intenance I
Services” in this Section, use Maintenance Sc
Spark Plug Wire Inspection*
Engine Timing Check*
Fuel Tank, Cap and Lines Inspection*
Engine Accessory Drive Belt Inspection*
Tire and Wheel Rotation
e
Drive Axle Service e
Brake Systems Inspection**
FOOTNOTES:
*An Emission Control Service
**See “Explanation
of Scheduled Maintenance Services” in this section.
TO285
7-6
Page 314 of 345
Downloaded from www.Manualslib.com manuals search engine Scheduled Maintenance Services
Explanation Of Scheduled Maintenance Services
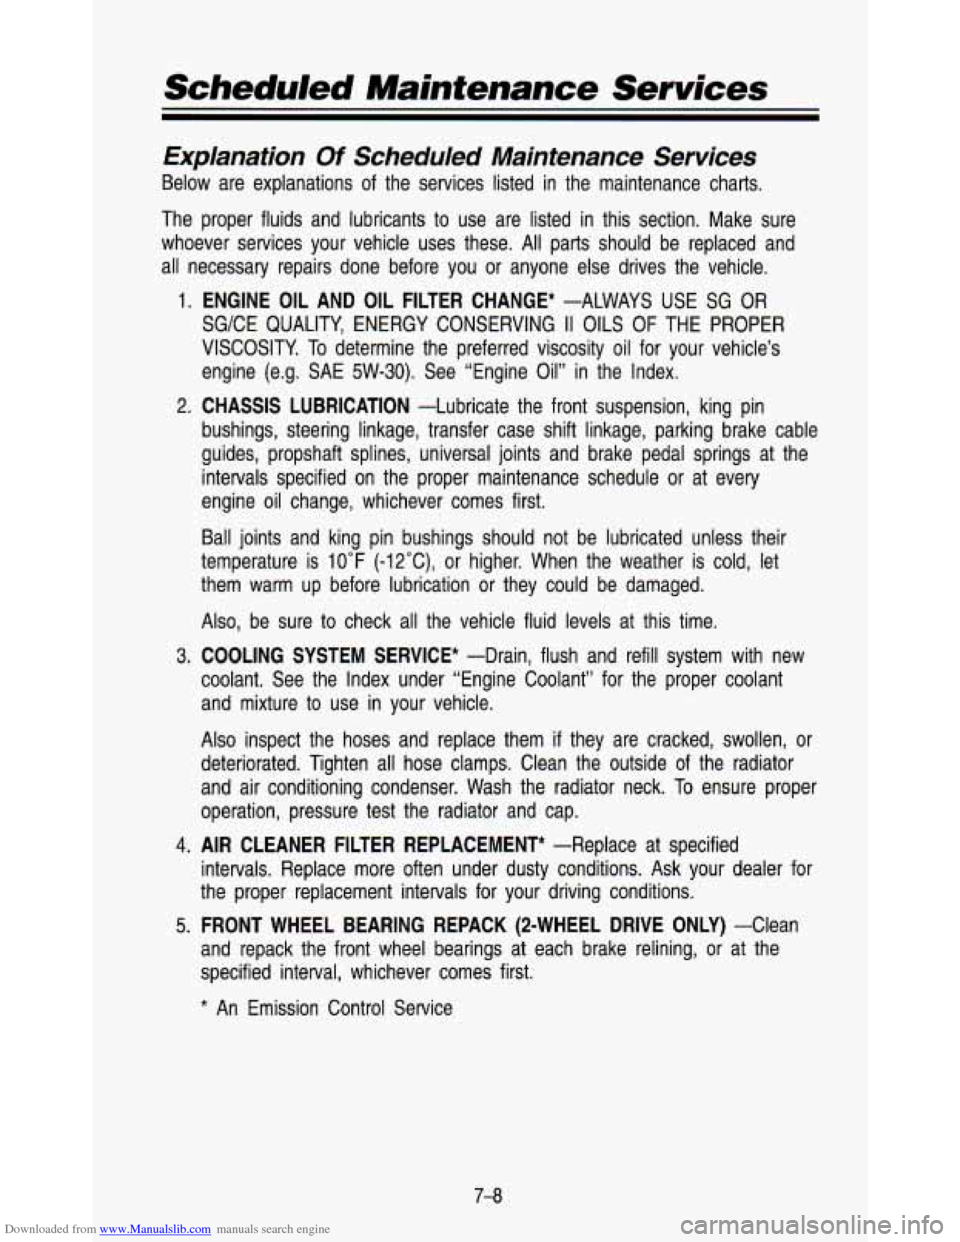
Below are explanations of the services listed in the maintenance charts.
The proper fluids and lubricants to use are listed in this section. Make sure
whoever services your vehicle uses these. All parts should be \
replaced and
all necessary repairs done before you or anyone else drives th\
e vehicle.
1. ENGINE OIL AND OIL FILTER CHANGE* -ALWAYS USE SG OR
SG/CE QUALITY, ENERGY CONSERVING II OILS OF THE PROPER
VISCOSITY.
To determine the preferred viscosity oil for your vehicle’s
engine (e.g. SAE 5W-30). See “Engine Oil” in the Index.
bushings, steering linkage, transfer case shift linkage, parking \
brake cable
guides, propshaft splines, universal joints and brake pedal spri\
ngs at the
intervals specified on the proper maintenance schedule or at ev\
ery
engine oil change, whichever comes first.
2.
CHASSIS LUBRICATION -Lubricate the front suspension, king pin
Ball joints and king pin bushings should not be lubricated unl\
ess their
temperature is
10°F (-12”C), or higher. When the weather is cold, let
them warm up before lubrication or they could be damaged.
Also, be sure to check all the vehicle fluid levels at this time.
3.
COOLING SYSTEM SERVICE* -Drain, flush and refill system with new
coolant. See the Index under “Engine Coolant” for the pro\
per coolant and mixture to use in your vehicle.
Also inspect the hoses and replace them
if they are cracked, swollen, or
deteriorated. Tighten all hose clamps. Clean the outside of the radiator
and air conditioning condenser. Wash the radiator neck.
To ensure proper
operation, pressure test the radiator and cap.
4. AIR CLEANER FILTER REPLACEMENT* -Replace at specified
intervals. Replace more often under dusty conditions. Ask your \
dealer for
the proper replacement intervals for your driving conditions.
5. FRONT WHEEL BEARING REPACK (2-WHEEL DRIVE ONLY) -Clean
and repack the front wheel bearings at each brake relining, or at the
specified interval, whichever comes first.
* An Emission Control Service