1993 CADILLAC ELDORADO display
[x] Cancel search: displayPage 168 of 398

Downloaded from www.Manualslib.com manuals search engine 1
1
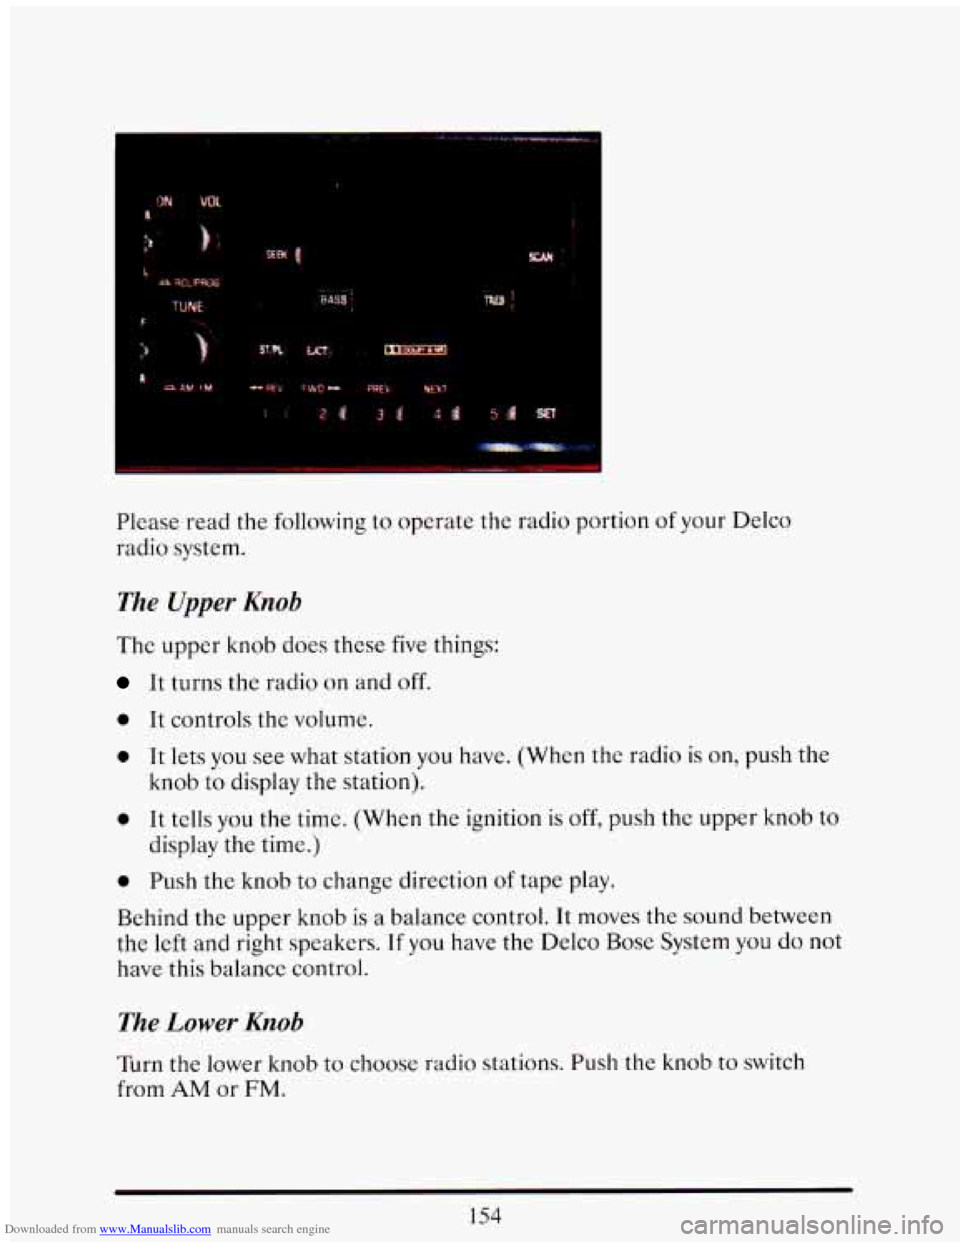
Please read the following to operate the radio portion of your Delco
radio system.
The Upper Knob
The upper knob does these five things:
It turns the radio on and off.
0 It controls the volume.
0 It lets you see what station you have. (When the radio is on, push the
knob to display the station).
0 It tells you the time. (When the ignition is off, push the upper knob to
0 Push the knob to change direction of tape play.
display
the time.)
Behind the upper knob
is a balance control. It moves the sound between
the left
and right speakers. If you have the Delco Bose System you do not
have this balance control.
The Lower Knob
Turn the lower knob to choose radio stations. Push the knob to switch
from AM or FM.
154
Page 169 of 398

Downloaded from www.Manualslib.com manuals search engine If you have the Delco Bose Gold Series Music System, it lets you switch
from
CD (Compact Disc) to TP (Tape player).
The control behind the lower knob moves the sound between your front
and rear speakers.
When you push this button either up or down,
the SCAN indicator in the
display will light and the radio will find the next station and stay there
about
5 seconds. Then it will go to the next station and pause, and keep
doing that until you push either the SCAN or upper knob.
SEEK
This button selects stations, but it doesn’t keep moving as SCAN does.
When you push SEEK
up or down, the radio will automatically go to the
next strongest station and stay there.
Export Radio Only
The SCAN and SEEK function selects station only in one direction.
Push Buttons
You can set the push buttons to get up to ten favorite. stations (Five on
AM and five more on FM). Just:
Choose either AM or FM
Tune in the station.
Push the SET button.
Within 5 seconds, push one of the five push buttons.
Repeat these steps for each of the five push buttons.
BASS
The slide control increases or decreases the bass response tone. Moving
the control to the right increases bass while moving it to the
left decreases
it.
155
Page 170 of 398

Downloaded from www.Manualslib.com manuals search engine TREBLE
The slide control increases or decreases the treble response tone. Moving
the control to the right increases the treble
while moving it to the left
decreases it.
Your Cassette Tape Player
Your cassette tape player works best with tapes that are 30 to 45 minutes
long on each side. Tapes longer than that are
so thin that they may not
work well in this player.
If you look at the tape, or on its label or box, it should say whether its
bias, ("equalization" is 70 microseconds (70
U ) or 120 microseconds (120
U ). Chrome and metal tapes are 70 u scc and standard iron tapes are 120
U sec. Your tape player will adjust automatically for either type of
cassette tape.
To Play A Cassette Tape
0 Turn the radio on.
0 Insert the cassette through the tapc door. (The "TAPE" indicator in
the display will light.)
If you hear nothing or hear just a garbled sound, the cassette may not be
in squarely. Push the EJCT button to remove the tape and start over. The
tape equalization is automatically sensed and set. Inserting the cassette
also automatically disables
DNR""'" and activates DOLBY"' noise
reduction.
DNR" is the Dynamic Noise Reduction. It helps remove background hiss
noise from the radio.
@ Once the tape is playing, use the upper and lower knobs to adjust the
volume and balance, just as you do
for the radio. Push the upper knob
to change tape direction. The arrow in the display show which
direction the tape is being played.
'"DNR" is a registered trademark of National Semiconductor
Corporation.
156
Page 172 of 398

Downloaded from www.Manualslib.com manuals search engine EJCT (Eject Tape)
Press this button to remove the tape.
The Delco Bose Gold Series Music System
This optional sound system combines an AM/FM stereo radio with a
cassette tape player and a compact disc player
in a single unit.
To operate the radio and cassette tape player portion of this music
system, please read the beginning
of this section. “How To Operate Your
Sound System” and “Your Cassette Tape Player.”
To Play the Disc Player
Before you begin, please note: don’t use the mini-discs that are called
“singles” (even with an adapter). They won’t eject.
Use full-size compact
discs only.
Turn the radio on.
Insert a disc (label side up) partway into the slot. The player will pull
it in. Wait a few seconds and the disc will play. Then only the time
of
day and “CD” will display.
If the disc comes back out, check to see if:
The disc is upside down.
The disc is dirty, scratched, or wet.
There’s too much moisture in the air. (If there is, wait about one hour
and try again).
“Err” (Error Detection)
If this message is displayed, you have a condition of either extreme
temperature, moisture,
or an incorrect disc. The disc will automatically be
ejected. When conditions are back to normal, the disc should play again.
RCLIPROG (RecalllProgram)
0 Press once to see what track is being played.
158
Page 173 of 398

Downloaded from www.Manualslib.com manuals search engine Within 5 seconds press it a second time to see how long the disc has
been playing.
Press it a third time to see the time of day.
Rev (Reverse)
Push and hold REV to return rapidly within a track. Release it to play the
passage.
The elapsed time will be displayed to show the reverse progress
of the CD.
FWD (Fast Forward)
Press and hold FWD to advance quickly within a track. Release it to
resume playing. Elapsed time will be displayed to show the forward
progress
of the CD.
Prev (Previous)
Push this button to go back to the beginning of the track or push it again
to a favorite track.
Next
Push this button to advance to the next track.
STIPL (StopjPlay)
Press this button and the disc or tape will stop without ejecting it and the
radio will start to play. Press it again and the disc or tape will start to play
again.
E JCT (Eject)
Press this button to eject the disc or tape. If you have both a CD and a
tape in the player, then the other playback media will start to play. Press
it again and the other media will eject.
159
Page 174 of 398

Downloaded from www.Manualslib.com manuals search engine Comp (Compression)
Pressing COMP makes soft and loud passages more nearly equal in
volume. For example, playing classical or jazz music with very quiet and
very loud passages
in the same tune. The COMP display will light as long
as COMP is on.
Setting The Clock
Turn the ignition on. Then:
To Set the Hour:
0 Press SET, and within 5 seconds,
0 Press and hold SEEK. When the clock gets to the correct hour, let go.
To Set the Minutes:
Press SET, and within 5 seconds,
Press and hold SCAN. When the clock gets to the correct minute, let
Your clock
is set.
go*
Care of Your Cassette Tape Player
A tape player that is not cleaned regularly can cause reduced sound
quality, ruined cassettes, or a damaged mechanism. Cassette tapes should
be stored
in their cases away from contaminants, direct sunlight, and
extreme heat. If they aren’t, they may not operate properly or cause
failure of the tape player.
Your tape player should be cleaned regularly each month or after every
15 hours of use. If you notice a reduction in sound quality, try a known
good cassette to see
if the tape or the tape player is at fault. If this other
cassette has
no improvement in sound quality, clean the tape player.
Clean your tape player with a wiping-action, non-abrasive cleaning
cassette, and follow the directions provided with it.
Cassettes are subject to wear and the sound quality may degrade over
time. Always make sure that the cassette tape is
in good condition before
you have your tape player serviced.
160
Page 244 of 398

Downloaded from www.Manualslib.com manuals search engine A CAUTION:
-. .:
- .. .- .
A vehicle can fall from a car carrier if it isn’t prope secured.
Lis can cause a collision, serious personal injury and vehicle
damage. The vehicle should be tightly secured with chains or
:.-
steel ca‘ - - ’ Iefore it is transported.~~--.l~~~~~:~~:. -: - *i.., >..- .,;.
Dodc auditUtes (ropes, leather s~~~ps’;’~anva~webLll~~-’.- , ~ 7. - , I
-
-L:.) that can be cut by sharp edg-- underneath the towed
vehic
.-
m. -
.. -. --. ..,
4r*’ -&cz&-’;L? . 2- - -- L-...;, . ..
ir“7r
.. . >. .. - ,,- -. . . ..~ -:- .. ..
-. . _.. ., . .-- , . ._ . .. , ..
._. , . -z- -. .- . -. -. --: -. .. s. .. . . _, ._f-- - :-; : . - .. .-
ENGINE OFERHEATING
You will find the warning light about a hot engine on your Cadillac
instrument panel (Export Only).
The driver information will display either “ENGINE COOLANT HOT
IDLE ENGINE” or
“STOP ENGINE ENGINE OVERHEATING.”
If Steam Is Coming From Your Engine:
230
Page 287 of 398

Downloaded from www.Manualslib.com manuals search engine Oils with these words on the container will help you save fuel.
This doughnut-shaped logo (symbol) is used on most oil containers
to
help you select the correct oil.
You should look for this on the oil container, and use only those oils that
display the logo.
GM Goodwrench@ oil (in Canada, GM Engine Oil) meets all the
requirements for your vehicle.
Engine Oil Additives: Don’t add anything to your oil. Your Cadillac
dealer is ready to advise
if you think something should be added.
When to Change Engine Oil: Your vehicle is equipped with an engine oil
life index (EOLI) feature as part
of the Driver Information Center
display (DIC). Oil change intervals are determined by the EOLI and will
usually fall at, or between, the
two recommended alternative intervals of
3,000 miles (5,000 kilometers) and 7,500 miles (12,500 kilometers), but
could be shorter than
3,000 miles (5,000 kilometers) under some very
severe driving conditions shown in Schedule I. The system will also
indicate the need for an oil change if
7,500 miles (12,500 kilometers) or
one year has passed.
Engine
oil life remaining is displayed through engine data as the ‘OIL
LIFE INDEX’ and as a ‘CHANGE ENGINE OIC message. The
‘OIL
LIFE INDEX’ display includes a number between 0 and 100. This is the
percentage
of oil life REMAINING based on driving conditions and
mileage driven since the last time of the oil life indicator was reset. When
the remaining oil life is less than
lo%, a ‘CHANGE OIL SOON’ message
will appear. This is a reminder to schedule an engine oil change. When
the oil life index reaches
0, the ‘CHANGE ENGINE OIC message will
appear. This indicates that no oil life remains and the oil should be
changed
as soon as possible, but certainly within the next 200 miles (320
km).
The EOLI will not detect excessively dusty conditions or engine
malfunctions which may effect the
oil. If you drive in dusty areas, change
the engine oil after every
3,000 miles (5,000 kilometers) or 3 months
(whichever comes first), unless instructed to do
so sooner by the DIC.
xu -
On Northstar 4.6 Liter engine equipped vehicles a ‘CHECK OIL LEVEE
message will appear whenever the oil level’s approximately one quart low.
273