1993 BUICK SKYLARK CD player
[x] Cancel search: CD playerPage 120 of 306

@ Part 3 Comfort Controls and Audio Systems
In this part you’ll find out how to operate the comfort control systems and audio systems offered with your Buick .
Be sure to read about the particular system supplied with your vehicle \
.
Part 3 includes:
Comfort Control System
............................................................ 120
Heater and Defroster
........................................................... 121
Air Conditioner
............................................................... 122
RearWindowDefogger
........................................................ 121
Ventilation
................................................................... 121
Audiosystems
.................................................................... 122
SeaingtheClock
................................................... 125.127. 124
RadioControls
.................................................... 124.126. 128
TapePlayerControls
........................................................... 127
CDPlayerControls
............................................................ 130
Care of Cassette Tape Player
& Tapes ............................................. 133
CareofCompactDiscs
......................................................... 133
Antennacare
................................................................ 134
Understanding Radio Reception
.................................................. 122
119
Page 124 of 306

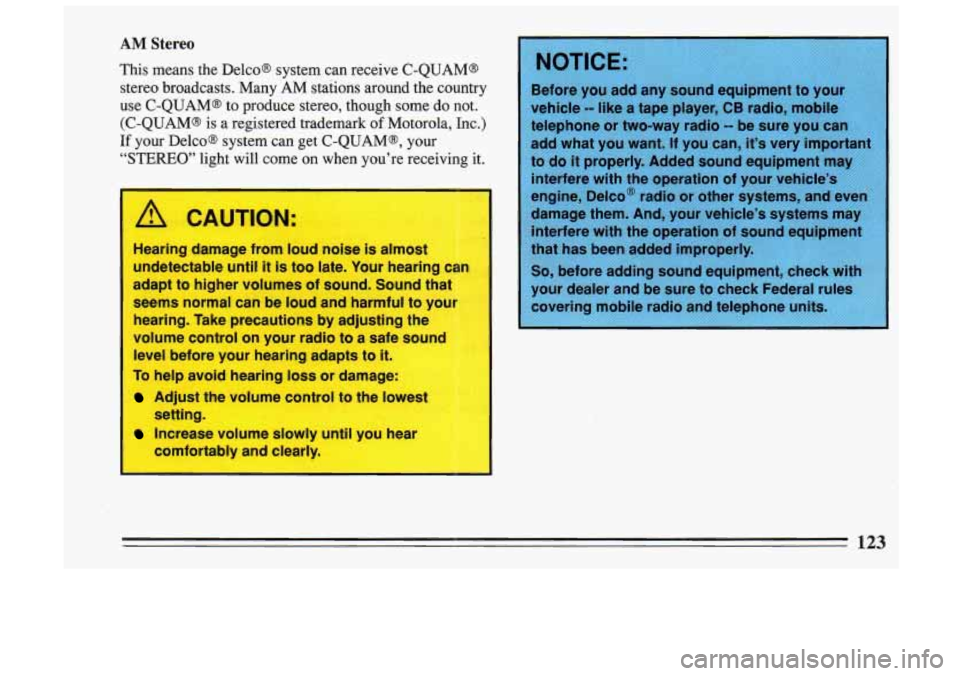
AM Stereo
This means the Delco@ system can receive C-QUAM@
stereo broadcasts. Many AM stations around the country
Before you add any sound equipment to your
use C-QUAM@ to produce stereo, though some do not. vehicle -- like a tape player, CB radio, mobile
(C-QUAM@ is a registered trademark of Motorola, Inc.) telephone or two-way radio -- be sure you can
If your Delco@ system can get C-QUAM@, your add what you want. If you can, it’s very important
“STEREO” light will come on when you’re receiving it. to do it properly. Added sound equipment may
Hearing damage from loua noise is almost
undetectable until
it is too late. Your hearing
adapt to higher volumes of sound. Sound that
seems normal can be
loud and harmful to your
hearing. Take precautions by adjusting the
volume control on your radio to a safe sound
level before your hearing adapts to it.
To help avoid hearing loss or damage:
Adjust the volume control to the lowest
Increase volume slowly until you hear can
I
setting.
comfortably and clearly. interfere
with the operation
of your vehicle’s
engine, Delco@ radio or other systems, and even
123
Page 128 of 306

0 Tune in the station you want.
e Press the SET pushbutton. (SET appears in the
display.)
0 Within 5 seconds, push one of the four pushbuttons
to store the station. Whenever you press that button,
the preset station will return.
Three additional stations may be preset on each band by
pressing two adjoining buttons at the same time.
0 Tune in the desired station.
0 Press the SET pushbutton. (SET appears in the
display.)
0 Within 5 seconds, push any two adjoining
pushbuttons at the same time. (The station will return
when the same two buttons are pressed again.)
Clock
To set the clock:
0 Press the SET button.
0 Within 5 seconds, press and hold SCAN until the
0 Press and hold SEEK until the correct minute
correct hour appears on
the display.
appears on the display.
Treble
Slide the treble lever up to increase the treble response.
If the station is weak or noisy, slide the treble lever
down to reduce the noise.
Bass
Slide the bass lever up to increase the bass response.
Adjust the bass lever to give a pleasing sound to your
ear.
To Play A Cassette
Your tape player is built to work best with tapes that are
30 to 45 minutes long on each side. Tapes longer than
that are
so thin that they may not work well in this
player.
Once the tape
is playing, use the upper and lower knobs
for volume balance and fade just as you do for the radio.
The lighted arrow shows which side
of the tape is being
played.
Forward
To advance the tape, press and the tape will advance
rapidly until you press the STOP-EJECT button lightly.
127
Page 129 of 306

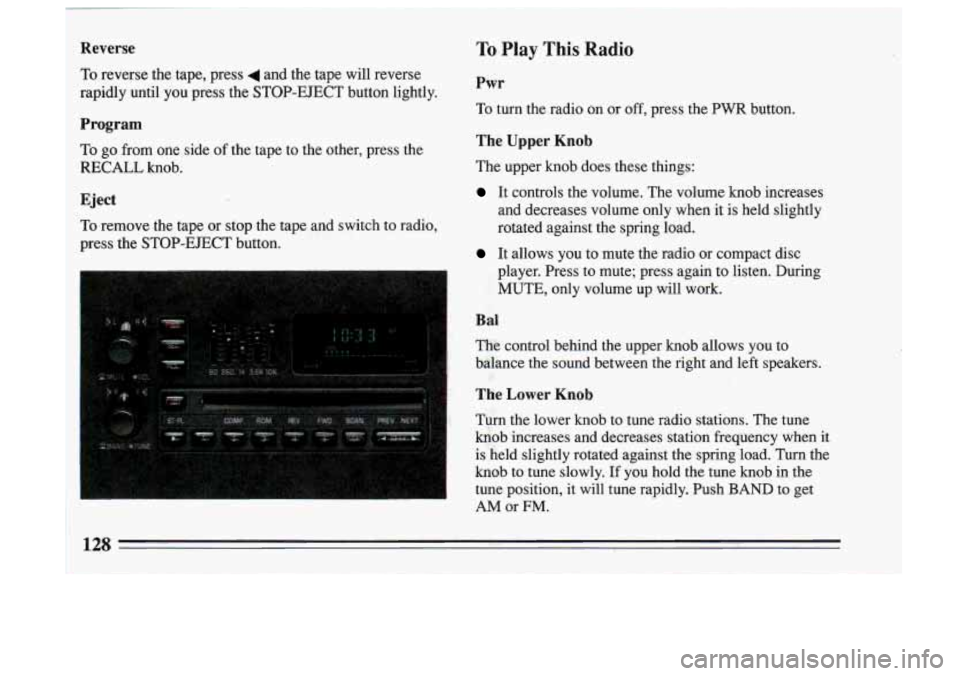
1 Reverse
i To reverse the tape, press 4 and the tape will reverse
rapidly until you press the STOP-EJECT button lightly.
Program
To
go from one side of the tape to the other, press the
RECALL knob.
Eject
To remove the tape or stop the tape and switch to radio,
press the STOP-EJECT button.
To Play This Radio
Pwr
To turn the radio on or off, press the PWR button.
The Upper Knob
The upper knob does these things:
It controls the volume. The volume knob increases
and decreases volume only when it is held slightly
rotated against the spring load.
It allows you to mute the radio or compact disc
player, Press to mute; press again to listen. During
MUTE, only volume up will work.
Bal
The control behind the upper knob allows you to
balance the sound between the right and left speakers.
The Lower Knob
Turn the lower knob to tune radio stations. The tune
knob increases and decreases station frequency when it
is held slightly rotated against the spring load. Turn the
knob to tune slowly. If you hold the tune knob in the
tune position, it will tune rapidly. Push
BAND to get
AM or FM.
3
I 1
- ,,.
Page 131 of 306

To Play A Compact Disc
Before you begin, please note: DO NOT use mini-discs
that are called singles. They won’t eject.
Use full-size
comuuct discs only.
If the disc player is very hot, or if you’re driving on a
very rough road, the disc may come out,
or just not play.
If you see the word HOT on the display, the disc player
is too hot to play the disc. Press RCL to make the word
HOT go
off the display. As soon as things get back to
normal, the disc should play again.
Press PWR to turn the system on.
Insert a disc partway into the slot, label side
up. The
player will pull it in. Wait a few seconds and the disc
should play.
[f the disc comes back out, check whether:
The disc is upside down.
It is dirty, scratched, or wet.
There’s too much moisture in the air. (If there is,
wait about an hour and try again.)
Recall
Press RCL to see what tram 1s playing. Press it again
within
5 seconds to see how long the CD has been
playing that track.
The track number also appears when you change the
volume or when a new track
starts to play.
Compression
Pressing the COMP button makes soft and loud passages
more nearly equal in volume.
Random
Pressing RDM means when it is pressed, it WM cause
the
CD to play the tracks back in a random order rather
than
in the sequential 1,2,3. ..order.
Rev
Press and hold REV to return rapidly to a favorite
passage. Release it to play the passage. Note the counter
reading in the graphic display.
Fwd
Press and hold FWD to advance quickly within a track.
Release it to resume playing. Watch the graphic display
to stop at a specific passage.
130
Page 132 of 306

Prev
Press PREV to hear the previous track. If you hold the
PREV button or press it more than once, the disc will
return to previous tracks.
Next
Press NEXT to hear the next track now (instead of
waiting until the present track is finished.)
If you hold
this button, or press it more than once, the disc will
advance further.
STPL
Press ST/PL (Stop/Play) and the disc will stop and the
radio will play. Press ST/PL again to restart the disc at
the point where it stopped.
Press the
PWR button or turn the ignition key off to stop
the disc player. The disc stays in the player and will
resume playing at the point where it stopped.
EJECT
Press EJECT and the disc will eject and the radio will
play. The disc will start at track
1 when you reinsert it.
-,
Anti-Theft Feature
Delco LOC I1 is an anti-theft feature for the compact disc
player. It can be used or ignored. If ignored the system
plays normally. If it is used, your player won’t be
useable if it
is ever stolen, because it won’t turn on.
The instructions below tell you how to enter
a secret
code into the system. If your car loses battery power for
any reason, or if the Smart battery activates, you must
unlock the system with the secret code before the system
will turn on.
Step
1. Write down any &digit number and keep it in a
safe place.
Step
2. Turn the ignition to the “Accessory” or the
“Run” position.
Step
3. Press PWR to turn the radio OIT.
Step 4. Press the 1 and 4 pushbuttons together. Hold
them down until
“ - - - ” shows on the display.
You are now ready to enter your secret code.
Don’t wait
more than
15 seconds between steps.
Step 5. Press SET and “000” will appear on the display.
Step
6. Press SEEK 4 or button to make the first
number appear.
131
Page 134 of 306

back-up code) and the unit is in the UNSECURED
mode. If the display shows"SEC", the disabling
sequence was.unsuccessfu1 and the numbers did not
match either of the codes and the unit will remain in the
SECURED mode.
Care of Your Cassette Tape Player
Your tapes will sound best if you clean your cassette
tape player from time to time. Use a non-abrasive
cleaning cassette instead of a music tape. Follow the
instructions on the cleaning cassette.
Store cassette tapes away from extreme heat or direct
sunlight. Protect the open ends from dirt or damage;
store them in their original cases or other protective
cases. Cassettes eventually wear out and you may need
to replace them if they become noisy.
Care of Your Compact Discs
Handle discs carefully. Store them in their original cases
or other protective cases and away from direct sunlight
and dust.
If the surface of a disc is soiled, dampen a
clean, soft cloth in a mild, neutral detergent solution and
clean it, wiping from the center to the edge.
Be sure never to touch the signal surface when handling
discs. Pick up discs by grasping the outer edges or the
edge of the hole and the outer edee.
133
Page 303 of 306

Starting Your Car if the Battery is “Dead” .............. 188
Steam From Hot (Overheated) Engine ................ 197
Steering ........................................ 154
Steering in Emergencies ........................... 155
Steering Wheel, Tilt ............................... 88
Steering Without Power Assist ..................... 154
Stereo Sound Systems ............................ 122
Storage Console ................................. 106
Storing Your Vehicle ............................. 237
Stuck. If Your Ignition Key is ....................... 73
Stuck. IfYour Car Is ............................. 213
Subscribing to Buick Product Service Publications ...... 288
Surge Tank Pressure Cap .......................... 233
Symbols on Your Car .............................. 12
Table of Contents ................................. 9
Tachometer ..................................... 1 17
Tamper-Resistant Odometer ........................ 108
Tape Player Care ................................ 133
Temperature. Engine Coolant Warning Light .......... 112
Theft ............................................ 70
Thermostat ..................................... 233
Third Gear ...................................... 78
Tilt Steering Wheel ............................... 88
Time. Setting the ......................... 125.127. 129
Tire Balance .................................... 246
Tire Chains ..................................... 248
Tire. Flat ....................................... 204
Tire Inflation ................................... 242
Tire Inspection and Rotation ....................... 243
Tire Quality Grading ............................. 245
Tires .......................................... 241
Tires. When to Replace ........................... 244
Tires. White Sidewall Cleaning ..................... 254
Torn Safety Belts ................................. 60
Torque Lock (Automatic Transaxle) ................. 174
Towing Your Buick .............................. 193
Towing a Trailer ................................. 179
Trademarks. GM ................................ 216
Traffic Lights ................................... 143
Traffic Officer .................................. 144
Trailer Brakes ................................... 182
Trailer Towing .................................. 179
Transaxle/Transmission. Automatic ................... 77
Transaxle Fluid .................................. 227
Trip Odometer .................................. 108
Trunk Release. Remote ............................ 66
Turn Signal and Headlight Beam Lever ................ 88
Turn Signal “On” Chime ............................ 90
Twisted Safety Belts .. I ............................ 35
Two Children Wearing the Same Safety Belt ............ 58
Turn Signal and Lane Change Indicator ............... 89