Page 220 of 340

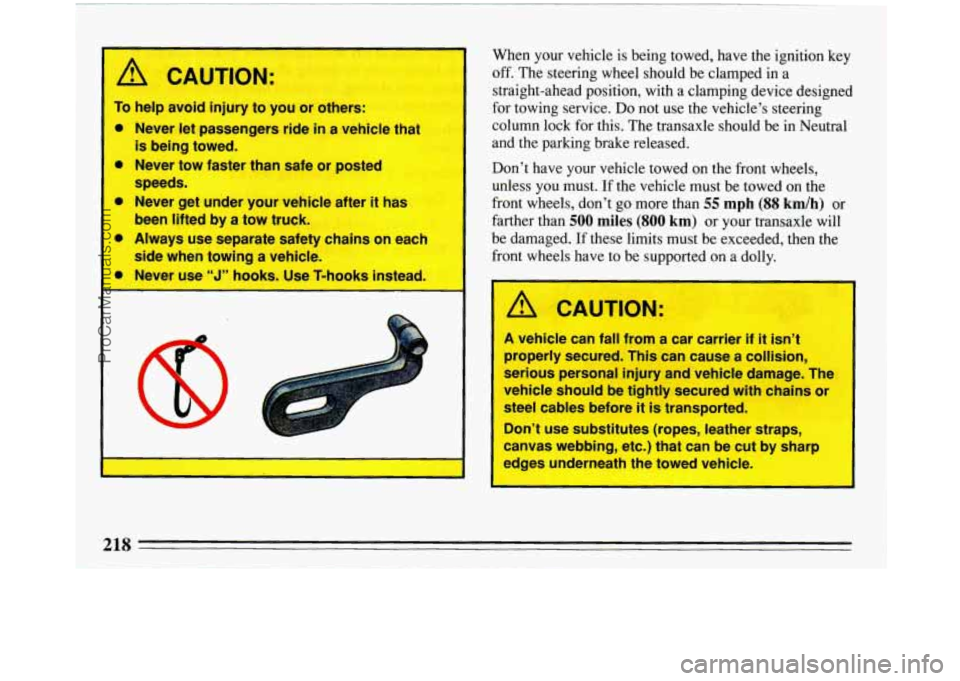
r /r CAUTION:
To help avoid injury to you or others:
0 Never let passengers ride in a vehicle that
0 Never tow faster than safe or posted
0 Never get under your vehicle after it has
0 Always use separate safety chains on each
is being towed.
speeds.
been lifted by
a tow truck.
side when ?owing
a vehicle.
V
t
When your vehicle is being towed, have the ignition key
off. The steering wheel should be clamped in a
straight-ahead position, with a clamping device designed
for towing service.
Do not use the vehicle’s steering
column lock for this. The transaxle should be in Neutral
and the parking brake released.
Don’t have
your vehicle towed on the front wheels,
unless you must.
If the vehicle must be towed on the
front wheels, don’t go more than
55 mph (88 kdh) or
farther than
500 miles (SO0 km) or your transaxle will
be damaged. If these limits must be exceeded, then the
front wheels have to be supported on a dolly.
A CAUTION:
A vehicle can fall from a car carrier if it isn’t
properly secured. This can cause a collision,
serious personal injury and vehicle damage. The
vehicle should be tightly secured with chains or
steel cables before it is transported.
Don’t use substitutes (ropes, leather straps,
canvas webbing, etc.) that can be cut by sharp
edges underneath the towed vehicle.
218
ProCarManuals.com
Page 221 of 340
Front Towing Hook- JPS
Attach "T" hook chains
behind the front wheels into
the bottom
slots of the
cradle rails on both sides Position a
4" x 4" wood beam
across the sling chains
contacting the bottom of the radiator support. Position
the lower sling crossbar just behind the rear edge of the
front bumper.
219
ProCarManuals.com
Page 222 of 340
Rear Towing Hook-Ups
Attach '7"' hook chains to
the slots in the bottom
of
floor pan just ahead of the
rear wheels
on both sides. Position the lower sling crossbar directly under the rear
bumper. A
4" x 4" wood beam is not needed.
Attach a separate safety
chain around the outboard
end
of each lower control
arm.
220
ProCarManuals.com
Page 230 of 340

8. Then replace the
pressure cap. Be
sure the arrows
on
the pressure cap
line up like this.
If a Tire Goes Flat
It’s unusual for a tire to “blow out” while you’re driving,
especially
if you maintain your tires properly. If air goes
out of a tire, it’s much more likely to leak out slowly.
But if you should ever have
a “blowout,” here are a few
tips about what to expect and what
to do:
If a front .tire fails, the flat tire will create a drag that
pulls the vehicle toward that side. Take your foot
off the
accelerator pedal and grip the steering wheel firmly.
Steer to maintain lane position, then gently brake to a
stop well out
of the traffic lane.
A rear blowout, particularly on a curve, acts much like a
skid and may require the same correction you’d use in
a
skid. In any rear blowout, remove your foot from the
accelerator pedal. Get the vehicle under control by
steering the way you want the vehicle to
go. It may be
very bumpy and noisy, but you can still steer. Gently
brake to
a stop, well off the road if possible.
If your tire goes flat, the next section shows how to use
your jacking equipment
to change a flat tire safely.
ProCarManuals.com
Page 231 of 340
Changing a Flat Tire
If a tire goes flat, avoid further tire and wheel damage
by driving slowly to a level place. Turn on your hazard
warning flashers.
A CAUTION:
Changing a tire can cause an injury. The vehicle
can
slip off the jack and roll over you or other
people. You and they could be badly injured. Find
a level place to change your tire. To help prevent
the vehicle from moving:
1. Set the parking brake firmly.
2. Put the shift lever in “P” (Park).
3. Turn off the engine.
I To be even more certain the vehicle won’t move,
you can
put chocks at the front and rear of the
tire farthest away from the one being changed.
That would be the tire on the other side of the
vehicle, a’ *?e opposite end.
- 2. I.
The following steps will tell you how to use the jack and
change a tire.
ProCarManuals.com
Page 232 of 340
The equipment you’ll need is in the trunk. Start
with the
jack and
the wheel wrench.
230
ProCarManuals.com
Page 233 of 340
The jack has a bolt at the
end. Attach the wheel
wrench to the jack bolt. If your Buick has a wheel cover, you must take it off to
reach the wheel nuts. Refer to the correct picture to see
how to remove your wheel cover.
If your vehicle has an aluminum wheel with a center
cover, remove
it using the flat end of the wheel wrench.
Rotate the wheel wrench clockwise (to
the right). That
will raise the lift head a little.
231
ProCarManuals.com
Page 234 of 340
If your vehicle has this
aluminum wheel, you
may have plastic wheel
nut caps. Use the wheel
nut wrench to remove
the wheel nut caps and
to loosen the wheel
nuts.
If your vehicle has wire
wheel covers, remove
them as follows:
3 Use the wire wheel key
wrench
to remove the wire
I
I
wheel cover.
Put the flat end in the slot
and take the small cover
ProCarManuals.com