1993 BUICK CENTURY bulb
[x] Cancel search: bulbPage 89 of 324

Turn Signal and Lane Change Indicator
The turn signal has two upward (for Right) and two
downward (for Left) positions. These positions allow you
to signal a turn or a lane change.
To signal a turn, move the lever all the way up or down.
When the turn is finished, the lever will return
automatically.
A green arrow on the
instrument panel will flash
in the direction of the turn
or lane change.
To signal a lane change,
just raise or lower the lever
until the green arrow
starts
to flash. Hold it there until
you complete your lane
change. The lever will
return by itself when you
release it.
As you signal a turn or a lane change, if the arrows don’t
flash but just
stay on, a signal bulb may be burned out
and other drivers won’t
see your turn signal.
If a bulb
is burned out, replace it to help avoid an
accident. If the green arrows don’t go on at all when you
signal a turn, check the
fuse (see “Fuses 8z Circuit
Breakers” in the Index) and for burned-out bulbs.
Turn Signal Reminder
If your turn signal is left on for more than % of a mile, a
chime will sound.
To turn off the chime, move the turn
signal lever to the off position.
ProCarManuals.com
Page 110 of 324

ignition on, you may have a problem with the fuse or
bulb. Have it fixed right away.
Sometimes when the engine is idling at a stop, the light
may blink on and
off. This is normal.
If you make a hard stop, the light may come on for a
moment.
This is normal.
1 A CAUTIONS
Don't keep driving if the oil pmssure is low. If
you do, your engine can become QO hot that It
catches flm. "ybu or others could be burned.
Check wur oil as soon as possible end have
your t rlcle senrlced.
I
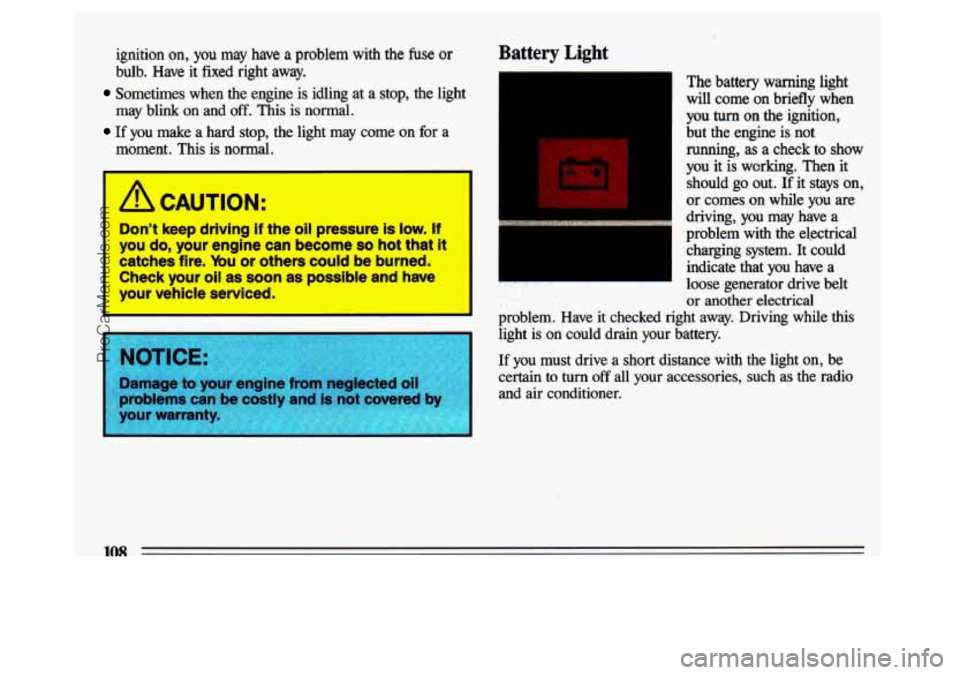
Battery Light
The battery warning light
will come on briefly when
you
turn on the ignition,
but the engine is not
running, as a check to
show
you it is wcrking. Then it
should go out. If it stays on,
or comes on while you are
driving, you may have a
problem with the electrical
charging system. It could
indicate that you have a
or another electrical
. ., . loose generator drive belt
problem. Have it checked right away. Driving while this light is on could drain your battery.
If you must drive a short distance with the light on, be
certain to
turn off all your accessories, such as the radio
and air conditioner.
108
ProCarManuals.com
Page 181 of 324

Driving with a Trailer
Towing a trailer requires a certain amount of experience.
Before setting out for the open road, you’ll want to get t\
o
know your rig. Acquaint yourself with the
feel of
handling and braking with the added weight of the trailer.
And always keep in mind that the vehicle you
are driving
is now a good deal longer and not nearly
so responsive as
your vehicle is by itself.
Before you
start, check the trailer hitch and platform, safety
chains, electrical connector, lights, tires and mirror
adjustment. If the trailer has electric brakes,
start your vehicle
and trailer moving and then apply the trailer brake controller \
by hand to be sure the brakes
are working. This lets you
check your electrical connection at the same time. During
your trip, check occasionally
to be sure that the load is secure,
and that the lights and any trailer brakes are still working.
Following Distance
Stay at least twice as fit, behind the vehicle ahead as you
would when driving your vehicle without a trailer. This
can help you avoid situations that require heavy braking
and sudden turns.
Passing
You’ll need more passing distance up ahead when you’re
towing
a trailer. And, because you’re a good deal longer,
you’ll
need to go much farther beyond the passed vehicle
before you can return to your lane.
Backing Up
Hold the bottom of the steering wheel with one hand.
Then, to move the trailer to the left, just move that hand
to the left.
To move the trailer to the right, move your
hand to the right. Always back up slowly and, if
possible, have someone guide you.
Making nrns
When you’re turning with a trailer, make wider turns
than normal.
Do this so your trailer won’t strike soft
shoulders, curbs, road signs, trees, or other objects.
Avoid jerky or sudden maneuvers. Signal well in
advance.
Turn Signals When Towing a Mler
When you tow a trailer, your vehicle has to have a
different turn signal flasher and extra wiring. The green arrows on your instrument panel will flash whenever you
signal a turn or lane change. Properly hooked up, the
trailer lights will also flash, telling other drivers you’re \
about to turn, change lanes or stop.
When towing a trailer, the green arrows on your instrument panel will flash for turns even if the bulbs on
the trailer are burned out. Thus, you may think drivers
behind you are seeing your signal when they are not. It’s
important to check occasionally to be sure the trailer
bulbs are still working.
179
ProCarManuals.com
Page 223 of 324

.
n
Part 6 Service and Appearance Care
. .
Here you will find information about the care of your Buick . This part begins with service and fuel information.
and then
it shows how to check important fluid and lubricant levels . There is also technical information about
your vehicle. and a section devoted to
its appearance care .
Part 6 includes:
Service ........................................................................\
..... 222
Fuel ........................................................................\
...... 223
HoodRelease ....................................................................... \
226
Engine Oil ........................................................................\
. 227
Aircleaner ........................................................................\
2.3
TransaxleFluid ..................................................................... 236
Enginecoolant ..................................................................... 239
Power Steering Fluid ................................................................. 241
Windshield Washer Fluid .............................................................. 242
Brakes ........................................................................\
.... 243
Battery ........................................................................\
.... 244
BulbReplacement ................................................................... 245
Tires ........................................................................\
...... 251
Loadingyourvehicle ................................................................. 249
Appearancecare .................................................................... 258
Vehicle Identification Number (VIN), Add-on Electrical Equipment ............................ 265
Capacities and Specifications .......................................................... -270
Fuses&CircuitBreakers .............................................................. 266
ReplacementBulbs .................................................................... 269
ProCarManuals.com
Page 247 of 324

Halogen Bulbs
Halogen bulbs have pressur5ued gasinstde
and can burst If you drop or scratch the bulb.
lbu or othem could be injured. Take spgclal
care when handllng and disposing of halogen
bulbs. t I
Headlamp Bulb Replacement
;or the type of bulb, see the Index under “Replacement
3ulbs
:’
1. Turn the bulb assembly counterclockwise Y6 turn,
pressing in firmly, until the flanges align with the
slots in the retainer ring.
2. Pull out the bulb assembly. You may have to rock it
up and down slightly to loosen it.
3. Disconnect the bulb base from the wiring harness by
lifting the plastic locking tab.
To replace the bulb
assembly:
1. Snap a new bulb into the
wiring harness
(A).
Make sure the locking
I tab (B) is over the lock
I (C) *
I 2. Install the bulb assembly
by putting the small tab
(D) in the small notch in
the retainer ring
(E). ,I
3. Turn the bulb assembly y6 turn clockwise to lock it in
place.
245
ProCarManuals.com
Page 248 of 324

Front Turn and Parking Bulb and/or Side
Marker Bulb Replacement
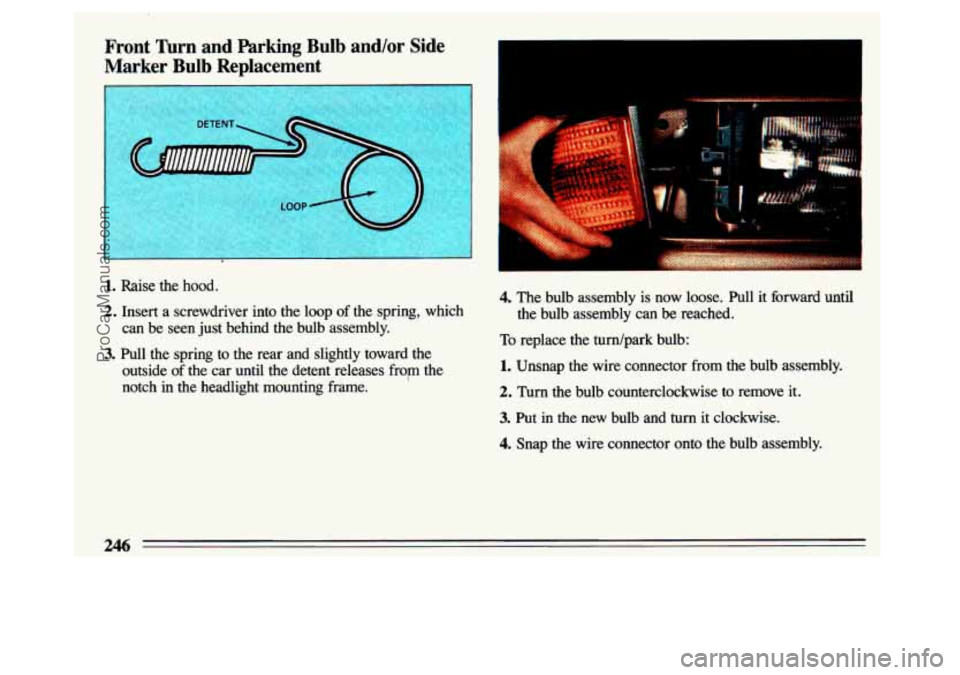
1. Raise the hood.
2. Insert a screwdriver into the loop of the spring, which
3. Pull the spring to the rear and slightly toward the can be seen just behind
the bulb assembly.
outside
of the car until the detent releases from the
notch in the headlight mounting frame.
4. The bulb assembly is now loose. Pull it forward until
To replace the turn/park bulb:
the bulb assembly can be reached.
1. Unsnap, the wire connector from the bulb assembly.
2. Turn the bulb counterclockwise to remove it.
3. Put -in the
new bulb and turn it clockwise.
4. Snap the wire connector onto the bulb assembly.
246
ProCarManuals.com
Page 249 of 324

To replace the side marker bulb:
1. Remove the socket by turning it counterclockwise and
pulling it straight out.
socket.
2. Remove the bulb by pulling it straight out of the
3. Insert the new bulb by pressing it straight into the
socket.
4. Insert the socket by pressing it straight into the bulb
hole and turning it clockwise.
1
To reinstall the lamp:
1. Guide the latch spring
through the opening
the metal inner panel.
a 2. Engage the twoblades
on the lamp into the slots
on the headlamp while
engaging the
two pins at
the rear
of the lamp
opening into the sockets
on the rear
of the lamp.
The lamp is now in
place.
3. Insert a screwdriver into the loop on the latch spring.
Pull the spring to the rear and slightly center
of the
vehicle until the detent engages into the notch.
Taillight Bulb Replacement (COUP sedan)
For the type of bulb, see the Index under “Replacement
Bulbs
I’
Replacing bulbs in the taillight housing is very difficult,
and we recommend that you
see your dealer when you
need a bulb replaced.
ProCarManuals.com
Page 250 of 324

aillight Bulb Replacement (Wagon)
For the type of bulb, see the Index under “Replacement
Bulbs
r’
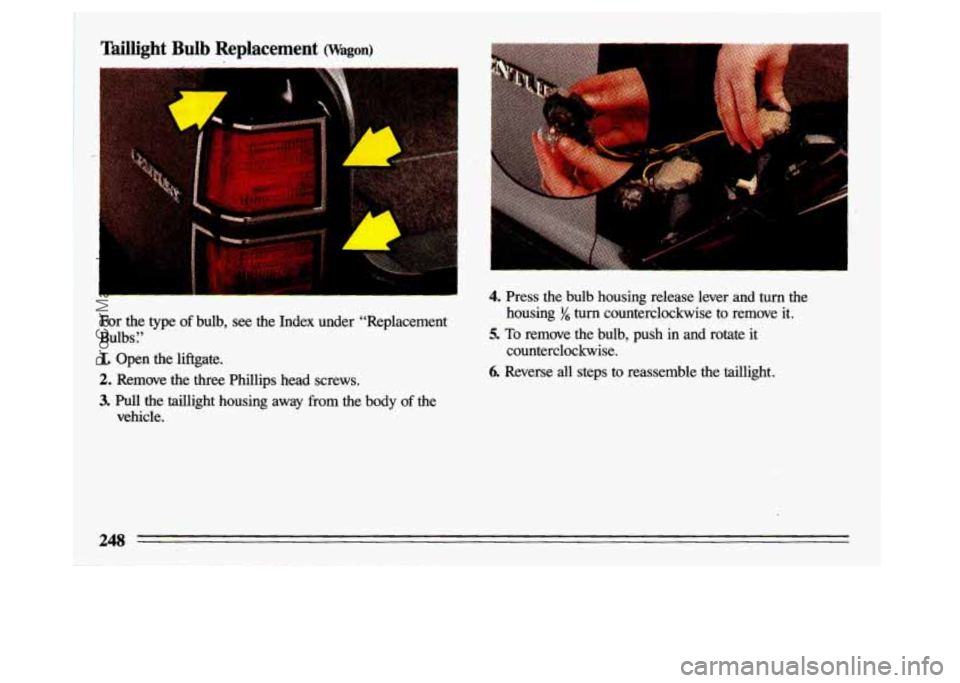
1. Open the liftgate.
2. Remove the three Phillips head screws.
3. Pull the taillight housing away from the body of the
vehicle.
4. Press the bulb housing release lever and turn the
housing
yS turn counterclockwise to remove it.
5. To remove the bulb, push in and rotate it
counterclockwise.
6. Reverse all steps to reassemble the taillight.
248
3
ProCarManuals.com