Page 109 of 274
The contributes effectively to vehicle
control since it prevent s th e wheels from
locking when the brakes are applied. This
means
that the vehicle remains steerable and is less inclined to skid.
Note
You
don' t have to the brake . Just hold the brake pedal down.
How ever,
do not expect that the
stances. When driving on gravel or on newly
fallen snow on top of icy surfaces, braking
distance may be even longer, therefore,
portant that you drive slowly and with great
care.
How the system works
An automatic check is made when a speed
of approx. 4 mph (6 km/h) is reached. When
this happens a pumping noise can be heard.
an individual wheel begins to rotate too
s lowly in rela tion to vehicle speed and tend to lock, the aut omatically reduces
brake pressure to prevent that wheel from
l ocking. This
autom
atic adj ustment process will cause a slight vibration of the brake al and some noises to alert you that
Page 115 of 274
tank
The fue l fille r n eck is loca te d on the right rear
side panel b eh in d th e fuel t an k
open the flap
Note
To open the fuel filler flap via the power locking system, insert the key to the driver's or front passenger's door and turn it twice, see also page 13.
The capacity of the tank is approx . 14.5
soon as the correctly operated nozzle switches off autom atically for the first time , the tank is full. Do not try to
add more fuel, because the expansion space in the fuel tank will be filled-the
fuel can then overflow when it becomes warm and pollutes the environment.
After
vehicles equipped with a catalytic converter, never drive your vehicle until the fuel tank is completely empty. This could cause your engine to misfire and fuel could get into the exhaust system. This could cause the exhaust system to overheat and damage the catalytic converter.
WARNING Never
carry additional fuel containers in your vehicle.
Page 141 of 274
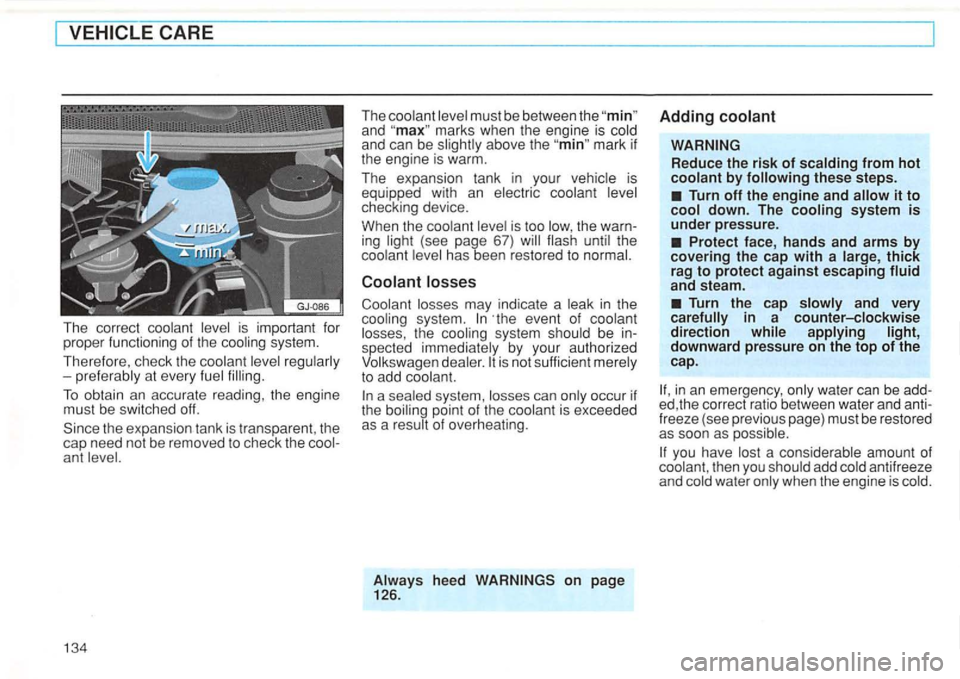
ant level.
134
The coolant level must be between the and marks when the engine is cold
and can be slightly above the mark if
the engine is warm.
The expansion tank in your vehicle is
equipped with an electric coolant level
checking device.
When the coolant level is too low, the
ing light (see page 67) will flash until the
coo lant level has been restored to normal.
Coolant losses may indica te a leak in the
cooling system. event of coolan t
losses , the cooling system should be
spected immediately by your authorized Volkswagen dealer. is not suHicient merely to ad d coolant.
a sealed system , losses can only occu r if
the boiling point of the coolant is excee ded
as a resu lt of overheating.
Always heed
on page 126.
Adding
these steps.
Turn off the engine and it to
cool down. The cooling system is
under pressure.
Protect face, hands and arms by
covering the cap with a large , thick
rag to protect against escaping fluid
and steam.
Turn the cap slowly and very in a counter-clockwise
direction applying light,
downward pressure on the top of the
cap .
in an eme rgency , only water can be ed ,the correct ratio between wate r and
you have lost a considerable amount of
coolant, then you should add cold antifreeze
and cold water only when the engi ne is co ld .
Page 151 of 274
Wiper blades mu st b e in good condition to
provid e vis ion.
w ith a
w ind shie ld washer solution to prev ent
streaking.
wi th insects ,
be caused by resi due on the windsh ield by automatic car washes . the wind shield washer container with a
special solution to remove the resid ue.
A l
ways loosen blades frozen to before operating wipers to prevent damage to the wiping system.
on page 126 .
144
Always inspect the cond ition of your wiper
b la de s. For safet y re as ons replace your wip
e r bl ad es once or tw ice a year if neces sary. your au tho rized Volkswagen dealer for replacement blades .
Notes
Commercial hot waxes applied by automatic car washes have been known to affect the cleanability of the windshield.
To prevent damage to wiper blades, do not use gasoline, kerosene, paint thinner, or other solvents on or near the wiper blades.
To prevent damage to the wiper arms or other components, do not attempt to move the wipers manually.
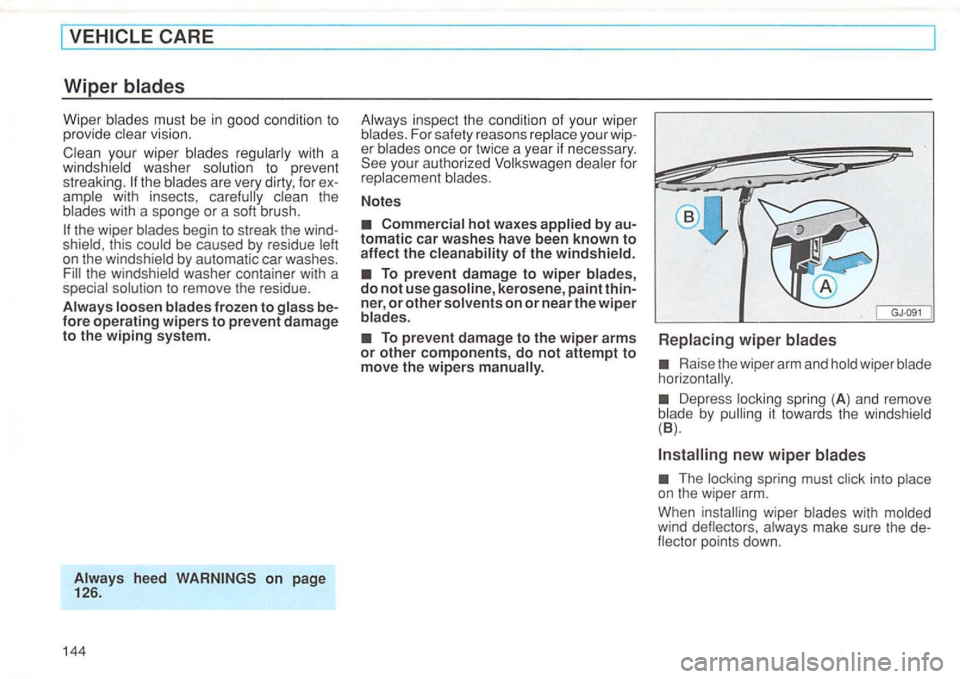
Replacing wiper blades
Raise the wiper arm and hold wiper horizontally.
D epres s lock ing spr ing (A ) and remove it towards the windshield
( B).
new wiper blades
The locking spring must on the wiper arm.
When
a lw ays make sure the de
flecto r points down.
Page 156 of 274
Furthermore, your aut horized Volkswagen
dealer stocks a range of tires and wheels.
plac ed in pairs and not
ways
vehicle handl ing , always
b uy replacemen t radial tires that have the
same specifications with regard to tire size ,
design , load carrying capacit
y, sp eed rating ,
tr ead pattern , trea d depth , e tc . This also
plies to Volksw agen recommended nate replaceme nt tires.
Make s
ure that the new tires also meet the
specifications listed on the located on the insid e of the fuel tank fl ap or on the er's door lock jamb (right rear door on the four door model).
Tire specifications
Never mix tires of different design
such as steel belted radials with
radial bias belted or bias
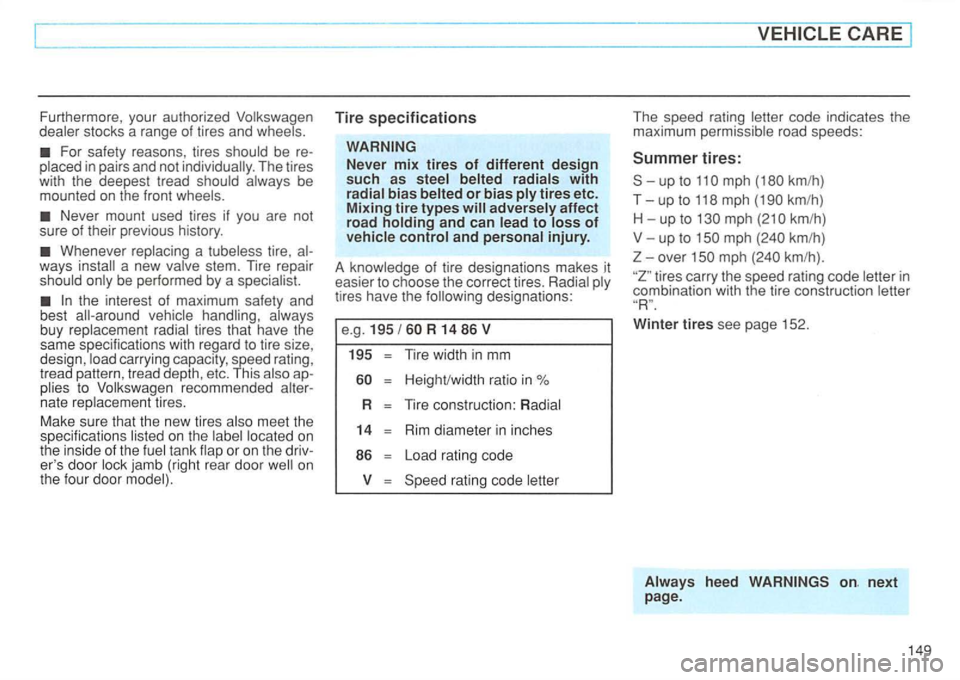
tires have the designations:
e.g.
R 14 86 V
195
T ir e width in mm
rating code letter
The s peed ra tin g letter code indicates th e
maximum permissible road speeds :
mph
mph
over km/h) .
tires carry the speed ra tin g code letter in
combi nat ion with the tire construc tio n letter
Winter tires see page 152.
Alw ays heed
Page 163 of 274
------------------------------------------------------------------------~
Jack and
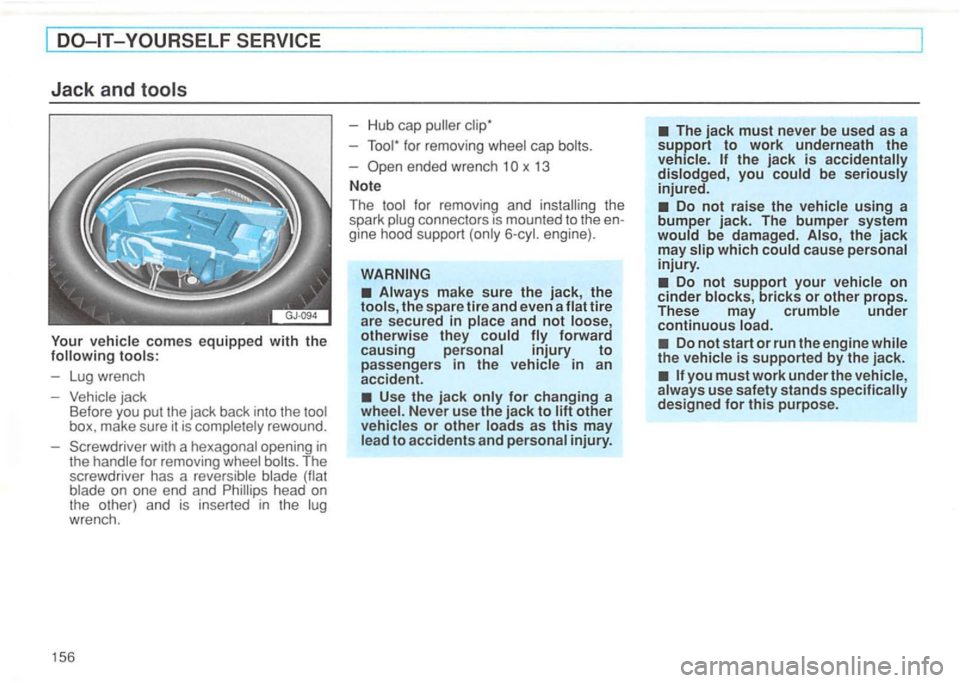
vehicle comes equipped with the
Vehicle jack
Before you put the jack back into the tool
box. make sure it is completely rewound.
Screwdriver with a hexagonal opening
in the handle for removing wheel
x 13
Note
The
Always make sure the jack, the
tools, the spare tire and even a flat tire
are secured in place and
not loose,
otherwise they could forward
causing personal injury to passengers in the vehicle in an
accident.
Use the jack only for changing a
The jack must never be used as a support to work underneath the
vehicle . the jack is accidentally
dislodged , you could be seriously injured.
Do not raise the vehicle using a
bumper jack. The bumper system
would be damaged. Also, the jack may slip which could cause personal
injury.
Do not support your vehicle on cinder blocks, bricks or other props.
These may crumble under
continuous load.
Do not start or run the engine while
the vehicle is supported by the jack.
Page 188 of 274
is located on the instrument
shows the month and year of
production and the vehic le identification
number of your
(perforation) as
Weight Rating (GA WR).
The engine number
is locate d on the fro nt face of the eng ine
b lock . just
when you stand on the right side of the and
DATA
3 TYP/lYPE ..
1 6 7
The vehicle identification label
in the luggage compartment.
1 - Production control no.
2 -
identification no.
3 - Type code numbe r
4 - Type designati on/
Engine output in Kilo watts
5 - Engine and transmission code letter
6 - Paint no./lnterior
7 -
found in your
Maintenance booklet.
181
Page 259 of 274
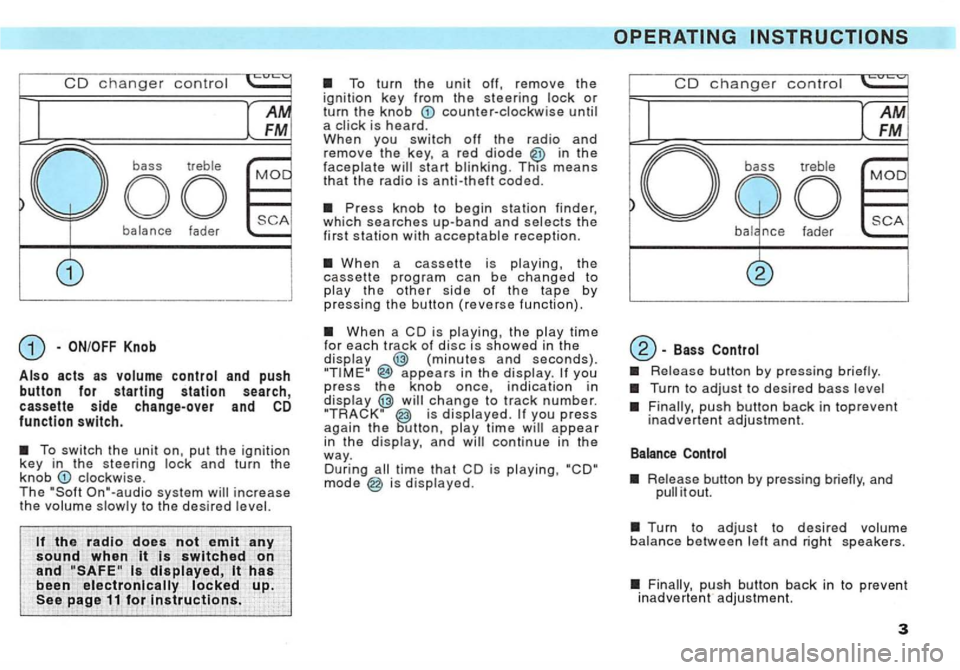
CD changer contro l
balance fader
and push button for starting station search, cassette side change-over and CD function switch.
The On"-audio system
the radio does not emit any
sound when it is switched on
and
counter-clockwise until a
in the faceplate
When a cassette is playing, the cassette program can be changed to play the other side of the tape by p ressing the button (reverse function).
When a CD is playing, th e p lay time for each track of disc i s showed in the display (minutes and seconds}. appears in the display. you press the knob once, indication in display is displayed. you press again t h e continue in the way. During is displayed.
CD changer control
-Bass
Release button by pressing briefly.
Turn to adjust to desire d bass level
push button back in toprevent inadvertent adjustment.
Release button by pressing briefly, and it out.
Turn to adjust to desired volume balance between left and righ t speakers.
Finally , push button back in to preve nt inadvertent adjustment.
3