1992 VOLKSWAGEN CARAVELLE spare wheel
[x] Cancel search: spare wheelPage 5 of 164

Downloaded from www.Manualslib.com manuals search engine
CONTENTS
DASHBOARD AND
CONTROLS
Layout
4
i\='-:ng
lamps 6
CONTROLS
AND
EQUIPMENT
•
e.s. Central locking system 7, 8
I:cs, Tailgate 9, 10
I'I
~g doors 11
..
-^ows, Mirrors 12, 13
Sea: belts 15 5re:y for children 18
-ead restraints 19
Seats
20 _:ariing/sleeping surface 26
__ggage
compartment cover 27 __cgage compartment/load surface ... 28
-edals, Brakes 29 Vanual gearbox 31
--tomatic gearbox 32
gnition
lock 36
Starting / Stopping the engine .... 37, 38 "struments 40
.'.
arning lamps 47
Switches 50
~yn signal and dip lever 52
3'uise
control system 53 .'.'indscreen wiper 54
-eating and ventilation 55
Air
conditioner 57
Recirculating air switch 61
Auxiliary heater 63
Additional
water heater 67
Sun roof, Sliding/tilting roof 70, 71
nterior lights, Sun visors 72, 73
Ashtray, Cigarette lighter 73
-oof
rack 75
DRIVING
TIPS
The first 1500 km - and afterwards ... 76 Driving safely 78
Driving economically and
ecologically
79
Trailer towing 81
GENERAL
MAINTENANCE
Filling the tank, Fuel 85, 86
Care of car, Maintenance 88, 93 Bonnet, Engine compartment 94, 95
Engine oil, Gearbox oil 96, 99
Air
cleaner 100 Power assisted steering 100
Cooling
system 101
Brake fluid 104
Battery 106
Windscreen washer system 108
Wheels 110
Arduous operating conditions 115
Winter driving 116
Accessories, modifications and
renewal of parts 117
Mobile
telephones and two way
radios 117
DO-IT-YOURSELF
First
aid kit, Warning triangle 118
Vehicle tools 118 Spare wheel/changing wheel ... 119, 120
Fuses
122
Changing
bulbs 124
Adjusting/masking headlights .. 128,129
Headlights 129
Installing radio 129
Emergency starting 130
Tow starting/towing 132
Lifting vehicle 134
TECHNICAL
DESCRIPTION
Engine 136
Emission control system 137
Activated charcoal filter '38 Power flow '39
Steering, Axles 139 Brakes, Body -139,
1
AC
Environment compatibility 140
TECHNICAL
DATA
Engine 141
Performance 142
Fuel consumption 143
Spark plugs 145
V-belts 145
Wheels,
Tyre
pressures 146, 147
Weights,
Trailer weights 148, 151 Dimensions 152
Capacities 153
Vehicle identification data 154
SPECIAL
INFORMATION
Adjusting the brake pressure regulator 155
ALPHABETICAL
INDEX
Alphabetical index 156
CHECKS
WHEN
FILLING
THE TANK
Overview 160
3
www.vwT4camper.info - a useful website for owners and enthusiasts of VW T4 Transporter Campervans
Page 112 of 164
Downloaded from www.Manualslib.com manuals search engine
GENERAL
MAINTENANCE
Wheels
General
notes
• New tyres do not give maximum grip straight away and should therefore be run in
at moderate speeds and a careful style of
driving for about the
first
100 km. This will help to make the tyres last longer.
• Check tyres for damage from time to time (cuts, splits, cracks and lumps) and remove any foreign bodies embedded in the
treads.
• To avoid damage to tyres and wheels crive over curbs and similar obstacles very
slowly and as nearly at
right
angles as
poss
ible.
Damage
to wheels and tyres is not always
easy
to see, so if you
think
that
a wheel is
damaged,
it must be checked by a Volks
wagen dealer.
• Keep grease, oil and fuel off the tyres.
• Replace missing dust caps as soon as
possible.
• Mark wheels before taking them off so
that
they rotate in the same direction when put back on again. • When taken off, the tyres should be
stored in a
cool,
dry and preferably dark
place.
Tyres
which are not on wheels should be stored in a vertical position.
Tyre
life
Tyre life depends to a considerable extent on the following factors:
Inflation
pressure
The inflation pressure is very important par
ticularly at high
speeds.
Therefore, the pres
sures
should be checked at least once a month and before every long journey.
At this opportunity do not forget the spare
wheel:
• The spare wheel should always be in flated to the highest pressure required on
the vehicle.
Always
check the pressures when the tyres are cold.
When
warm,
the pressure is
higher
but do not
reduce.
The pressur
es
are given on page 147 and on a sticker on
the driver's door lock pillar.
Pressures
which are too high or too low
shorten
tyre
life - quite apart from the detri mental influence on vehicle handling.
Attention
At
continuous
high
speeds a
tyre
in
which
the pressure is too low
flexes
more
and
heats
up excess
ively.
This can cause
tread
separ
ation
and
tyre
blow
out.
pCU
A
pressure
which
is too low in- oo
creases
the
fuel
consumption
and
this
burdens
the
environment
unnecessarily.
Mode
of
driving
Fast
cornering, hard acceleration and viol
ent braking also increase
tyre
wear.
'0
www.vwT4camper.info - a useful website for owners and enthusiasts of VW T4 Transporter Campervans
Page 114 of 164
Downloaded from www.Manualslib.com manuals search engine
GENERAL
MAINTENANCE
*
^
v
J
l B43
-
155~|
Changing
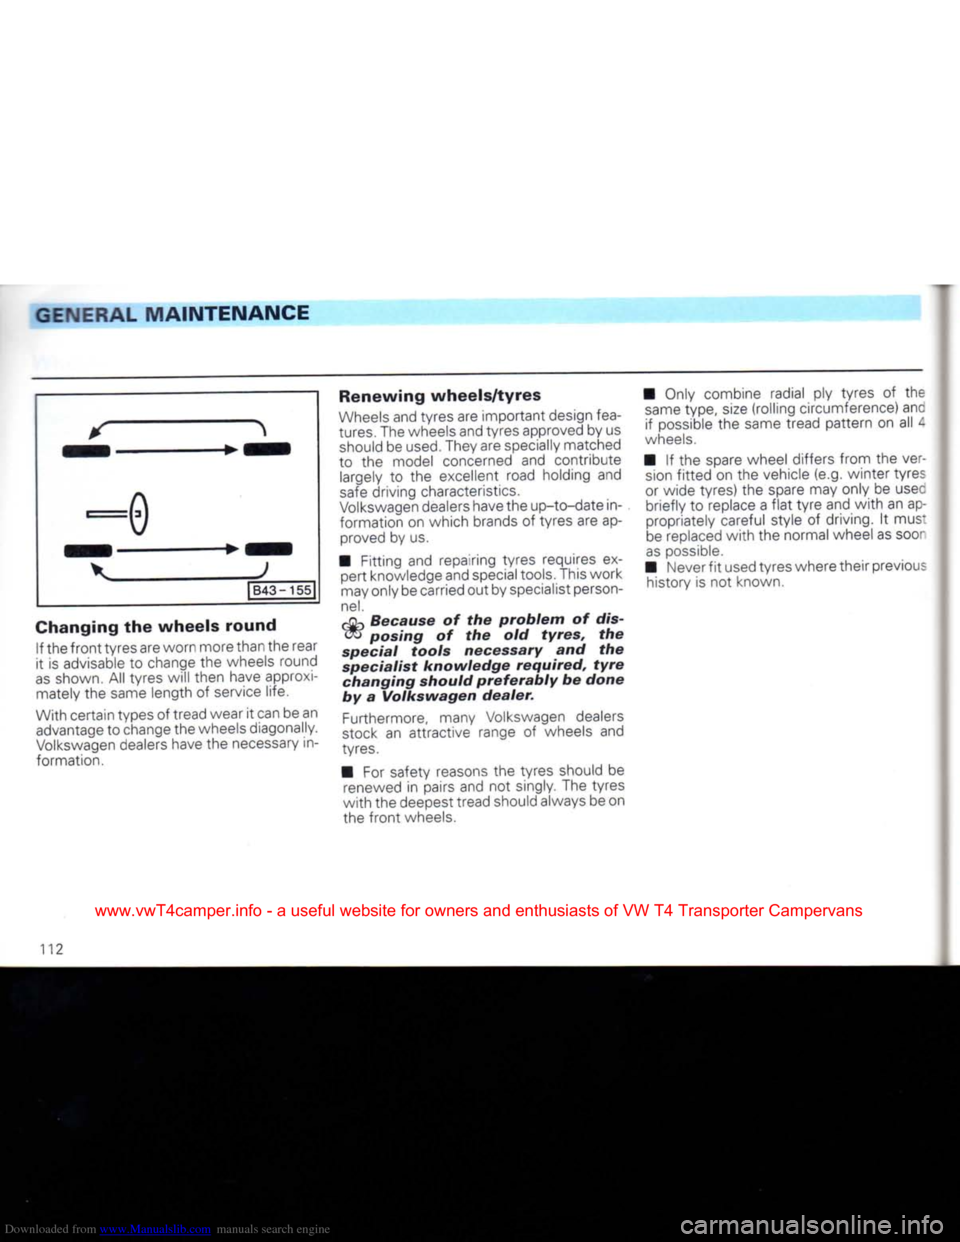
the wheels round If
the
front
tyres are worn more than the rear
it
is
advisable
to
change
the
wheels round
as
shown.
All
tyres will then have approxi mately
the
same length
of
service life.
With certain types
of
tread wear
it
can be an advantage
to
change the wheels diagonally.
Volkswagen
dealers have
the
necessary
in
formation.
Renewing wheels/tyres
Wheels
and tyres are important design
fea
tures. The wheels and tyres approved by us should be
used.
They are specially matched
to
the
model concerned
and
contribute largely
to the
excellent road holding
and
safe
driving characteristics.
Volkswagen
dealers have the up-to-date in
formation
on
which brands
of
tyres are ap proved
by us.
• Fitting
and
repairing tyres requires
ex
pert knowledge and special tools. This work
may only be carried out by specialist person
nel.
djn
Because
of the
problem
of dis-
<^>
posing
of the old
tyres,
the
special
tools
necessary
and the
specialist
knowledge
required,
tyre
changing
should
preferably
be
done
by
a
Volkswagen
dealer.
Furthermore, many Volkswagen dealers
stock
an
attractive range
of
wheels
and
tyres.
•
For
safety reasons
the
tyres should
be
renewed
in
pairs and
not
singly. The tyres
with
the deepest tread should always be on
the
front
wheels. • Only combine radial
ply
tyres
of the
same
type,
size
(rolling circumference) anc if possible
the
same tread pattern
on all 4
wheels.
•
If the
spare wheel differs from
the
ver
sion
fitted
on the
vehicle (e.g. winter tyres
or wide tyres)
the
spare may only
be
usee briefly
to
replace
a
flat
tyre
and
with
an
appropriately careful style
of
driving.
It
mus:
be replaced
with
the
normal wheel as soor
as
possible.
• Never
fit
used tyres where their previous history
is not
known.
112
www.vwT4camper.info - a useful website for owners and enthusiasts of VW T4 Transporter Campervans
Page 116 of 164

Downloaded from www.Manualslib.com manuals search engine
GENERAL
MAINTENANCE
Winter
tyres
In winter conditions winter tyres will dis
tinctly improve the vehicle's handling. This
applies
in particular to vehicles that are
equipped
with wide tyres.
Because
of their
construction (width, rubber mixture, tread
formation etc.) these tyres provide
less
trac
tion on ice and snow.
When
fitting
winter tyres note the follow
ing:
• Only radial ply winter tyres may be fitted.
The
factory recommended tyre
sizes
are
givenonpagel
46.
• To obtain the best possible handling
characteristics,
winter tyres must be
fitted
on all four wheels. • Winter tyres are no longer fully effective
when the tread has worn down to a depth
of 4 mm.
• All-weather tyres can also be used in
stead
of winter tyres.
• If you have a
flat
tyre the remarks on
using
the spare wheel on page 112 should
be
noted.
• Do not leave winter tyres
fitted
for an un
necessary
long period because when the
roads
are free of snow and ice the handling
with summer tyres is better.
For
environmental
reasons
summer
tyres
should
be
fitted
again
as soon as possible
because
normally
they
are
quieter
in
running,
tyre
wear
is
reduced
and the
fuel
consumption is
lower.
Snow chains
Snow chains may only be
fitted
on
the
front
wheels.
Snow
chains must not be
fitted
on 215/65 F
16
tyres. When
necessary
the vehicle mus:
be
equipped with smaller tyres - see
Wheels,page146.
Only
use thin chains which do not stanc
clear
more than 15 mm (including ten-
sioner).
When
using snow chains wheel
trim
plates
and
trim
rings must be taken off. For safet
reasons
the wheel bolts must then be f ittec
with caps which are available from
Volks
wagen
dealers.
When
driving over roads which are free of
snowyou
must remove the
chains.
On such
roads
they are detrimental to vehicle handl
ing,
damage the tyres and wear out quickly.
In Germany, the maximum permissible
speed
with snow chains is 50 km/h.
114
www.vwT4camper.info - a useful website for owners and enthusiasts of VW T4 Transporter Campervans
Page 121 of 164

Downloaded from www.Manualslib.com manuals search engine
DO-IT-YOURSELF
Spare
wheel
The spare wheel is secured under the rear of the vehicle in a special hinged carrier.
Lowering
spare
wheel
carrier
Attention
When
loosening the screws it is
essential
to
keep
to the
following
sequence:
• Loosen safety screw B
until
it turns freely.
Note
The safety screw B is held at the end
with
a
clip so
that
it cannot be screwed out
com
pletely. • Remove securing screw A completely.
The spare wheel carrier then rests on the safety screw B.
Attention
If the screws are loosened in the
opposite
sequence, the
carrier
can
fall
off
screw
B.
• Then insert the wheel spanner in the carrierto the stop as shown in illustration on
the
right.
• Grip wheel spanner
firmly
with
both
hands,
lift
slightly and swing to the
right
until
the large hole in the carrier can be swung
over the safety screw and down.
• Take spare wheel out.
Lifting
spare
wheel
carrier
•
Insert
wheel spanner in spare carrier.
•
Place
wheel on carrier
with
well up wards, swing carrier up
with
wheel spanner
and hook it on the safety screw.
• Screw in securing screw A
first,
then
.safety screw B.
• Then tighten both screws fully.
Attention
For
safety
reasons the
spare
wheel
carrier
must
always
be
firmly
secured so
that
the
spare
wheel
cannot
fall
down
acciden
tally.
Note
The rear mounting of the spare wheel
carrier can be adjusted in height to cater for
tyres of different widths.
www.vwT4camper.info - a useful website for owners and enthusiasts of VW T4 Transporter Campervans
Page 122 of 164
Downloaded from www.Manualslib.com manuals search engine
DO-IT-YOURSELF
Changing
wheels
Park
the vehicle as far as possible away
from the
traffic
flow, if necessary switch on emergency warning lights and place the
warning triangle in position - note legal re
quirements.
• All vehicles occupants should leave the vehicle and move to a safe area (e.g. behind
the barrier).
• Apply handbrake firmly. If the car is on a
slope,
block one of the wheels on the oppo
site side
with
a stone or some similar object.
• Take the tools out of the vehicle.
• Take spare wheel out of carrier at rear of vehicle - see previous page.
JB70
- 121J
•
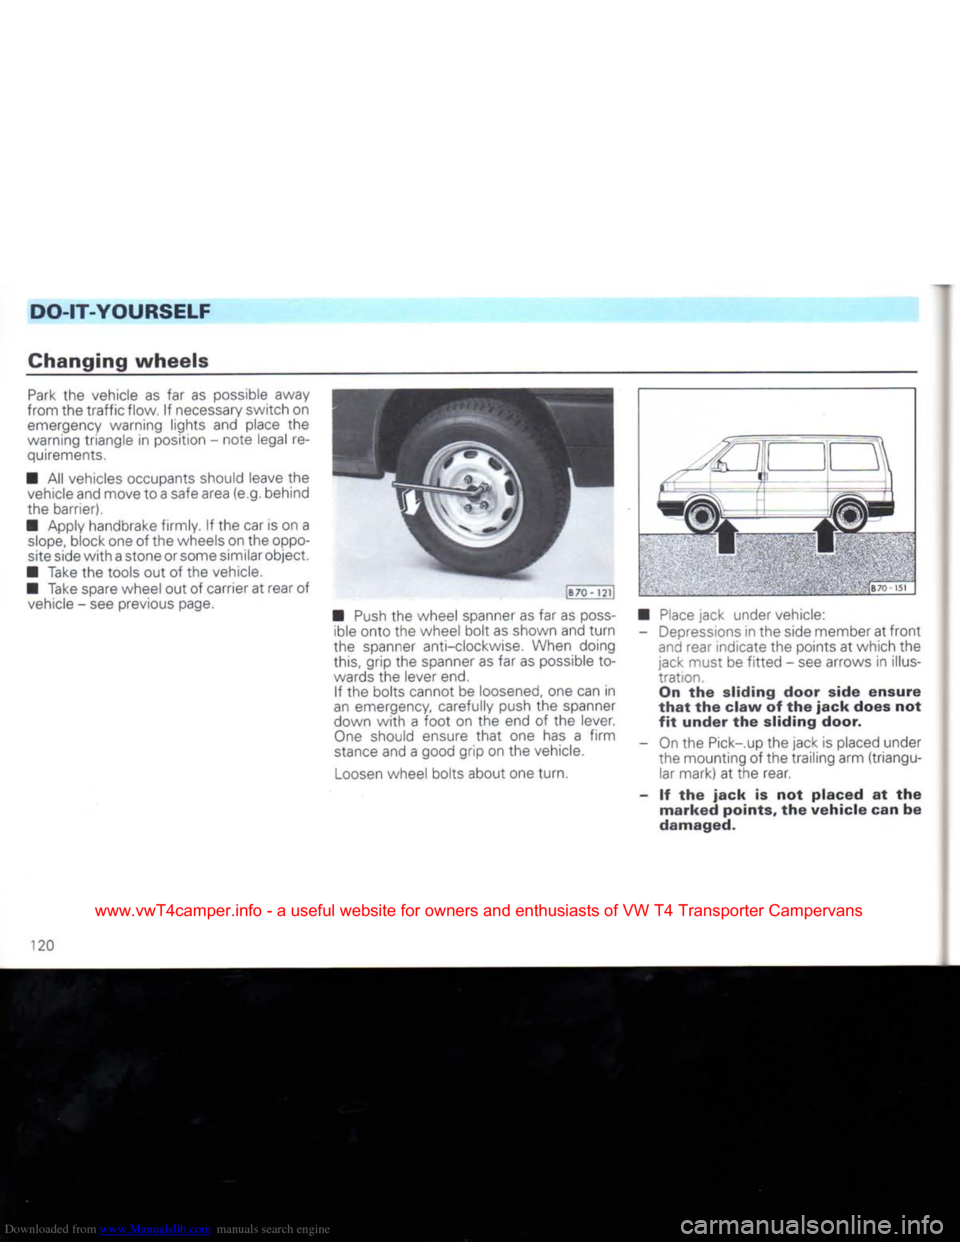
Push
the wheel spanner as far as
poss
ible onto the wheel bolt as shown and
turn
the spanner anti-clockwise. When doing this, grip the spanner as far as possible to
wards the lever end.
If the bolts cannot be loosened, one can in
an emergency, carefully push the spanner
down
with
a
foot
on the end of the lever.
One
should ensure
that
one has a
firm
stance
and a good grip on the vehicle.
Loosen
wheel bolts about one turn. 8"" 1 •>!
•
Place
jack under vehicle: - Depressions in the side member at
front
and rear indicate the points at which the
jack must be
fitted
- see arrows in illus
tration. On the sliding door side
ensure
that
the
claw
of the
jack
does not
fit
under
the sliding door.
- On the Pick-.up the jack is placed under the mounting of the trailing arm (triangular mark) at the rear.
- If the
jack
is not
placed
at the
marked
points, the
vehicle
can be
damaged.
120
www.vwT4camper.info - a useful website for owners and enthusiasts of VW T4 Transporter Campervans
Page 123 of 164
Downloaded from www.Manualslib.com manuals search engine
DO-IT-YOURSELF
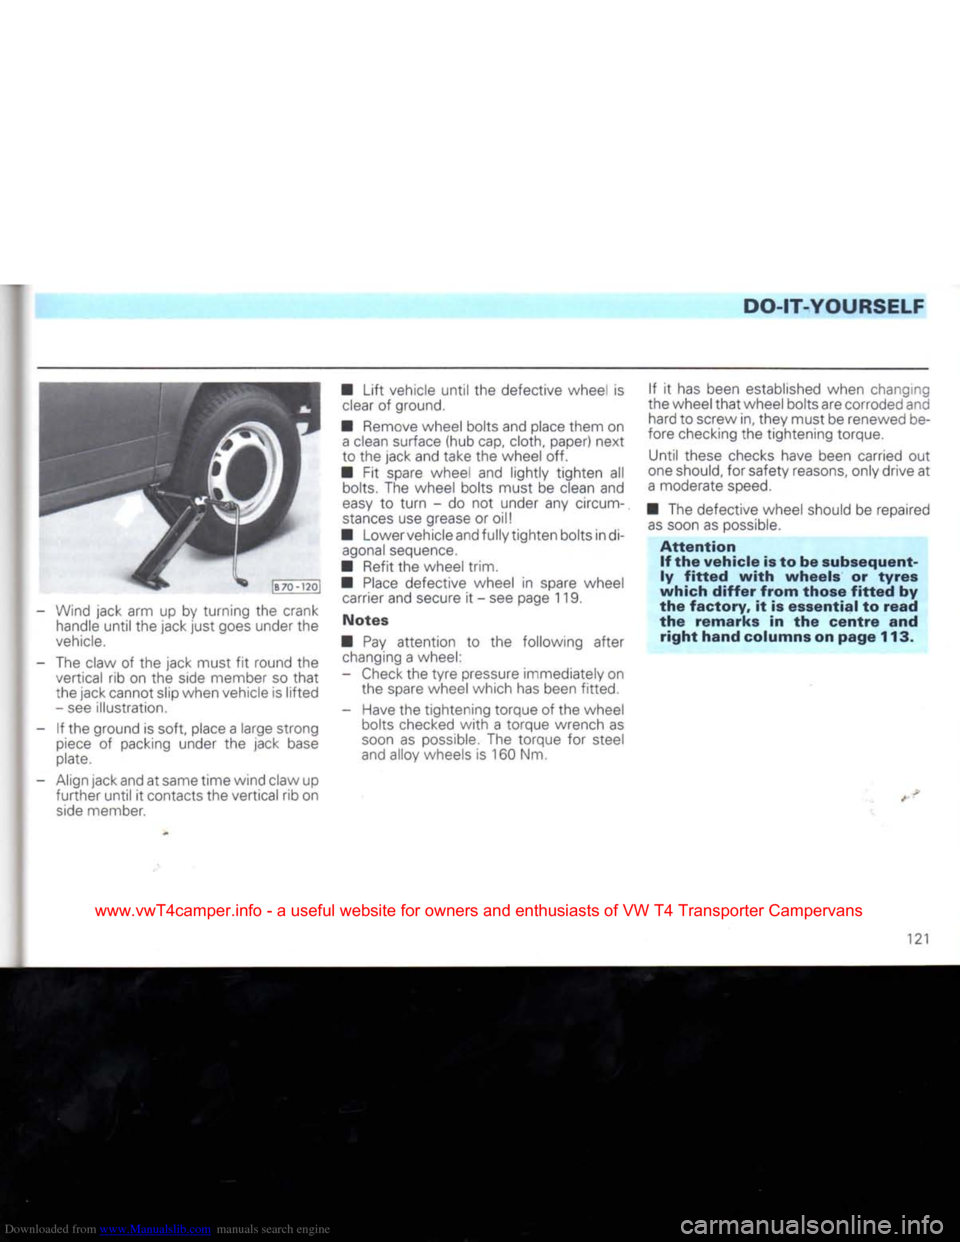
- Wind jack arm up by turning the crank handle
until
the jack
just
goes under the
vehicle.
- The claw of the jack must fit round the vertical rib on the side member so
that
the jack cannot slip when vehicle is
lifted
- see illustration.
- If the ground is soft, place a large strong
piece
of packing under the jack base
plate.
- Align jack and at same time wind claw up
further
until
it contacts the vertical rib on
side
member. •
Lift
vehicle
until
the defective wheel is
clear
of ground.
• Remove wheel bolts and place them on
a
clean surface (hub cap, cloth, paper) next
to the jack and take the wheel off.
• Fit spare wheel and lightly tighten all bolts. The wheel bolts must be clean and
easy
to
turn
- do not under any circum
stances
use grease or oil!
• Lowervehicleand fully tighten bolts indi- agonal sequence.
• Refit the wheel trim.
•
Place
defective wheel in spare wheel carrier and secure it - see page 119.
Notes
• Pay attention to the following after changing a wheel:
- Check the
tyre
pressure immediately on the spare wheel which has been fitted.
- Have the tightening torque of the wheel bolts checked
with
a torque wrench as
soon
as possible. The torque for steel
and alloy wheels is 160 Nm. If it has been established when changing
the wheel
that
wheel bolts are corroded and hard to screw in, they must be renewed be
fore checking the tightening torque.
Until these checks have been carried out
one should, for safety reasons, only drive at
a
moderate
speed.
• The defective wheel should be repaired
as
soon as possible.
Attention
If the
vehicle
is to be
subsequent
ly
fitted
with
wheels
or
tyres
which
differ
from
those
fitted
by
the
factory,
it is
essential
to
read
the
remarks
in the
centre
and
right
hand
columns on
page
113.
121
www.vwT4camper.info - a useful website for owners and enthusiasts of VW T4 Transporter Campervans
Page 161 of 164
Downloaded from www.Manualslib.com manuals search engine
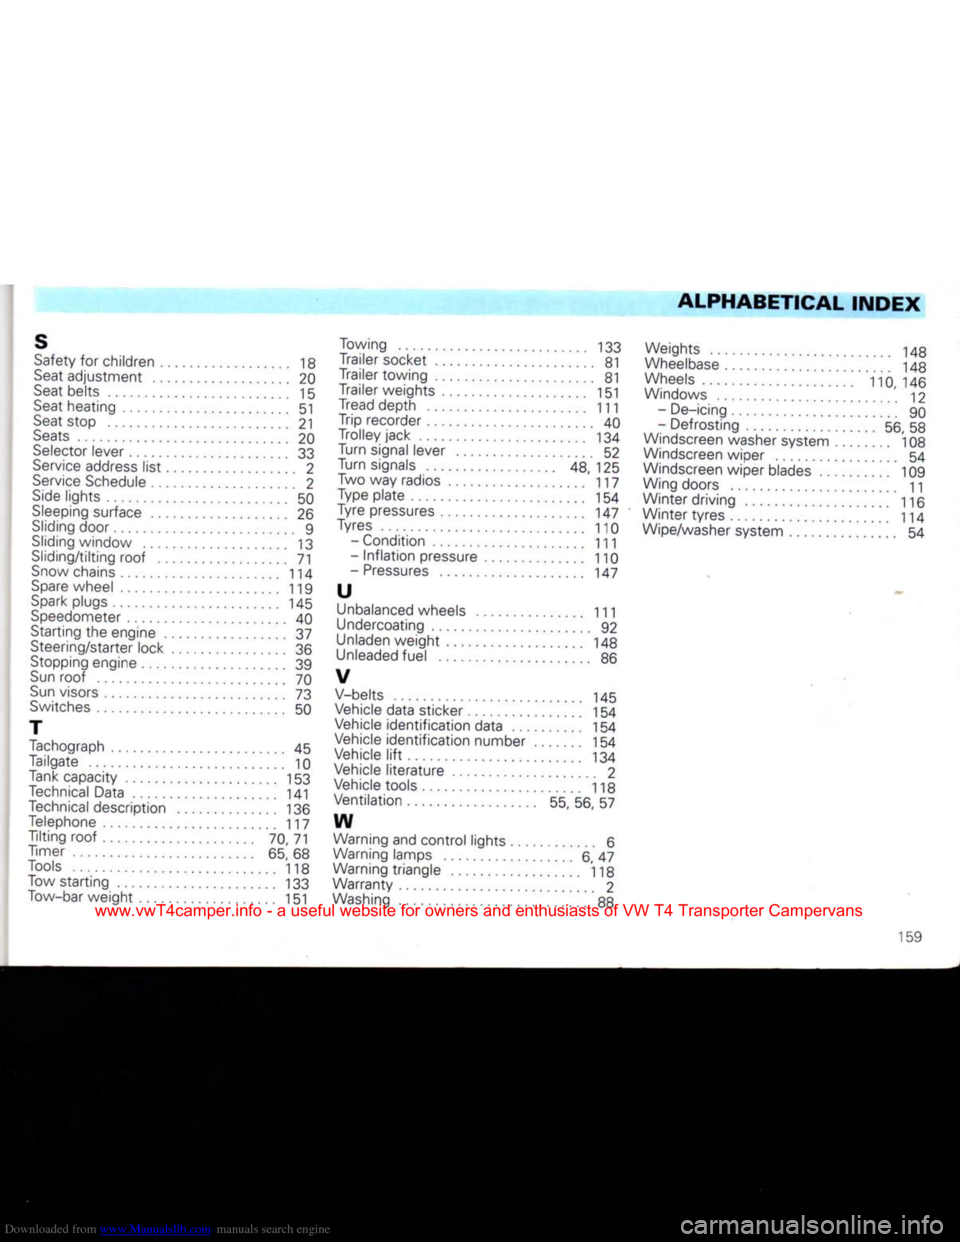
ALPHABETICAL
INDEX
S
Safety
for children 18
Seat
adjustment 20
Seat
belts 15
Seat
heating 51
Seat
stop 21
Seats
20
Selector
lever 33
Service
address list 2
Service
Schedule 2
Side
lights 50
Sleeping
surface 26
Sliding
door 9
Sliding
window 13
Sliding/tilting roof "71
Snow
chains 114
Spare
wheel 119
Spark
plugs 145
Speedometer
40
Starting the engine 37
Steering/starter lock 36
Stopping engine 39
Sun
roof 70
Sun
visors 73
Switches
50
T Tachograph 45 Tailgate 10
Tank capacity 153
Technical
Data 141
Technical
description 136 Telephone 117
Tilting roof 70, 71
Timer 65, 68
Tools
118 Tow starting 133
Tow-bar weight 151 Towing 133
Trailer socket 81
Trailer towing 81
Trailer weights 151
Tread depth 111 Trip recorder 40
Trolley jack 134 Turn signal lever 52
Turn signals 48, 125
Two way radios 117
Type plate 154 Tyre pressures 147
Tyres
110 - Condition 111
-
Inflation
pressure 110 - Pressures 147
u
Unbalanced
wheels 111
Undercoating 92
Unladen
weight 148
Unleaded
fuel 86
V
V-belts
145
Vehicle
data sticker 154
Vehicle
identification data 154
Vehicle
identification number 154
Vehicle
lift
134
Vehicle
literature
2
Vehicle
tools 118
Ventilation 55, 56, 57
w
Warning and control lights 6 Warning lamps 6, 47
Warning triangle 118
Warranty 2
Washing
88 Weights 148
Wheelbase
148
Wheels
110, 146
Windows 12
- De-icing 90
- Defrosting 56, 58
Windscreen
washer system 108
Windscreen
wiper 54
Windscreen
wiper blades 109
Wing doors 11 Winter driving 116
Winter tyres 114
Wipe/washer
system 54
159
www.vwT4camper.info - a useful website for owners and enthusiasts of VW T4 Transporter Campervans