Page 28 of 225
Safety Labels
These labels are in the locations shown. They warn you of potential
hazards that could cause seriousinjury. Read these labels carefully
and don't remove them.
If a label comes off or becomes
hard to read, contact your Honda
dealer for a replacement.
Driver and Passenger Safety
RADIATOR CAP
BATTERYProCarManuals.comMain Menu Table of Contents s t
Page 137 of 225

Cooling System
Checking the Coolant Level
Check the level of the engine
coolant by looking at the radiator
reserve tank next to the battery. If
the level is at or below the MIN line, add coolant to bring it up to the
MAX line. This coolant should
always be a mixture of 50%
antifreeze and 50% water. Never
add straight antifreeze or plain
water. Always use Genuine Honda Anti-
freeze/Coolant. The cooling system contains many aluminum compo-
nents which can corrode if an
improper antifreeze is used. Some
antifreeze, even though labeled as
safe for aluminum parts, may not
provide adequate protection.
Adding Radiator Coolant
If the reserve tank is completely
empty, you should also check the
coolant level in the radiator.
1. Make sure the engine and radiator are cool.
CONTINUED
Maintenance
RESERVE TANK
MAX
MIN
Removing the radiator cap
while the engine is hot can
cause the coolant to spray out,
seriously scalding you.
Always let the engine and
radiator cool down before
removing the radiator cap.ProCarManuals.comMain Menu Table of Contents s t
Page 138 of 225

Cooling System
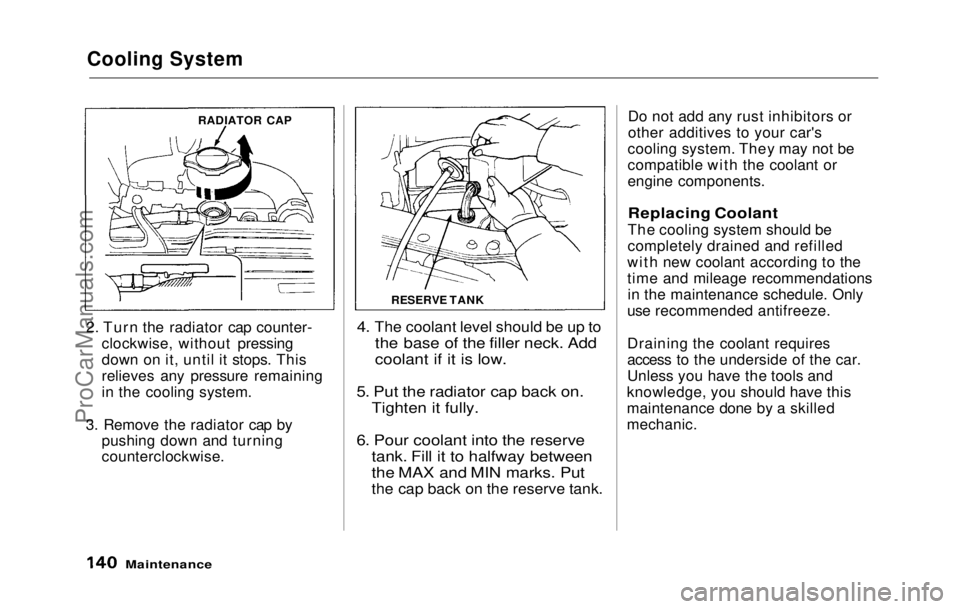
2. Turn the radiator cap counter- clockwise, without pressing
down on it, until it stops. This
relieves any pressure remaining
in the cooling system.
3. Remove the radiator cap by pushing down and turning
counterclockwise.
4. The coolant level should be up to
the base of the filler neck. Add
coolant if it is low.
5. Put
the radiator cap back on.
Tighten it fully.
6. Pour coolant into the reserve tank. Fill it to halfway between
the MAX and MIN marks. Put
the cap back on the reserve tank.
Do no t
add any rust inhibitors or
other additives to your car's
cooling system. They may not be
compatible with the coolant or
engine components.
Replacing Coolant
The cooling system should be
completely drained and refilled
with new coolant according to the
time and mileage recommendations in the maintenance schedule. Only
use recommended antifreeze.
Draining the coolant requires
access to the underside of the car.
Unless you have the tools and
knowledge, you should have this
maintenance done by a skilled
mechanic.
Maintenance
RADIATOR CAP
RESERVE TANKProCarManuals.comMain Menu Table of Contents s t
Page 139 of 225
Cooling System
1. Slide the heater temperature control lever to maximum heat.
Open the hood. Make sure the
engine and radiator are cool to
the touch.
2. Remove the radiator cap. 3. Loosen the drain plug on the
bottom of the radiator. The
coolant will drain through the
splash guard. Remove the drain
bolt from the engine block. 4. Remove the reserve tank from
its holder by pulling it straight up.
Drain the coolant, then put the
tank back in its holder.
5. When the coolant stops draining, tighten the drain plug in the
bottom of the radiator. Apply non-hardening sealant to the
drain bolt threads and reinstall
the bolt in the engine block.
Tighten it securely.
Maintenance
DRAIN
PLUG
DRAIN
BOLT RESERVE TANK
HOLDER
RESERVE
TANK CAP
CONTINUEDProCarManuals.comMain Menu Table of Contents s t
Page 140 of 225
Cooling System
6. Mix the recommended antifreeze with an equal amount of purifiedor distilled water in a clean
container. The cooling system
capacity is:
With 5-speed transmission:
(US: S, Canada: S)
3.5
(0.92 US gal, 0.77 Imp gal)
(US: Si, Si 4WS, Canada: SR, SR 4WS)
3.8
(1.00 US gal, 0.84 Imp gal)
With automatic transmission:
(US: S, Canada: S)
3.4
(0.90 US gal, 0.75 Imp gal)
(US: Si, Si 4WS, Canada: SR, SR 4WS)
3.7
(0.98 US gal, 0.81 Imp gal)
7. Pour coolant into the radiator up to the base of the filler neck.
8. Loosen the bleeder bolt on top ofthe engine. Tighten it again
when coolant comes out in asteady stream with no bubbles.
9. Refill the radiator to the base of the filler neck. Put the cap on the
radiator, only tighten it to the
first stop. Start the engine and
let it run until it warms up (the
radiator cooling fan comes on at
least twice).
Maintenance
FILLER NECK
Fill up to here
BLEEDER
BOLTProCarManuals.comMain Menu Table of Contents s t
Page 141 of 225

Cooling System, Windshield Washers
10.Turn off the engine. Check the
level in the radiator, add coolant
if needed. Install the radiator cap,
tighten it fully.
11.Fill the
reserve tank to the MAX
mark. Install the reserve tank
cap.
Windshield Washers
Chec
k the level in the windshield
washer reservoir at least monthly
during normal usage. In bad
weather, when you use the washers often, check the level every time
you stop for gas.
The windshield washer reservoir is
located behind the left headlight.
Check the reservoir's fluid level by
removing the cap and looking at the float. It should be up to the top of the neck. If the float is at the
bottom of the neck, the reservoir is
nearly empty.
Fill the reservoir with a good- quality windshield washer fluid.
This increases the cleaning
capability and prevents freezing in cold weather.
Do not use engine antifreeze or a
vinegar/water solution in the
windshield washer reservoir.
Antifreeze can damage your car's paint, while a vinegar/water
solution can damage the windshield
washer pump.
Use only commercially-available
windshield washer fluid.
Maintenance
NOTICE
RESERVE TANK
FLOATProCarManuals.comMain Menu Table of Contents s t
Page 155 of 225

Air Conditioner
Optional for S model
Your car's air conditioner is a
sealed system. Any major mainte-
nance, such as recharging, should
be done by a qualified technician. There are a couple of things you
can do to make sure the air condi-
tioner works efficiently. Periodically check the engine's
radiator and air conditioning
condenser for leaves, insects, and
dirt stuck to the front surface.
These block the air flow and
reduce cooling efficiency. Use a light spray from a hose or a soft
brush to remove them.
The condenser and radiator fins
bend easily. Only use a low- pressure spray or soft-bristle brush
to clean them.
Run the air conditioner at least
once a week during the cold
weather months. Run it for at least ten minutes while you are driving
at a steady speed with the engine at
normal operating temperature.
This circulates the lubricating oil contained in the refrigerant. If the air conditioner does not get
as cold as before, it is probably
because some of the refrigerant has
leaked from the system. Have your dealer check the system for leaks
and recharge the system with
Refrigerant 12 (R-12).
Charging quantity: 750 — 800 g (26.5 — 28.3 oz)
Whenever you have the air condi-
tioning system serviced, make sure
the service facility uses a refrige-
rant recycling system. This system captures the refrigerant for reuse.
Releasing refrigerant into the at-
mosphere can damage the environ-
ment.
Maintenance
AIR CONDITIONING
CONDENSER
NOTICE
NOTICEProCarManuals.comMain Menu Table of Contents s t
Page 190 of 225

If Your Engine Overheats
6. Look for any obvious coolant
leaks, such as a split radiator
hose. Everything is still extreme-
ly hot, so use caution. If you find
a leak, it must be repaired before
you continue driving (see
Towing on page 202 ).
7. If
you don't find an obvious leak,
check the coolant level in the
radiator reserve tank (see page
139). If the level is below the
MIN mark, add coolant to half-
way between the MIN and MAX
marks.
8. I f
there was no coolant in the
reserve tank, you may also have
to add coolant to the radiator. Let the engine cool down until
the temperature gauge registers
below the midpoint, or lower,
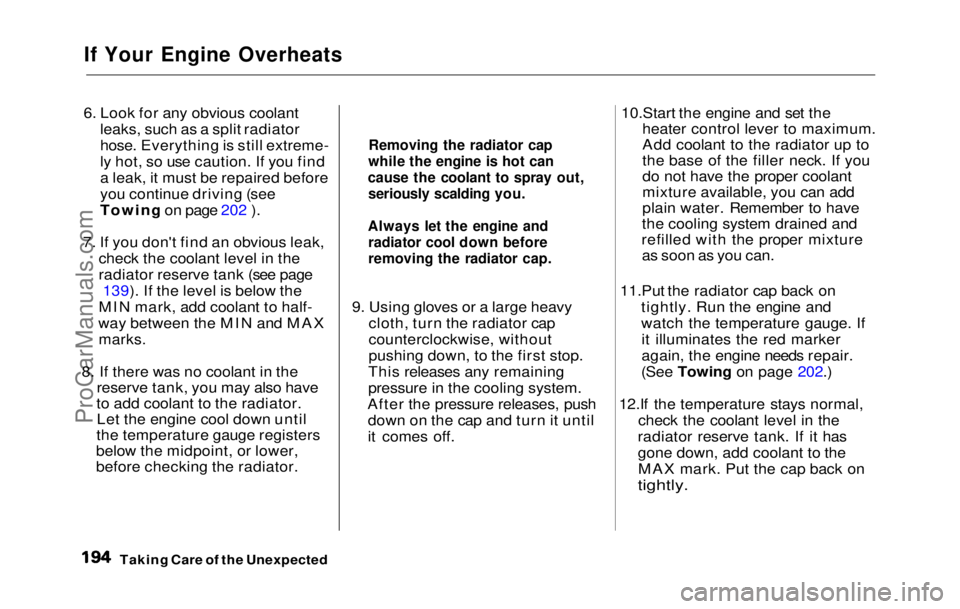
before checking the radiator. 9. Using gloves or a large heavy
cloth, turn the radiator cap
counterclockwise, without
pushing down, to the first stop.
This releases any remaining
pressure in the cooling system.
After the pressure releases, push down on the cap and turn it until
it comes off.
10.Start th e
engine and set the
heater control lever to maximum.
Add coolant to the radiator up to
the base of the filler neck. If you
do not have the proper coolant
mixture available, you can add
plain water. Remember to have
the cooling system drained and
refilled with the proper mixture as soon as you can.
11.Put the radiato
r cap back on
tightly. Run the engine and
watch the temperature gauge. If
it illuminates the red marker
again, the engine needs repair.
(See Towing on page
202.)
12.If th e
temperature stays normal,
check the coolant level in the
radiator reserve tank. If it has
gone down, add coolant to the MAX mark. Put the cap back on
tightly.
Taking Care of the Unexpected
Removing the radiator cap
while the engine is hot can
cause the coolant to spray out, seriously scalding you.
Always let the engine and radiator cool down before
removing the radiator cap.ProCarManuals.comMain Menu Table of Contents s t