1990 HONDA PRELUDE ECO mode
[x] Cancel search: ECO modePage 2 of 143

Introduction
This manual contains important information about the safe
operation and maintenance of your car.
We urge you to read it carefully, become familiar with the controls it
describes, and follow its recommendations, to help make your
driving trouble-free and enjoyable.
Statements or labels on the product preceded by the following
words are of special significance:
indicates severe personal injury or death will result if
instructions are not followed.indicates a strong possibility of severe personal
injury or death if instructions are not followed.means hazards or unsafe practices which could
cause minor personal injury or product or property
damage.
NOTE: gives helpful information.
Break-in Period During the first 600 miles (1,000 km) of driving, avoid full throttle
starts and cruising for extended periods at a constant speed.
NOTE:
This break-in procedure also applies to exchanged or overhauled
engines.
During and after the break-in period, drive the car at moderate
speeds until the engine is fully warmed up.
During the first 200 miles (300 km), try to avoid severe braking.
Brake misuse during this period will reduce future braking efficiency.
Remember, your Honda Automobile Dealer knows your car best,
and should be consulted for service assistance and advice.ProCarManuals.comMain Menu t s
Page 44 of 143

Heating and Cooling (cont'd)
NOTE:
The windows may become fogged if the system is in the
position for an extended period of time with the air
conditioner off. As soon as the interior is warmed, switch to the
position.
How to Use the Controls
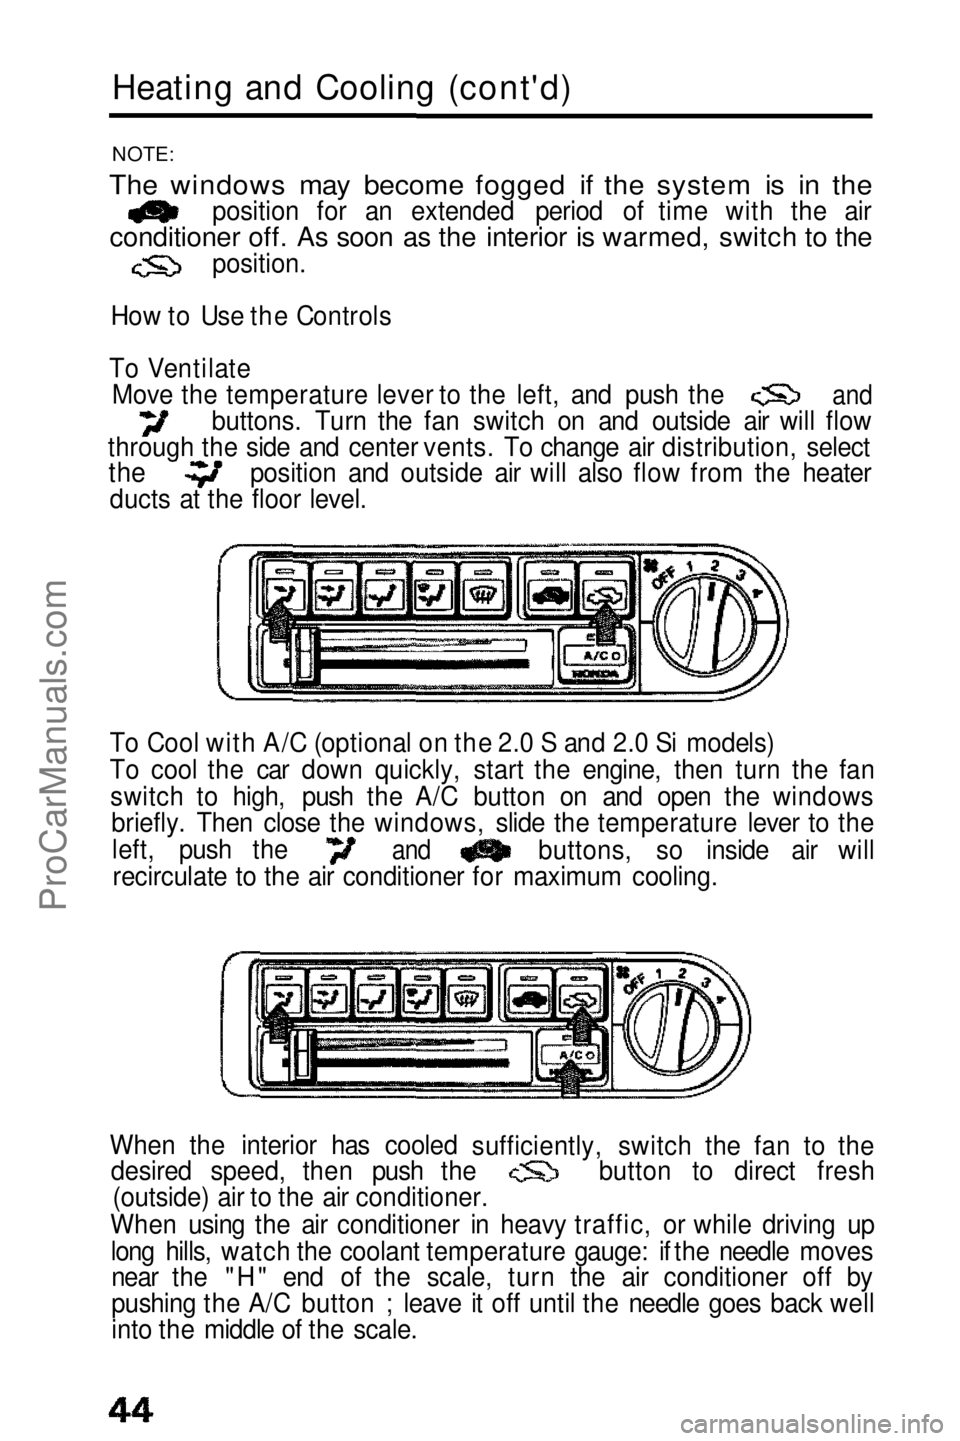
To Ventilate Move the temperature lever to the left, and push the buttons. Turn the fan switch on and outside air will flow
through the side and center vents. To change air distribution, select
To Cool with A/C (optional on the 2.0 S and 2.0 Si models)
To cool the car down quickly, start the engine, then turn the fanswitch to high, push the A/C button on and open the windows briefly. Then close the windows, slide the temperature lever to the
When the interior has cooled desired speed, then push the (outside) air to the air conditioner.
When using the air conditioner in heavy traffic, or while driving up long hills, watch the coolant temperature gauge: if the needle movesnear the "H" end of the scale, turn the air conditioner off by
pushing the A/C button ; leave it off until the needle goes back well
into the middle of the scale.
and
the
ducts at the floor level. position and outside air will also flow from the heater
sufficiently, switch the fan to thebutton to direct fresh
and
left, push the
recirculate to the buttons, so inside air will
air conditioner for maximum cooling.ProCarManuals.comMain Menu t s
Page 49 of 143

Seek Tuning
Each time you push this button up or down, the tuner will
automatically seek the next higher or lower frequency station. Preset Station Selection
1 .Select AM or FM band by depressing the Band Selector. Find the station you want by Manual Tuning or Seek Tuning.
Press and hold one of the Preset Buttons.
2. In a few seconds, a beep will sound and the light in the button will
3. come on. The station is now preset in the memory. You may preset 1 AM and 1 FM station per button.
(total, 6 of each on the 2.0 S and 2.0 Si models and 8 of each on
the Si model).
4. You can tune to a preset station by pushing its corresponding preset button.
NOTE: On the Si model
The Auto Preset button must be off before the Preset Station Selection can be used. Auto Select Button (Si only)
If you are visiting a new broadcast area, you can quickly enter into
memory the stronger stations in that area by simply pushing the
Auto Select Button. The radio will then automatically scan the AM
and FM bands and temporarily memorize up to eight stations in each.
With the Auto Select Button on, these stations can then be tuned by pushing the preset buttons. Manually-preset stations remainmemorized for use when you return to your normal broadcast area,
but are only selectable with the Auto Select Button off. Stereo indicator
This lights up when an FM broadcast in stereo is being received. It will flash when the signal strength diminishes. If it flashes, good
stereo reception cannot be expected. Stereo reception is available
only for FM stereo broadcasts, not for AM stereo broadcasts.
(cont'd)ProCarManuals.comMain Menu t s
Page 56 of 143

Gasoline (cont'd)
NOTE:
Fuel system damage or vehicle performance problems resulting
from the use of such fuels is not covered under the new car warranties. Honda cannot endorse the use of fuels containingmethanol since evidence of their suitability is as yet incomplete. Before purchasing fuel from an unfamiliar station, try to confirm
whether the fuel contains alcohol; of what kind, and how much. If
you notice any undesirable operating symptoms after using a
gasoline that contains alcohol, or one that you think contains
alcohol, switch to an unleaded gasoline, as recommended on page 55.
Operation In Foreign Countries In order to comply with U.S. Federal Emissions Regulations, you
must use unleaded fuels of the recommended octane rating. These
fuels may not be available in other countries. If you intend taking your car outside the U.S. or Canada, write to American Honda
Consumer Affairs (stating the year and model of your car) at the
address below for information regarding modifications you mayneed to have done.
American Honda Motor Co., Inc.
Consumer Affairs
100 W. AIondra Blvd.,
Gardena, CA 90248
Fuel Filler Door and Cap
Gasoline is extremely flammable and is explosive under certain
conditions. Perform this operation in a well-ventilated area with
the engine stopped. Do not smoke or allow open flames or sparks in the area or where gasoline is stored.
The fuel filler door is opened by pulling up on the lever at the leftside of the driver's seat.
The door will lock automatically when closed; push it until it clicks.
CAUTION:
You may hear a hiss when you open the filler cap. This sound is residual pressure escaping from the fuel tank. Open the cap slowly
and remove the cap after the hissing stops. Do not overfill the tank;
fill only until the gas pump clicks off automatically and never top off.ProCarManuals.comMain Menu t s
Page 118 of 143

Changing a Flat Tire (cont'd)
7. Set the jack handle extension in the connector on the end of the jack and install the lug wrench/jack handle. Turn the lug wrench/jack handle clockwise until the tire is slightly off the ground.
8. Remove the lug nuts, wheel cover and wheel.
(Wheel cover is not equipped
with 4WS or ALB models)
9. Install the spare tire; and install the lug nuts hand tight.
10. Lower the car, remove the jack,
then tighten the lug nuts
securely in an "X" pattern as
shown.11. Tighten the lug nuts securely.
The recommended torque is:
110 N .
m(11 kg-m,80 Ib-ft)
If a torque wrench was not
used, ask an authorized Honda
dealer to verify the torque as
soon as possible.
12. Repai
r or replace the damaged tire as soon as you can, then
reinstall it in its original position on the car, and put the spare back
in the car.
CAUTION:
Always stow the jack, tools and tire securely to prevent them
from becoming dangerous projectiles in an accident.
NOTE:
Secure the tire and the spacer as shown in the illustration.
COMPACT SPARE
DAMAGED TIRESPACER
SPACER TIGHTENING TORQUE
110 N.m (11 kg-m, 80 Ib-ft)
VALVE
NUT
WHEEL COVER
LUG WRENCH/JACK HANDLE JACK HANDLE EXTENSIONProCarManuals.comMain Menu t s