1986 CHEVROLET CORVAIR recommended oil
[x] Cancel search: recommended oilPage 10 of 56
Downloaded from www.Manualslib.com manuals search engine OPERATING INSTRUCTIONS
I
YOUR CORVAIR'S FIRST FEW HUNDRED MILES OF DRIVING
Sound design and precision manufacturing methods
will permit you to operate your new Corvair without
adhering to a formal "break-in" schedule. However,
during the first few hundred miles of driving you can,
by observing a few simple precautions, odd to the future
performance and economy of your cor.
It is recommended that your speed during the first
500 miles be confined to a maximum of 60 MPH, but
do not drive for extended periods at anyone constant
speed,
either fast or slow. During this period, ovoid full
throttle starts and unnecessary, quick abrupt stops .
Gentle braking during the first few hundred miles of
operation will result in longer broke life and better
future performance. Avoid unnecessary, hard stops espe
cially during the first 200 miles of operation since broke
misuse during this period will destroy much future broke
efficiency.
Always drive at a moderate speed until the engine
has completely warmed up.
DRIVING FOR ECONOMY
Proper maintenance and wise operation will com
bine to help you achieve maximum fuel economy with
your Corvair. Your Authorized Chevrolet Dealer can
properly tune and maintain your car but wise operation
is your responsibility. Give the cor sufficient warm-up
time, do not make "Full Throttle" storts or unnecessary
severe stops,
and drive at reasonable speeds and as
steady as traffic permits to gain the benefits of all the
economy built into your Corvair.
CAUTION: Avoid inhaling exhaust gases especially in an enclosed area such as a garage. Exhaust gases
contain
a percentage of carbon monoxide which is a potentially lethal gas that, by itself, is tasteless, color
less, and odorless. The exhaust system should be inspected for proper mounting, leaks and missing or damaged
parts each time the vehicle is raised for lubrication or oil change service.
7
Page 34 of 56
Downloaded from www.Manualslib.com manuals search engine cleaned with a cleaning compound specified for acrylic
finishes.
It is recommended that all bright metal parts of your
Corvair,
after being thoroughly cleaned, be given a
coating
of wax and rubbed to a high polish. This will
serve to keep corrosive agents away from these surfaces,
and should be repeated as often as required.
Cleaning White Sidewall Tires
Use soap, warm water or a tire cleaner and a stiff
brush to remove
road grime and' dirt from white sidewall
tires. A fine
grade of steel wool will remove severe curb
scrapes .
Do not use gasoline, kerosene or any oil product
which would discolor or deteriorate the rubber.
INTERIOR APPEARANCE
Dust and Dirt
Clean the interior of your car frequently, using a
broom
or vacuum cleaner.
Polish should not be used to clean interior bright
finish parts. Abrasive compounds used
in most polishes
may damage the finish. Cleaning with a damp cloth,
then rubbing with a polishing cloth
is all that is required.
31
CAUTION: Some white sidewall cleaners will cause
serious damage to aluminum trim. Use caution
when cleaning tires with this type
of cleaner .
Spots and Stains
Remove upholstery stains as soon as possible or
they may become "set" and difficult or impossible to
remove. First determine the type
and age of the stain
and the kind of upholstery material. Kar Kleen Uphol
stery Cleaner, available from your Authorized Chevrolet
Dealer,
will remove most stains. Do not use alkaline
cleaners for they may
damage the color or finish of the
materials.
Other solutions such as hot or cold water,
ammonia water,
soap, ink eradicator, etc., will probably
discolor and disturb the material.
CAUTION: When cleaning interior fabrics or
carpeting, do not use volatile cleaning solvents
such
as: acetone, lacquer thinners, carbon tetra
chloride, enamel reducers, nail polish removers,
or laundry soaps, bleaches and reducing agents.
NEVER USE GASOLINE OR NAPHTHA FOR ANY
CLEANING PURPOSE.
Page 36 of 56
Downloaded from www.Manualslib.com manuals search engine ENGINE OIL REQUIREMENTS
Engine Oil Recommendations
Use only "first line" oils which, according to the
label on the can, are (1) intended for service MS, and
(2) pass car makers' tests
(including
General Motors
Standard GM 6041-M. The
oil
change interval, as rec
ommended in this section on
oils,
is based on the regular
use of oil of this quality of
engine oil. The majority of
the suitable oils currently
available are multi-viscosity
(e.g., 10W-30) products.
NOTE: Non-detergent and
other low quality oils are
specifically not recommended. The use of proper engine
oils and oil change intervals are your best assurance of
continued reliability and performance from your Corvair
engine.
The use of "break-in" oils, "tune-up" compounds,
"frictIon-reducing" compounds, etc., in your Corvair
engine are not recommended. However, there are
additive supplements available that can be helpful
under certain conditIons. For example, if higher deter
gency is required to reduce varnish and sludge deposits,
a thoroughly tested
and approved concentrate-"High
Detergency Concentrate" * -is available at your Corvair 'or "Engine Oil Supplement"'
33
dealer who can advise you regarding its use.
NOTE: When checking or adding oil, be care
ful to avoid spilling or dropping oil onto the
engine shrouding .
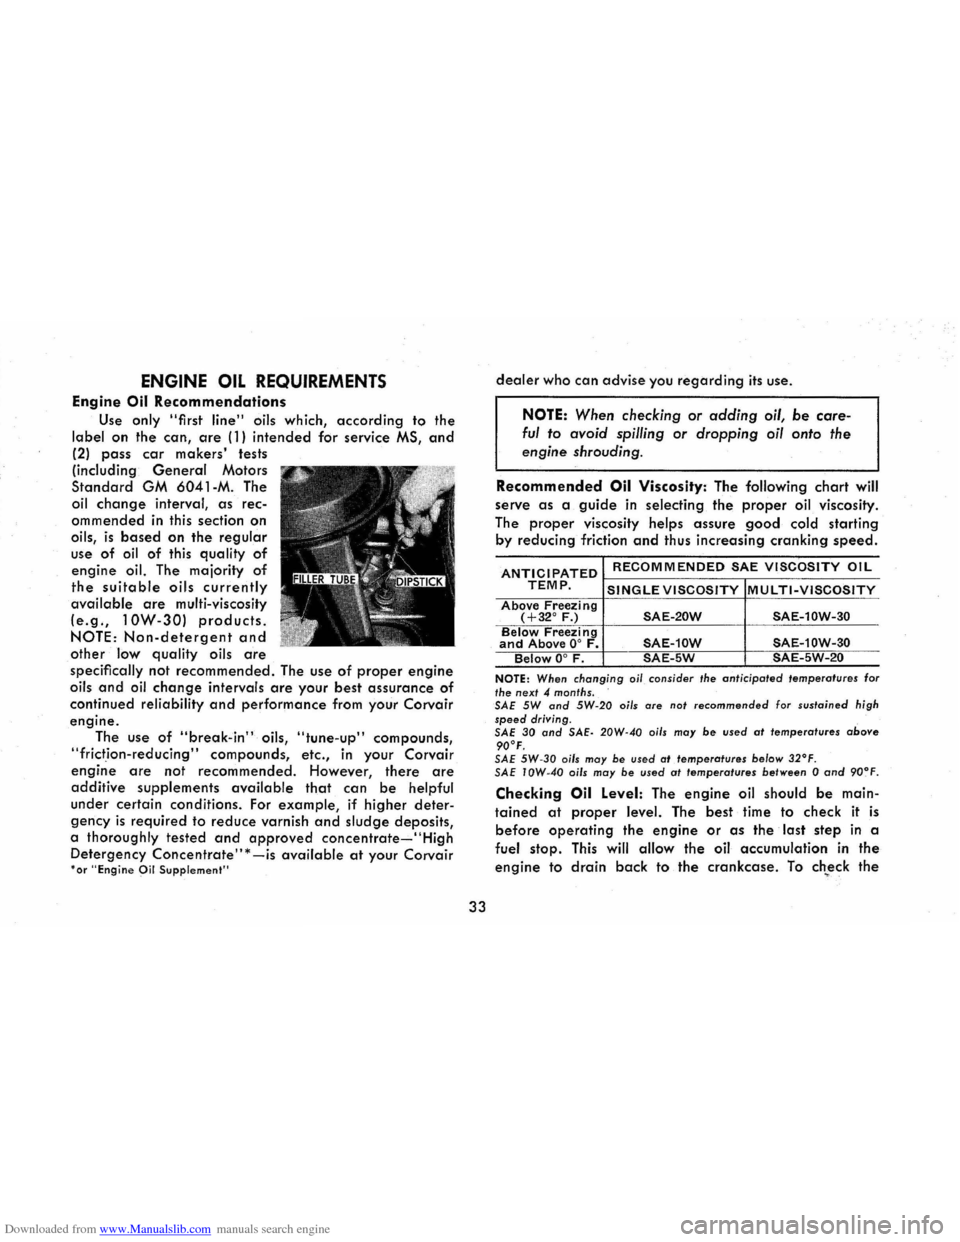
Recommended Oil Viscosity: The following chart will
serve
as a guide in selecting the proper oil viscosity.
The
proper viscosity helps assure good cold starting
by reducing friction and thus increasing cranking speed.
ANTICIPATED RECOMMENDED SAE VISCOSITY OIL
TEMP. SINGLE VISCOSITY MULTI-VISCOSITY Above Freezing (+32° F.) SAE-20W SAE-10W-30 Below Freezing and Above 0° F. SAE-10W SAE-10W-30 Below 0° F. SAE-5W SAE-5W-20
NOTE: When changing oi/ consider the anticipoted temperatures for the next 4 months.
SAE 5W and 5W·20 oils are not recommended for sustained high speed driving.
SAE 30 and SAE· 20W-40 oils may be used at temperatures above 90°F. SAE 5W-30 oils may be used at temperatures be/ow 32°F . SAE IOW-40 oils may be used at temperatures between 0 and 90~F.
Checking Oil Level: The engine oil should be main
tained at proper level. The best time to check it is
before operating the engine or as the last step in a
fuel stop.
This will allow the oil accumulation in the
engine to drain back to the crankcase. To ch~eck the
Page 37 of 56
Downloaded from www.Manualslib.com manuals search engine level, remove the oil gauge rod (dip stick), wipe it
clean and reinsert it firmly for an accurate reading.
The oil level should be maintained in the safety margin,
neither going above the FULL line nor below the ADD
mark. Reseat the gauge firmly after taking the reading.
DO NOT OVERFilL.
COOLING SYSTEM CARE
The engine fan belt should be checked for tightness
at regular intervals. When a new belt is needed use only
the approved premium belt available from your Chev
rolet dealer. If any other belt is installed, replace with
recommended belt when possible.
Watch the TEMP-PRESS and GEN-FAN indicators on the
instrument
panel for signs of overheating.
Air inlet louvers, located in the panel below the rear
window, supply air for engine combustion and cooling
and for the Direct Air Heater. Make sure the louvers are
never sealed or blocked.
TIRES
The factory installed tires on your car are selected
to provide the best all around tire performance for all
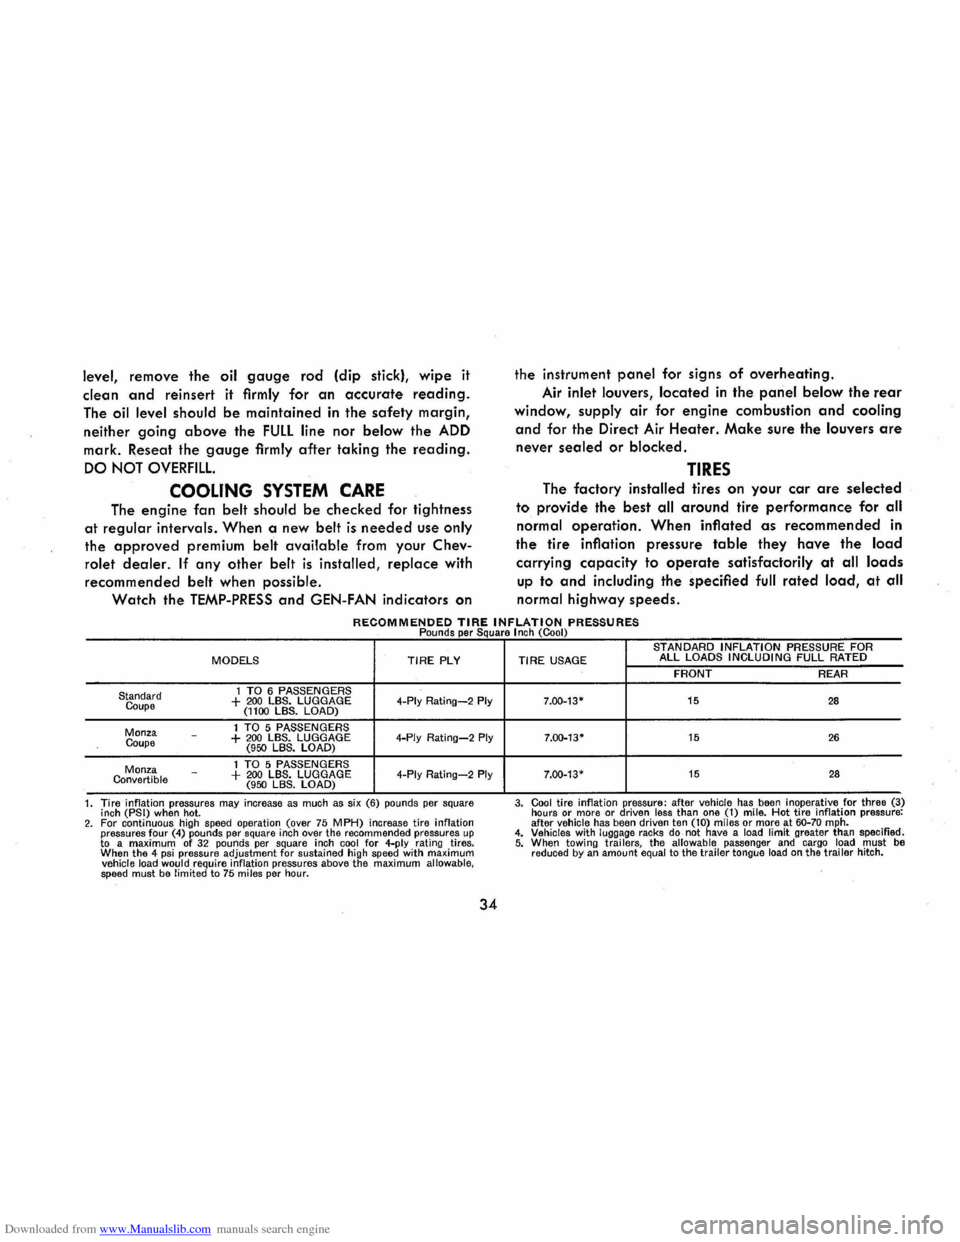
normal operation. When inflated as recommended in
the
tire inflation pressure table they have the load
carrying capacity to operate satisfactorily at all loads
up to and including the specified full rated load, at all
normal highway speeds.
RECOMMENDED TIRE INFLATION PRESSURES Pounds per Square I nch (Cool)
MODELS TIRE PLY
1 TO 6 PASSENGERS Standard
Coupe + 200 LBS. LUGGAGE 4-Ply Rating-2 Ply (1100 LBS. LOAD)
1 TO 5 PASSENGERS Monza
Coupe -+ 200 LBS. LUGGAGE 4-Ply Rating-2 Ply (950 LBS. LOAD)
1 TO 5 PASSENGERS Monza Convertible -+ 200 LBS. LUGGAGE 4-Ply Rating-2 Ply (950 LBS. LOAD)
1. Tire inflation pressures
may increase as much as six (6) pounds per square
inch (PSI) when hot. 2. For continuous high speed operation (over 75 MPH) increase tire inflation pressures four (4) pounds per square inch over the recommended pressures up to a maximum of 32 pounds per square inch cool for 4-ply rating tires.
When the 4 psi pressure adjustment for sustained high speed with maximum vehicle load would require inflation pressures above the maximum allowable, speed must be limited to 75 miles per hour.
34
STANDARD INFLATION PRESSURE FOR TIRE USAGE ALL LOADS INCLUDING FULL RATED
FRONT REAR
7.00-13-15 28
7.00-13· 15 26
7.00-13· 15 28
3. Cool tire inflation pressure: after vehicle has been inoperative for three (3)
hours or more or driven less than one (1) mile. Hot tire inflation pressure:
after vehicle has been driven ten (10) miles or more at 60-70 mph. 4. Vehicles with luggage racks do not have a load limit greater than specified. 5. When towi ng trai lers, the allowable passenger and cargo load must be reduced by an amount equal to the trailer tongue load on the trailer hitch.
Page 40 of 56
Downloaded from www.Manualslib.com manuals search engine PERIODIC MAINTENANCE AND LUBRICATION
The time or mileage intervals on the following pages
are intended as a general guide for establishing regular
maintenance and lubrication periods for your Corvair.
Sustained heavy duty or high speed operations or oper-
A WORD ABOUT VEHICLE EMISSIONS
All new 1968 Corvairs are certified by the United States Department of Health, Education and Welfare as
conforming to the requirements of the regulations for
the Control of Air Pollution from New Motor Vehicles
and New Motor Vehicle Engines.
General Motors has developed control systems which
are highly effective in reducing undesirable crankcase
and exhaust emissions. It is very important that the owner make certain that the engine is serviced regularly
in order to maintain its efficiency and to keep emissions
below maximum allowable limits.
The emission control system on
your 1968 Corvair is
relatively easy to maintain, requiring only specific serv
ices as recommended by Chevrolet. To function properly,
this system must be inspected periodically and engine
tune-up performed at specified intervals by qualified
repairmen. For ready reference, pertinent information regarding ignition timing and idle speed and fuel mix
ture specifications is shown on a sticker affixed under
the hood of your vehicle. Following the prescribed main-
37
ation under adverse conditions may necessitate more
frequent servicing. For specific recommendations for con
ditions under which you use your vehicle, consult your
authorized Chevrolet Dealer.
tenance services
will help assure cleaner air and will
provide better running, longer lasting engines for greater
all-around satisfaction, economy and performance.
POSITIVE CRANKCASE VENTILATION (P.C.V')
The Positive Crankcase Ventilation system, which is
standard equipment on your vehicle, prevents emission
of gases from the crankcase. The P .C.V. system connects
the crankcase and intake manifold of the engine and
crankcase gases are returned through this system to the
combustion
chamber where they are burned. Periodic
inspection
and required servicing of your P.C.V. system
assures a cleaner, better-performing, longer-lasting
engine. A plugged P.C.V. system results in a loss of
crankcase ventilation which can cause condensation of
blow-by gases in the crankcase, resulting in the forma
tion of acids, sludge build-up and oil dilution. This also
results in
an increase in exhaust emissions due to car
buretor enrichment. Every 12,000 miles or 12 months,
whichever occurs first, the PCV valve should be replaced.
Page 42 of 56
Downloaded from www.Manualslib.com manuals search engine every 6000 miles. This interval applies to the initial
change as well as subsequent oil changes. The oil
change interval for your Corvair engine is based on the
use
of oils that meet the requirements indicated in the
section on
"Engine Oil Recommendations". Oil change
intervals longer than 4 months or 6,000 miles will result
in serious reductions in engine life and may effect Chev
rolet's
obligation under the provisions of the New Vehicle Warranty.
Certain atmospheric and/or driving conditions includ
ing
prolonged operations at sub-zero temperatures or
under extremely dusty conditions, frequent trailer haul
ing, and extensive idling necessitate more frequent oil
and filter changes. * Operation in dust storms may require
an immediate change of both oil and filter. See your
Chevrolet dealer for advice on frequency of oil and
filter changes because of unusual driving conditions.
A high
quality MS oil meeting General Motors
Standard GM 6041-M was installed in your engine at
the factory. It is not necessary to change this factory
installed oil
prior to the recommended normal change
period. However, the oil level should be checked more
frequently during
the break-in period since somewhat
higher oil consumption is normal until the piston rings
become seated.
*In many such situations, oil change intervals should not exceed 2
months, or 3000 miles, whichever occurs first, and similarly, filter changes should not exceed 4 months or 6000 miles, whichever comes
first.
39
OIL FILTER
Replace filter of first oil change and at every second
oil change thereafter. This recommendation is based on
the use of engine oil which meets the requirements indi
cated in the section on "Engine Oil Recommendations,"
and the use of the applicable AC. or equivalent quality replacement oil filter.
TRANSMISSION-3 AND 4-SPEED
The manual transmission and the rear axle have' a
common
oil sump. Provisions for checking and main
taining lubricant level are provided on each unit.
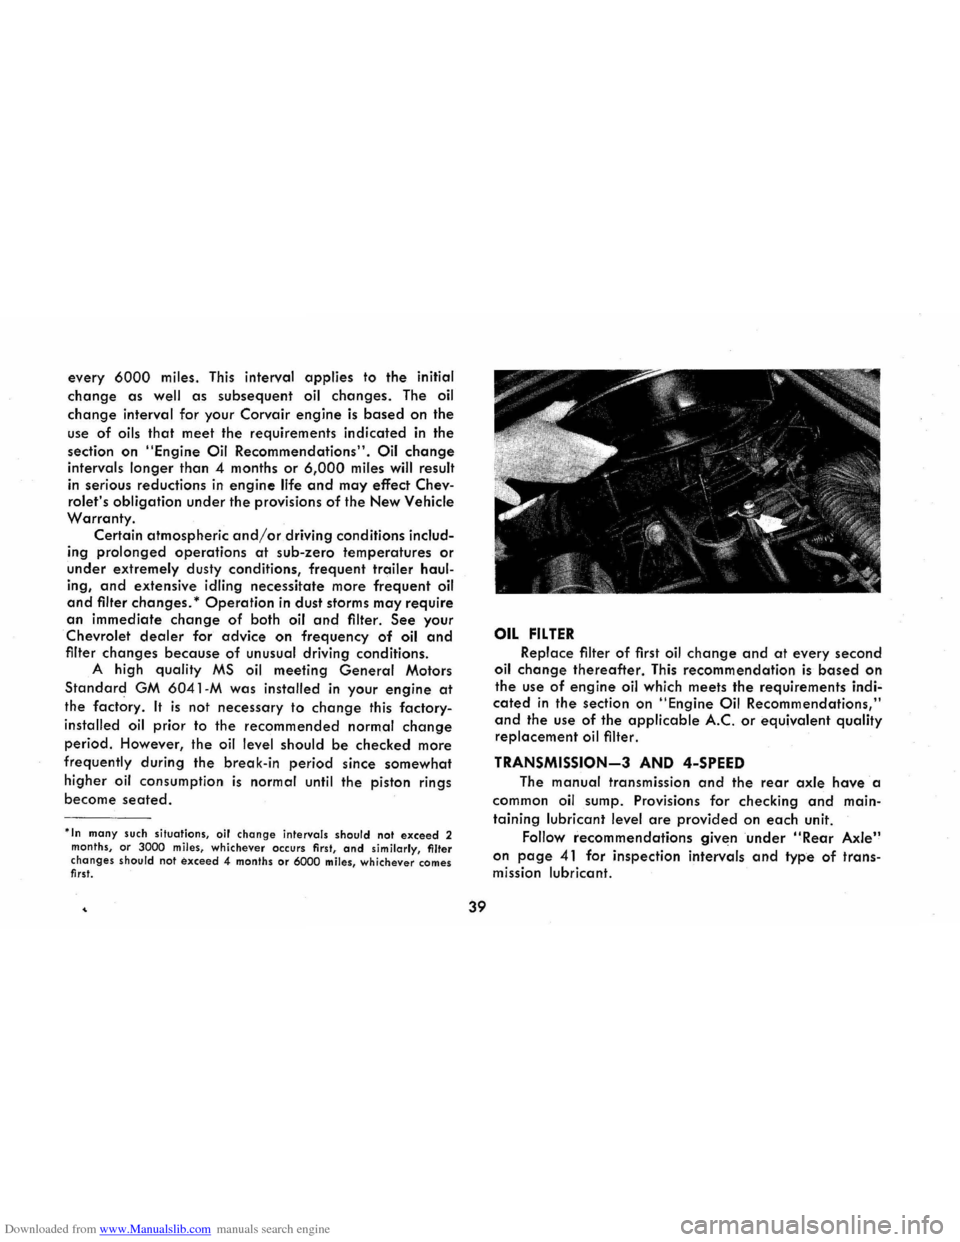
Follow recommendations given
under "Rear Axle"
on page 41 for inspection intervals and type of trans
mission lubricant.
Page 43 of 56
Downloaded from www.Manualslib.com manuals search engine TRANSMISSION CONTROL LlNKAGE-
3 AND 4-SPEED
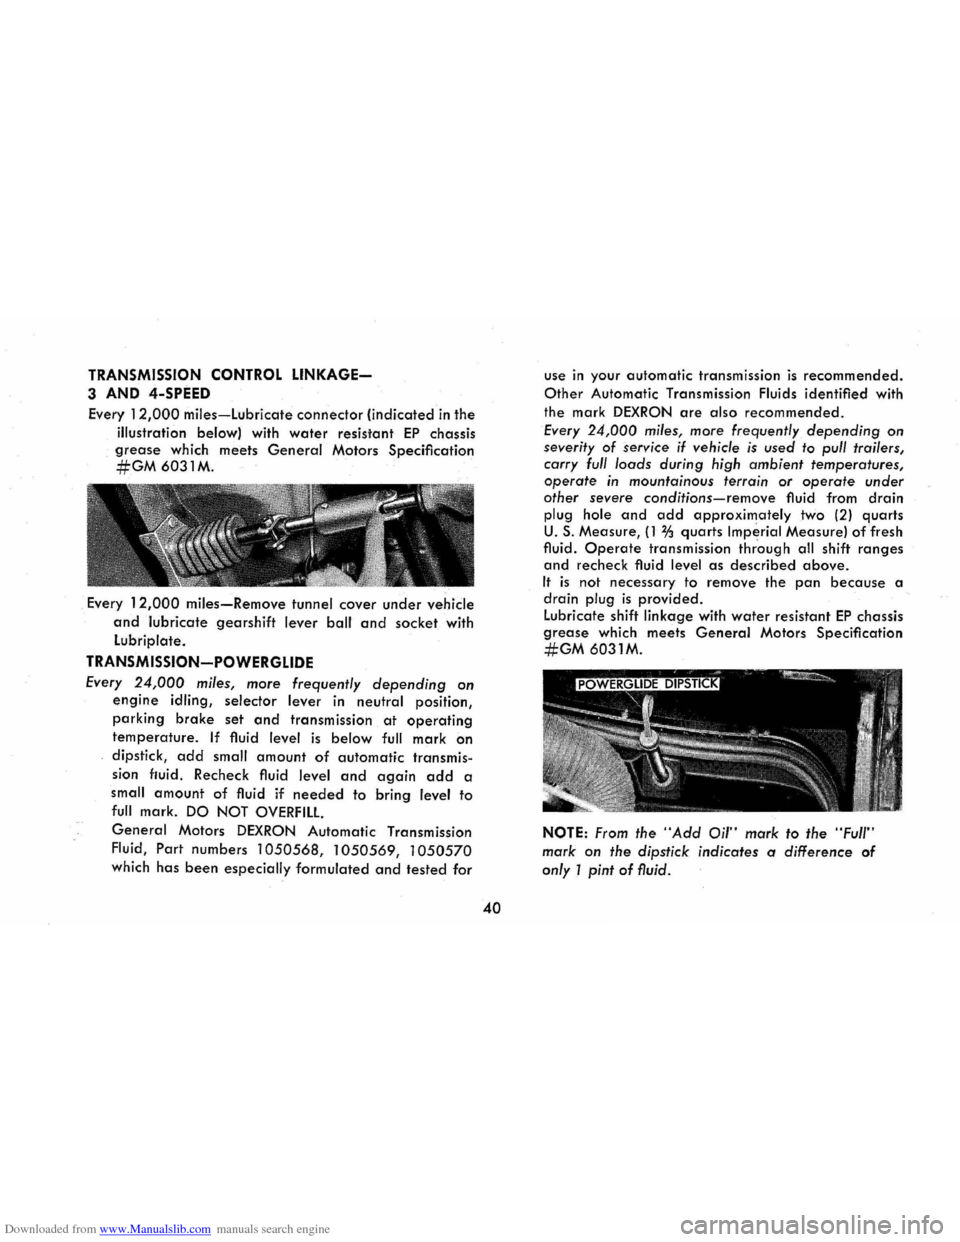
Every 12,000 miles-Lubricate connector (indicated in the
illustration below) with
water resistant EP chassis
grease which meets General Motors Specification
#GM6031M.
. Every 12,000 miles-Remove tunnel cover under vehicle
and lubricate gearshift lever ball and socket with
Lubriplate.
TRANSMISSION-POWERGLIDE
Every 24,000 miles, more frequently depending on
engine idling, selector lever in neutral position,
parking brake set and transmission at operating
temperature. If fluid level is below full mark on
dipstick, add small amount of automatic transmis
sion fluid. Recheck fluid level and again add a
small
amount of fluid if needed to bring level to
full mark. DO NOT OVERFILL
General Motors DEXRON Automatic Transmission
Fluid,
Part numbers 1050568, 1050569, 1050570
which has been especially formulated and tested for
40
use in your automatic transmission is recommended.
Other Automatic Transmission Fluids identified with
the mark
DEXRON are also recommended.
Every 24,000 miles, more frequently depending on
severity of service if vehicle is used to pull trailers,
carry full loads during high ambient temperatures,
operate in mountainous terrain or operate under
other severe
conditions-remove fluid from drain
plug hole and add approximately two (2) quarts
U. S. Measure, (1 % quarts Imperial Measure) of fresh
fluid.
Operate transmission thr'ough all shift ranges
and recheck fluid level as described above.
It is not necessary to remove the pan because a
drain plug is provided .
Lubricate shift linkage with
water resistant EP chassis
grease which meets General Motors Specification
#GM 6031M.
NOTE: From the "Add Oil" mark to the "Full"
mark on the dipstick indicates a difference of
only 1 pint of fluid.
Page 51 of 56
Downloaded from www.Manualslib.com manuals search engine and blocked AIR CLEANER ELEMENTS. Replace the air cleaner ele
ments
if necessary. Idle adjustment should be performed by your
Chevrolet Dealer.
If the above Fuel System checks and the checks suggested under
the Electrical System following do not correct the malfunction, it is
recommended that you turn to your Authorized Chevrolet Dealer
for further checks, adjustments
or repairs.
ELECTRICAL SYSTEM
If, when the ignition key is turned to START, the engine will not
turn over, you have
good reason to suspect electrical trouble.
(F) When there is no response at all to attempts to start the car,
check the obvious-your AUTOMATIC TRANSMISSION SELECTOR
LEVER must be in neutral position before the engine can be started.
Turning the IGNITION SWITCH rapidly back and forth several
times
will sometimes correct a poor internal switch contact.
(G) The BATTERY may be discharged. If so, lights will be dim and
the horn will have a poor tone if it will blow at all.
Usually
a garage recharge will be necessary to return the battery
to operotion. Occasionally, however, a long drive will recharge
the battery.
NOTE:
If the battery is determined to be dead, and for no apparent
reason, have
your Authorized Chevrolet Dealer check the
battery, the GENERATOR and the
VOLTAGE REGULATOR.
GENERATOR trouble should already have been indicated
by
the indicator on the instrument panel. Never remove generator
"BAT" lead without first disconnecting battery ground cable.
48
POOR BATTERY CONNECTIONS may be suspected if the car has operated properly a short time before and now not even the horn
will operate. Check both ends of both battery cables. If the con
nections are corroded, a car may sometimes be restored to operation by removing all cable ends, scraping all contacting surfaces
clean with a pen knife, and reassembling. If the cables are broken,
they must be replaced. The power supply should now be restored
unless the battery is dead.
(H) If, however, the lights and horn work properly but the starter will still not turn over, check the STARTER connections. A "click" from the starter solenoid indicates that the wiring to the starter is properly installed. If the wiring seems to be clean and tightly installed, the trouble is probably in the starter itself and should be referred to your Authorized Chevrolet Dealer.
When the engine will "turn over" but will not start, the following
items may be checked along with Fuel System Checks listed previously.
(I) With a clean dry cloth wipe the ceramic portions of the spark plugs dry. In particularly damp or rainy weather dampness may be the cause of not sta rting, especially when the engine is cold.
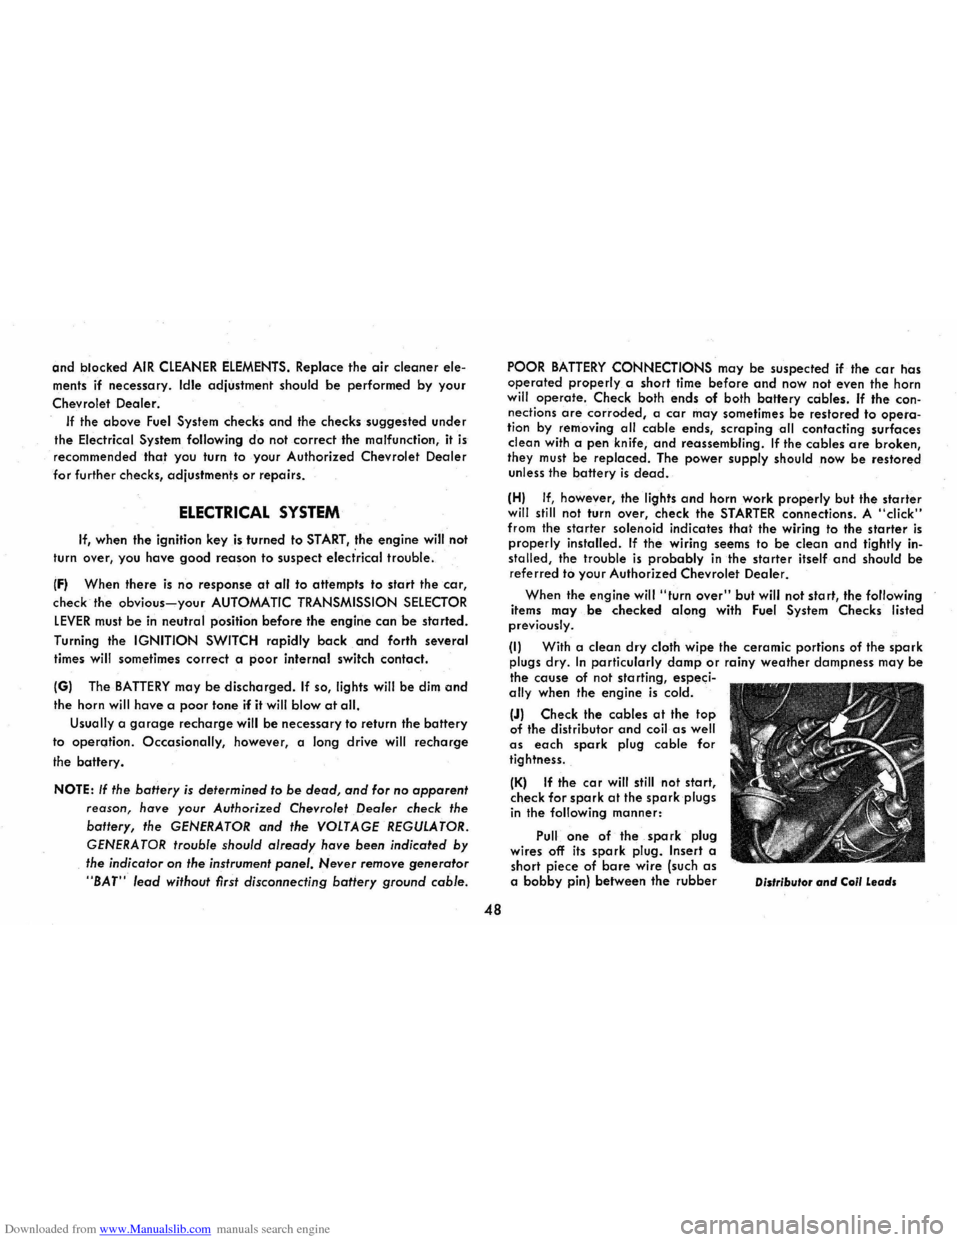
(J) Check the cables at the top of the distributor and coil as well as each spark plug cable for
tightness.
(K) If the car will still not start, check for spark at the spark plugs in the following manner:
Pull one of the spark plug
wires off its spark plug. Insert a
short piece of bare wire (such as a bobby pin) between the rubber Distributor and Coil Leads