Page 780 of 875

GM – CAMARO 1982-1992 – Repair Guide (Checked by WxMax) 780
If the drain plug is equipped with a re
movable washer or gasket, check its
condition and replace, if necessary , to provide a leakproof seal.
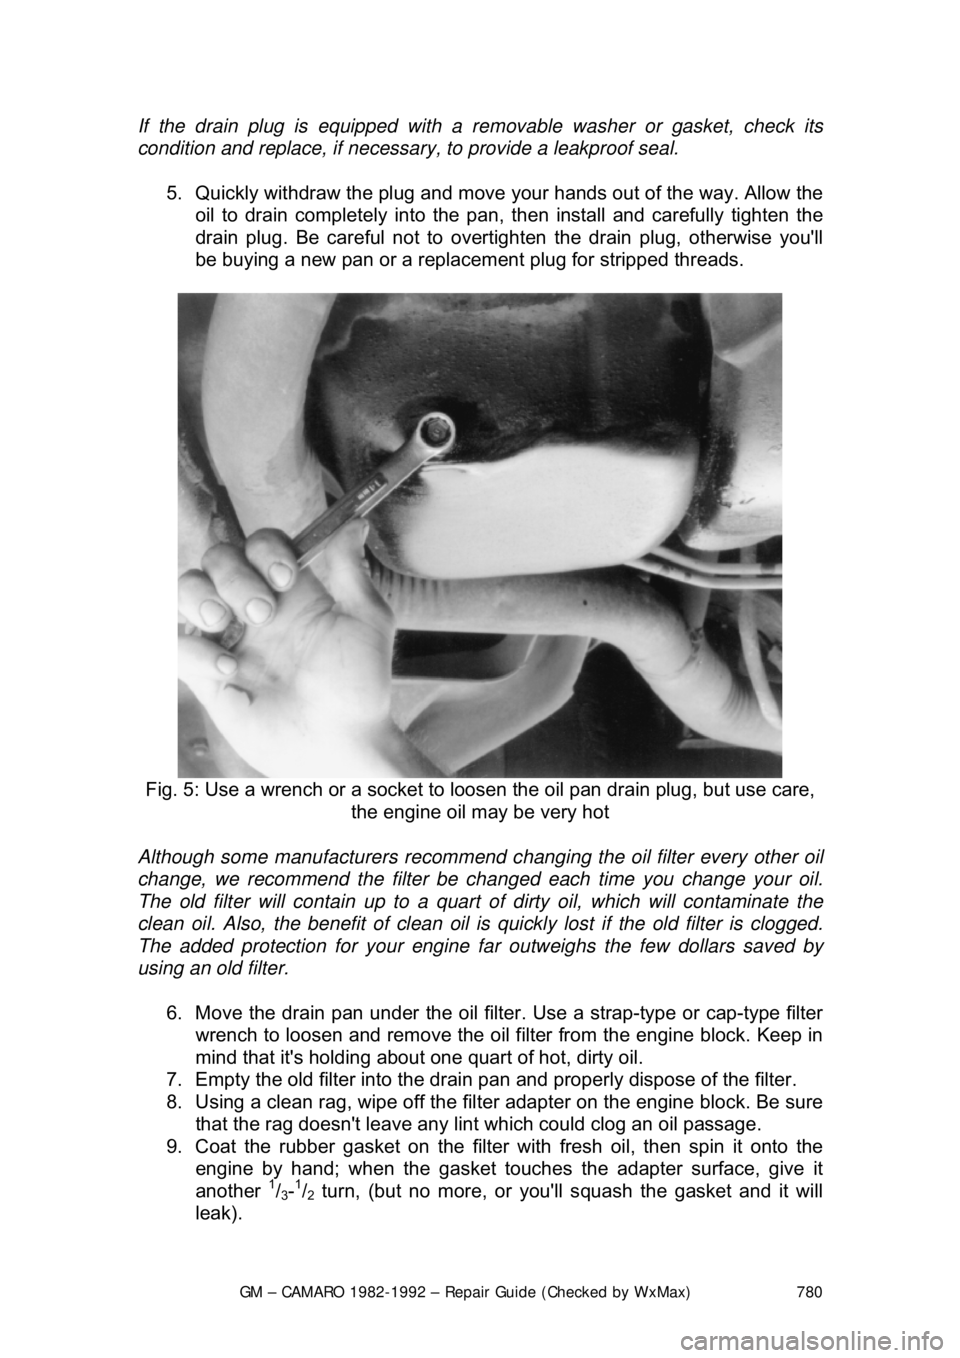
5. Quickly withdraw the plug and move your hands out of the way. Allow the
oil to drain completely into the pan, then install and carefully tighten the
drain plug. Be careful not to overtighten the drain plug, otherwise you'\
ll
be buying a new pan or a replacem ent plug for stripped threads.
Fig. 5: Use a wrench or a socket to l oosen the oil pan drain plug, but use care,
the engine oil may be very hot
Although some manufacturers recommend c hanging the oil filter every other oil
change, we recommend the filter be chan ged each time you change your oil.
The old filter will contain up to a quart of dirty oil, which will contaminate the
clean oil. Also, the benefit of clean oil is quickly lost if the old filter is clogged.
The added protection for your engine far outweighs the few dollars saved by
using an old filter.
6. Move the drain pan under the oil filter. Use a strap-type or cap-type filter
wrench to loosen and remove the oil f ilter from the engine block. Keep in
mind that it's holding about one quart of hot, dirty oil.
7. Empty the old f ilter into the drain pan and proper ly dispose of the filter.
8. Using a clean rag, wipe off the filt er adapter on the engine block. Be sure
that the rag doesn't leave any lint which could clog an oil passage.
9. Coat the rubber gasket on the filter with fresh oil, then spin it onto the
engine by hand; when the gasket touches the adapter surface, give it
another
1/3-1/2 turn, (but no more, or you'll squash the gasket and it will
leak).
Page 781 of 875
GM – CAMARO 1982-1992 – Repair Guide (Checked by WxMax) 781
Fig. 6: Use an oil filter wrench to loosen, but not to install a filter
Fig. 7: Before installing a new oil filt er, lightly coat the rubber gasket with clean
oil
Page 782 of 875

GM – CAMARO 1982-1992 – Repair Guide (Checked by WxMax) 782
10. Refill the engine with the correct amount
of fresh oil. Please refer to the
Capacities chart at the end of this section.
11. Check the oil level on the dipstick. It is normal for the level to be a bit
above the full mark. Start the engine and allow it to idle for a few
minutes.
CAUTION - Do not run the engi ne above idle speed until it has built up oil
pressure, as indicated w hen the oil light goes out
12. Shut off the engine and allow the oil to flow back to the crankcase for a
minute, then recheck the oil level. C heck around the filter and drain plug
for any leaks, and correct as necessary.
MANUAL TRANSMISSIONS
FLUID RECOMMENDATIONS
• 1982-85 4-speed manual transmissi ons - SAE 80W/90 GL-5 gear
lubricant
• 1986-87 4-speed manual transmission - Dexron®®II automatic
transmission fluid
• 1982-84 5-speed manual transmissions - use SAE 80W/90 GL-5 gear
lubricant (SAE 80W GL-5 in Canada)
• 1985-92 5-speed manual transmissi ons - Dexron®II automatic
transmission fluid
LEVEL CHECK
The oil in the manual tr ansmission should be check ed every 12 months or
15,000 miles.
1. Raise the car and support on jackstands as close to level as possible. \
2. Remove the filler plug from the side of the transmission housing.
3. If lubricant begins to trickle out of the hole, there is enough and you need
not go any further. Otherwise, carefully insert your finger (watch out for
sharp threads) and check to see if the oil is up to the edge of the hol\
e.
4. If not, add oil through the hole until the level is at the edge of the hole.
Most lubricants come in a plasti c squeeze bottle with a nozzle; making
additions simple.
5. Install and tighten the filler plug.
DRAIN AND REFILL
The fluid in the manual transmission do es not require changing. If you do
choose to change the transmission fluid, the fluid can be drained out through
the lower drain plug hole on the side of the transmission. Fill the transmission
with the recommended lubricant to the bottom of the filler plug hole and install
the filler plug.
Page 784 of 875

GM – CAMARO 1982-1992 – Repair Guide (Checked by WxMax) 784
b. If fluid is warm, the le
vel should be close to the ADD mark, either
above or below.
c. If fluid is too hot to touc h, the level should be at the FULL mark.
3. If the fluid level is low, add Dexr on®II automatic transmission fluid (ATF)
through the dipstick tube. This is eas ily done with the aid of a funnel.
Check the level often as you are f illing the transmission. Be extremely
careful not to overfill it. Overfilling will cause slippage, seal damage and
overheating. Approximately 1 pint (0.473L) of ATF will raise the fluid level
from one notch/line to the other.
If the fluid on the dipstick appears discolored (brown or black), or smells burnt,
serious transmission troubles, probably due to overheating, should be
suspected. The transmission should be inspected by a qualified technician to
locate the cause of the burnt fluid.
DRAIN AND REFILL
Please refer to the "PAN AND FILTER SERVICE" procedure listed in this
section.
PAN AND FILTER SERVICE
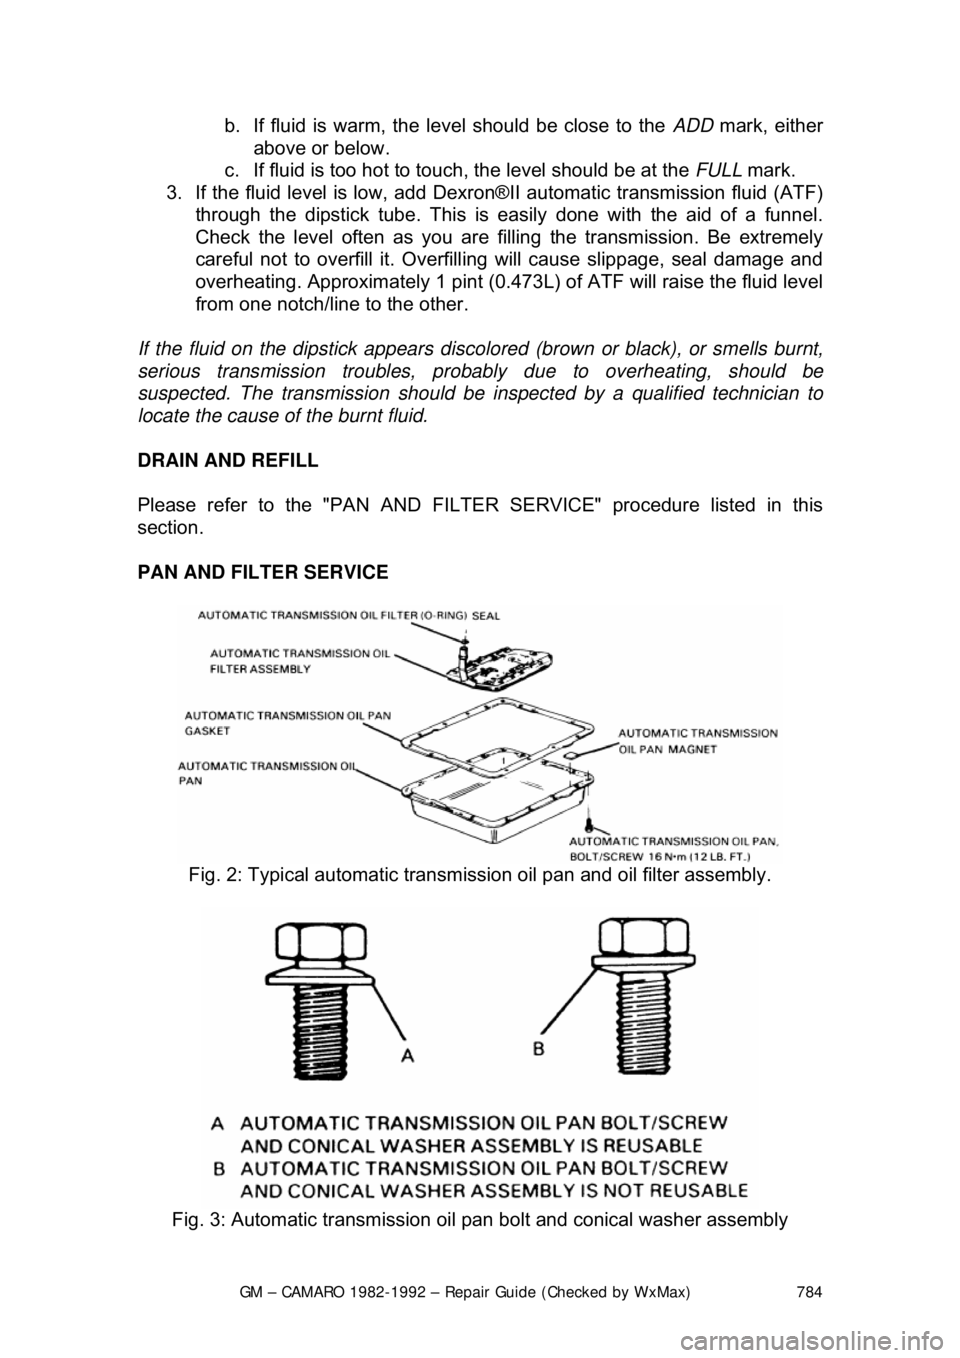
Fig. 2: Typical automatic transmiss ion oil pan and oil filter assembly.
Fig. 3: Automatic transmission oil pan bolt and conical washer assembly
Page 785 of 875

GM – CAMARO 1982-1992 – Repair Guide (Checked by WxMax) 785
The automatic transmission fluid and fi
lter should be changed every 15,000
miles (24,000km) if your Camaro is driven in heavy city traffic in hot weather, in
hilly or mountainous terrain, frequent trailer pulling, or uses such as found in
taxi, police car or delivery service. If your Camaro is driven under other than
listed above conditions, change the fl uid and filter every 30,000 miles
(48,300km).
1. Raise and support the car on jackst ands. Place an oil catch pan under
the transmission.
2. Remove the oil pan bolts fr om the front and sides only.
3. Loosen rear oil pan bolts approximately 4 turns.
WARNING - Do not damage the transmission case or oil pan sealing surfaces.
4. Lightly tap the oil pan with a rubber mallet or gently pry it downward to
allow fluid to drain.
5. Remove the remaining oil pan bolt s, then remove the oil pan and pan
gasket.
6. Remove the filter and seal.
7. Clean the transmission case and oi l pan gasket surfaces with suitable
solvent and air dry. Make sure to re move all traces of the old gasket.
To install: 8. Coat the seal with a sm all amount of Transjel®.
9. Install the new s eal onto the filter.
10. Install the new filter into the case.
11. Install the oil pan and new gasket.
On 1991 and later vehicles, inspect t he oil pan screws and washer assemblies.
The screws must not be used if the coni cal washer is reversed. Failure to
replace the screw and washer assembly may result in improper fastening of
system components.
12. Install the oil pan bolts and tighten them to 12 ft. lbs. (16 Nm).
13. Lower the car.
14. Fill the transmission to proper level with Dexron®II fluid.
15. Check cold fluid level reading fo r initial fill. Do not overfill the
transmission.
16. Follow the fluid level che ck procedure described before.
17. Check the oil pan gasket for leaks.
Page 787 of 875
GM – CAMARO 1982-1992 – Repair Guide (Checked by WxMax) 787
Fig. 6: Remove oil pan and allow excess oi l to drain from valve body and filter
assembly
Fig. 7: Remove gasket material from transmission case and pan
Page 788 of 875
GM – CAMARO 1982-1992 – Repair Guide (Checked by WxMax) 788
Fig. 8: Remove the transmission o il filter and O-ring from the case
Fig. 9: Install the transmission oil f ilter with new O-ring, into the case