1976 CHEVROLET VEGA clutch
[x] Cancel search: clutchPage 19 of 87
Downloaded from www.Manualslib.com manuals search engine Starting Engine
Automatic Transmission
Models
1. Apply the parking brake.
2. Place transmission selector
in uP" or "N" ("P" preferred).
A starter safety switch prevents
starter operation while the trans
mission selector
is in any drive
position.
(If it is necessary to·
re-start the engine with the car
moving, place the selector lever
in
"N".)
3. Depress accelerator pedal and
activate starter
as outlined be
low for different conditions.
IMPORTANT: Do not keep the starter
engaged for more than 15 seconds
at a time. Wait 1 0 or 15 seconds
before trying agair.
• Cold Engine -Fully depress
accelerator pedal and slowly
release.
Wilh fOOl 00 the pedal,
crank
the engine by
turning the ignition key to the
Start position -release when
engine starts.
If engine starts, but fails to
run, repeat this procedure.
When engine is running
smoothly (approximately
30
seconds), the idle speed may
be reduced by slightly de
pressing the accelerator pedal
and then slowly releasing.
• Warm Engine -Depress ac
celerator
pedal about halfway
and hold while cranking the
engine.
• Extremely Cold Weather
(Below 00 F. -180 C.) Or
After Car Has Been Standing
Idle Several Days-
2-3
Fully depress and release ac
celerator pedal two
or three
times before cranking the
engine.
With foot 00 the ac
celerator pedal,
crank the en
gine by turning the key to the
Start position and release
when engine starts.
Manual Transmission Models
1. Apply parking brake, fully de
press
clutch pedal, and shift
transmission to neutral.
2. Hold clutch pedal to the floor
throughout
the starting proce
dure, A starter safety switch pre
vents starter operation when the
clutch
is not fully depressed.
(Select the proper gear posi
tion before releasing the clutch
pedal).
3. Operate accelerator pedal and
starter
as outlined in step 3
(under Automatic Transmission
Models).
Page 20 of 87
Downloaded from www.Manualslib.com manuals search engine Engine Flooded
Depress accelerator pedal and
hold to floor while starting until en
gine
is cleared of excess fuel and is
running smoothly. Never "pump"
the accelerator pedal.
Warm-Up
Always let the engine idle for 20
to 30 seconds after starting and
drive at moderate speeds for sev
eral miles, especially during cold
weather.
Driving with the Chevrolet Automatic Transmissions
The Turbo Hydra-Matic is a
completely automatic transmission
that replaces the standard clutch
and transmission.
After starting the engine with the
floor selector lever in N (Neutral)
or
P (Park) position select the
range desired (see table) and de
press the accelerator.
A gradual start with a steady in
crease in accelerator pressure will
result in best possible fuel economy.
Rapid acceleration for fast starts
will result in greater fuel consump
tion.
Automatic transmission shift
quadrants of all GM cars continue
the uniform sequence of selector
positions. This particularly benefits
multicar families and those who oc
casionally drive other cars.
Shift in
dicators are arranged with
"Park"
position at one end, followed in se
quence by
"Reverse", "Neutral"
and the forward driving ranges.
All automatic transmissions are
equipped with a starter safety switch
designed to permit starting the en
gine only when the transmission
is
in the "Park" or "Neutral" position.
For additional engine braking ef-
2-4
fect, as sometimes needed in moun
tainous driving, place the transmis
. sion in low range.
Page 22 of 87
Downloaded from www.Manualslib.com manuals search engine Driving with Manual Transmissions
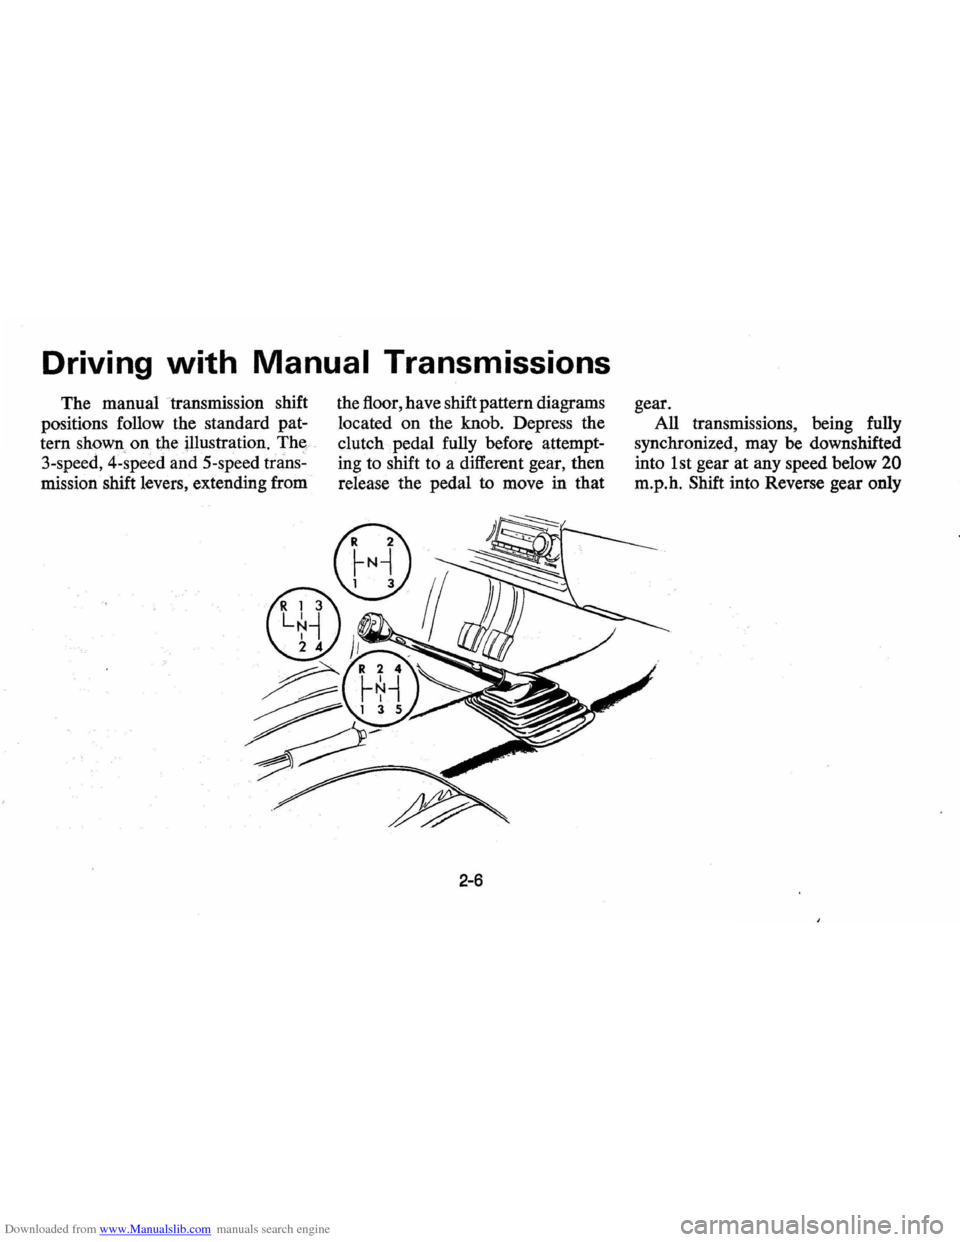
The manual transmission shift
positions follow the standard pat
tern
shown on the illustration. Th~
3-speed, 4-speed and 5-speed trans~
mission shift levers, extending from the
floor, have shift pattern diagrams
located on the
knob. Depress the
clutch pedal fully before attempt
ing to shift to a different gear, then
release the pedal
to move in that
2-6
gear.
All
tranSIll1SSlons, being fully
synchronized, may be downshifted
into 1 st gear at any speed below
20
m.p.h. Shift into Reverse gear only
Page 23 of 87
Downloaded from www.Manualslib.com manuals search engine after the car has stopped. Always
depress and release the clutch pedal
fully when shifting.
On the 4-speed transmission lift
up on the release handle (below
the shift knob) momentarily when
shifting into reverse.
Good Driving Practice
The lower gears of the transmis
sion are used to normally accelerate
the vehicle to the desired cruising
(Cruising speed
is defined as a rela- tively
constant speed operation that
includes steady speed operation
as
well as moderate variations in speed
consistant with road and traffic con
ditions.) speed and the highest gear
of the transmission is used to
maintain the desired speed. The 5th
gear (overdrive) of a 5-speed man
ual transmission
is recommended
for use in maintaining extended
highway cruising speeds. Use of 5th
gear in city traffic
is not recom
mended.
If the vehicle speed is re-duced
below
20 MPH, or if the en
gine
is obviously lugging, the trans
mission should be downshifted from
high gear to the next lowest gear.
Downshifting two or more gear
positions may be necessary to pre
vent lugging the engine or to pro
vide a satisfactory performance
leveL As the first (1 st) gear of the
transmission
is fully synchronized,
the transmission should be down
shifted to first gear whenever the
vehicle stops or the vehicle speed
Manual Transmission Shift Speeds
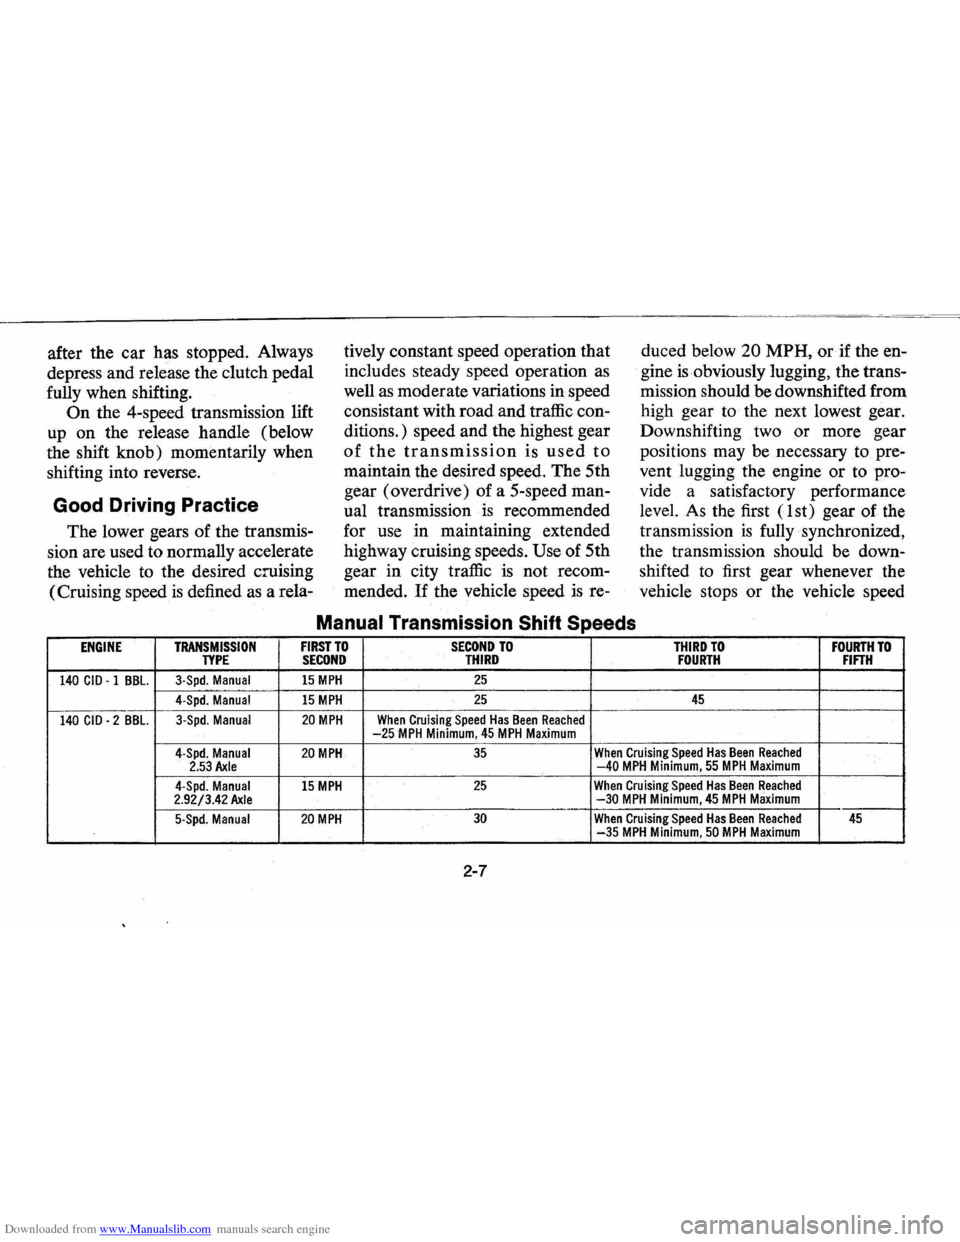
ENGINE TRANSMISSION FIRST TO SECOND TO THIRD TO FOURTH TO TYPE SECOND THIRD FOURTH FIFTH
140 CID . 1 BBL. 3·Spd. Manual 15 MPH 25
4·Spd. Manua! 15 MPH 25 45
140 CID • 2 BBL. 3·Spd. Manual 20 MPH When Cruising Speed Has Been Reached -25 MPH Minimum, 45 MPH Maximum
4·Spd. Manual 20 MPH 35 When Cruising Speed Has Been Reached 2.53 Axle -40 MPH Minimum, 55 MPH Maximum
4·Spd. Manual 15 MPH 25 When Cruising Speed Has Been Reached 2.92/3.42 Axle -30 MPH Minimum, 45 MPH Maximum
5·Spd. Manual 20 MPH 30 When Cruising Speed Has Been Reached 45 -35 MPH Minimum, 50 MPH Maximum
2-7
Page 25 of 87
Downloaded from www.Manualslib.com manuals search engine cluster flashes to indicate proper
operation of the front and rear turn
signal lamps.
If the indicator lamp
remains on and does not flash,
check for a defective lamp bulb.
If
the indicator fails to light when the
lever
is moved, check the fuse and
indicator bulb.
NOTE: For operation of hazard
flasher, see page 3-1, in
Section "In
Case of Emergency."
Horn
The horn on your car is actuated
by firmly pressing on the pad in the
center of the steering wheel.
As a good motorist,
~se of the
horn should be kept at a minimum.
However, acquaint yourself
as soon
as possible with this function of
your car, should it ever become
necessary to give a warning to a
pedestrian
or another motorist.
Power Steering
If the steering system power as
sist fails due to some malfunction,
or because the engine has stalled,
the vehicle can still be steered.
However, much greater effort
is re
quired, particularly in sharp turns.
Tilt Steering Wheel
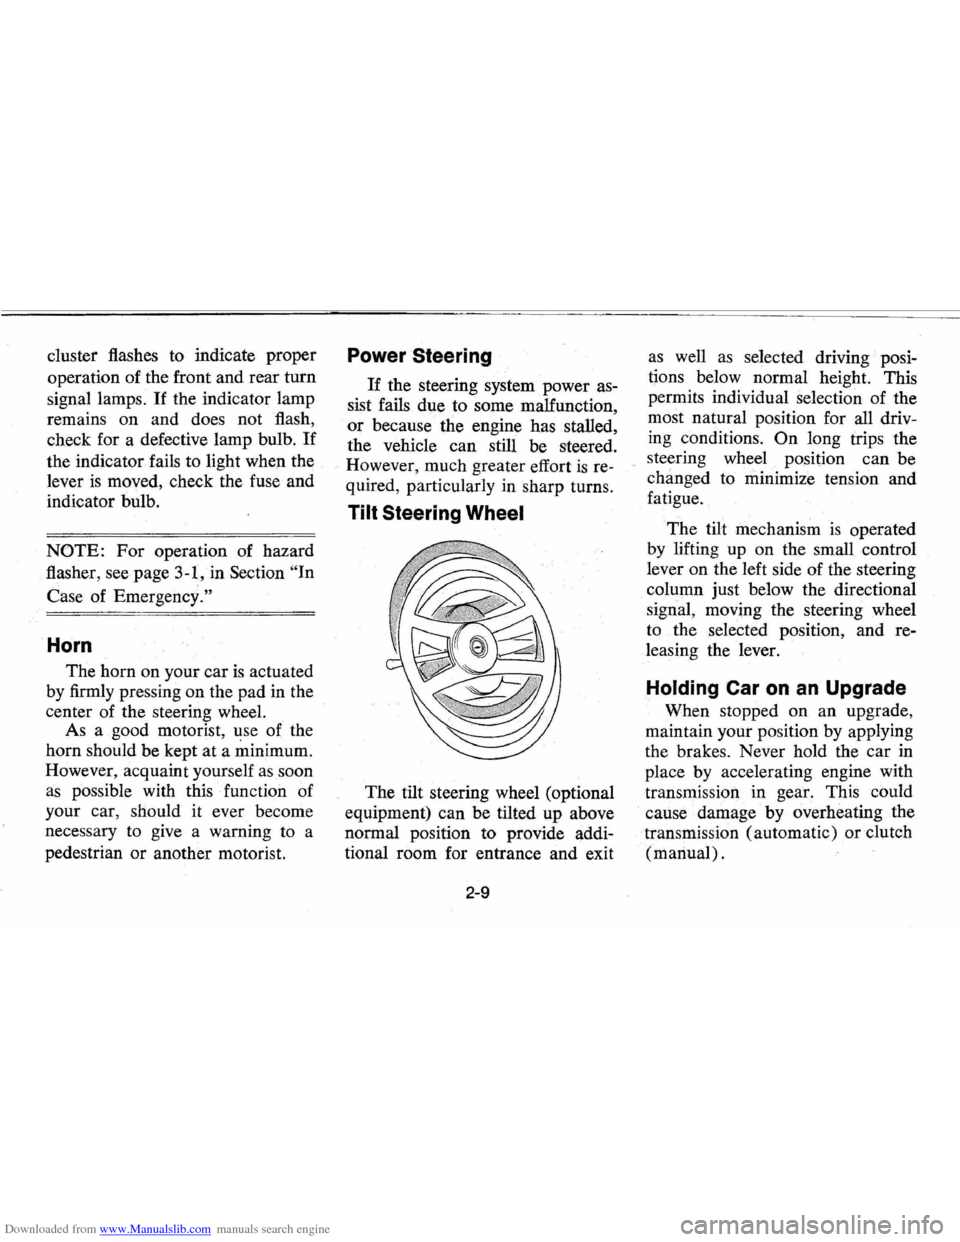
The tilt steering wheel (optional
equipment) can be tilted up above
normal position to provide addi
tional room for entrance and exit
2-9
as well as selected driving· posi
tions below normal height. This
permits individual selection of the
most natural position for
all driv
ing conditions.
On long trips the
steering wheel position can be
changed to minimize tension and
fatigue.
The tilt mechanism
is operated
by lifting up on the small control
lever on the left side of the steering
column just below the directional
signal, moving the steering wheel
to the selected position, and re
leasing the lever.
Holding Car on an Upgrade
When stopped on an upgrade,
maintain your position by applying
the brakes. Never hold the car
in
place by accelerating engine with
transmission in gear. This could
cause damage by overheating
the
. transmission (automatic) or clutch
(manual) .
Page 27 of 87
Downloaded from www.Manualslib.com manuals search engine Parking Brake
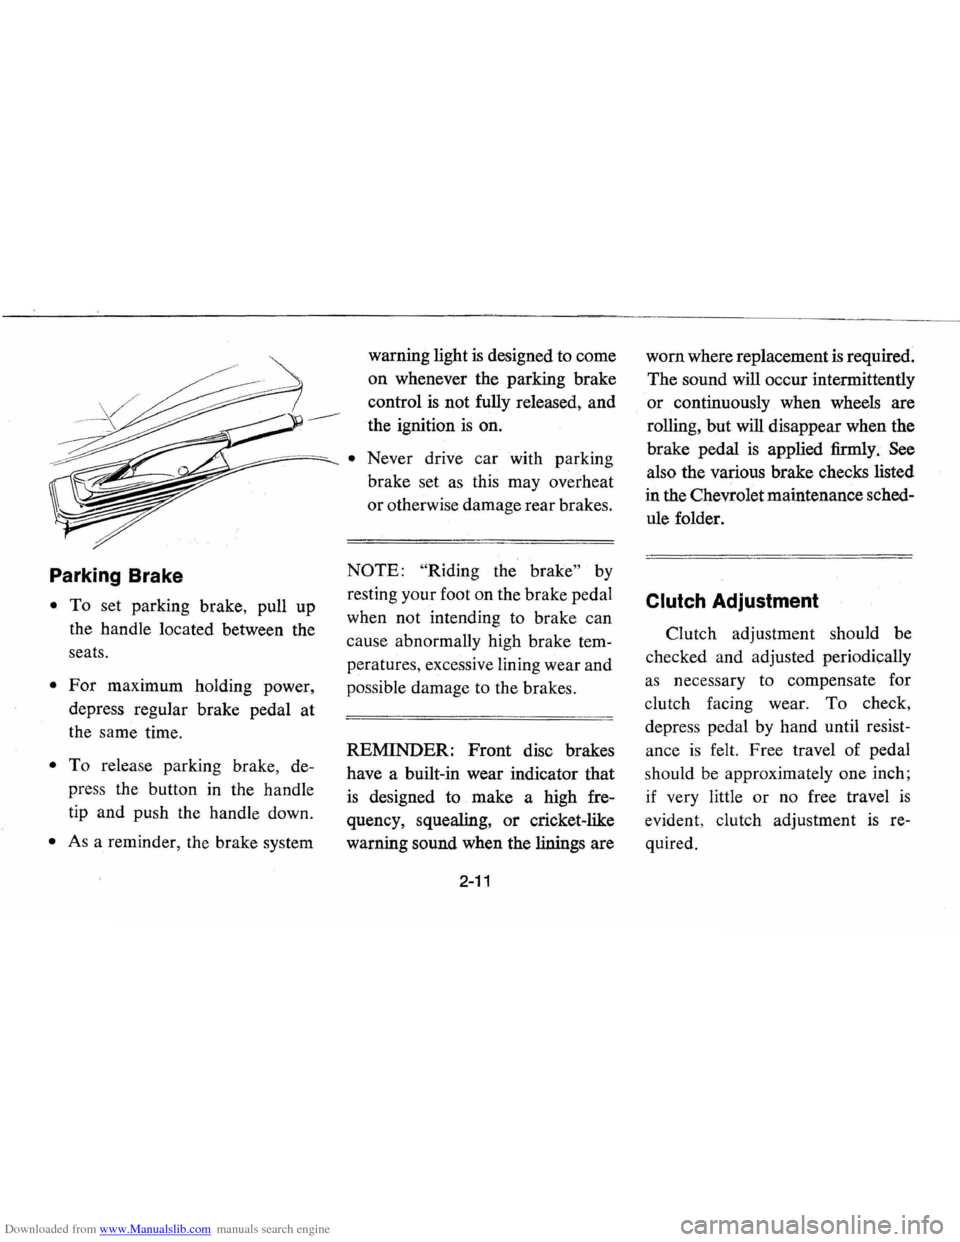
• To set parking brake, pull up
the handle located between the
seats.
• For maximum holding power,
depress regular brake pedal at
the same time.
• To release parking brake, de
press the button in the handle
tip and push the handle down.
• As a reminder, the brake system warning
light
is designed to come
on whenever the parking brake
control
is not fully released, and
the ignition ·
is on.
• Never drive car with parking
brake set
as this may overheat
or otherwise damage rear brakes.
NOTE: "Riding the brake" by
resting your foot on the brake pedal
when not intending to brake can
cause abnormally high brake tem
peratures, excessive lining wear and
possible damage to the brakes.
REMINDER:
Front disc brakes
have a built-in wear indicator that
is designed to make a high fre
quency, squealing,
or cricket-like
warning sound when the linings are
2-11
worn where replacement is required.
The sound will occur intermittently
or continuously when wheels are
rolling, but will disappear when the
brake pedal
is applied firmly. See
also the various brake checks listed
in the Chevrolet maintenance sched
ule folder.
Clutch Adjustment
Clutch adjustment should be
checked and adjusted periodically
as necessary to compensate for
clutch facing wear.
To check,
depress pedal by hand until resist
ance
is felt. Free travel of pedal
should be approximately one inch;
if very little
or no free travel is
evident , clutch adjustment is re
quired.
Page 64 of 87
Downloaded from www.Manualslib.com manuals search engine • If it feels warm, the level should
be close to the
"ADD" mark
( either slightly above
or beloW).
• If it feels hot (cannot be held
comfortably) the level should
be
between the "ADD" and
"FULL" marks.
NOTE: DO NOT OVERFILL. It
takes only one pint to raise level
from
ADD to FULL with a hot
transmission.
Automatic Transmission
Drain
Intervals
The transmission operating tem
perature resulting from the type of
driving conditions under which
your vehicle
is used is the main
consideration in establishing the
proper frequency of transmission
fluid changes.
If you do not use your vehicle
under severe conditions, change the
fluid and filter every
60,000 miles.
Refer to section 6,
"Specifications",
for required fluid quantities.
If the vehicle is usually driven
under one
or more of the follow
ing conditions-considered severe
transmission
service-change the
transmission fluid and filter every
15,000 miles.
• In heavy city traffic.
• Where the outside temperature
regularly reaches
90° F. (32°
C.) for extended periods.
• In very hilly or mountainous
areas.
• Frequent trailer pUlling.
• Commercial uses, such as taxi,
police
car or delivery service.
Manual Transmissions
Lubricant
Level
Every 6 months or 7,500 miles,
whichever occurs first, check lubri
cant level and add lubricant, if nec
essary, to
fill to . level of filler plug
hole.
5-6
• 3-Speed and 4-Speed-Use SAE
80W or SAE 80W-90 GL-5
Gear Lubricant. (For those
vehicles normally operated in
Canada, use
SAE 80W GL5
Gear Lubricant. )
Transmission Shift Linkage
(Manual and Automatic)
Every 7,500 miles or 6 months
lubricate shift linkage and
on
manual transmission floor controls
lever contacting faces with water
resistant
EP chassis lubricant which
meets
GM specification 6031 M.
Clutch Cross -Shaft -Every
30,000 miles or sooner if necessary
-Remove the plug, install a lubri
cation fitting and lubricate with
water resistant
EP Chassis Lubri
cant which meets GM Specification
6031M.