1971 CHEVROLET CAMARO air conditioning
[x] Cancel search: air conditioningPage 22 of 88
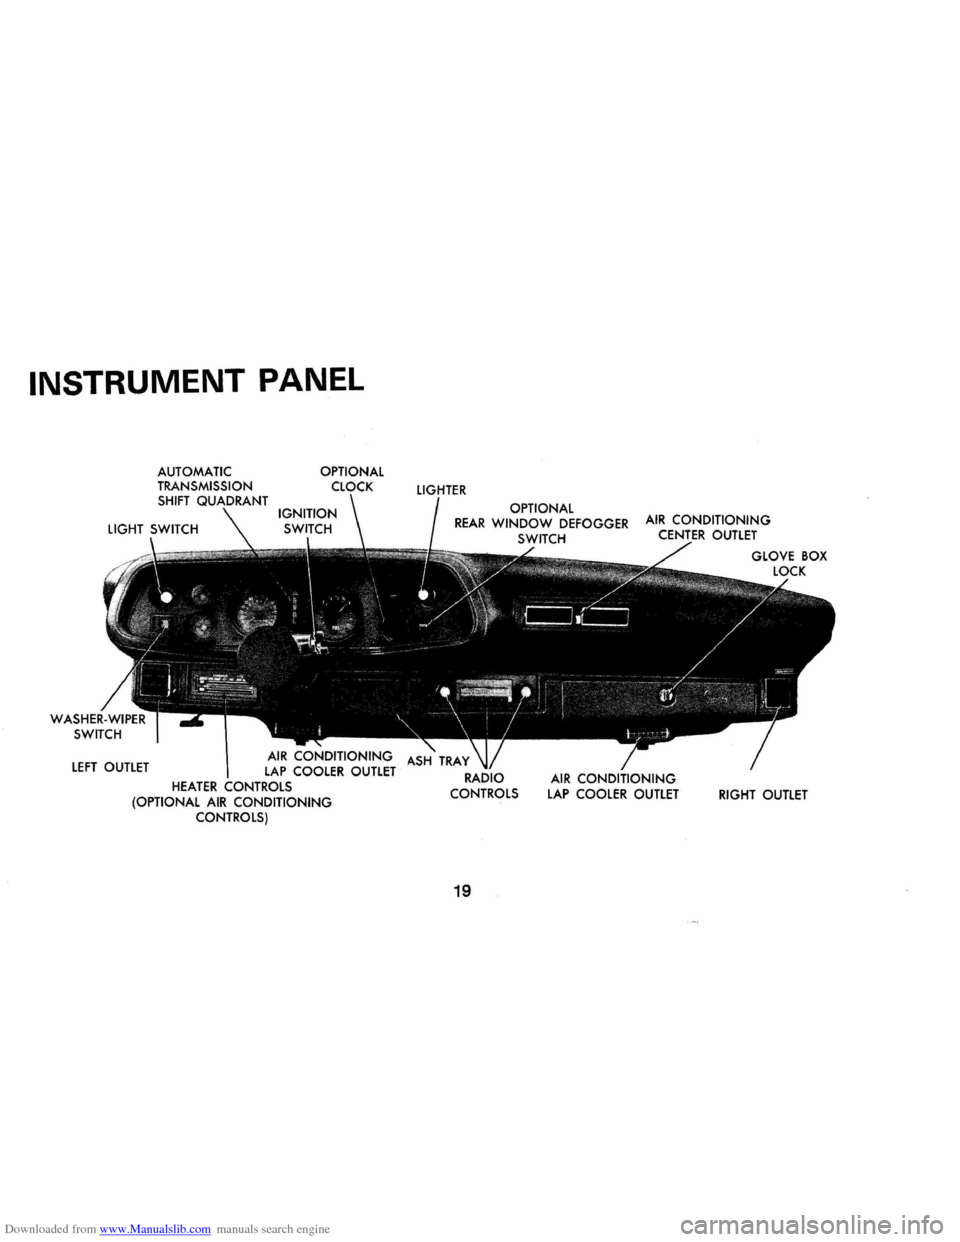
Downloaded from www.Manualslib.com manuals search engine INSTRUMENT PANEL
LEFT OUTLET
OPTIONAL
AIR CONDITIONING LAP COOLER OUTLET HEATER CONTROLS (OPTIONAL AIR CONDITIONING CONTROLS)
LIGHTER
OPTIONAL REAR WINDOW DEFOGGER SWITCH
19
AIR CONDITIONING LAP COOLER OUTLET RIGHT OUTLET
Page 27 of 88

Downloaded from www.Manualslib.com manuals search engine Clock
Reset the clock, if your car is so
equipped, by pulling out the knob
and turning the hands clockwise
if
slow, counterclockwise if fast. This
will, if the clock error
is five min
utes
or more, automatically com
pensate for time gain or lag.
Sev
eral resettings, several days apart,
may be needed to properly adjust
the clock mechanism. Have your
clock cleaned and oiled by a com
petent clock serviceman at least
every two years.
Cigarette Lighter
The accessory cigarette lighter is
located on the instrument panel
face. To operate, push it in. When
it becomes heated, it automatically
pops out ready for
use.
Windshield Wiper
and Washer
The windshield wiping system
operates at two speeds and
is de
signed to wipe clear designated areas
of the windshield under most
inclement weather conditions. The
windshield wipers work electrically
and are not affected by engine op
eration.
Push the control lever to the
right
to start the electric windshield
wiper. The two-speed electric wiper
has both a
"low" and a "high" speed
position.
Pressing the control will send a
measured amount of water or other
cleaning agent onto the windshield
and will also cause the wiper lever
to move, thus starting the wiper
motor. The wiper will then con
tinue to operate until manually
turned off at the wiper lever.
Fill the washer jar only
% full
during the winter to allow for ex
pansion if the temperature should
fall low enough to freeze the
so
lution.
• Check washer fluid level regu
larly-do it frequently when the
24
weather is bad.
• Use GM OPTIKLEEN to pre
vent freezing damage, and to
provide better cleaning.
• Do not use radiator anti-freeze in
windshield washer; it could
cause paint damage.
• In cold weather, warm the wind
shield with defrosters before
us
ing washer-to help prevent ic
ing that may seriously obscure
vision.
Air Vents
The air vents in each kick panel
admit air from the vent grille just
ahead of the windshield. Control
knobs open and close the vents .
The amount of air entering the
car through this system
is depend
ent upon vehicle speed.
Four Season Air Conditioning
equipped cars have no kick panel
vents since the vents are a part of
the air conditioning system. The
lever beside each instrument panel
Page 29 of 88
Downloaded from www.Manualslib.com manuals search engine vehicle, to clear the intake ducts
of snow.
• Keep all windows and vents
closed to reduce dust, road and
wind noise and uncomfortable
drafts.
• For most satisfactory heater op
eration and air circulation, oper
ate fan on low or medium speeds
for normal operation and high
speed for quick warm-up and
during extremely low tempera
tures.
• For adequate rear seat heating,
the area beneath the front seat
must not be blocked by carpet
ing, rags, paper
or other mate
rial and fan should operate on
high blower.
• For additional summer ventila
tion move the
AIR lever to mid
position and the
DEFROSTER
lever to DE-ICE. If greater air
flow is desired, move the FAN
lever down to operate the three-
Rear Window Defroster
To insure clear vision through
the rear window during inclement
weather, the Rear Window De
froster has become established
as a
popular accessory. This unit draws in
air from the passenger compart
ment and directs it against the back
window to remove frost or mois
ture. Its blower has a two-speed
control switch on the instrument
panel.
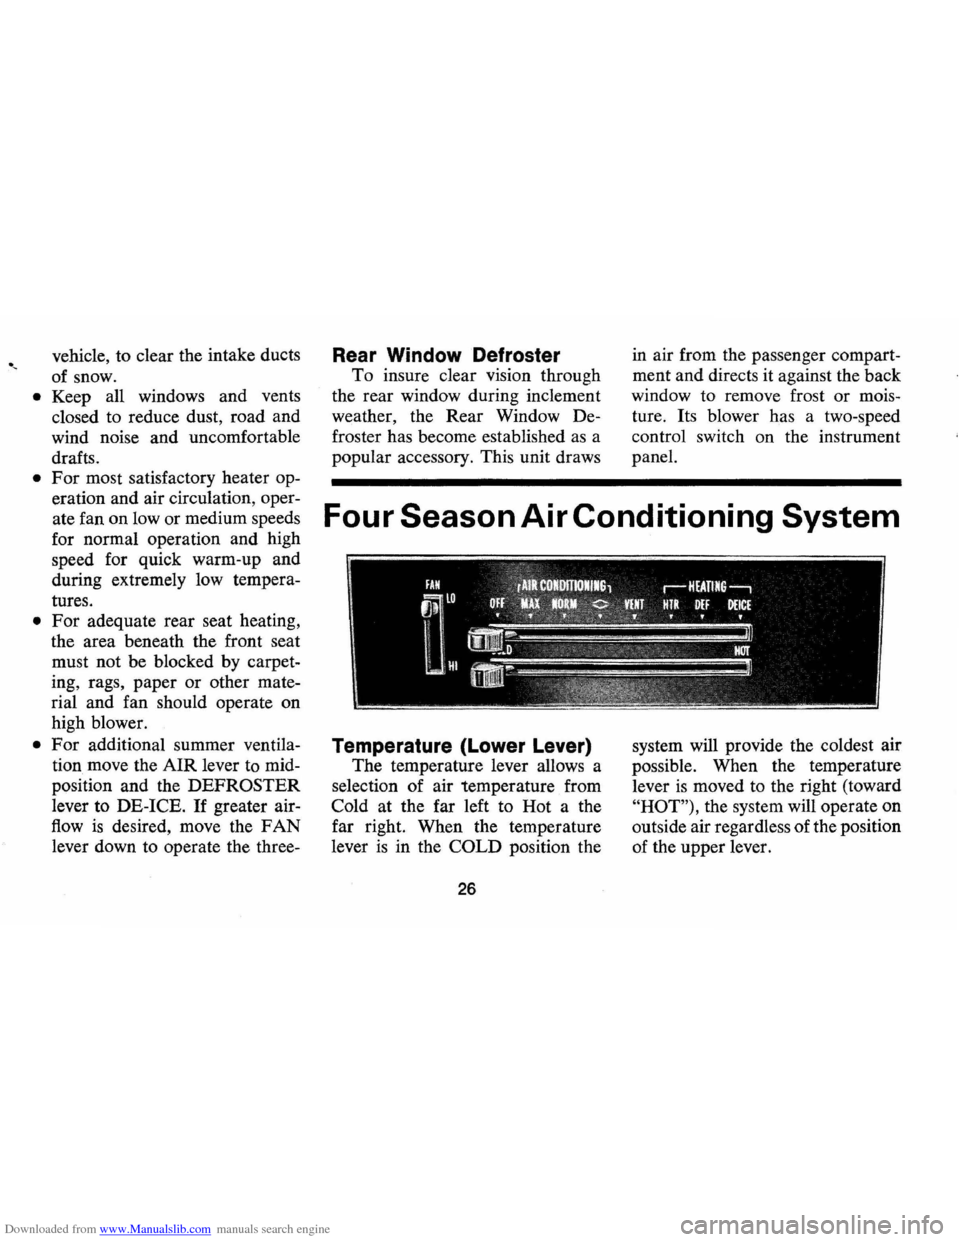
Four Season Air Conditioning System
Temperature (Lower Lever)
The temperature lever allows a
selection of air temperature from
Cold at the far left to Hot a the
far right. When the temperature
lever
is in the COLD position the
26
system will provide the coldest air
possible . When the temperature
lever
is moved to the right (toward
"HOT"), the system will operate on
outside air regardless of the position
of the upper lever.
Page 30 of 88
Downloaded from www.Manualslib.com manuals search engine "
Selector (Upper Lever)
This lever provides a selection of
systems available to handle various
heating and cooling requirements
throughout the year. The positions
of the Selector lever are separated
into four (4) major operational
groups
"Off", IIAir Conditioning",
IIVent" and IIHeating". The "Air
Conditioning" and IIHeating"
groups have several positions which
improve the effectiveness of
the
system for various demands.
Fan
The fan lever has four (4) posi
tions from Lo at the top to High at
the bottom. Blower speed
is auto
matically maintained when the
ignition switch
is in the "ON" posi
tion, regardless of the position of
the selector lever. The blower re
mains
ON with the Selector lever
in the
OFF position and the igni
tion switch
ON in order to purge moisture
from the evaporator core
and distributor ducts, thereby help
ing to prevent inadvertent flash
fogging of the windows when the
system
is turned on.
Selector Lever Operation
uOFF" -Shuts the entire system off
but blower automatically remains
operative.
uMAX"-Air from the passenger
compartment is recirculated
through the system and discharged
from the upper outlets when the
temperature lever
is in "Max." cold.
(If the liTem perature" lever is
moved warmer, the system will
automatically
go on outside air.)
The
IIMax." position is used when
maximum cooling
is required under
conditions of high temperature and
humidity.
uNORMAL" -Outside air is passed
through the system and discharged
through the
Ale outlets. This posi-
27
tion is recommended for most air
conditioning situations because of
reduced blower noise and reduction
of cigarette smoke within the
ve
hicle.
uBI-LEVEL"-Outside air is passed
through the system and discharged
from both the upper and lower out
lets. This position
is recommended
for sunny cooler weather where
warm air
is required on the feet
with cooler air above to provide
comfortable breath level. Temper
ature may be adjusted
as desired.
(<> BI-Level position)
NOTE: This position will clear
fogged windows rapidly due to the
dehumidifying effect of the cooling
coils when the outside temperature
is above 30°F.
UVENT" -Air flow and tempera
ture control are the same
as "BI
Level"
except that the compressor
Page 31 of 88
Downloaded from www.Manualslib.com manuals search engine . ~
is off. This position is provided for
cool to moderate weather when
refrigeration
is not required.
"HEATER"-Outside air is deliv
ered through the
lower outlets.
Temperature may be adjusted
as
required. This position is recom
mended for most winter driving.
"DE~FOG"-Outside air is deliv
ered from the lower outlets and the
defroster duct to provide comfort
and keep the windshield clear un
der low, fogging conditions.
Operating tip: When driving in
snow, if defog or deice
is not re
quired to keep the windshield from
fogging, it
is recommended that the
"Heater" position be used. This
keeps the windshield cold so that
snow will not stick and melt and
will provide a cleaner view.
"DE-ICE" -Outside air is deliv
ered through the defroster outlets only.
Temperature and blower
speeds
may be adjusted as required .
This position
is recommended for
conditions of severe fogging and
icing only.
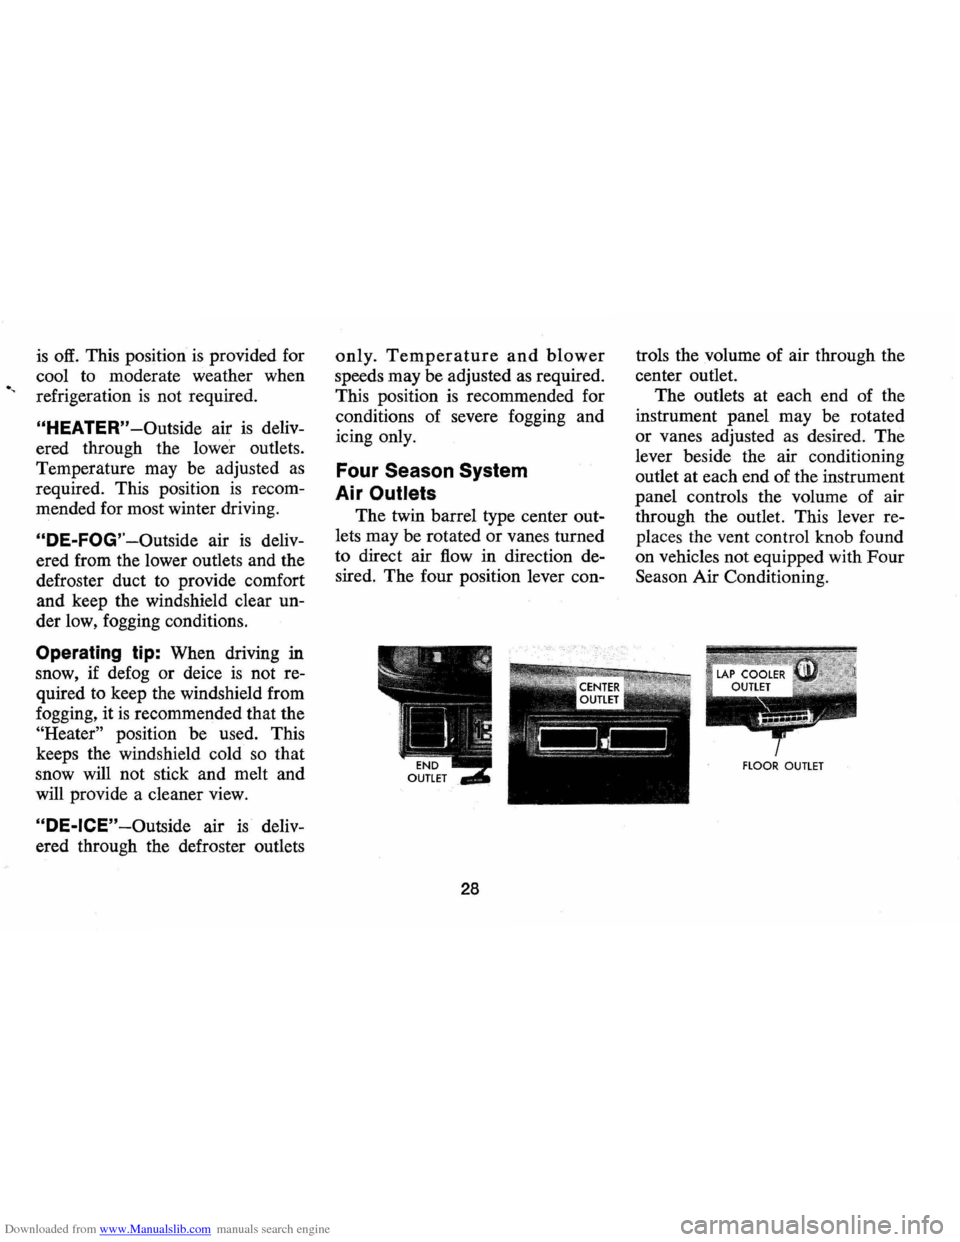
Four Season System
Air Outlets
The twin barrel type center out
lets may be rotated or vanes turned
to direct air
flow in direction de
sired. The four position lever con-
28
troIs the volume of air through the
center outlet.
The outlets at each end of the
instrument panel may be rotated
or vanes adjusted
as desired . The
lever beside the air conditioning
outlet at each end of the instrument
panel controls the volume of air
through the outlet. This lever re
places the vent control knob found
on vehicles not equipped with Four
Season Air Conditioning.
flOOR OUTLET
Page 40 of 88

Downloaded from www.Manualslib.com manuals search engine lights, turn signals, backup lamps, and hazard
warning flashers. Have someone observe operation
of each light while you activate the controls.
• Starter Safety Switch (Automatic Transmis
sion Cars)
CAUTION: Before making the following check, be sure to have a clear distance ahead and behind the car, set the parking brake and firmly apply the foot brake. Do not depress accelerator pedal. Be prepared to turn ott ignition switch immediately if engine should start.
Check starter safety switch by placing the transmis
sion in each of the driving gears while attempting to
start the engine. The starter should operate only in the
Park ("P") or Neutral ("N") positions.
• Starter Interlock (Manual Transmission Cars)
-To check a manual transmission equipped car,
depress the clutch halfway, place the transmission
in neutral, and attempt to start.
The starter should
operate only when clutch
is fully depressed.
• Transmission Shift Indicator-Check to be sure
shift indicator accurately indicates the shift posi
tion selected.
• Horn-Blow the horn occasionally to be sure that
it works.
37
• Seat Back LatcheS-Check to see that seat bac k
latches are holding by pulling forward on the seat
back top.
• Rearview Mirrors and Sun Visors-Check that
friction joints are properly adjusted so mirrors and
sun visors stay in the selected position.
• Door LatcheS-Check for positive closing, la tch
ing and locking.
• Hood Latches-Check to make sure hood closes
firmly . Check also for broken , d amaged or missing
parts which might prevent secure latching.
• Fluid LeakS-Check for fuel, water, oil or other
fluid leaks by observing the ground beneath the
vehicle after it has been parked for a while . (Water
dripping from air conditioning system after use
is
normal). If gasoline fumes are noticed at any time,
the cause should be determined
and corrected with
out delay because of the possibility of fire.
• Exhaust System-See engine exhaust gas caution
at beginning of starting and operating section of
this manual for suggested driver observations and
checks.
Page 62 of 88
Downloaded from www.Manualslib.com manuals search engine Standard Steering Gear
The steering gear is factory
filled with steering gear lubricant.
Seasonal change of this lubricant
should not be performed
and the
housing should
not be drained-no
lubrication
is required for the life
of the steering gear.
Every 36,000 miles, the gear
should be inspected for seal leak
age (actual solid
grease-not just
oily film).
If a seal is replaced or
the gear is overhauled, the gear
housing should be refilled with
Part No. 1051052 (13 oz. con
tainer)
Steering ' Gear Lubricant
which meets
GM Specification GM
4673M, or its equivalent.
NOTE: Do not use EP Chassis
Lube, meeting
GM Specification
GM 6031 M, to lubricate the gear.
DO NOT OVER-FILL the gear
housing.
Power Steering Pump
Every 6,000 miles or 4 months
Check level in pump reservoir. Fill
pump reservoir
as required with
GM Power Steering Fluid or, if
this
is not available, DEXRON®
Automatic Transmission fluid.
Oil
should be at operating tempera
ture
and wheels in straight ahead
position when checking
or filling
operation is performed to ensure
against over-filling.
Hood Latches
Every 4 months or 6,000 miles,
whichever occurs first, lubricate
hood latch assembly
and hood
hinge assembly as follows:
1. Wipe off any accumulation of
dirt
or contamination on latch
parts.
2. Apply Lubriplate
or equivalent
to latch pilot bolts
and latch
locking plate.
3. Apply light engine oil to
all
59
pivot points in release mecha
nism, as well as primary
and sec
ondary latch mechanisms.
4. Lubricate hood hinges.
5. Make hood hinge
and latch
mechanism functional check to
assure the assembly is working
correctly.
Air Conditioning
Have your Chevrolet Dealer
check your Air Conditioning sys
tem at some time during the winter
months to
be sure there has been
no loss in cooling output. During
the summer, see your Chevrolet
Dealer immediately if you suspect
the system is
not performing as it
should.
NOTE: On vehicles equipped with
a
Four Season Air Conditioning
System, the system will not operate
below ambient temperatures of
30oP. regardless of control posi
tion.
Page 69 of 88
Downloaded from www.Manualslib.com manuals search engine MAINTENANCE SCHEDULE
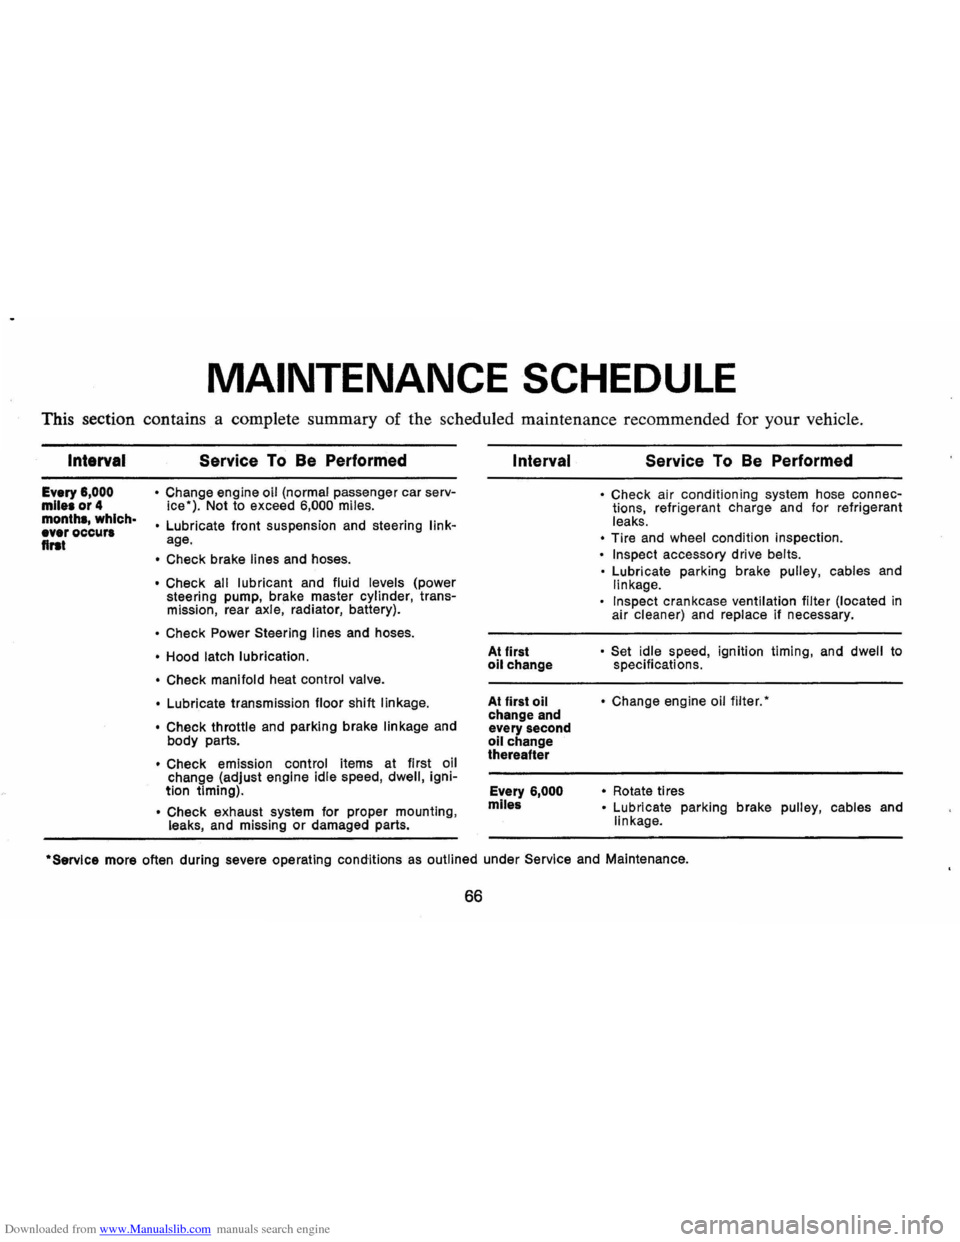
This section contains a complete summary of the scheduled maintenance recommended for your vehicle.
Intarval
Every 6,000 mile. or 4 month., which· ever occur. flrat
Service To Be Performed
• Change engine oil (normal passenger car serv
ice"). Not to exceed 6,000 miles.
•
Lubricate front suspension and steering linkage.
• Check brake lines and hoses.
• Check all lubricant and fluid levels (power
steering pump, brake master cylinder, transmission, rear axle, radiator, battery).
• Check Power Steering lines and hoses.
• Hood latch lubrication.
• Check manifold
heat control valve.
•
Lubricate transmission floor shift linkage.
• Check
throttle and parking brake linkage and
body parts.
• Check emission control items at first oil
change (adjust engine idle speed, dwell, ignition timing) .
• Check exhaust system for proper mounting , leaks, and missing or damaged parts.
Interval
At first oil change
At first
oil change and
every second
oil change
thereafter
Every
6,000
mlle&
Service To Be Performed
• Check air conditioning system hose connections, refrigerant charge and for refrigerant
leaks.
• Tire and wheel condition inspection.
• Inspect accessory drive belts.
•
Lubricate parking brake pulley, cables and linkage.
Inspect crankcase ventilation filter (located in
air cleaner) and replace if necessary.
• Set idle speed , ignition timing, and dwell to
specifications.
• Change engine oil filter."
•
Rotate ti res • Lubricate parking brake pulley, cables and
linkage .
·Servlce more often during severe operating conditions as outlined under Service and Maintenance.
66