1965 DODGE POLARA window
[x] Cancel search: windowPage 29 of 46

24
Normal Cooling (cooling with fresh air):
When the desired amount of cooling is obtained with "Max A/C ", you can continue cooling with fresh outside air for added
comfort by pushing the "A /C" bullon and adjusting the Fan Switch to change fan speed to suit occupants' requirements. If less cool
ing is desired move the Fan Switch to "low "
speed and re-adjust the Cooling Oullets for indirect cooling. For warmer air move the Temperature Control lever to the right.
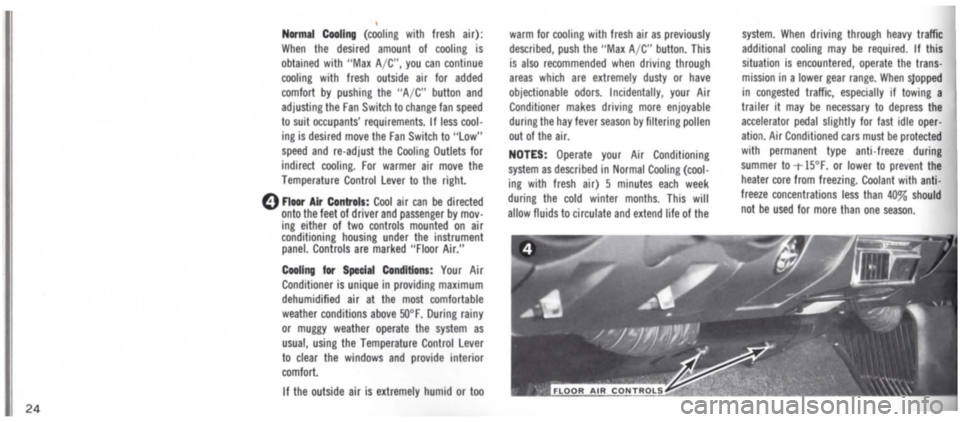
o Floor Air Controls: Cool air can be directed onto the feet of driver and passenger by moving either of two controls mounted on air conditioning housing under the instrument panel. Controls are marked "Floor Air."
Cooling for Special Conditions: Your Air Conditioner is unique in providing maximum dehumidified air at the most comfortable
weather conditions above sooF. During rainy or muggy weather operate the system as
usual, using the Temperature Control lever to clear the windows and provide interior
comfort.
If the outside air is extremely humid or too
warm for cooling with fresh air as previously
described, push the "Max A/C " bullon. This is also recommended when driving through areas which are extremely dusty or have
objectionable odors. Incidentally, your Air Conditioner makes driving more enjoyable dunng the hay fever season by filtering pollen
out of the air.
NOTES: Operate your Air Conditioning
system as described in Normal Cooling (cooling with fresh air) 5 minutes each week during the cold winter months. This will
allow fluids to circulate and extend life of the
system. When driving through heavy traffic additional cooling may be required. If this
situation is encountered, operate the transmission in a lower gear range. When slopped
in congested traffic, especially if towing a trailer it may be necessary to depress the accelerator pedal slighlly for fast idle oper
ation. Air Conditioned cars must be protected
with permanent type anti· freeze during
summer to 1-15°F. or lower to prevent the heater core from freezing. Coolant with antifreeze concentrations less than 40% should
not be used for mOre than one season.
Page 30 of 46

o Heater Operation
Make sure the air intake, located outside the car below the windshield is free of snow or
other obstructions and the Warm Weather
Ventilation knobs are pushed all the way in. Best heating is achieved. with the windows
closed.
When the engine temperature gauge on the
instrument panel reaches the first mark, move the Temperature Control lever to far right (Warm), push the "Heat" button and
move the Fan Switch to either "Medium" or
"High" speed. When the interior is warm,
re·adjust the Temperature Control lever and Fan Switch as required to suit occupants'
wishes. During heating, some air is directed
onto the windshield to prevent fogging.
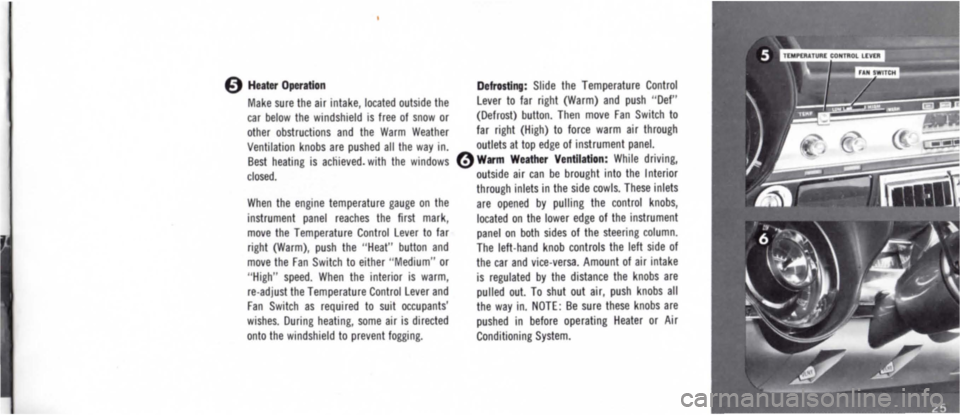
Defrosting: Slide the Temperature Control
lever to far right (Warm) and push "Def" (Defrost) button. Then move Fan Switch to far right (High) to force warm air through
outlets at top edge of instrument panel.
<:) Warm Weather Ventilation: While driving, outside air can be brought into the Interior
through inlets in the side cowls. These inlets are opened by pulling the control knobs,
located on the lower edge of the instrument panel on both sides of the steering column.
The left·hand knob controls the left side of
the car and vice· versa. Amount of air intake
is regulated by the distance the knobs are pulled out. To shut out air, push knobs all the way in. NOTE: Be sure these knobs are
pushed in before operating Heater or Air
Conditioning System.
Page 32 of 46

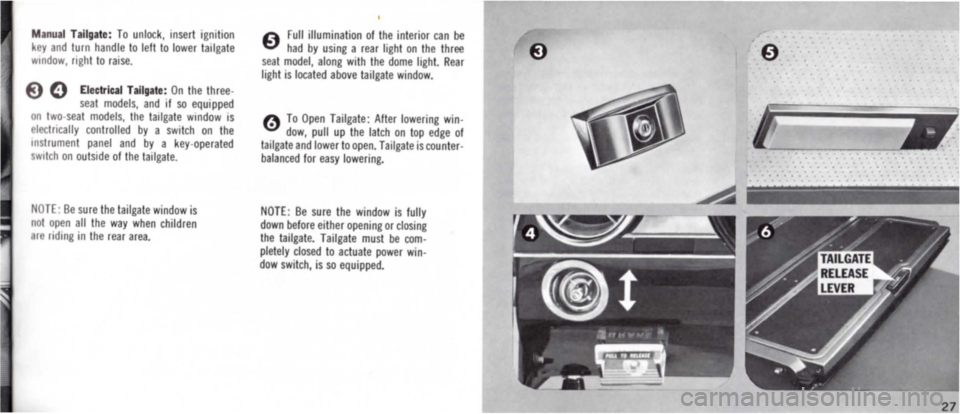
Manual Tailgate : To unlock, Insert ignition key and turn handle to left to lower tailgate window, nght to raise.
E) 0 Electrical Tailgate: On the three-seat models, and If so equipped on two seat models, the tailgate window IS electncally controlled by a switch on the mstrument panel and by a key·operated sWitch on outside of the tailgate.
NOTE: Be sure the tailgate window is not open all the way when children r ndmg in the rear area.
A Full illumination of the interior can be .::1 had by using a rear light on the three seat model, along with the dome light. Rear light is located above tailgate window.
o To Open Tailgate: After lowering window, pull up the latch on top edge of tailgate and lower to open. Tailgate is counterbalanced for easy lowering.
NOTE: Be sure the window is fully down before either opening or closing the tailgate. Tailgate must be completely closed to actuate power window switch, is so equipped.
--------------
2 7
Page 34 of 46

CONVERTmLE TOP . . . OPERATION
AND MAINTENANCE
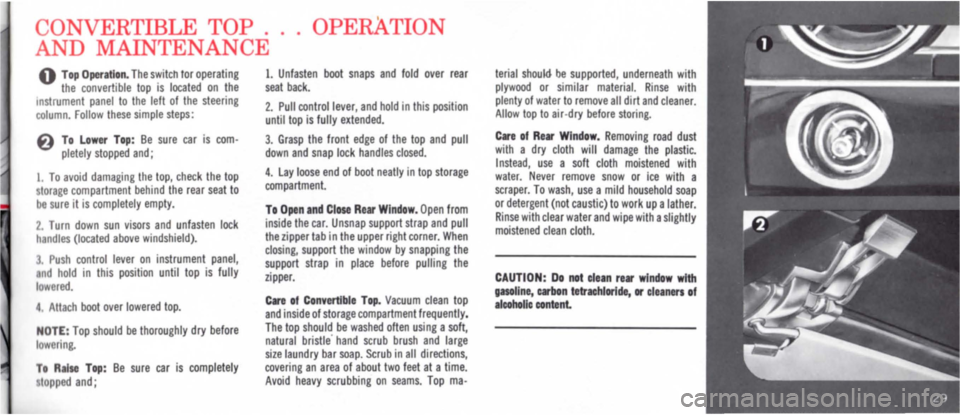
o Top Operation. The switch lor operating the convertible top is located on the Instrument panel to the left of the steering column. Follow these simple steps:
6 To Lower Top: Be sure car is com· pletely stopped and;
1. To avoid damaging the top, check the top storage compartment behind the rear seat to be sure it is completely empty.
2. Turn down sun visors and unfasten lock handles (located above windshield).
3. Push control lever on instrument panel, nd hold in this position until top is fully lowered.
4 .
Attach boot over lowered top.
NOTE: Top should be thoroughly dry before lowering.
To R.lse Top: Be sure car is completely topped and;
1. Unfasten boot snaps and fold over rear seat back.
2. Pull control lever, and hold in this position until top is fully extended.
3. Grasp the front edge of the top and pull down and snap lock handles closed.
4. Lay loose end of boot neatly in top storage compartment.
To Open and Close Rear Window. Open from inside the car. Unsnap support strap and pull the zipper tab in the upper right corner. When closing, support the window by snapping the support strap in place before pulling the zipper.
Care of Convertible Top. Vacuum clean top and inside of storage compartment frequently. The top should be washed otten using a soft, natural bristle' hand scrub brush and large size laundry bar soap. Scrub in all directions, covering an area of about two feet at a time. Avoid heavy scrubbing on seams. Top mao
terial should be supported, underneath with plywood or similar material. Rinse with plenty of water to remove all dirt and cleaner. Allow top to air-dry before storing.
Care of Rear Window. Removing road dust with a dry cloth will damage the plastic. Instead, use a soft cloth moistened with water. Never remove snow or ice with a scraper. To wash, use a mild household soap or detergent (not caustic) to work up a lather. Rinse with clear water and wipe with a slightly moistened clean cloth.
CAUTION: Do not clean rear window with gasoline, carbon tetrachloride, or cleaners of lcoholic content.
Page 37 of 46

32
APPEARANCE CARE
OutsIde. Wiping off dust or dirt with a dry
cloth or using a combination cleaner and polish without first washing the car may
scratch the paint finish.
WASH your car often to prevent road dirt,
salt, chemicals and other matter from dam
aging finish. flood the painted surfaces
with cold water to loosen surface dirt and prevent scratching. Use a MoPar Wash Mit,
soft brush, sponge or cloth, and dry com
pletely with a clean towel or damp chamois.
MoPar Car Wash Liquid added to water will help remove stubborn dirt and road film.
Cleaning windows and windshield with MoPar
Bug Remover is recommended for remov
ing bug residue from the grille area. I n hot weather, wash the car in as cool and shady
a spot as you can find.
A vinyl-covered top should be washed often,
using a sott, natural bristle hand scrub brush and large size laundry bar soap. Scrub in all
directions, covering an area of about two feet
at a time. Rinse with plenty of water to
remove all dirt and suds. for cleaning con
vertible tops, see page 29.
BRIGHT METAL (chrome, stainless steel and anodized aluminum) should be washed
with special care. Using abrasive powders or
steel wool may scratch the finish and qn
anodized aluminum may remove the protective coating and cause discoloration. To
safely and effectively restore sparkle, use
MoPar Chrome Cleaner and Polish (with
silicones). To prevent the harmful effects of salt and other road chemicals in winter, a
coating of MoPar Auto Wax or Super Glaze
is recommended.
If desired, you may polish your car imme
diately by using non·abrasive MoPar Auto
mobile Polish. Before using any other type
of cleaner or polish, be sure to let enamel age
and harden for at least three months. The finish may then be cleaned and polished with
most any cleaner and polish you prefer
according to directions on the container. In
hot weather, polish the car in the shade.
TIRE CARE-Wash tires with clear water
and a sponge. Use MoPar Tar and Road Oil
Remover to remove gummy substances, such
as tar, asphalt, oil or undercoating materials from the car finish and tires. When cleaning
white side walls spray on MoPar White Side
Wall Tire Cleaner and just rinse away the
dirt. Use a brush or steel wool on heavily
scuffed areas.
FABRtC UPHOLSTERY should be brushed
or vacuumed regularly. Fabric can be cleaned
with MoPar Spot Remover and Fabric Cleaner or mild soap. For spots or stains, try cold
water, then warm water. Follow with MoPar Spot Remover and Fabric Cleaner. CAUTION:
If
you use a volatile· type cleaner to remove
spots from foam rubber cushions, DO NOT
SATURATE CUSHIONS WIT H CLEANING
SOL VENT . • . instead wet a cloth with
cleaner, wring it almost dry and rub outward
from the center of the spot GASOLINE IS
DANGEROUS -DO NOT USE AS A
CLEANING AGENT-it may ignite with brisk rubbing.
VINYL PLASTIC OR LEATHER UPHOL· STERY should be cleaned with MoPar
Multi-Purpose Cleaner or thick mild soap suds in lukewarm water. Apply wet sponge
or clean cloth and wipe off with damp cloth.
Then dry the surface. DO NOT USE volatile
cleaner, or solvents on vinyl or leather upholstery.
HEADLINING (ceiling). It is recommended
that MoPar Vinyl Cleaner with 0-5 additive be used to clean vinyl headlinings. Use
MoPar Upholstery Cleaner for cloth and per
forated hardboard headlinings.
CARPETING should be cleaned regularly
with vacuum or whisk broom. Remove stains from carpeting with MoPar Spot and fabric
Cleaner or any dependable carpet cleaner.
Wash rubber composition carpets or mat s
with a small mixture of Car Wash Liquid,
Vinyl Cleaner or soapy water.