1964 CHEVROLET CORVETTE steering
[x] Cancel search: steeringPage 12 of 52
CLUTCH AND STEERING ADJUSTMENTS-Your Chevrolet deal!!! '?I.n make these 'adjustments for YQu: • A linkage adjustment to reduce clutch pedal travel to permit .fast release and more rapid gear shifting; • An adjustment to move the steering wheel forward or rearward; _ A linkage IIdjustment to permit
"faster" steering
response.
TRAILERS and their EFFECT on CAR OPERATION
The Corvette is designed primaril y (or passenge r
co nveyance . H owever , it is well known that many owners do pull trailers and have experi e nced very
sa tisfacLOry serv ice.
When a trailer is attached to a car, the car becomes
not only a l oad-carrying vehicle, but a load-pulling vehicle . The d e m a n ds of this type of operation are
very different from those (or which t h e automobile is pri ma rily designed and may present probl ems, such
as spring and tire loading, braking, coo ling, lighting, and steering. Howeve r, careful driving practices will
better s atisfy the requirements of trailer hauling.
If in the opinion of the manufacturer a part or com ponent of a motor vehicle has been advers ely affected
by misuse of the vehicle with trailer loads, such part or
com
ponent will not be covered by the manufacturers warranty .
The size o f and equipment for trailers, including
su ch ite ms as hitc hes and safe t y ch a ins, brakes, ligllls, pO\ve r- wei ght ratios a n d over-all length, are gen erally
su bject to safet y regulations in all states, and i t is the responsibility o f the u ser to m a ke certain that h e is in full compliance with th e regulations of the states
in which h e plans to opera te with a traile r and of t h e Interstate Commerce Commission, i f applicable,
before doing so . Furthe r , when opera tin g a car with a traile r attached, the drive r must realize tha t the performance, steering characte ri stics , a n d brakin g distance of his ca r h ave been altered , and that h e mlls t exe r c ise greater caution t o safe ly handle his
ca r and trailer.
Page 14 of 52
SPEEDOMETER
AND
ODOMETER
..
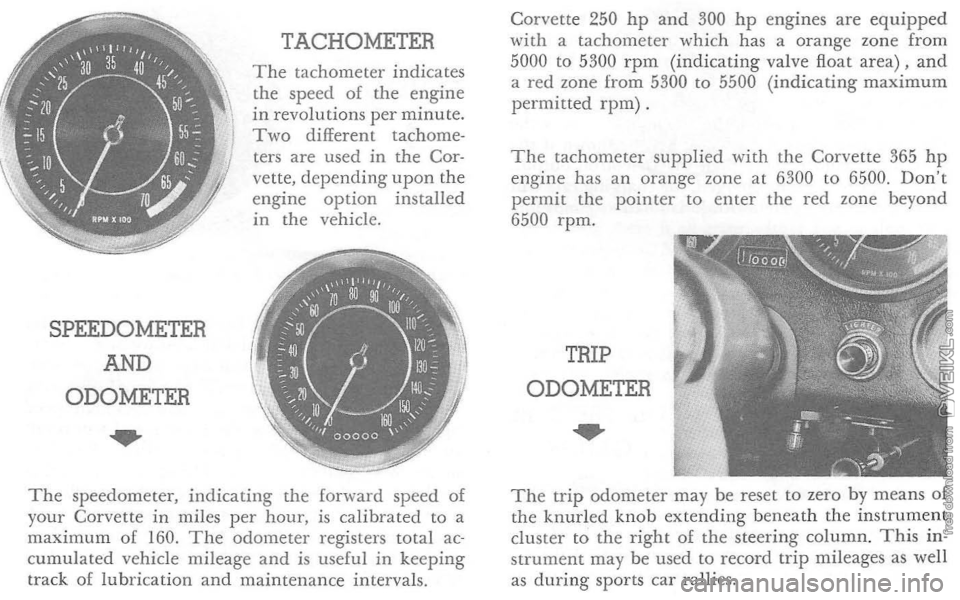
TACHOMETER
The tachometer indicates
the speed of the engine in revolutions per minute. Two different tachometers are used in the Cor
vette, depending upon the engine option installed
in the vehicle.
The speedometer, indicating the forward speed of
your Corvette in miles per hour, is calibrated to a
maximum of 160. The odometer registers total accumulated vehicle mileage and is useful in keeping
track of lubrication and maintenance intervals. Corvette
250
hp and 300 hp engines are equipped with a tachometer which has a orange zone from
5000 to 5300 rpm (indicating valve float area) , and a red zone from 5300 to 5500 (indicating maximum permitted rpm) .
The tachometer supplied with the Corvette 365 hp engine has an orange zone at 6300 to 6500. Don't permit the pointer to enter the red zone beyond
6500 rpm.
TRIP
ODOMETER
The trip odometer may be reset to zero by means of
the knurled knob extending beneath the instrument
cluster to the right of the steering column.
This in
strument may be used to record trip mileages as well as during sports car rallies.
Page 19 of 52
HEADLIGHT
BEAM •
SWITCH
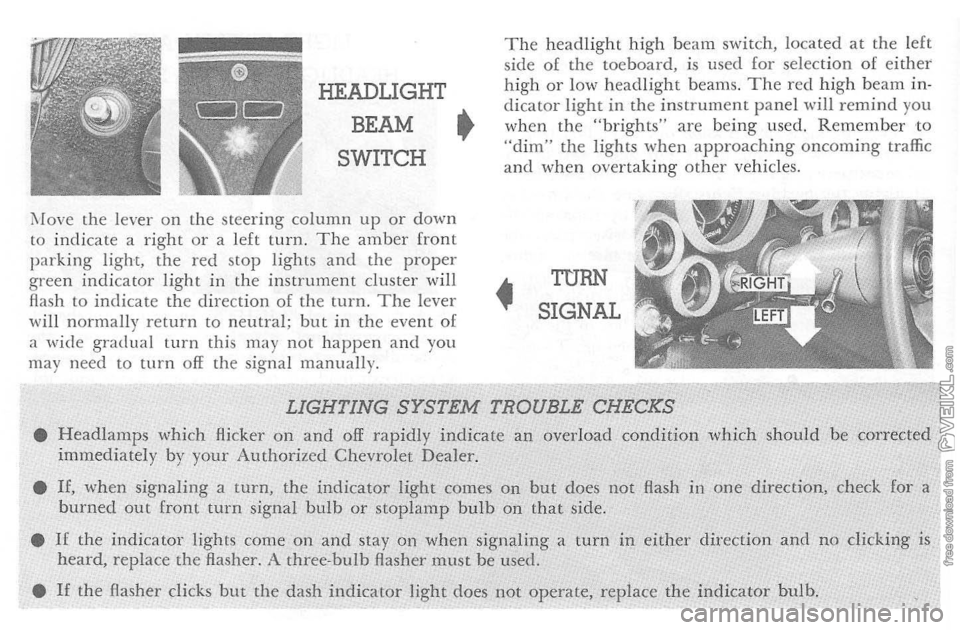
i\fove the lever on t h e steering column up or down to indicate a right o r a left turn. The amber front parking light, the red stop lights and the proper green indicator light in the instrument cluster will
flash to indicate the d irection of the turn. The lever
wi ll normally return to neutral; but in the event of
a wide gradual turn this may not happen and you
may nee d to turn off the signa l manually.
The headlight high beam switch, located at the left
side of the toeboard. is used for selection of either high or low headlight beams. The red high beam indicator light in the instrument p a nel will remind you when the "brights" are being used. Remember to "dim" the lights when approaching oncoming traffic and when overtaking other vehicles .
•
TURN
SIGNAL
LIGHTING SYSTEM TROUBLE CHECKS • Headlamps which Hickel' on and off rapidly indicate an overload condition which should be corrected immediately by your Authorized Chevrolet Dealer.
•
If, when signaling a turn, the indicator light comes on but does not Hash in one direction, check for a burned out front turn signal bulb or stoplamp bulb on that side.
•
If the indicator lights come on and stay on when signaling a turn in either direction and no clicking is heard, replace the flasher. A three-bulb Aasher must be used.
•
If the Hasher clicks but the dash indicator light does not operate, replace the indicator bulb.
Page 20 of 52
HOOD
RELEASE •
The brakes usually adjust themselves as necessary. The optional heavy duty metallic brakes adjust on forward stops, others adjust on reverse stops. Should
brake pedal travel become excessive, drive the vehicle
back ward
and forward several times applying the
brakes to stop. Pedal travel should return to normal after several stops. To apply the parking brake, pull straight out on the T-shaped handle. To release, turn the handle slightly and push in. The red "BRAKE" warning light in the instrument cluster will remain on when the brake is applied and the ignition key is on. POWER BRAKES-Optional power brakes make use of engine vacuum to help you bring your car to a stop with much less braking effort than needed with regular brakes. Should the engine stall. a vacuum
reserve supplies three power assisted stops, after
which additional foot pressure will be needed for
brake response.
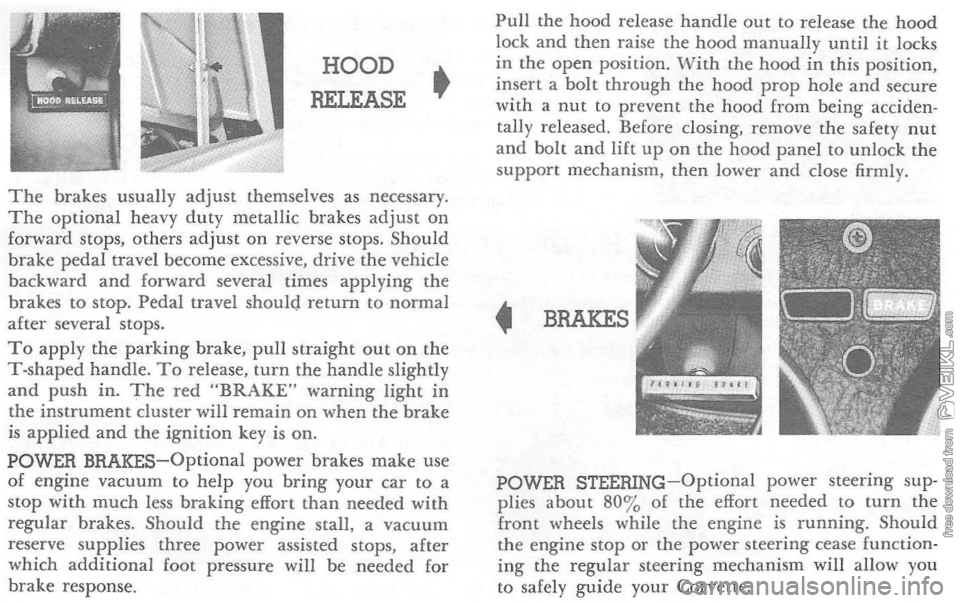
Pull the hood release handle out to release the hood lock and then raise the hood manually until it locks
in the open position . With the hood in this position, insert a bolt through the hood prop hole and secure
with a nut to prevent the hood from being acciden
tally released. Before closing, remove the safety nut
and bolt and lift up on the hood panel to unlock the
support mechanism . then lower and close firmly.
• BRAKES
POWER STEERING-Optional power steering sup
plies about 80 % of the effort needed to turn the front wheels while the engine is running. Should the engine stop or the power steering cease function ing the regular steering mechanism will allow you
to safely guide your Corvette.
Page 21 of 52
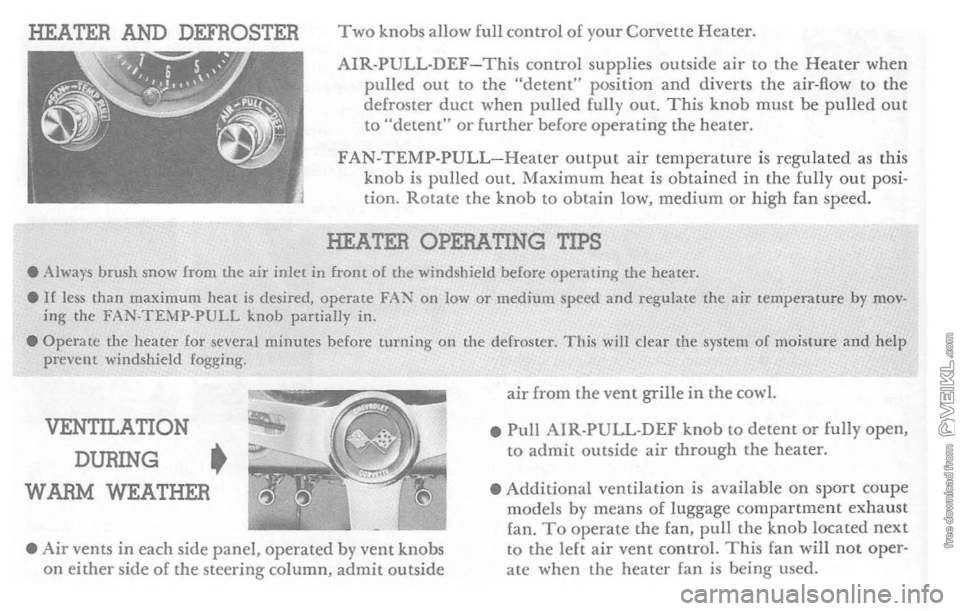
HEATER AND DEFROSTER Two knobs allow full control of your Corvette Heater.
AIR·PULL-DEF-This control supplies outside air to the Heater when pulled out to the "detent" position and diverts the air-flow to the defroster duct when pulled fully out. This knob must be pulled out to "detent" or further before operating the healer.
FAN-TEMP-PULL-Heater output air temperature is regulated as this knob is pulled out. Maximum heat is obtained in the fully out posi
tion . Rotate the knob to obtain low, medium or high fan speed.
HEATER OPERATING TIPS
• Always brush snow from the air inlet in front of the windshield before operating the heater. elf less than maximum heat is desired, operate FA~ on low or medium speed and regulate the air temperature by moving the FAN·TEMP·PULL knob partially in. • Operate the heater for several minutes before turning on the defroster. This will clear the system of moisture and help
prevent windshield fogging.
VENTILATION
DURING •
WARM WEATHER
•
Air vents in each side panel, operated by vent knobs
on either side of the steering column, admit outside
air from the vent grille in the cowl.
•
Pull AIR·PULL-DEF knob lO detent or fully open, to admit outside air through the heater.
• Additional ventilation
is available on sport coupe
models by means of luggage compartment exhaust fan. To operate the fan , pull the knob located next to the left air vent control. This fan will not oper
ate when the heater fan is being used.
Page 38 of 52

Parking Brake Cables and Linkage -Every 6,000 miles-Apply lubricant specified in Note I, page 39.
STEERING GEAR
Every 36,000
miles-Check lubricant level as follows: l. Remove the forward and the outboard cover attaching screws. 2. Inject steering gear lubricant into the forward
cover attaching screw hole until
lubricant begins
to come out of the outboard screw hole. 3. Replace both screws.
POWER STEERING PUMP
Check fluid level
in pump reservoir every 6,000 miles
or 6 months. Fill as required with Automatic Trans
mission fluid "Type A" with AQ-ATF-A mark. Oil should be at operating temperature and wheels in straight ahead position when checking or filling
operation is performed to ensure against overfilling.
FRONT SUSPENSION
Every 6,000 miles
or 6
months, lubrica te 4 fittings (2 fittings on each side), with lubricant specified in Note I, page 39. I
STEERING LINKAGE
Ev ery 6,000 miles or 6 months-lubricate fittings
shown below with lubricant specified in Note I ,
page 39.
Manual-Fitting at each tie rod end and at relay rod (5 fittings) .
Power
-Fitting at each tie rod end and at power
steering valve adapter and cylinder (6 fittings).
Page 47 of 52
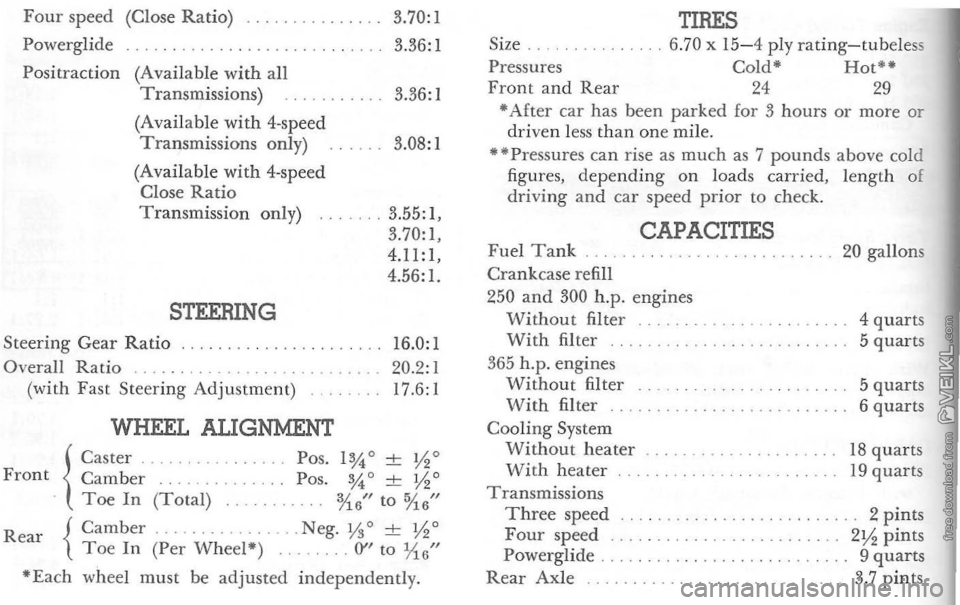
Four speed (Close Ratio)
Powerglide Positraction (Available
with all
Transmissions)
(Available
with 4-speed
Transmissions only)
(Available
with 4- speed
Close Ratio Transmission only)
STEERING
Steering Gear Ratio Overall Ratio (with Fast Steering Adjustment)
WHEEL ALIGNMENT
3.70:1
3.36:1
3.36:1
3.08:1
3.55:1,
3.70:1,
4.11:1, 4.56:1.
16.0:1
20.2:1 17.6: I
{ Caster
.
Front Camber
Toe In (Total)
Rear
{Camber. . . . Toe In (Per Wheel")
Pos. 1%0 ± y.o Pas. %' ± y.' %6" to %6" . Neg. y.0 ± y.o (y'to JAG'" "Each whee l must be adjusted independently . Size
Pressures
Front and Rear
TIRES 6.70 x 15-4 ply rating-tubeless Cold" Hot" 24 29 • After car has been parked for 3 hours or mOTe or driven less than one mile. ··Pressures can rise as much as 7 pounds above cold
figures, depending on loads carried, length of
driving and car speed prior to check.
Fuel Tank Crankcase refill
CAPACITIES
250 and 300 h.p. engines Without filter With filter
365 h.p_ engines Without filter With filter Cooling System Without heater With heater Transmissions Three speed Four speed
Powerglide
Rear Axle
20 gallons
4
quarts 5 quarts
5 quarts 6 quarts
18 quarts 19 quarts
2 pints 2Y. pints 9 quarts 3.7 pints
Page 49 of 52
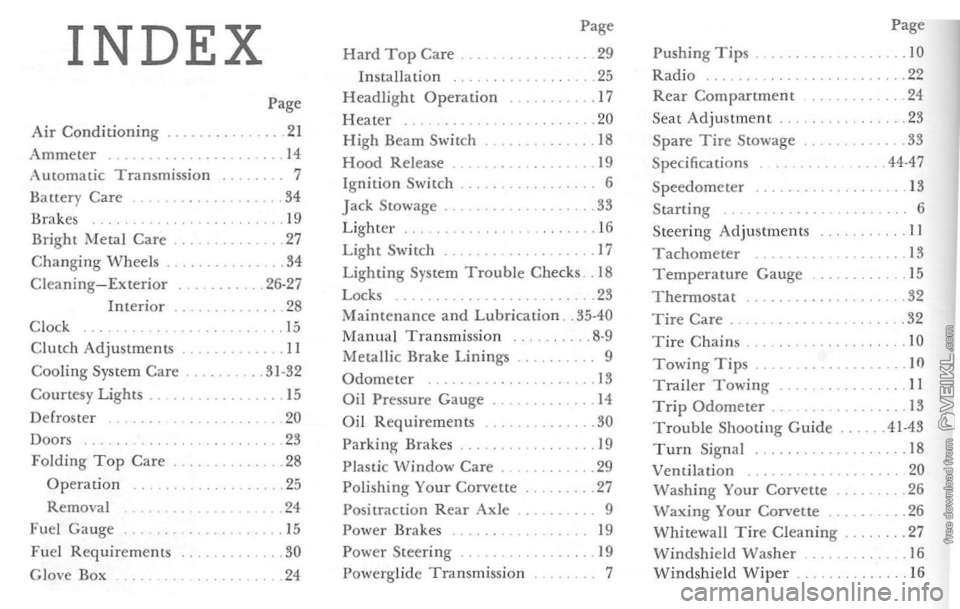
INDEX Page
Page Hard Top Care
. 29 Pushing Tips. .10 Installation .25 Radio .22
Headlight Operation .17 Rear Compartment 24
Page
Heater .20
Seat
Adjustment .23
Air
Conditioning . .21 High Beam Switch .... 18 Spare Tire Stowage .
33
Ammeter 14 Hood Release . 19 Specificat ions .44-47 Automatic Transmission 7
Ignition Switch . 6 Speedometer 13
Batter y Care .. 34
Jack Stowage . .... 33 Starting 6 Brakes . 19
Lighter 16 Steering Adjustments II Bright Metal Care . .... 27 Light Switch . .. 17 Tachometer .13 Changing
Wheels .34 Lighting System Trouble Checks. 18 Temperature Gauge . 15 Cleaning-Exterior .26-27 Locks . .... 23 T h ermostac .32 Interior
.28 Maintenance and Lubrication . .
35-40 Tire Care .
32
C l ock . 15
Manual Transmission .8-9 10 Tire Chains Cililch Adjustments . .... 11 Metallic Brake Linings 9
. . 10 Towing Tips . Cooling System Care . . 31-32 Odometer 13 Trailer Towing II Courtesy Lights. ... 15 Oil Pressure Gauge. . .. 14 Trip Odometer . .13 D e f
roster
20 Oil Requirements .... 30 Troubl e Shooting Guide .41·43
Doors ... 23 Parking Brakes 19 Turn Signal .18 Folding Top Care .... 28
Plastic \oVindow Care . .. 29 Ventilation 20 Operation ... 25 Polishing Your Corvette . .27 Washing Your Corvette .
26
Removal ... 24 Positraction Rear Axle. Waxing Your Corvette .26
Fuel Gauge ... 15 Power Brakes 19 Whitewall Tire Cleaning .27
Fuel Requirements . 30 Power
Steering . . 19 Windshield Washer .
. 16 G love Box
.24 Powerglide Transmission
7 Windshield Wiper 16