1964 CHEVROLET CORVETTE ignition
[x] Cancel search: ignitionPage 7 of 52
Starting the Engine
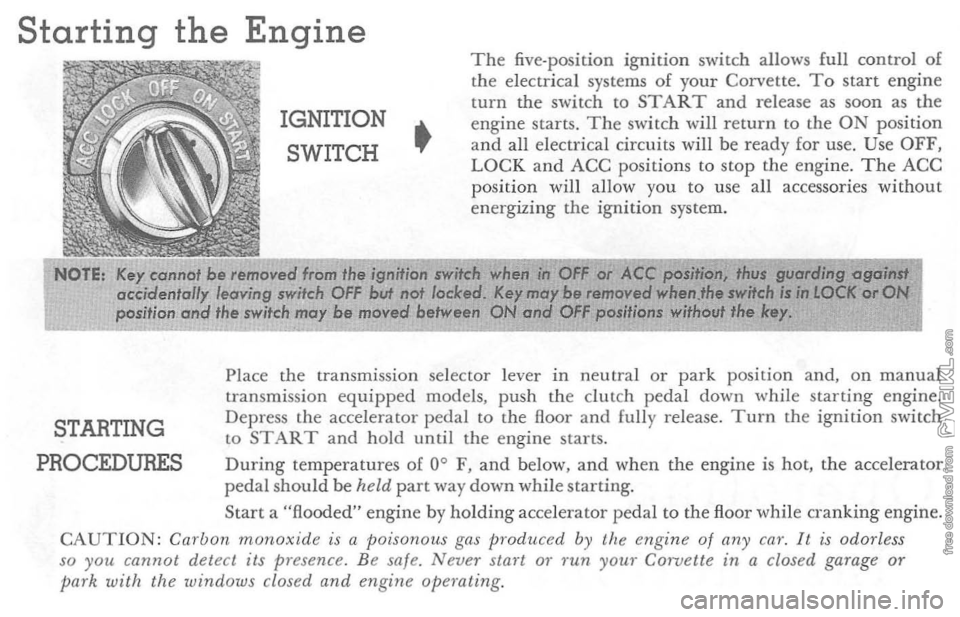
IGNITION SWITCH
•
The five-position ignition switch allows full control of the electrical systems of your Corvette. To start engine turn the switch to START and release as soon as the engine starts. The switch will r eturn to the ON position and all electrical circuits will be ready for use. Use OFF, LOCK and ACC positio ns to stop the engi ne. The ACC position will anow you to use all accessories without e n ergizi ng the ignition system.
NOTE, /(ey cannot
be ,emoved from the ignition ..... itch . ';f;;;.#fi';;'..;;a.;:" i;h~'i4i;C't:;o:N:' accidentally leaving IWifeh OFF but IlOl ladeed. /(fl' 111(" b. nollllOVed 11 position and the switch may be moved between
STARTING
PROCEDURES
Place the transmission selector lever in neutral or park position and, on manual transmission equipped models, push the clutch pedal down while starting engine.
Depress the accelerator pedal to the floor and fully release. Turn the ignition switch to START and hold until the engine starts. During temperatures of 0 ° F, and below, and when the engine is hot, the acce lerator pedal should be held part way down while starting. Start a "flooded" engine by holding accelerator pedal to the floor while o'anking engine. CAUTION: Carbon monoxide is a poisonous gas produced by the engine of any ca?'. It is odorless
so you cannot detect its presence. B e safe. Never Sial"t or run YOW" C01"Velte in a closed garage or park with the windows closed and engine operating.
Page 11 of 52
10
Pushing and Towing Tips
PUSHING CAR TO START
Should it ever beco me necessary to start the engine by
pu shing the car (towing to start is not recommended as car being towed may accelerate into tow car), pro
ceed as fo llows: Turn off all e lect rical loads su ch as radio, heater
and, if possible, lights until the engine st arts.
MANUAL TRANSMISSION - T
urn ignition switch
to "on." Place shift leve r in high (3rd on 3-spee d
transmissions, 4th on four-speed) and depress clutch. When car reaches 25-30 miles per hour, slowly re
l ease clutch to sta rt e ng ine.
POWERGLlDE TRANSMISSION -
Turn ignit io n
switch to "on" and place sel ector lever in "N." W h e n
car reac hes a spee d of 25-30 mph, place th e selecto r
l ever in
A DISABLED CAR
If your Corvette must be towed, the following pre
cautions must be observed:
MANUAL TRANSMISSION
-Release parking brake
and place shift lever in neutral.
POWERGLIDE TRANSMISSION -Release
parking brake and place selector lever in "N." DO NOT TOW IN EXCESS OF 30 MPH. II the transmission is inoperative, or not operating properly, the propeller shaft must b e d isconnected or car must be
towe d with rear wheels off the ground.
TOWING WITH REAR WHEELS
RAISED-When a
vehicle is being towed on its front wheels, the steer
ing whee l shou ld be secured to maintain a straight
forward position.
Do
not use tire chains on the rear wheels of your Corvette . Clearance between
USE OF TIRE CHAINS
AND SNOW TIRES
• tire and wheelhouse is insufficient to permit operation with chains insta!led.
Many [ire manufa cturers market tires for the Corvette which have specialized
tread designs for mud and snow use.
Page 16 of 52
FUEL
GAUGE
..
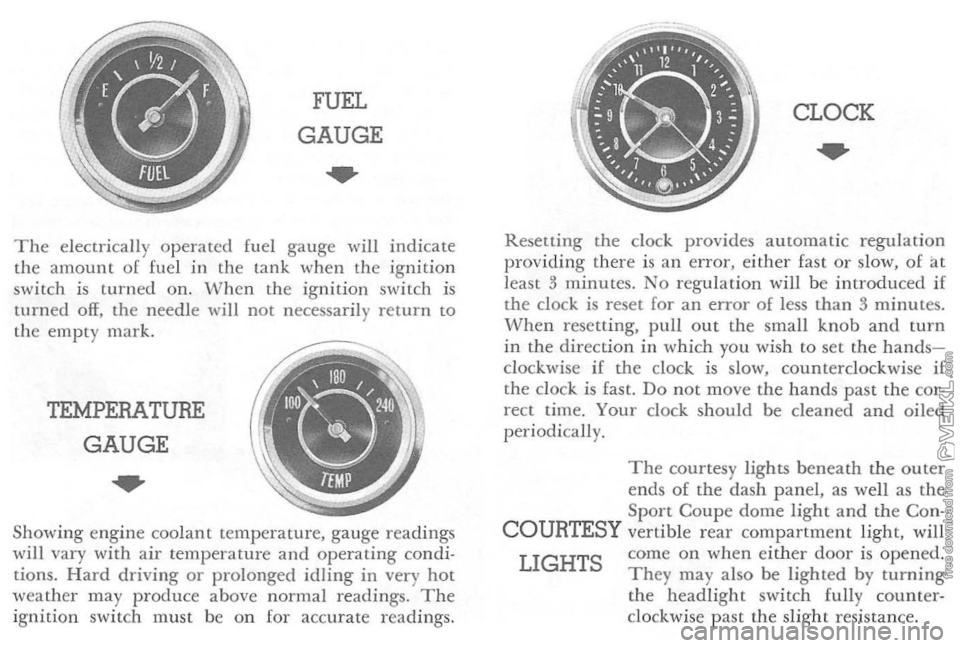
The ele ctr ically o p erated fuel gauge will indicate
th e amoun t o f fuel in the lan k when th e ig nition
switc h i s turned on. W hen the ignition switch is
turned off, the nee dle will not necessar ily retur n to the em pty mark.
TEMPERATURE
GAUGE
..
Showing engin e coo lant temperature, gauge readings w ill vary with air temp eratur e and operating condi
tions. Hard driving or prolonged idling in very hot
weather may produc e above normal readings. The ignitio n swit ch must be o n [or accur ate r eadings.
CLOCK
..
Resetting the dock provides a utomatic regulat io n
providing ther e is an error, either fast o r slow, of at
lea st 3 minu tes. No regulat ion will be introd uced if
the clock is reset for an error of less than 3 minutes. When resetting, pull out the small knob and turn in the direction in whi ch you wi sh to set the handsclockwise if the clock is slow, counterclockwi se if the clo ck is fast. Do not move the hand s pas t the cor
rect time. Your clock should be cleaned and oiled periodi cally.
The courtesy lights beneath the o u ter
en ds of the dash p a nel, as well as the Sport Coupe dome light and the Con-
COURTESY vertible r ear compartment light, will
LIGHTS come on when eithe r door is opened. They may a lso be lighted by turning the headlight switch fully counterclockwise past the slight resi stan ce.
Page 17 of 52
WINDSHIELD
WIPER
AND WASHER
..
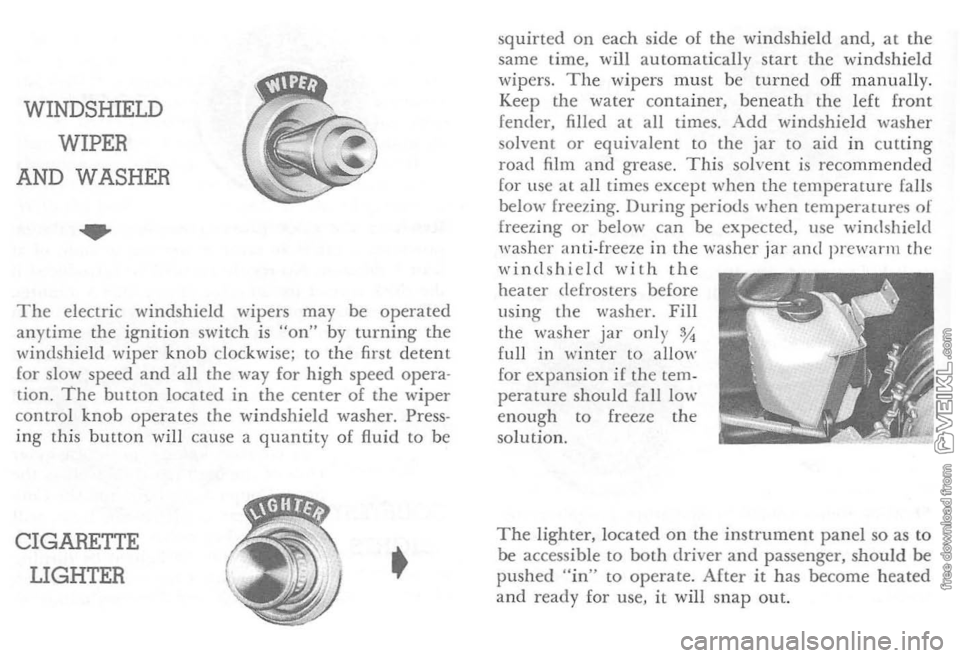
The electric windshield wipers may be operated
anytime the ignition switch is "on" by turni ng the
\-vindshield wip er knob clockwise; to the first detent
for slow speed
and all the way for high speed opera
tion. 'The button located in the center of the wiper
contro l knob operates the windshield washer. Press
ing this button will cause a quantity of fluid to be
CIGARETTE
LIGHTER • squ
irted on ea
ch sid e of the windshield and, at the
same time, will autom atically star t the windshi eld
w ipers. The wipers must be turned off manually.
Keep the water container , beneath the l eft front
fender, filled
at all times. Add windshield washer solvent or equ ivalent to the jar to aid in c utting
road film and grease . This so lve nt is recomm ended for lise at all times except when th e temperature falls
below freezing. During periods when temperawres of freezing or below can be expected, use windshield
washer anti-freeze in the washer jar and prewarm the windshield with the heater defrosters before
us ing the washer. Fill
the was her jar on l), %
full in win ter to allow for expa nsion if the temperature should fall low enou gh to freeze the
so lution.
The light e r. located on the instrument panel so as to
be accessible to both dri
ver and passenger, should be pushed "in" to operate. After it has become hea ted and ready for use, it will snap out.
Page 20 of 52
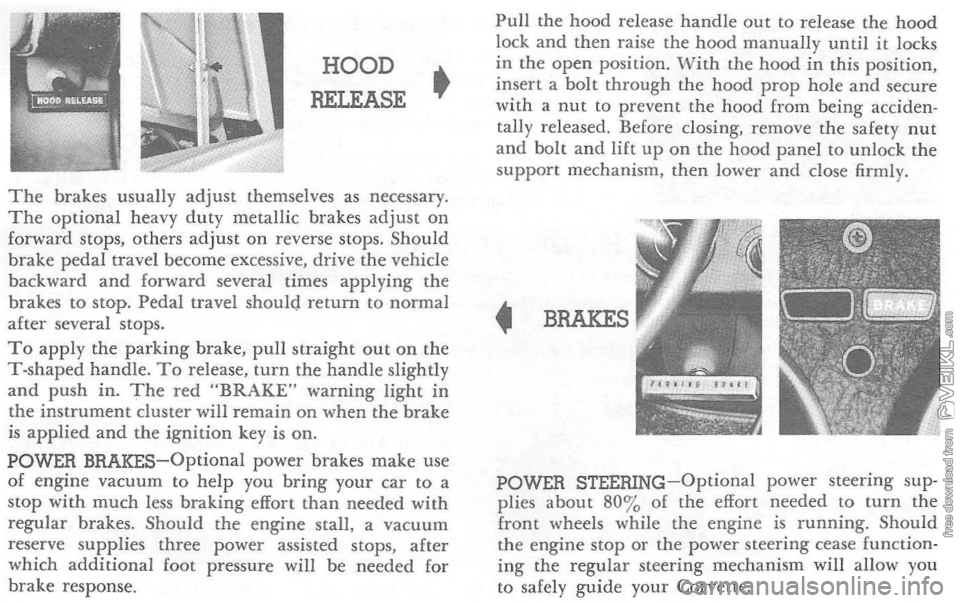
HOOD
RELEASE •
The brakes usually adjust themselves as necessary. The optional heavy duty metallic brakes adjust on forward stops, others adjust on reverse stops. Should
brake pedal travel become excessive, drive the vehicle
back ward
and forward several times applying the
brakes to stop. Pedal travel should return to normal after several stops. To apply the parking brake, pull straight out on the T-shaped handle. To release, turn the handle slightly and push in. The red "BRAKE" warning light in the instrument cluster will remain on when the brake is applied and the ignition key is on. POWER BRAKES-Optional power brakes make use of engine vacuum to help you bring your car to a stop with much less braking effort than needed with regular brakes. Should the engine stall. a vacuum
reserve supplies three power assisted stops, after
which additional foot pressure will be needed for
brake response.
Pull the hood release handle out to release the hood lock and then raise the hood manually until it locks
in the open position . With the hood in this position, insert a bolt through the hood prop hole and secure
with a nut to prevent the hood from being acciden
tally released. Before closing, remove the safety nut
and bolt and lift up on the hood panel to unlock the
support mechanism . then lower and close firmly.
• BRAKES
POWER STEERING-Optional power steering sup
plies about 80 % of the effort needed to turn the front wheels while the engine is running. Should the engine stop or the power steering cease function ing the regular steering mechanism will allow you
to safely guide your Corvette.
Page 24 of 52
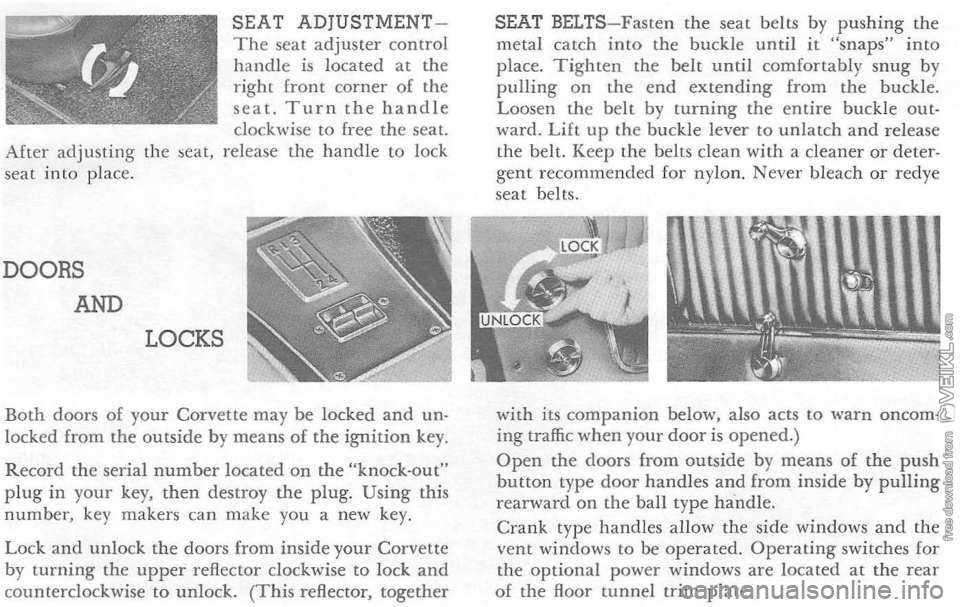
SEAT ADjUSTMENTThe seat adjuster control handle is located at the right front corner of the seat. Turn the handle clockwise to free the seat. After adjusting the seat, release the handle to lock
seat into place.
DOORS
AND
LOCKS
Both doors of your Corvette may be locked and un· locked from the outside by means of the ignition key.
Record the serial number located on the "knock·out" plug in your key, then destroy the plug. Using this number, key makers can make you a new key.
Lock and unlock the doors from inside your Corvette by turning the upper reflector clockwise to lock and counterclockwise to unlock. (This reflector, together
SEAT BELTS-Fasten the seat belts by pushing the metal catch into the buckle until it "snaps" into place. Tighten the belt until comfortably snug by pulling on the end extending from the buckle.
Loosen the belt by turning the entire buckle out· ward. Lift up the buckle lever to unlatch and release
the belt. Keep the belts clean with a cleaner or deter· gent recommended for nylon. Never bleach or redye
seat belts.
w
ith its companion below, also acts to warn oncoming traffic when your door is opened.) Open the doors from outside by means of the push bu tton type door handles and from inside by pulling rearward on the ball type handle .
Crank type handles allow the side windows and the vent windows to be operated. Operating switches for
the optional power windows are located at the rear o f the floor tunnel trim plate.
Page 34 of 52
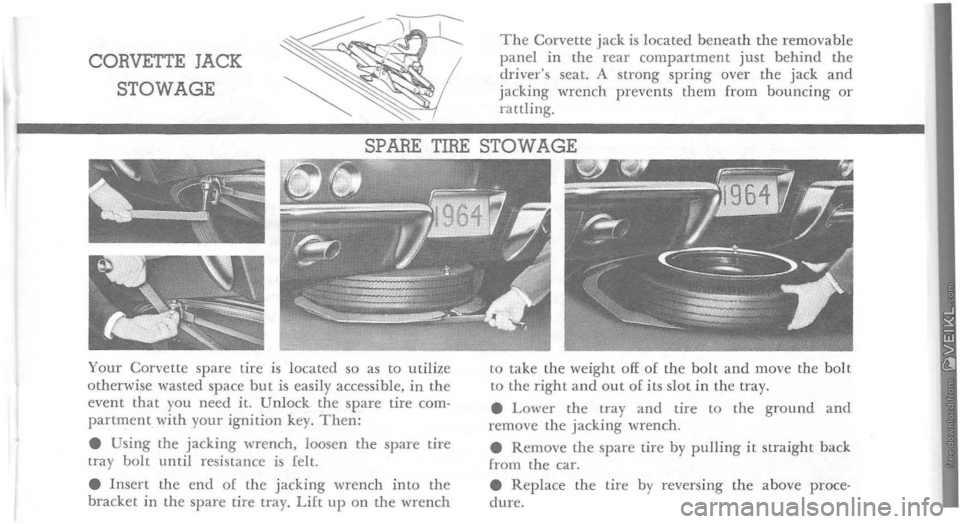
CORVETTE JACK
STOWAGE
The Corvette jack is located beneath the removable panel in the rear compartment just behind the driver's seat. A strong spring over the jack and jacking ·wrench prevents them from bouncing or rattling.
SPARE TIRE STOWAGE
Your Corvette spare tire is located so as to utilize otherwise wasted space but is easily accessible, in the event that you need it. Unlock the spare tire com· partn:tent with your ignition key. Then: • Using the jacking wrench, loosen the spare tire tTay bolt until resistance is felt.
• Insert the end of the jacking wrench into the bracket in the spare tire tray. Lift up o n the wrench
E.&1~1I,lI;II
to take the weight off of the bolt and move the bol t to the right and out of its slot i n t h e tray.
•
Lower the tray and tire to the ground and remove the jacking wrench .
• Remove the spare tire by pulling it straight back
(rom the car.
• Replace the tire by reversing the above procedure.
Page 42 of 52
MINOR TROUBLE SHOOTING PROCEDURES
T h e chart on the p reviou s page, and the information on the pages which follow, contains information designed to
aid th e average drive r to d iscove r, and possibly correc t,
conditions resu ltin g i n m inor m echanica l difficulties i n his
c ar. The chart, des igned to point out poss ible solutions to
s evera l of the most cQ,mmon autom otive malfunctions and point out a log ica l checkin g seq uence, will lead step by step to the most lik el y causes and corrective proc edures.
H, afte r makin g the checks and adjustments suggeste d, the source of the trouble has not been found and corrected, it is stro ngly recommended that an Authorized Chevrolet Dealer inspect the vehicl e and make whatever r e pairs or adjust me nts are necessary.
FUEL SYSTEM AND ENGINE If the ignition switch will cause the e n gin e to "turn over" or "crank" but the car will not sta rt, check Steps A through D below.
a
TE: ,l Continuol "flooding" of the carburetor is ev;de by 0 carburefor wet with fuel o r blade exhaust smoke
perform the operation suggested in paragraph D only
(A) T h e first and most obv ious , and one of the most frequently overlooked, items to check when you have difficulty in starting your car is the amount of fuel in the
tank. Make it a habit to chec k the FUEL GAUGE reg - ularly
a n d m ost especia lly
at a time when the engine _ "turn over" but will not start. (B) If th e fue l tank is not empty, you may check fur.=c to see whether the fuel is reachin g the carburetor. Disc:o&r neet the fuel line at the carb uretor. Place a jar or c:r
under the open line and brieRy "crank" the ~~e ... mean s of the st arter. ]( fuel spurts from the fiuiog.
may assume that the FUEL LINES are clear and the FeIl.. PUMP is operating properly. If n o fuel leaves the :me. either the fuel lines, fuel pump or the in-lin e filter art' 1-fault. See your Authorized Chevrolet Dealer. (C) Befor e recolln ecting the fu el line to me carbu..~ r emove the FUEL FILTER from the carburetor inlet ux! check its co ndition. !{ it appears to be clean , replace i~ a=. reconnec t the fue l line. If the filter appears to be p1!:s--;rt!
clean it as we ll as possible by scraping out the foreigt!~. rial and cleaning in a solvent. Then reinst all the filter ~== a new one as soon as possible.
(D) If the fuel seems to be reaching the carburetor prop
erly , th e problem may be: a n EMPTY CA.RBL""RET O::" BO'VL caused by a "stuck shut" carburetor; a ROODE:> CARBURETOR caused by a "stuck open" condition 2r.C. ev idenced by gasoline flowing down the outside 0: :.2 carburetor ; or a stuck CHOKE valve. Remove the U:cleaner from the carburetor. Check that the choke ~~ moves free ly and is not stuck . (Don't mistake no~ sp~~ tens ion for a stuck valve.) Tap the side of the carb~..lX sharply seve ral times with a light tool such as a sc::::-ewdriver handle or plie rs. R e p lace the air cleaner and a~?,to start the engin e in the normal manner.