1960 CHEVROLET CORVAIR brake
[x] Cancel search: brakePage 5 of 38
OPERATING INSTRUCTIONS
BREAKING-IN PERIOD
Sound design and precision manufacturing methods
will permit you to operate your new Corvair in a normal
manner from its very first mile without adhering to a
formal "break-in" schedule. However, during the first
few hundred miles of driving you can, by observing a
few simple precautions, add to the future performance
and economy of your car.
It is recommended that your speed during the first
500 miles be confined to a maximum of 60 M.P.H., but
do not drive for extended periods at anyone constant
speed, either fast or slow. During this period, avoid full
throttle "jack-rabbit" starts and quick, abrupt stops.
Gentle braking during the first few hundred miles of
operation will result in longer brake life and better
future performance. Avoid hard stops especially during
the first 200 miles of operation since brake misuse during
this period will destroy much future brake efficiency.
Always drive at a moderate speed until the engine
has completely warmed up.
2
STARTING THE ENGINE
LOCK OFF ON START
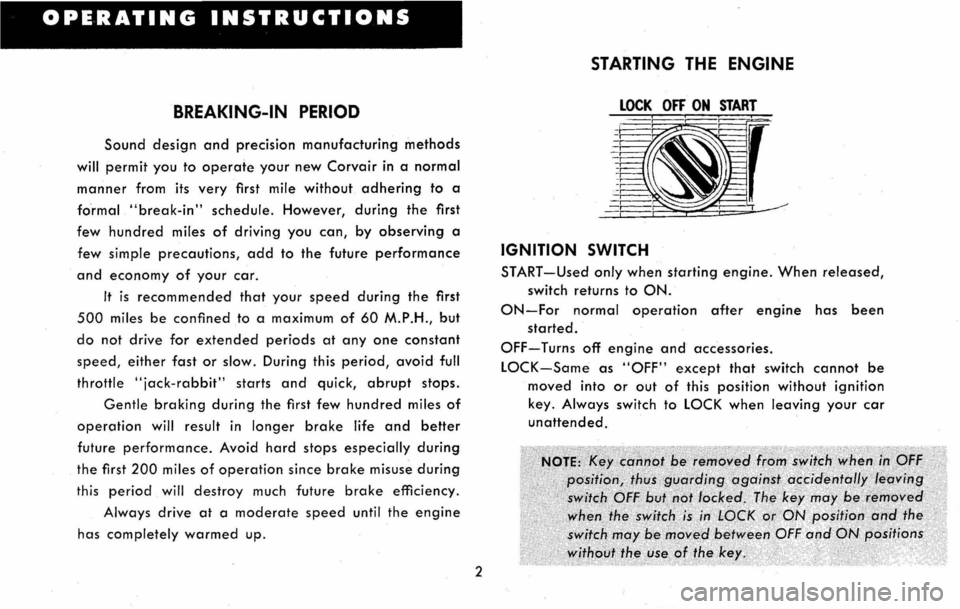
IGNITION SWITCH
START-Used only when starting engine. When released,
switch returns to ON.
ON-For normal operation after engine has been
started.
OFF-Turns off engine and accessories.
LOCK-Same as "OFF" except that switch cannot be
moved into or out of this position without ignition
key. Always switch to LOCK when leaving your car
unattended.
Page 7 of 38
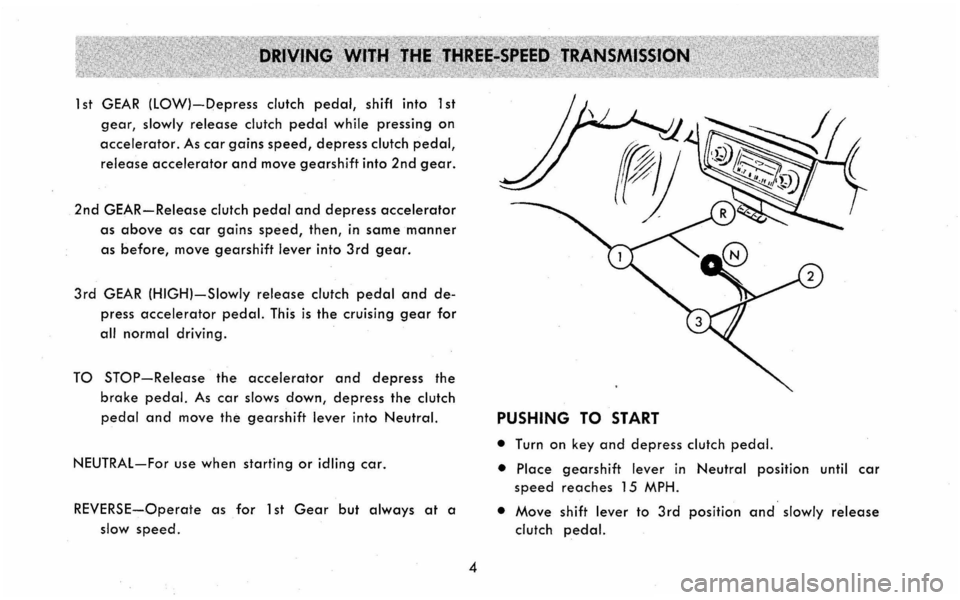
1 st GEAR (lOW}-Depress clutch pedal, shiff into 1 st
gear, slowly release clutch pedal while pressing on
accelerator. As car gains speed, depress clutch pedal,
release accelerator and move gearshift into 2nd gear.
2nd GEAR-Release clutch pedal and depress accelerator
as above as car gains speed, then, in same manner
as before, move gearshift lever into 3rd gear.
3rd GEAR (HIGH}-Slowly release clutch pedal and de
press accelerator pedal. This is the cruising gear for
all normal driving.
TO STOP-Release the accelerator and depress the
brake pedal. As car slows down, depress the clutch
pedal and move the gearshift lever into Neutral.
NEUTRAL-For use when starting or idling car.
REVERSE-Operate as for 1 st Gear but always at a
slow
speed.
4
PUSHING TO START
• Turn on key and depress clutch pedal.
• Place gearshift lever in Neutral position until car
speed reaches 15 MPH.
• Move shift lever to 3rd position and slowly release
clutch pedal.
Page 8 of 38
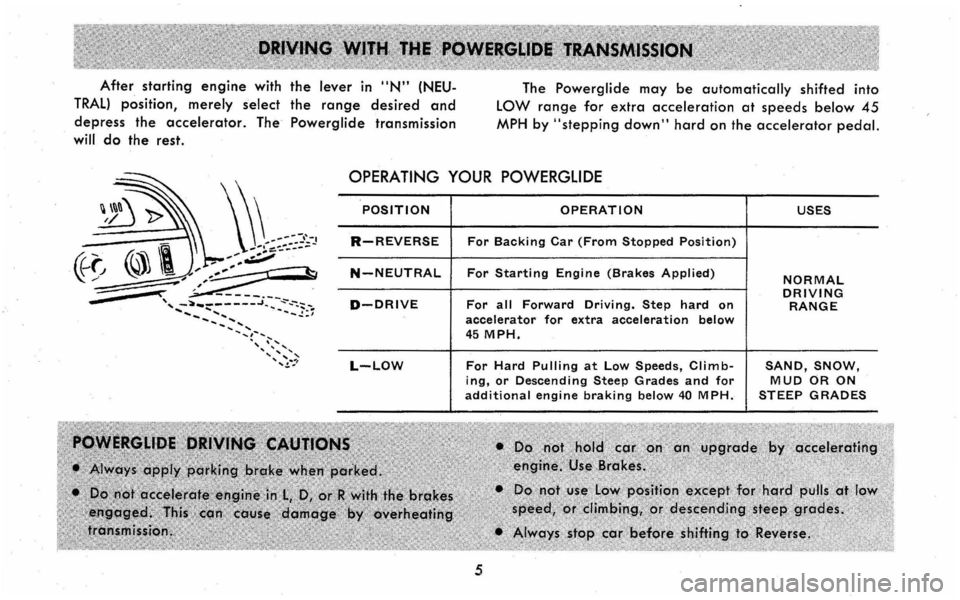
After starting engine with the lever in "N" (NEU
TRAL) position, merely select the range desired and
depress the accelerator. The Powerglide transmission
will do the rest. The
Powerglide may be automatically
shifted into
LOW range for extra acceleration at speeds below 45
MPH by "stepping down" hard on the accelerator pedal.
OPERATING YOUR POWERGLIDE
POSITION OPERATION USES
R-REVERSE For Backing Car (From Stopped Position)
N-NEUTRAL For Starting Engine (Brakes Applied) NORMAL DRIVING D-DRIVE For all Forward Driving. Step hard on RANGE accelerator for extra acceleration below 45 MPH.
L-LOW For Hard Pulling at Low Speeds, Climb-SAND, SNOW, ing, or Descending Steep Grades and for MUD OR ON additional engine braking below 40 MPH. STEEP GRADES
5
Page 12 of 38

BRAKES
The brake pedal is of the pendant type, providing
ample footroom and extra leverage for easy safe stops.
PARKING BRAKE
Pull the parking brake lever to engage the brake. The
lever will remain in the applied position until released
by means of the "trigger" on the handle. To release,
pull the
handle toward the steering wheel, depress the
unlocking trigger and allow the handle to return to the
releas.ed position. Always engage the parking brake
when parked.
PARKING BRAKE APPLYING HANDLE
9
WINDSHIELD WIPERS AND WASHERS
The parallel acting wipers are operated by means
of the wiper control knob on the dash .
Pressing
once on the accessory windshield washer
button will cause the washer to squirt a measured
amount of water or other cleaning agent onto the glass,
and will at the same time turn on the wiper motor. You
will have to turn off the wiper manually at the switch .
Keep the
washer jar filled to a level 2 inches below
the top of the jar with a suitable solvent. G. M. Part No.
988299, Windshield Washer Anti-Freeze and Solvent,
is recommended for use in the Corvair windshield washer
jar. NEVER USE ANY SOLVENT OR ANTI-FREEZE SOLU
TION WHICH CONTAINS METHANOL Fill the washer
jar only % full to allow for expansion if the solution
freezes. In freezing weather, pre-warm the windshield
using the heater defrosters before using the washers.
Page 22 of 38

the car for lowering the car or removing the wheel nuts.
When jacking the car, set the hand brake, block diagonal
wheel, and, if changing wheels, remove the hub cap and
loosen wheel nuts. Place the jack under the side of the
car located as shown.
Spare Tire
The tire is mounted in the luggage compartment.
Switching Tires
Switching tires every 5000 miles as shown will pro
mote more even tire wear and longer tire life. After
switch ing tires readjust tire pressure to correspond to
table on page 18.
CAUTION: Never attempt to raise the Corvair by
placing any kind of jack under the bumper.
FRONT
JACKING CAR SWITCHING TIRES 19
CHASSIS LUBRICATION
------
.-
Your Corvair deserves the best care you can give it.
Regular maintenance will guarantee you more, depend
able, trouble free miles of enjoyable driving. The
following pages are devoted to maintenance and lubri
cation items which should be performed at regular inter
vals
. Each item is numbered to correspond to the items
shown on the Lubrication Diagram on page 26. The
Lubrication and Maintenance Guide on pages 24 and
25 provides an easy way of checking on necessary
maintenance at any given mileage or seasonal interval.
Page 25 of 38

13. TRANSMISSION
3-Speed (Transmission and Rear Axle)
First 1'000 miles-Drain and refill with lubricant spe
cified
below.
Every 1000 miles-Check at operating temperature
and keep lubricant at level of the filler plug.
Add SAE-80 multipurpose gear lubricant (G. M.
Part No. 3772661) as required.
Powerglide (Transmission only)
Every 1000 miles-Check fluid level on dipstick with
engine idling, selector lever in NEUTRAL posi
tion,
parking brake set and transmission at
operating temperature. Add Automatic Trans
mission
Fluid Type "A" with an AQ-ATF-A num
ber to full mark on dipstick . Check with engine
idling. DO NOT OVERFILL. Correct oil level must
be established by dipstick measurement.
NOTE: From the "Add Oil" mark to the "Full"
mark
on the dipstick indicates a difference of
only 1 pint of fluid.
22
14. REAR AXLE
First 1000 miles-Drain rear axle and refill with
lubricant specified
below.
Every 1000 miles-Check rear axle at operating tem
perature and keep lubricant at level of filler
plug.
Every 10,000 miles or seasonally-Drain rear axle
and refill with lubricant specified below.
With Powerglide Transmission
Add G. M. No. 3772661 (SAE-80 Multipurpose Gear
Lubricant) or equivalent to rear axle as required.
With 3-Speed Transmission
Add G. M. Part No. 3772661 (SAE-80 Multipurpose
Gear Lubricant) or equivalent to rear axle as
required.
NOTE: if rear axle requires additional lubricant,
be sure that 3-speed transmission is also checked.
Low lubricant in the axle indicates that the trans
mission
may also be low .
15. BATTERY
Every 1000 miles-Check fluid level. Keep filled with
distilled
water to level of the split ring in the
vent tube. Oil battery terminal washer with engine
oil. Clean top of battery regularly with diluted
Page 26 of 38
ammonia or soda solution and flush with clear
water. Check state of charge regularly, espe
cially in freezing weather, for an undercharged
battery may freeze and break.
16. FUEL FILTER
Every 15,000 miles-Replace filters, located in each
carburetor inlet. If flooding occurs, replace more
often.
17. BRAKE MASTER CYLINDER
Check frequently and maintain fluid level at mark
inside reservoir below filler opening, using G. M.
Hydraulic Brake Fluid, Super No. 11. If addition
of fluid is required more often than ·every 1000
miles the entire system should be checked for
leaks.
18. PARKING BRAKE & CLUTCH PULLEYS
AND CABLES
Every 10,000 miles-Lubric.ate pulleys under dash.
Remove the
tunnel cover under vehicle and lubri
cate pulleys and cable bearing points with lub
riplate. lubricate gearshift lever ball and socket
and shift rod universal joint at transmission con
nection with lubriplate.
BODY LUBRICATION POINTS
Most body lube points do not need frequent, heavy
23
lubrication as does the chassis. However, periodic checks
of certain points on the Corvair body, and lubrication
when needed will eliminate annoying squeaks and
noises . Be careful not to over-lubricate. Wipe off all
surplus lubricant.
The following items should be lubricated periodically:
1. DQQr Hinges-Wipe off dirt and apply Lubriplate.
2 . Door Lock
Striker-Wipe off dirt and apply stick type lubricant.
3. Door Bottom Drain Hole Sealing Strip-Apply silicone rub-
ber lubricant.
4. Door Jamb Switch-Apply Lubriplate.
5 .
Rear Door Weatherstrip-Apply silicone rubber, lubricant.
6 . Front
and Rear Compartment Lid Lock-Apply Lubriplate.
7. Front Compartment Lid Torque Rods-Apply dripless oil to bearing points.
8. Gas Tank Filler Door Hinge-Apply dripless oil. 9. Glove Box Door Hinge-Apply dripless oil. 10. Rear Folding Seat Back Support Link Assembly & Filler Panel Hinge-Apply dripless Qil to bearing points.
The following items moy be lubricated whenever
access to the item is availoble:
11. Door Outsi.de Handle Lock Cylinder Shaft-Apply Lubri-
plate. 12. Door Window Regulator and Cams-Apply Lubriplate .
13. Door Lock Parts-Apply Lubriplate . 14. Door Locking Mechanism-Apply Lubriplate .
15. Front and Rear Compartment Hinges-Apply Lubriplate.
Page 27 of 38
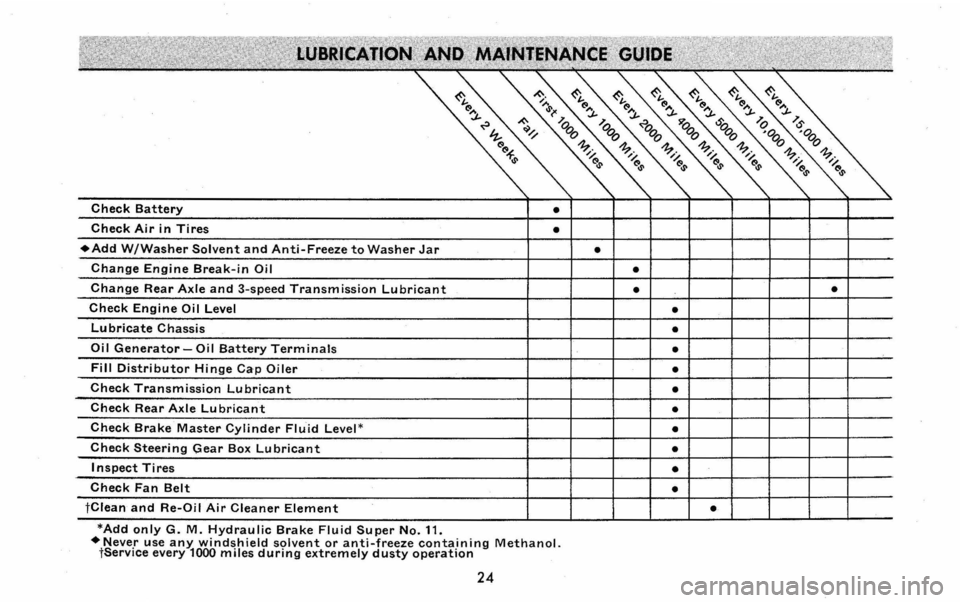
*Add only G. M. Hydraulic Brake Fluid Super No. 11. +Never use any windshield solvent or anti-freeze containing Methanol. tService every 1000 miles during extremely dusty operation
24